Different bags are needed, different bags are important. It is with this phrase that you can continue the topic of bags on our website, because the girls try to carefully choose this accessory to each of their images.
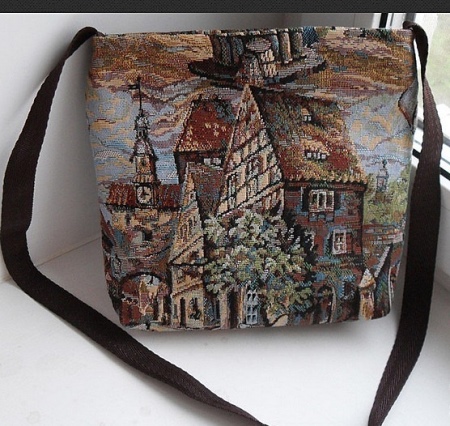
The model over the shoulder firmly occupies a leading position in the ranking of the most convenient bags.
How to sew a bag over your shoulder and on what pattern? This will be our article.
Pattern
Baggage with a shoulder strap can have a different shape: a square, a semicircle, a rectangle. The following patterns will allow the craftswomen to sew the model, taking into account their desires and preferences for the color of fabric, leather and other details.
The material for sewing bags you can choose the most diverse: genuine and artificial leather, jeans, velveteen, tarpaulin.
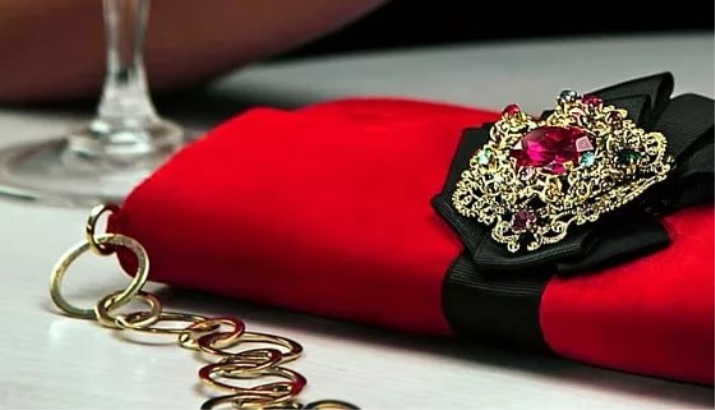
Clutches on a long strap look great from satin and velvet.
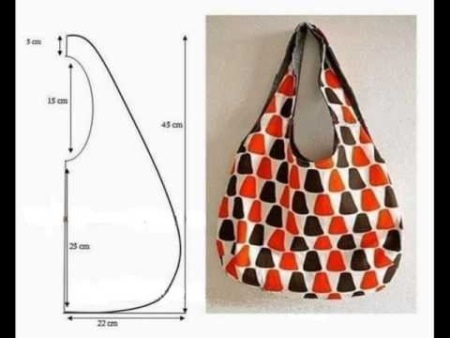
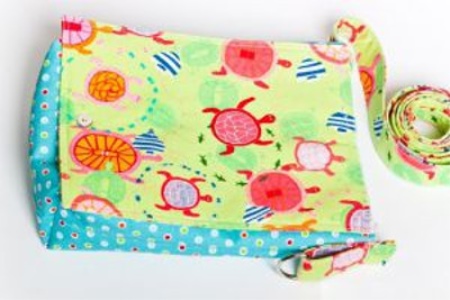
Model No. 1
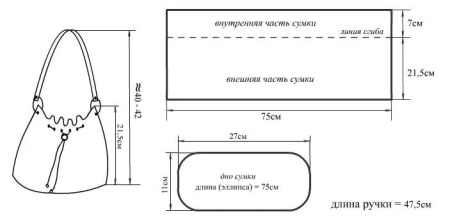
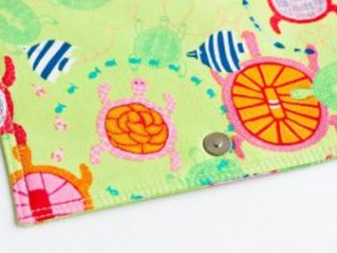
This is a capacious bag, where a convenient braid serves as a fastener. The shape allows you to decorate it with applique, lace, shuttlecocks from different fabrics.
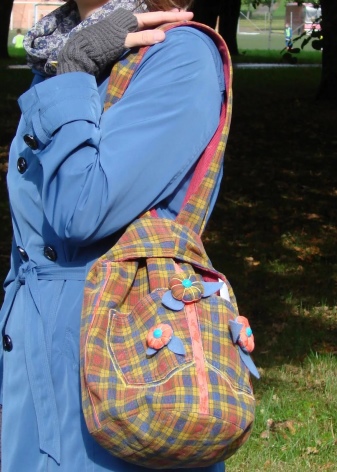
Model No. 2
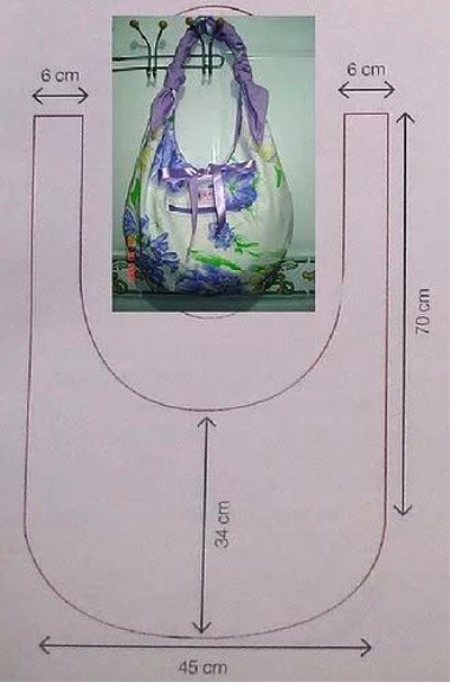
Baggage with one-piece handles. For this pattern will be a good beach bag. A great advantage when creating a model will be the lack of a separate sewing of pens. One-piece handles are sewn simultaneously with the main parts.
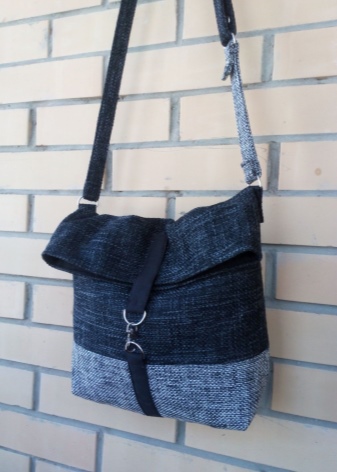
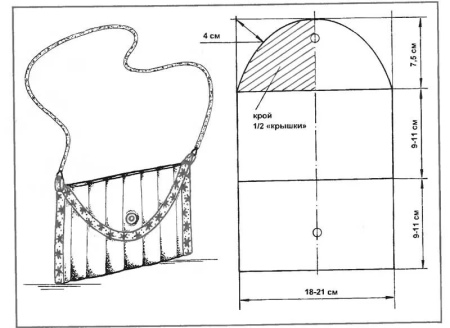
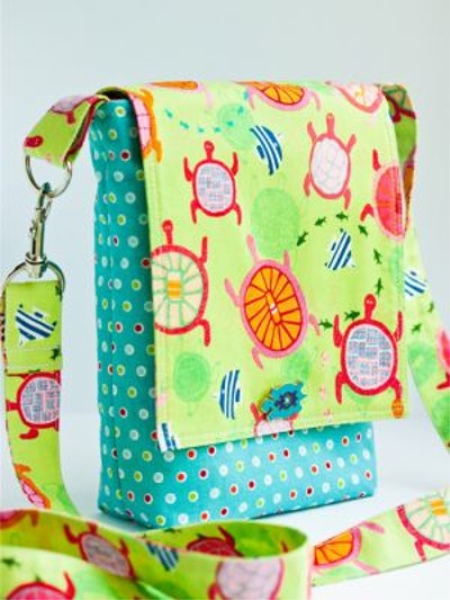
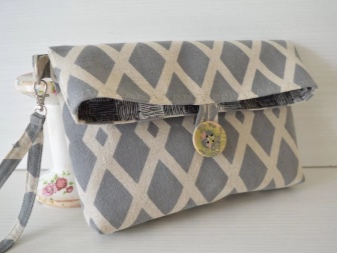
Model No. 3
According to the scheme, you can sew a saddle bag made of leather or faux leather. The style attracts attention with its folding part, to which you can attach a magnetic clasp.

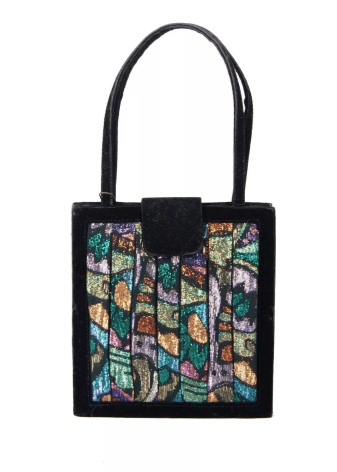
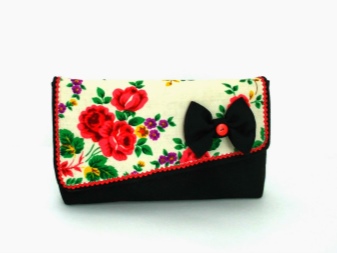
Model No. 4
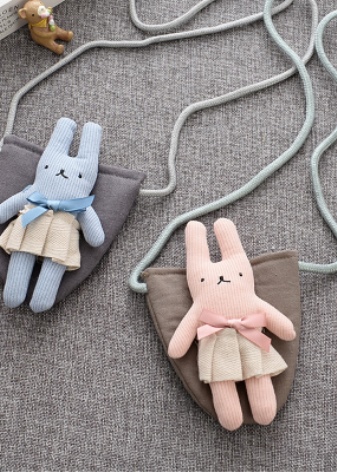
A cute clutch will allow you to keep all the necessary little things at hand if the girls have planned a walk in the park or a meeting with friends. The chain strap will make it stylish and effective.
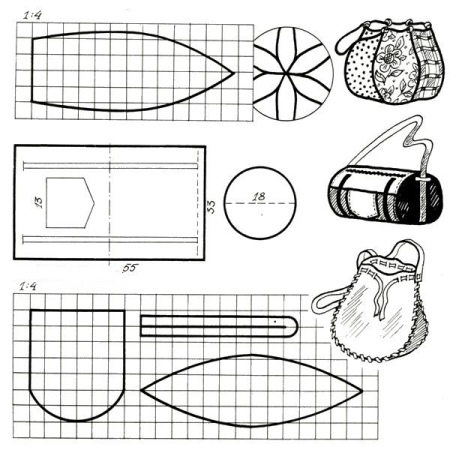
Model No. 5
The photo shows just three styles of the product. Each pattern has its advantages.
- The banana style resembles a sports bag, which is suitable for sports.
- A pouch on a lace strap consists of several wedges and a long shoulder strap. You can sew such a pouch with or without a lining. In the first case, it is worth choosing dense fabrics that will hold the shape of the luggage well. For lined handbags, any lightweight materials are suitable.
- The third option resembles a saddle bag. Its shape allows you to choose any finish: applique, patch, embroidery and other decor.
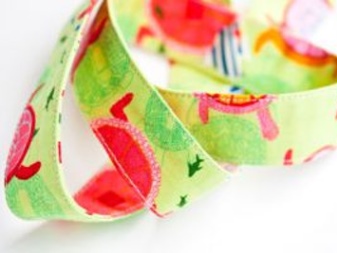
How to make a strap?
The strap allows you to carry hand luggage on your shoulder. Everyone has long been accustomed to the fact that the length of the strap should be adjustable. Therefore, we get down to business.
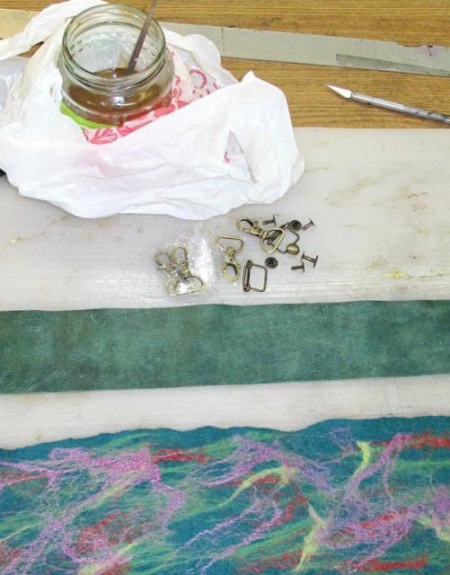
Required:
- Material for the belt.
- Carbine.
- Non-woven or felt (if the belt is made of leather).
The sewing steps are as follows:
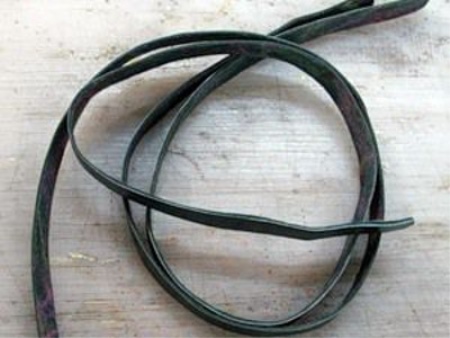
- Cut the strap to the desired length and width. The size of the width is taken arbitrarily, but in the finished form, the strap should correspond to the width of the buckle. When cutting, take the double width of the belt. Buckle allows you to adjust the length of the belt.
- The length of the strap is taken into account the adjustment in the finished product.
- Cut interlining with a length equal to the length of the belt and a width reduced by 0.5 mm. This will make the shoulder strap even and beautiful when sewing.
- Insert the non-woven into the belt, fold the belt and lay the machine line.
- Now you need to insert the buckle into the belt for adjustment.
In the video you can see how to properly insert such accessories.
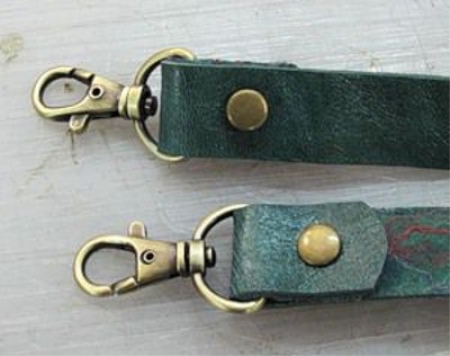
- The carabiner will allow to unfasten the belt. If the luggage is made of fabric, the carabiner must be inserted through the ends of the belt and sewn. In the bag, rings or small loops must first be inserted, for which the carabiner will cling.
- On a leather belt, the carabiner should be secured with holniten. Insert the carabiner into the leather blank of the belt on one side.
- Bend the edge, punch a hole under the roof and insert the part. Holniten can be inserted by itself with a machine or hammer. A bag repair shop will surely help solve this problem.
- The second edge of the belt is processed by analogy with the first.
A master class on manufacturing one of the models is in the next video.
.
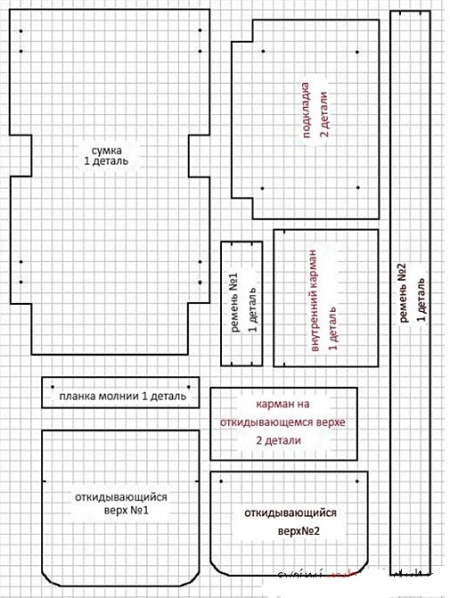
How to sew cross-body: a master class
Crossbody has long been used by girls in everyday life. The sequence of all sewing operations how to create a cross-body made of fabric, sorted by points.
To make a cross-body you need:
- The cloth;
- Pattern;
- Carbine;
- Threads;
- Magnetic button;
- Half ring.
Such drawings will be required:
- 2 rectangles, size 20x24;
- Belt: size 7x 110 cm, short belt 7x10 cm;
- Valve: 2 rectangles (17x20 cm);
- Large inside pocket: size (20x17 cm);
- Small inside pocket (20x13 cm).
Getting to sewing:
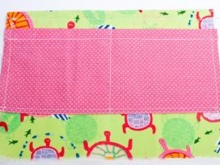
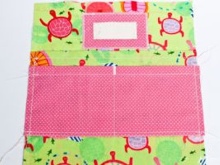
- Handle the entrance at the pockets: tuck the fabric 0.5 cm, then another one cm. Turn the lower edge at the smaller pocket.
- We sweep a small pocket on the front side of a large pocket and stitch it in the center, we get 2 pockets. We fasten the sides of the pockets with a basting.
- Pockets with the wrong side pin on the front side of the lining and bast.

- Fold the valve parts face inward and flash on the machine on three sides. We turn the valve out and lay a straight line along the edge of the part. Sew on one part of the magnet.
- Fold a long belt and two short ones in half and grind it by car.
- The lining is folded face inwards and stitched on 3 sides. Turn out the finished lining.
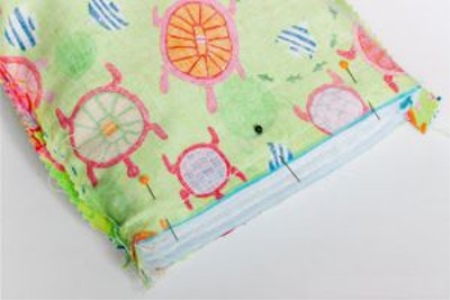
- How to get the bottom of the bag? Fold the bottom with the corner as in the photo (the bottom and side seam should be visible). We retreat 2.5 cm from the edge along the side seam, draw a straight line and sew along it.
- Cut off the excess fabric, leaving an allowance of 1 cm.
- Similarly, on the 2 previous points we create another corner. Leave the lining on the inside.
- The main parts of the bag are folded with the wrong side out and stitched. Corners should be processed exactly the same as on the lining, and turn the bag.
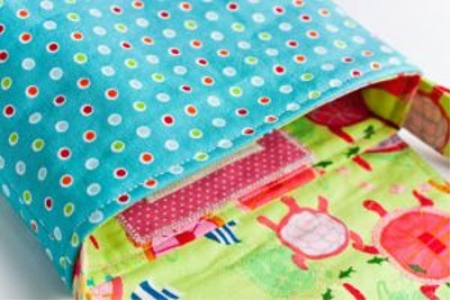
- Baggage collection: attach the valve with the outside to the back of the bag, lay a mark on the top.
- Sweep the main strap to one of the side seams.Strap that shorter fold in half and sweep to the other side.
- Pull the lining on the base of the handbag face to face, pin it with pins and stitch it on the sides and bottom.
- Unscrew the product through the hole left on the pad, iron it and lay the machine stitch in a circle.
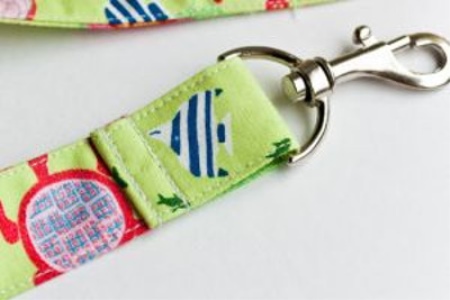
- Insert the carabiner into the strap, solve the length issue and flash it.
- Lower the valve, make a mark for sewing on the second part of the magnetic button.
- Sew stitches with hidden stitches, through which it is useful for turning the product around.
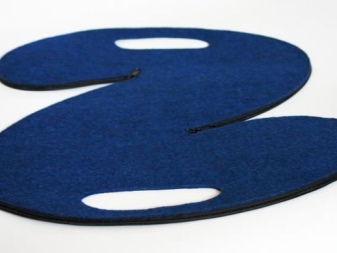
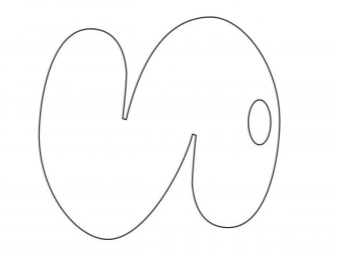
Felt or felt clutch
Such an original clutch will turn out on a one-piece pattern. Felt and felt do not crumble, so this material will be most convenient for creating a masterpiece.
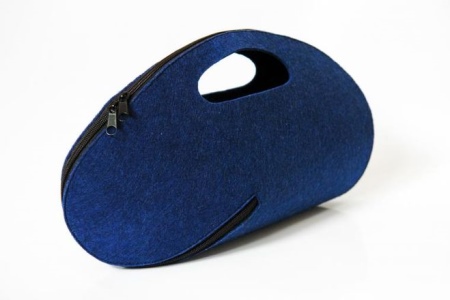
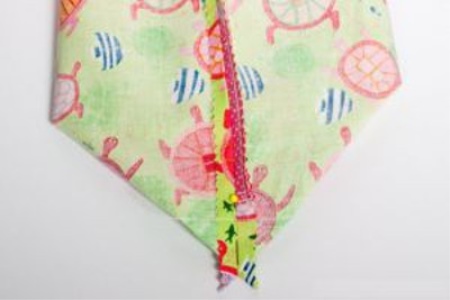
A future clutch will require two-way lightning. Followed by:
- Make a measurement on the finished pattern.
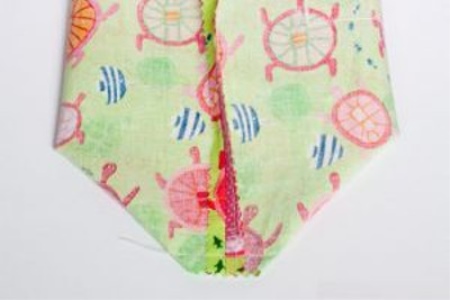
- Cut out 1 part and sew on the zipper.
- Handles can be sewn with a buttonhole.
Tablet bag
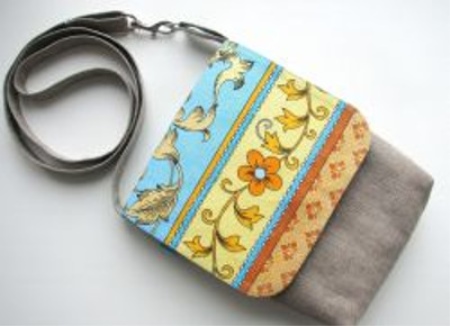
This bag attracts attention with its good capacity. In this model, you can put a netbook and, of course, a tablet. The bag is disguised as an ordinary woman's luggage. She will replace the usual bag for computer equipment, and will delight her mistress with a bright fashionable print.
The bag is similar to a cross-body. Using the detailed instructions for creating a cross-body, you can sew a bag-tablet.
Women's made of fabric
All of the above models are sewn from fabric. Any material in practicality inferior to products made of genuine and artificial leather. But! There will always be events in life where feminine and original reticules, seductive pouches or attractive clutches for little things will be required to create a complete image.
If the girls have initial knowledge in sewing and certain skills, then, relying on any master class, you can create a bag for any pattern.
Bag bag
Hand luggage is convenient for shopping and grocery shopping. To create a bag-bag, any dense fabric and lining will do.
On the fabric, make the following cut: 2 - the main fabric, 2 - lining.
The following steps:
- Combine the main part of the product with the lining facing inward, stitch the handles on the machine. Scissors make notches and turn them out. Repeat this step for the second wall of the product.
- Combine the two finished parts of the bag with the wrong side out, sweep and flash on the machine.
- Oblique tape to close open internal sections.
A large collection of patterns of handbags in the piggy bank of girls will prompt them to create charming models with stunning finishes.