Surely in the life of every girl there came a time when the store assortment of accessories was fed up with the order, but the desire to acquire a new product did not leave. What to do in this case? A great option is the independent manufacture of a bag for simple, unpretentious patterns.
Let us consider in more detail which models are easiest to sew and which ones will have to be worked on. We also get acquainted with the fabrics that are most suitable for sewing such products.
Simple patterns
Sometimes girls do not undertake the independent production of bags because of fears of doing something wrong and ruining the material. But always and in everything you can find a compromise, and in this case - this is the choice of simple patterns, tailoring products on which does not require much work.
When choosing patterns, it is necessary to take into account several features that indicate their simplicity:
- The maximum number of straight lines;
- As little roundness and decorative “tucks” as possible;
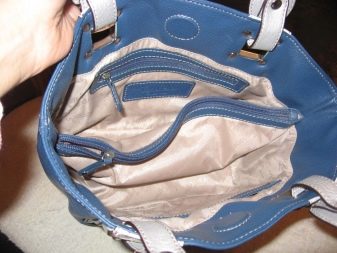
- The most simple internal space (in simple patterns, bags have only one internal compartment);
- It is desirable that the fasteners on the bag are as simple as possible - a zipper or a button.
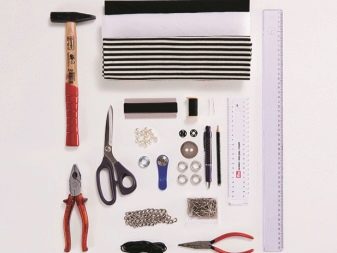
In addition, in order to simplify your task as much as possible, you should not immediately sketch the fabric, but first draw it on special paper for sewing. This will help to avoid mistakes and to cut out as even as possible details.
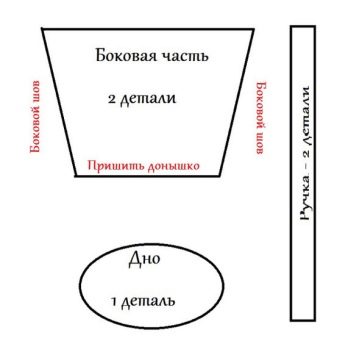
Trapezoidal shape
A trapezoidal bag is quite simple in execution.It is more practical if the product is a regular trapezoid with a wider lower part and a narrow upper one. So the product will be more practical and roomy.
To sew a trapezoid bag, you need to cut out three parts: two equal walls in the form of a trapezoid and the bottom of a bag of a rectangular shape. The side walls can be made integrally connected to the front and rear, or can be cut separately, in the form of four additional parts.
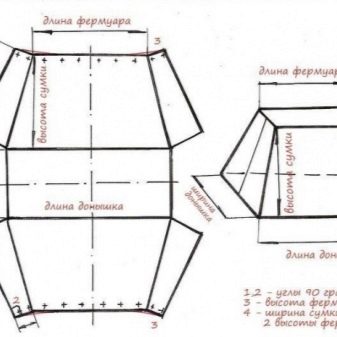
The sewing process is as follows:
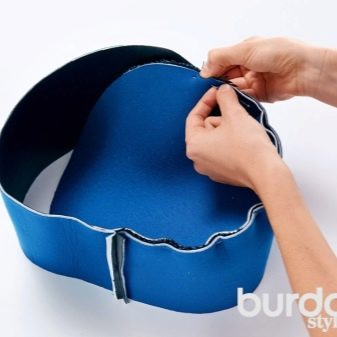
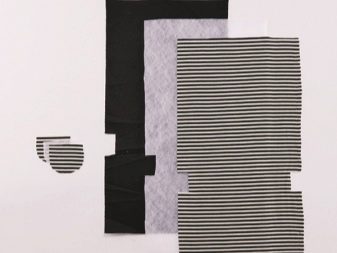
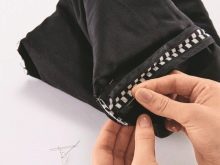
- Preliminarily required draw on the fabric the details of the required size and take into account the additional distance - seam allowances. Then, as carefully as possible, these parts need to be cut and stitched together, after preliminary processing the edges with an overlock.
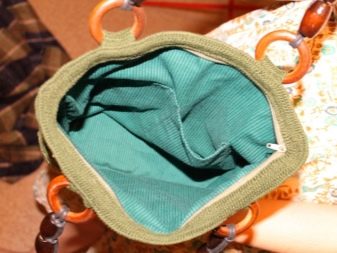
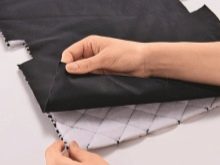
- Necessary cut the same parts from the lining material, the size of which should be one centimeter smaller than the finished ones. Then it is necessary to stitch the resulting two parts in such a way that the wrong sides are in contact with each other. Unlined, the bag will be fragile and messy.
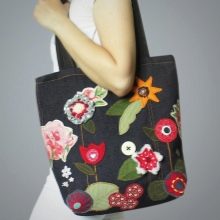
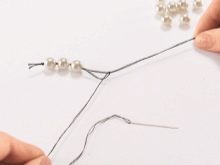
- Then it’s the small business - it’s necessary neatly complete all seams, complete the bag with the necessary accessories, neat handles and a reliable clasp. In addition to external attractiveness, you can add simple decor elements - stripes, beads, stones and rhinestones.
More clearly, the sewing steps are shown in the next video.
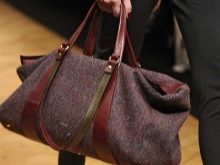
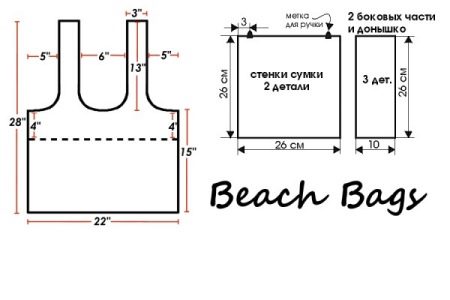
Bag bag
The bag bag is ideal for the summer, simple in style and performance. To make this product you will not need any special materials, as well as the cost of a large amount of time and effort.
Everything is much simpler than it might seem at first glance:
- First thing, you must select a material not only for the outside, but also for the lining. The fact that the bag is made at home does not mean at all that the lining is not needed - it is still an integral part of any product.
- Further, we cut out the details: two square walls of large size and three rectangular parts that will be needed for the manufacture of side parts and the bottom. And also handles are best if they are layered, but flat, so they will be as strong and durable as possible.
- Then we follow the same principle that was used in the manufacture of the previous model: we carefully sew all the details, we process edges, we fix a lining and handles. In the area of pens, it is necessary to make several lines in order to provide greater strength and reliability.
The product is spacious in the interior, suitable for beach vacations and tourist trips. And as an ornament, you can use wooden beads, fringe from fabric, sequins and rhinestones on an adhesive basis.
See another option in the next video.
On puffs
Perhaps an even simpler option is a bag with puffs, but this model, having only one handle, does not look very attractive. This model looks much more stylish in the form of a backpack with two adjustable straps that allow you to free your hands and carry the product behind your back.

In addition to pens and ties, for the manufacture of this model you will need only three large parts:
- a large rectangular segment for the backpack case itself;
- round bottom and cap;
- masking a long tie.
Cutting the size of the main part of the bag should be based on individual preferences, it can be either small, decorative size or large - representing a full-fledged functional product, suitable even for tourist trips.

So what is next:
- Having fastened the smaller edges with an even seam, you will get a cylinder, based on the diameter of which you should cut the bottom of the backpack in the form of an even circle. In the form of a half oval, we cut the upper part of the backpack, which will cover the ties, for a more aesthetic appearance, and the protection of the closing element.
- Next, we cut two long handles that will perform the main functional part, and a small one - holding which you can carry the product in your hand. For greater functionality, you should purchase the appropriate accessories, allowing you to adjust the length.
- The matter remains small - we bend the upper part and insert the eyelet, getting a functional and practical product at the output.
Here's how to get a stylish bag in one evening. Watch the video.
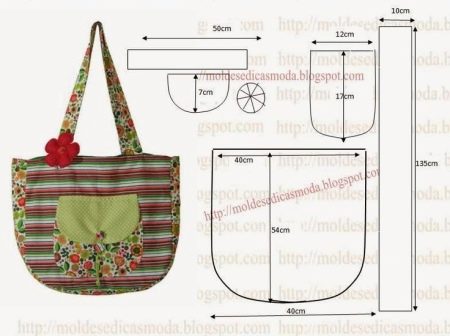
Semi-oval shaped model
A bag with a semi-oval lower part looks very feminine and beautiful, which can become both a worthy everyday option, and a great addition to the beach look and outfit for walking.
Let's consider in more detail how to cut and stitch this model correctly:
- In the pattern of this model the following details will be needed: two semi-oval parts - front and rear walls, a long rectangular part - for connecting these parts, two rectangular parts - for the manufacture of handles. You can complement the model with a small decorative pocket sewn on the front.
- Smooth seam we fasten the front and back walls with a rectangular connecting piece. The next step is to hem the lining, then insert the zipper. It’s better not to save on the fastener, as cheap zipper is very easy to disable.
- Further, fold the pens and flash themso that they are more durable and last a much longer time. We measure an equal distance at both ends of the main parts, and sew on the handles, carefully making sure that they do not twist.
- The final touch - we process the edges of the decorative pocket and gently sew it on top of the product, fasten the decorative clasp to the top, in the form of a button or a large stone, on which you can put a loop.
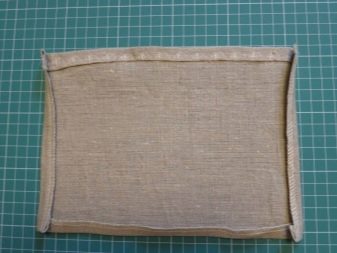
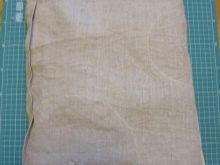
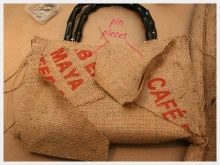
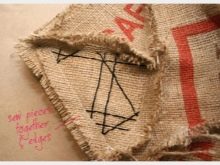
How to sew from linen and burlap?
The bag can be sewn from light, cheap fabric, but will such a product be practical? If we take, for example, linen fabric, what properties will the product have?
Let us consider in more detail how to make a bag from light linen and decorative burlap and how functional these products will be:
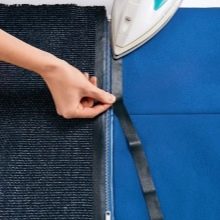
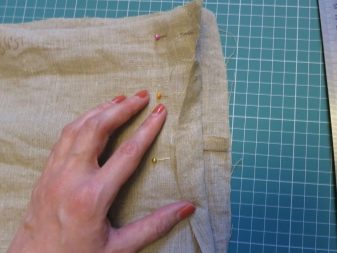
- Work with linen more carefully, pre-processing all edges with an overlock to prevent the flow of material. In addition, the seams must be sewn with a small stitch or in two layers in order to provide the product with greater wear resistance.
- Special threads should be selected.suitable for sewing linen products, as well as special thin needles that will not cause excessive damage to the material, creating too large holes, which, due to gravity and friction of the threads, will increase in width, which will lead to damage to the product.
- Burlap is even more fragile, therefore, to sew a full-fledged functional product that would last a long time is a very difficult task. The bulk of burlap bags is rather a decorative complement to the image in the style of eco, hippie or boho-chic.
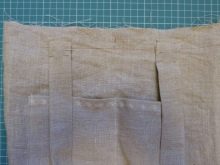
To sew products from burlap you will need dense, strong threads, as well as a needle with the appropriate eye, in order to prevent the formation of nodules and rolling fibers of the thread, in the process of excessive friction against the needle hole. This material does not need to use any special equipment.

What other fabrics are suitable?
In addition to the above materials, bags can also be made from other fabrics that will help make products more functional, as well as suitable for the requirements of any style, whether it is a strict classic or a hooligan military.
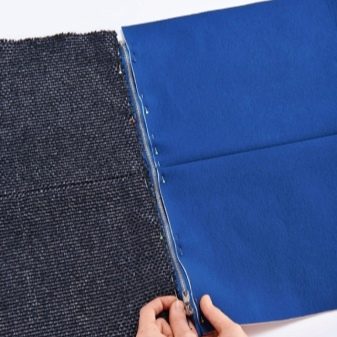
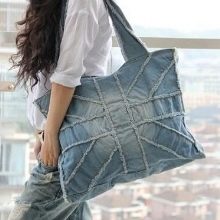
Denim is great, which is not only very practical to use, but also very durable. But for sewing a denim bag, you may need dense, strong threads, as well as thick needles, because a thin needle can simply break due to the rather rigid surface of the fabric.
For making a pretty practical outer bag nylon fithaving a number of advantages. For example, the material is durable, holds its shape well, is quite light and, due to the ease of its extraction and processing, is also very inexpensive.
But for the manufacture of high-quality lining, a much smaller number of fabrics is suitable, since many materials are too dense, easily wrinkled, and quickly torn. It is best to use polyester, viscose, satin and cupro, and avoid lining from taffeta, mesh and satin.
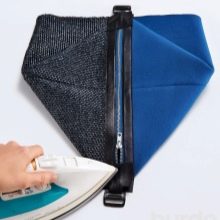
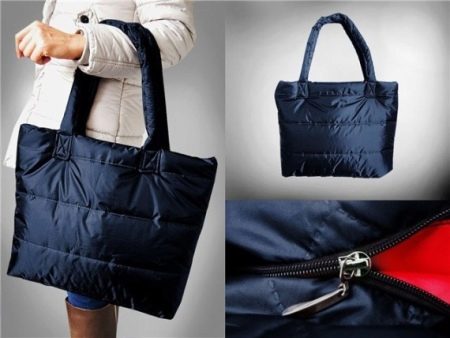
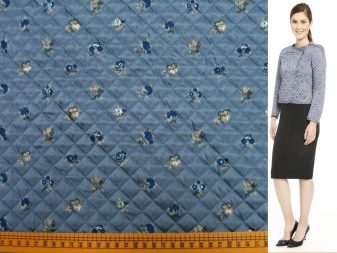
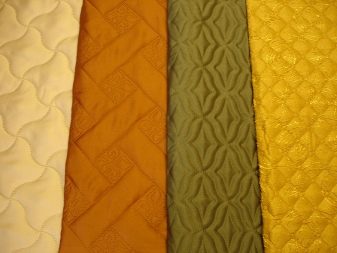
Sewing from quilted fabric
The fashion on the quilted surface of products was introduced by the famous Coco Chanel, introducing mesmerizing models of not only dresses and coats, but also small neat handbags that looked very sophisticated, beautiful and feminine.
But what to do with the burning desire not to purchase such a product, but to make it yourself?
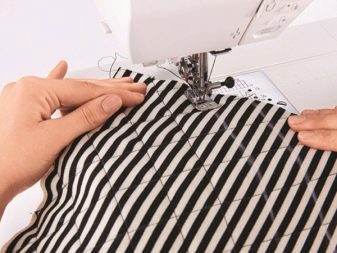
Everything is very simple. It is only necessary to know that quilted products have a surface stitched with diamonds of equal sizes. In fabric stores, one can often find material with the effect of stitches, which is achieved both by spot sizing and firmware.
To give the bag a quilted effect on your own, you must:
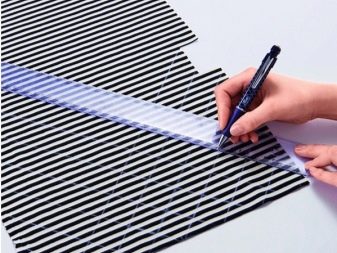
- Mark the seamy side of the fabric. It is necessary to carefully apply on the material, with the help of a ruler and tailor's chalk, a marking of numerous inverted squares that look like neat, equilateral rhombuses.
- If you are planning to give your product a more voluminous appearance, you need to make markings on the inner layer, having previously connected it with the outer one.
- Next, carefully flashing the material, strictly observing the markup, since even the slightest deviation can harm the appearance of the entire product.
The stitch should not be lined, as it should cover all internal seams and perform completely different functions.
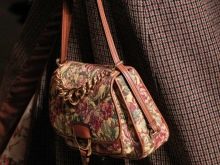
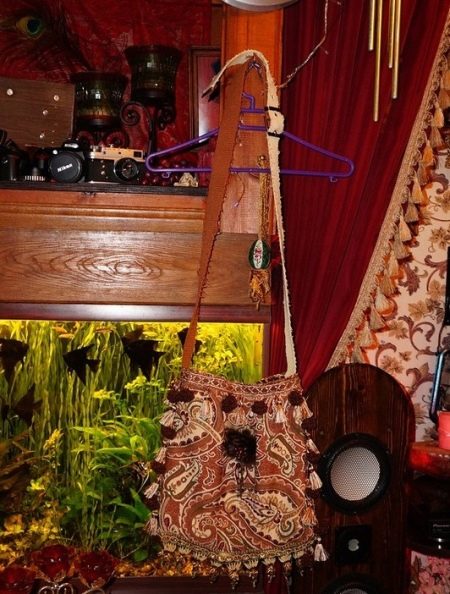
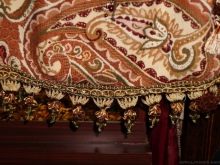
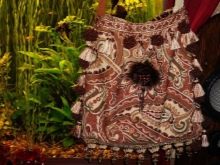
We make tapestry
Some needlewomen take up a rather difficult task - making tapestry bags. The material is a dense fabric with a jacquard pattern applied or embroidered on it. It is thanks to this ornament that the product will look very stylish and expensive, even if made by hand.
Due to the special interweaving of the fibers, the material is very durable, so you should, first of all, carefully make patterns from it, making sure that the edges do not move out and are equally even. Otherwise, the bag will be messy.
In addition, due to the density of the fabric, it will be necessary to acquire special needles for hard tissues.
Cut-out details do not need to be swept together, it will only be enough to chop them with special pins, and then flash them on a typewriter, stepping back from the edge about a centimeter. It is important that the product be flashed at medium speed in order to avoid undue tension of the thread, due to which it may break.
Although the material is rather tough and rarely shredded, its edges need to be overlaid.

If you are making a volume model with a rather wide bottom from a tapestry, it is best to choose a different material for the bottom so as not to stain and quickly wear a beautiful fabric.
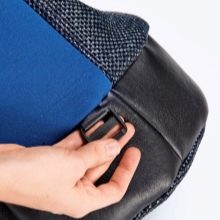
The bottom of the bag can be made of thick leather, picking up the appropriate accessories - neat metal legs.
Transformer bag
Often, girls prefer not only functional, but also very stylish and interesting models of bags in their ideas. These products include an unusual bag-transformer, which with a flick of the wrist turns into a comfortable roomy backpack.
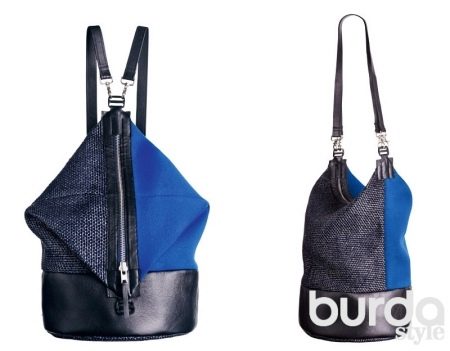
To make this model, you will need quite a few details:
- side walls - in the form of fabric high rectangles;
- lower decorative parts made of leather;
- leather bottom and double handles;
- in addition, you must purchase the appropriate accessories in stores for needlework.

The sewing steps are as follows:
- The rectangular parts are sewn together on the sides, and the leather parts are their continuation in the lower part. A bottom made of the same material is attached to the skin. At this stage, you should get a cylinder with a closed bottom.
- Then, we hem the lining and insert a stylish metal zipper, and on the edges of the bag, in the area of the side seams, we attach metal or plastic parts for pens. It is best if they are rings with wide enough holes. In addition, the ring must be fixed in the lower part of one of the sides.
- We sew handles of the required length, folding the skin in several layers, and at the ends we attach small hooks.
- Clinging the ends of the handles on the sides, you get bags, and attaching one of the ends of the handles at the bottom of the product - a stylish backpack.