
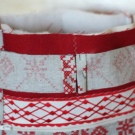
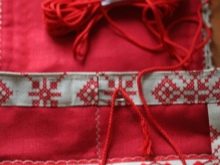
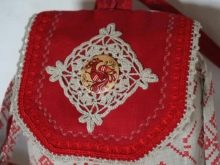
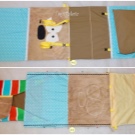
To date, the backpack bag has gained the most popularity among many accessories. An irreplaceable thing not only in the conditions of the city, but also for various trips. Buying a backpack bag is not a problem, but for those who love needlework it is much more interesting and pleasant to sew it with your own hands, especially since the needlewoman always chooses the materials. Therefore, a hand-sewn accessory is distinguished by an individual design, without losing its functionality.
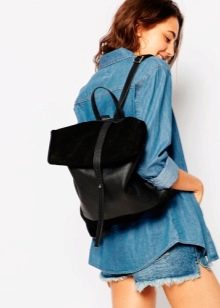


How to make a women's do-it-yourself backpack transformer?
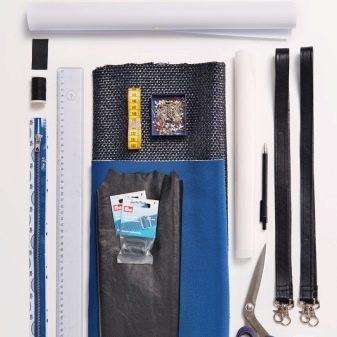
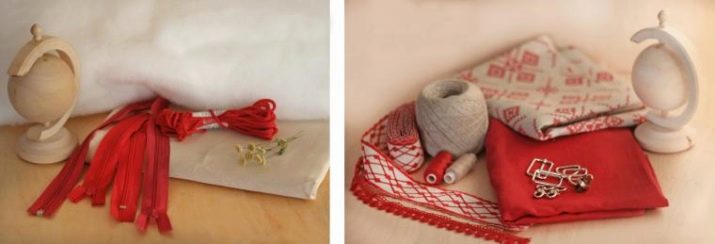
To make such a transformer, it is necessary to prepare:
- flizofiks;
- 55 cm x 140 cm neoprene cut;
- a piece of skin;
- mat flap 160 cm wide and 45 cm long;
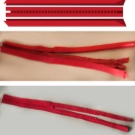
- lightning 35 cm long;
- three buckles:
- as well as threads, pins, scissors, a ruler and two finished handles with carbines 85 cm long.
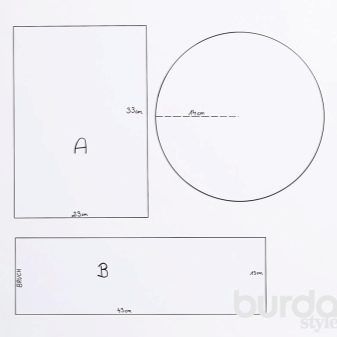
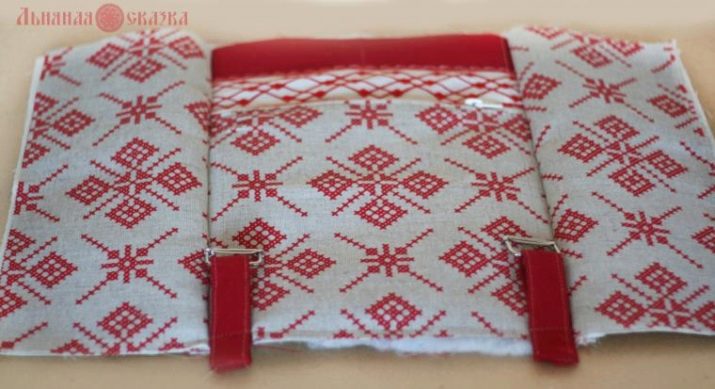
We draw a pattern of three parts. Two rectangles measuring 33x23 cm and 43x13 cm, a circle with a diameter of 28 cm.
In the dimensions of all parts, allowances for seams are taken into account.
Next steps:
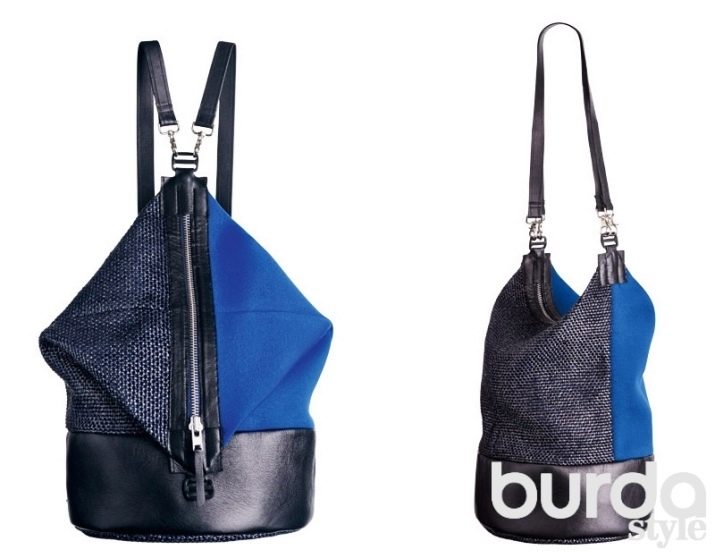
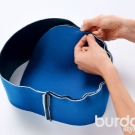
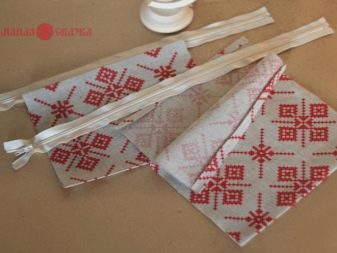
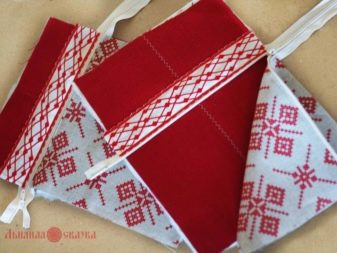
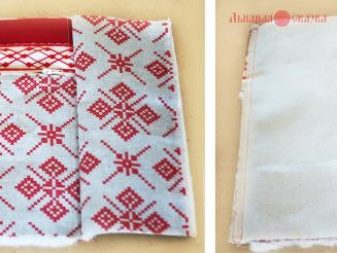
- From neoprene, matting and glue, we cut out one round part and glue them with an iron, placing a circle of adhesive tissue between the neoprene and matting. We do exactly the same with 43x13 parts cut out of leather, neoprene and adhesive. In a rectangular glued workpiece, we perform a side seam and attach to it, departing from the edge of 1 cm, a circle.
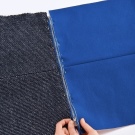
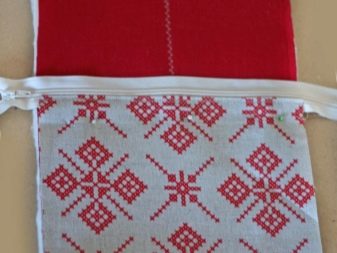
- From neoprene and matting, we cut out two pieces of 33x23 cm, which we sew together along the long side. We attach a zipper to the resulting two parts, without bending the sections to which we are gluing, and then we sew two strips of leather 2x44 cm in size.
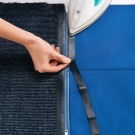
- Now we grind the side seams of this workpiece and attach two buckles to different ends of the zipper.To attach the buckles to the bag, we cut two parts of leather. Each part consists of two rectangles 6x45 cm in size, interconnected by a 2x2 cm jumper. We insert buckles into them and fix them with glue and iron, and then sew along the side seams.
- For the third buckle, you need to cut a 2.5x5 cm loaf from the leather and sew it to the workpiece from glued parts (bottom of the bag). Now we connect the bottom and top of the accessory by stitching from the wrong side, joining the lower side seam with the upper seam. The bag is ready.

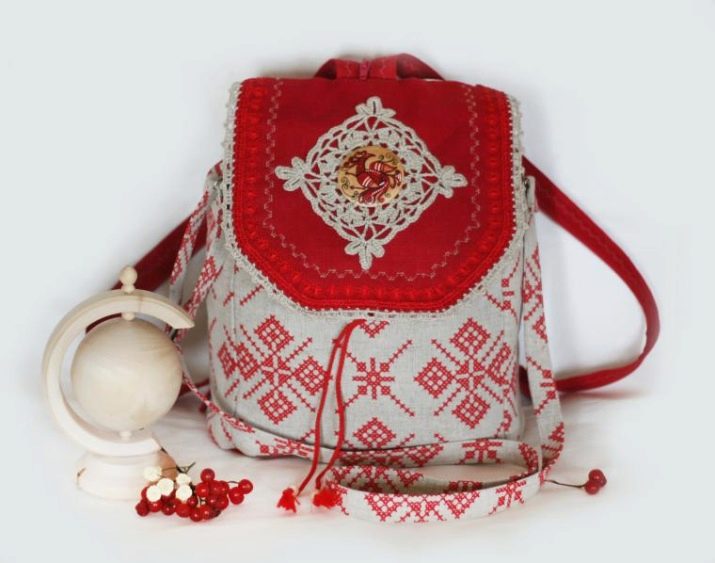
We sew for the child
For the baby, you can design and sew a beautiful backpack that transforms with the handle into a bag.
We will need:
- two types of fabric: plain and with ornament;
- severity and synthetic winterizer for compaction;
- cord in the color of plain fabric and four zippers.
The accessories required for manufacturing consist of a magnetic fastener, three buckles, two half rings, two carbines and one fixing element for the cord. As tools we use threads, scissors and a sewing machine.
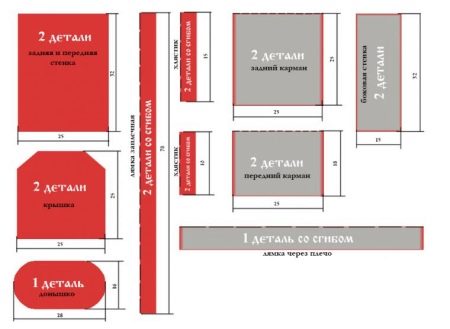
Cut
- We cut out seven rectangular blanks from fabric with ornament. Two pieces each for the back pocket 25x25 cm, for the front pocket 16x25 cm, for the side walls 15x32 cm and one blank 8x130 cm for the fabric strap over the shoulder.
- From one-color fabric we cut one blank for the back and front wall of the backpack 25x32 cm. We duplicate the details for two types of loops 8x15 cm and 8x10 cm in size, as well as for a backpack belt 8x80 cm.
- The upper part of the backpack will be sewn from two pieces of 25x25 cm, in which we cut corners of 7 cm on each side.
- For the bottom of the bag, we draw an oval with a width of 28 cm and a height of 16 cm.
Sewing Stages
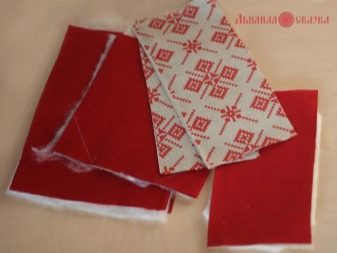
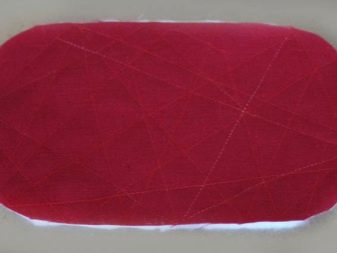
- For sealing the cover, bottom, two walls, loops and knapsack straps cut out from the severity of one detail. Additionally, we seal the bottom and back wall with a synthetic winterizer. Three blanks for the bottom are quilted between each other and set aside.
- Sew zippers to the blanks for pockets on one side. Sew pockets to the front and back of the backpack, on the front side. Carefully align the pocket, jokes to the wall. We put a braid on the upper half of the zipper and attach it to the main blank. It turned out two blanks with pockets.
- Sew the side sealed parts to the back wall, overlay the slices. At the loafing blanks, we turn the slices inwards, fold them in half and sew along. In the finished loops, insert the frames and sew to the back wall.
- Now we are preparing knapsacks. To do this, we turn the slices from the long sides inward, then fold them in half and iron both parts. We insert a lightning between them and sew.
- Grind the workpiece, consisting of a back wall and two side with a front wall and a bottom. We twist and attach to it a strip of 8x80 cm, designed for a lace with previously curved edges, and, stepping back from the top edge about 5 cm.
- We sew parts at the backpack lid, iron, insert the upper half of the clasp, decorate, and then sew to the main workpiece along with satchel straps. On the sides we attach loops with inserted half rings.
- We insert the second half of the clasp into the front wall. Now we sew the lining, adding a pocket with a zipper. We place the finished lining inside the backpack, bending the upper cut by 2 cm, and stitching about 5 mm from the edge. Then we retreat another 5 mm and make a line along the strip for the lace.
- We insert the cord with a pin inside the product, and drag the ends through the locking device, tie the ends with a knot.
- Now we sew the strap over the shoulder. We bend the slices inward, fold them in half, iron them and build them on the front side.
- At the ends we install a buckle for adjusting the length and a carbine.
The bag is ready.

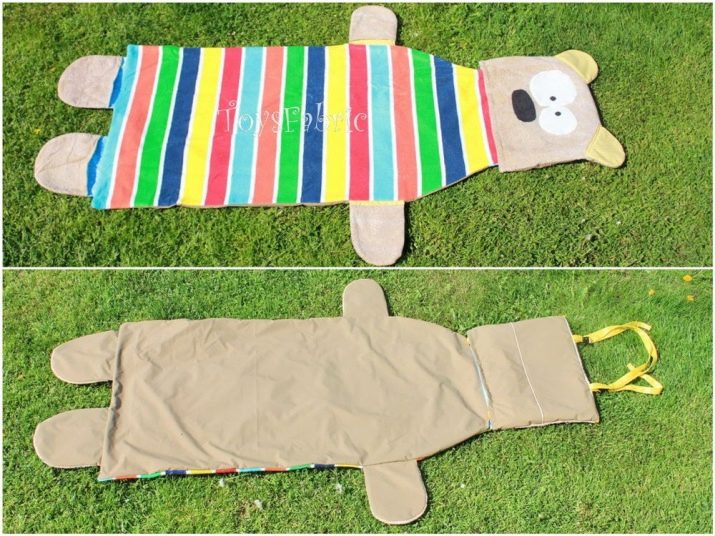
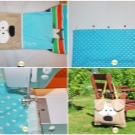
Beach model with a rug
To go to the beach, you can sew a comfortable and functional backpack with a rug in the shape of a bear.
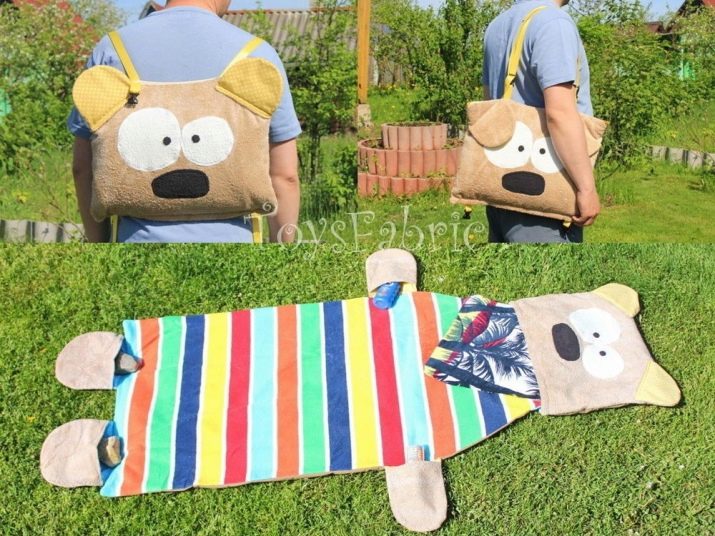
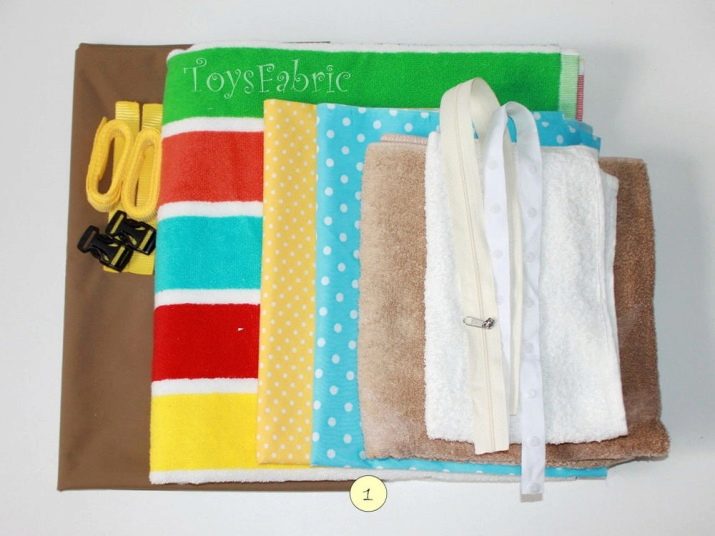
To make this interesting and funny beach accessory you will need:
- Two terry towels sized 70x140 and 50x90.
- 100x150 moisture resistant fabric.
- Cuts of fabric of various sizes for pockets, paws and head. For the upper pocket and the lining side of the ears - 50x100 cm, the lining fabric for the legs - 50x50 cm and for the lower pocket - 50x90 cm.
- And you also need a knapsack tape - 270 cm, a zipper - 50 cm, a semi-automatic fastener for the tape - 4 pcs, Velcro - 50 cm.
- In addition, threads, scissors, pins and a marker on the fabric will be required.
Sewing
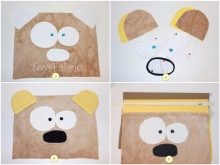
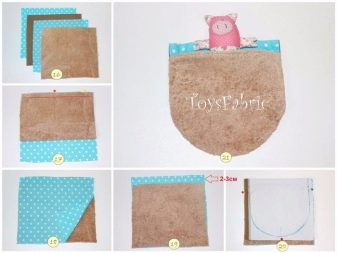
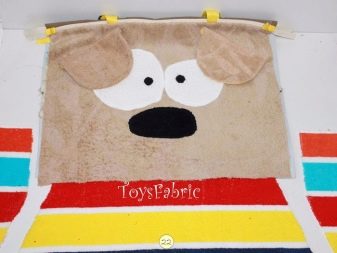
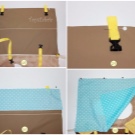
- We cut out the muzzle from the cut 47x37 cm. Draw on paper, and then cut out the eyes, nose, ears. We apply the resulting details to the fabric, circle and cut. Attach the resulting blanks to the head with a curly seam.
- Then we cut out two parts from the lining fabric and one of the same size from the moisture-resistant fabric. Sew parts of the ears with lining fabric and set aside.
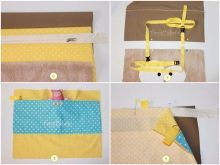
- Pins the belt tape on the parts. Sew pockets and a loaf with a half ring into one of the lining blanks. Attach a zipper between the lining parts and the front. For convenience, we sew pieces of rep ribbon. We grind the lining blanks around the perimeter, folding them with their front sides. Sew ears to the muzzle.
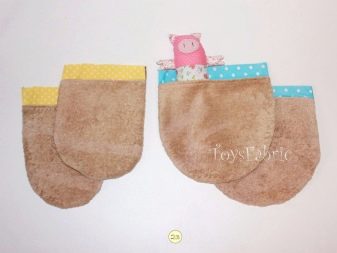
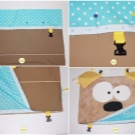
- We prepare parts for paws. To do this, we cut four parts for each paw: two for the lining, one main of the terry cloth and one of the fabric that does not allow moisture to pass through.
- We sew the main terry and one lining, folding it with the front sides. Then we sew the stitched details face up and make another line. We put the second lining blank face up, and on it the sewn blank with the terry side up, departing from the edge 2-3 cm and the blank from the fabric that does not let moisture face down. We fasten all the details with pins and draw an oval shape for the paw from the bottom edge. We cut and sew along the perimeter, do not touch the upper cut and turn it out. The result was a paw with a pocket. We do the same with the remaining three paws.
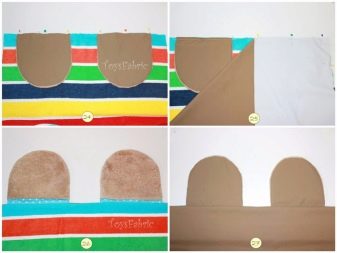
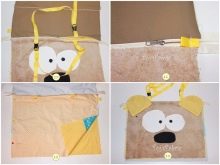
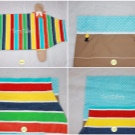
- Take a prepared towel 70x140 and, putting the muzzle on the smaller side, cut out the neck, removing 2 cm from each side. Then, according to the size of the cut body, we cut the workpiece from a fabric that does not allow moisture to pass through. On the towel, we spread the paws face down, and on top of the blank from the fabric that does not allow moisture to pass through, we grind around the perimeter, then we turn it off.
- To the back of the knapsack, we pin the fasteners on the tape, docking with fasteners of long belts. On top we lay a lining measuring 15x47 cm and grind along the long side. On the muzzle, lay out the lining face down in size 35x47 and sew. Then we sew the contact tape to the lower sides of the lining parts. When the lining parts are tucked inside the backpack bag, the stitched contact tapes should coincide.
- We unfold the part of the bag with a short lining, put a rug and a lining fabric measuring 25x47 cm face down on top. We combine slices and grind parts. Now we combine the cuts of the pocket in which there will be a rug, and grind along the sides. We twist and stitch the bottom of the lining. Sew the bag in a circle.
- We insert the pocket into the bottom of the bag and remove the towel mat in it. We fix the bottom using the contact tape.
The bag is ready.
How else can I sew a backpack bag, see the next video.