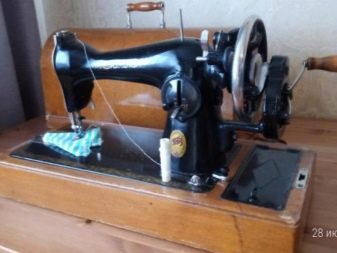
PMZ sewing machines have long been the main working tool of Soviet seamstresses. Once the plant was established as a branch of the Zinger enterprise, and after nationalization, it switched to the production of its own products. A review of Podolsk cars with manual transmission allows you to get a fairly complete picture of the technical capabilities of such equipment. Among its obvious advantages can be noted the ability to configure and adjust with your own hands, simplicity and reliability.
Instructions for use of old machines of the mechanical plant named after Kalinina allows today to easily use mechanical equipment for sewing. Of course, according to their technical data, they are much inferior to modern models. But most of the PMZ sewing machines today remain “in operation” - they can quite successfully grind clothing parts and be used to repair them. So it’s worth learning a little more about them.
History of creation
The history of Podolsk sewing machines began at the beginning of the 20th century, when Singer decided to open its own enterprise in the Russian Empire. The plant was built under the leadership of the German manager Dixon and in 1902 was put into operation. After 11 years, the enterprise already had a very solid status - in completely manual mode, workers collected 600,000 sewing machines each year from original German spare parts. The popularization of home-based sewing was facilitated by the high quality of the products sold, as well as their sale by installments, through a network of company stores.
After the revolution of 1917, the enterprise was nationalized. From the remnants of parts for some time a technique was produced under the brand name "Gosshveimashina". Products with this logo could be purchased from 1918 to 1931. Subsequently, the Podolsky Mechanical Plant was established on the basis of the enterprise. Since 1948, it received the prefix "im. Kalinina ". It was on it that the PMZ sewing machine began to be produced, considered completely Soviet development, but based on the same Singer machine.


It is traditionally believed that all the equipment of the plant was of higher quality at the time when the original Singer parts were used in its configuration. That is, if you look at the years of release - this is 1902-1931. You can decipher the production time of PMZ sewing machines by the serial number, if you know how to read it, but there is no single database. It is easiest to navigate according to GOST standards - they correspond to certain periods of production.
In 1932, the company received its own foundry. PMZ began to produce cast parts in the USSR for housings of household machines and the first industrial sewing equipment of class 31. Cast iron production volumes reached 36,000 tons annually. Since 1935, the plant began to produce motorcycle equipment. During the Second World War, the company was redesigned for the manufacture of ammunition cases.
The production of sewing machines at the PMZ resumed in 1946 - in July, a batch of 100 pieces of equipment left the assembly line. But by 1957, the demand for these products in the domestic segment fell markedly. Instead of a planned batch of 3,000,000 pieces, it was necessary to cut the volume of machines produced to 1,200,000. It became clear that the enterprise could not do without radical changes. A lot of work was done, and a few years later, the first one came off the assembly line "The Seagull" - a new sewing machine that meets the requirements of the time.
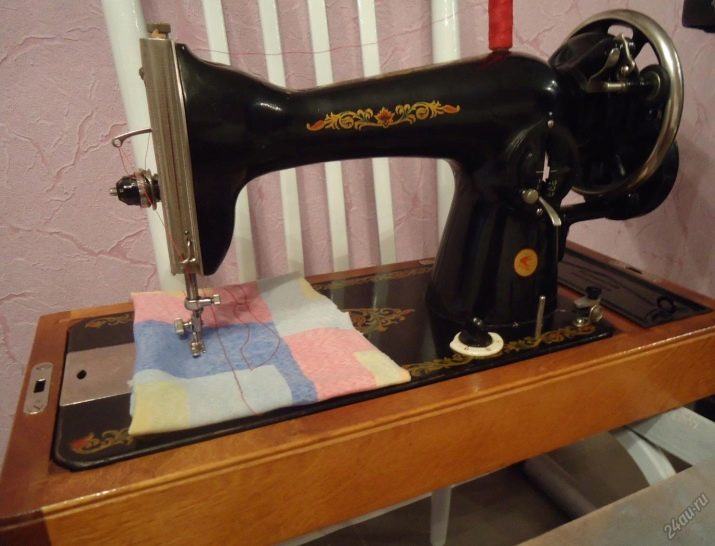
Device and specifications
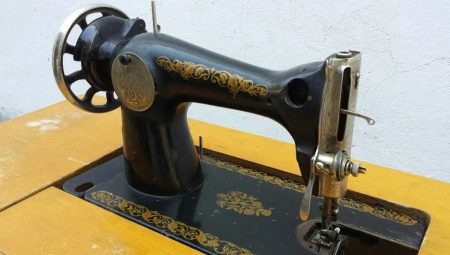
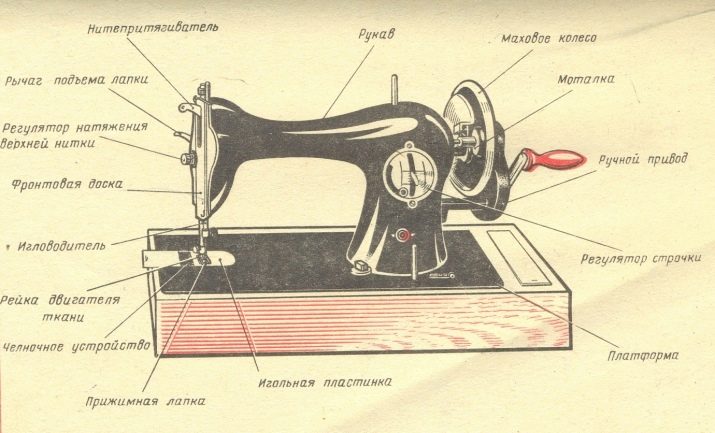
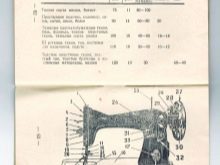
About how the device of sewing machines PMZ looks like, it is known thanks to the operation manuals. The composition of their design must include:
- platform with base and legs;
- sleeve with a spool pin;
- flywheel;
- needle bar with thread guide;
- lever for adjusting the stitch with the head screw;
- lever thread take-up with spring and regulator;
- washer necessary for thread tension;
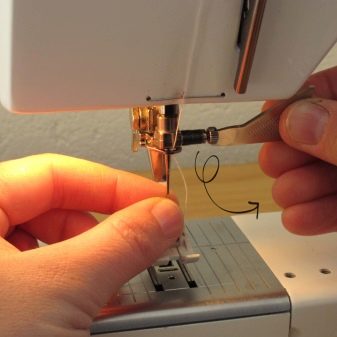
- threading element;
- thread trimmer element;
- foot and primitive tissue conveyor below;
- needle plate;
- bar needle holder with clamping screw;
- front panel with adjusting screw;
- head screws to control the pressure of the foot, adjust the stitch;
- winder with spindle, pulley, latch, spool pin, lower tensioner.
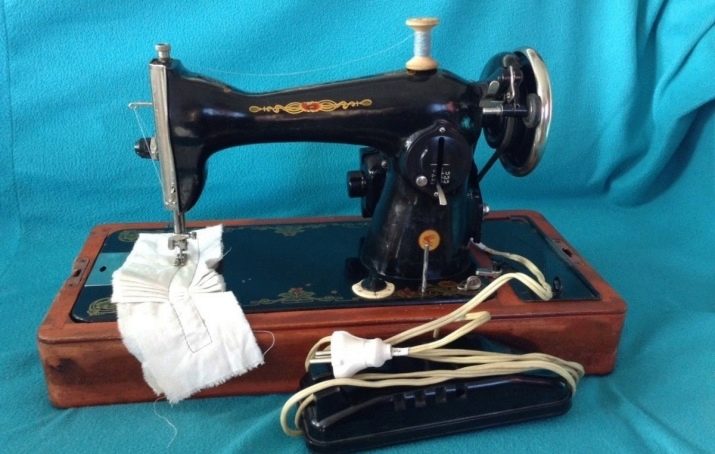
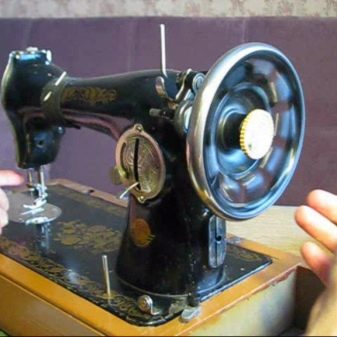
By design type, machines equipped with different types of drive can be distinguished: foot, electric, manual. Depending on the side where the shuttle is looking, the right-handed and left-handed models (second ones of later production) are distinguished. Electric machines are equipped with a special pedal and work much faster than with a manual drive.
All models have a shuttle with a central spool. The maximum sewing speed reaches 1200 rpm, the stitch length reaches 4 mm. Sewing equipment supports the creation of a straight seam, reverse stitching, equipped with a convenient travel switch. The package includes a basic working platform, which has dimensions of 37.1 x 17.8 cm.
The lineup includes the following options.
Podolsk 2M
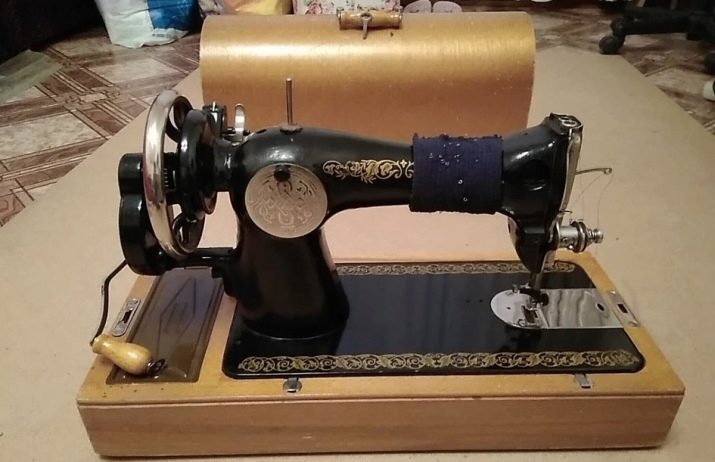
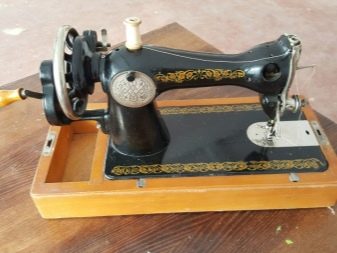
The most common model, almost completely matching the Singer sewing machine. This option was widely used at school production plants and today you can find equipment in very good condition. In terms of power and other characteristics, the machine is not inferior to many analogs with an electric motor. "Podolsk 2M" is suitable for sewing thick materials, multilayer products, genuine leather. The only drawback is the limited list of available operations.
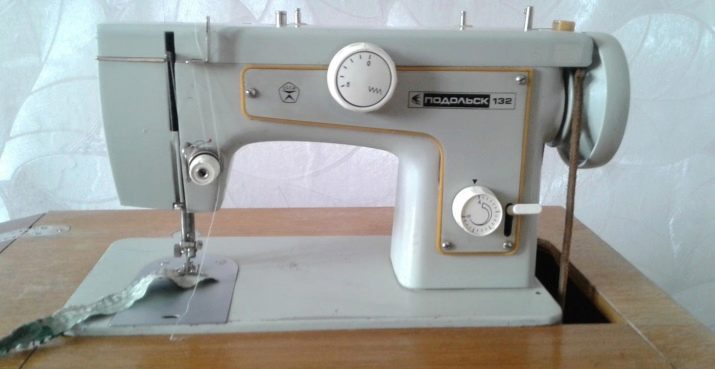
"Podolsk 132"
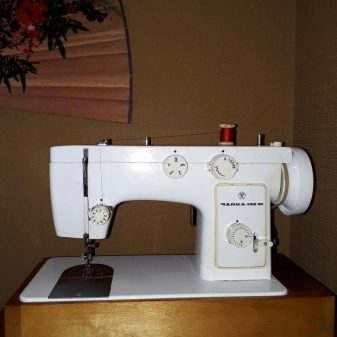
Electromechanical machine with a pedal, outwardly similar to modern options. Designed for stitching woolen, linen, silk fabrics, can sew in a straight line, zigzag, darn and embroider. The machine supports work with double-barreled needles. This is the first full zigzag model released by PMZ.
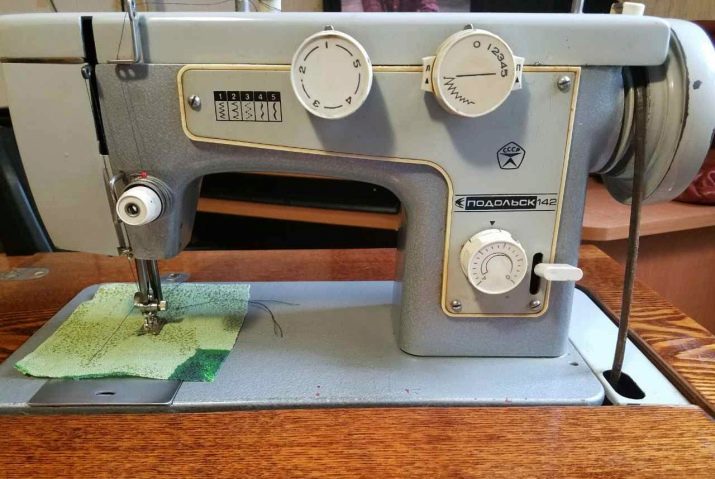
"Podolsk 142"
An improved model, functionally almost no different from the previous version. The design has become more sophisticated, the controls are ergonomic, and the quality of the metal has improved.
Setting and adjustment
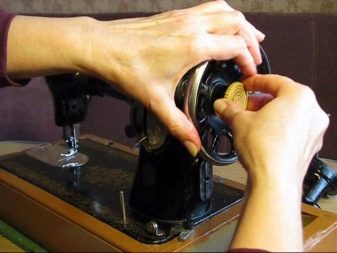
Even if only an old car is available, it can always be configured and applied as intended. It is not difficult for an experienced seamstress to open the internal mechanisms in the stand, thread the thread into the shuttle, and adjust the presser foot. For a beginner, even a task such as the need to insert a needle into the holder or adjust the free-wheeling of the flywheel can be a serious problem.
Carefully following the instructions will help to adjust the operation of the equipment.

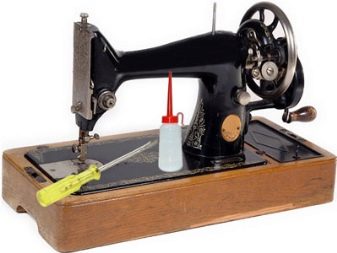
Grease
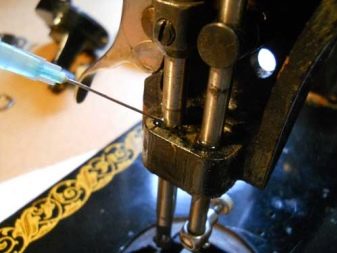
After a long downtime, as well as during intensive use, the rubbing parts of the Podolsk sewing machine need lubrication. Daily manipulations are performed in all nodes of the mechanism. Hard-to-reach parts have special holes for filling engine oil. To get the shuttle to work properly, its guiding elements in the mechanism case are also lubricated, and to apply the composition to reduce friction on the hinge part of the needle bar, you will need to remove the front panel of the machine.
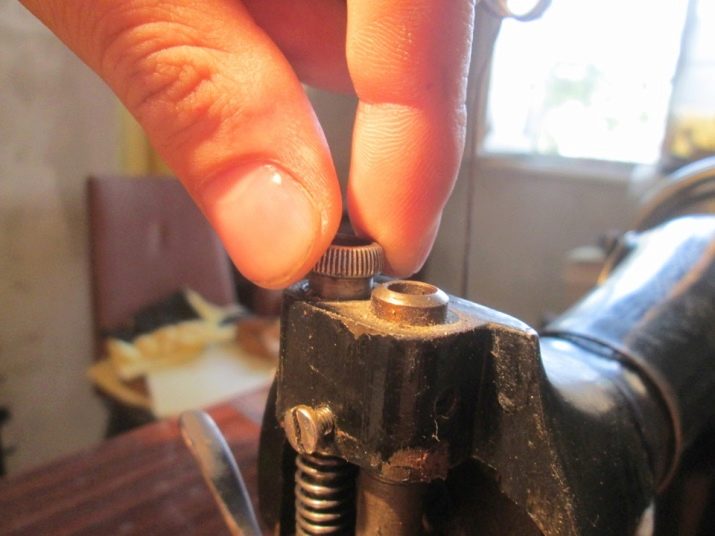
Foot pressure adjustment
The pressure rate of the material changes quite rarely. But in some cases this is necessary. Changing the factory settings is simple: you just need to turn the head screw. This is done in a counterclockwise direction, if you need to reduce the pressure, and along its course to increase it. Usually 2-3 turns are enough.
Reverse stitch
All PMZ cars can lead a line in the opposite direction or against the course. In order to activate the mode, you need to move the lever of the regulator that determines the stitch length on the front panel to the right all the way up. To return to the normal sewing mode, just move it down.
The stitch length does not change - you can switch the line to the forward and backward right in the process.
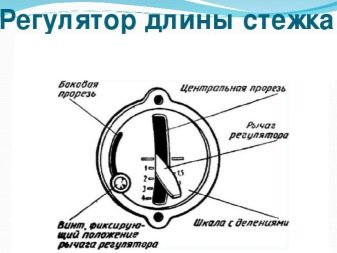
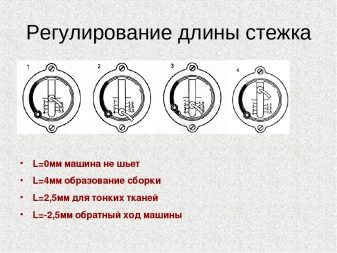
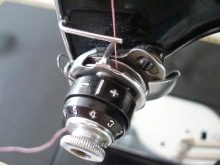
Stitch Length Setting
The standard length of 1 stitch for a mechanical sewing machine is 1.5-2 mm. This will be sufficient for medium-density materials. If the fabric is thinner, the stitch frequency must be reduced. For thick tissues, it is recommended to increase this indicator to maximum values.
Setting the stitch length on PMZ sewing machines is carried out in the range from 1 to 4 mm. The regulator is located on the front panel and looks like a lever moving along the scale up and down. A scale with numbers equal to the desired width parameters, has a gradation of 0.5 mm, provides accurate control over the pitch of the needle.
The middle line, which separates the lower half of the regulator from the upper one, distinguishes between reverse and forward switching. Fixing the required step width is carried out using a special head screw. It is loosened to move the regulator and tightened to achieve the desired position.
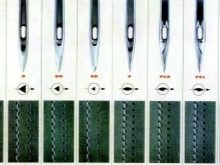
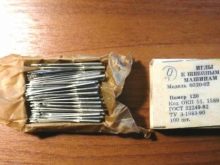
Sewing number selection
The correct combination of the thickness of the thread and needle with the type of fabric largely affects the quality of the stitch being formed. Typically, needles No. 70, 80, 90, 100, 110 are used to work on PMZ machines. The higher the number, the thicker the tip. For threads, the numbering goes in the opposite direction - the thickest ones have number 10, the thinnest ones have number 90-100. In the instructions for the technique there is a summary table that determines the correspondence of the parameters of the needles and suture material.

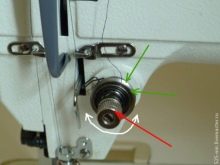
Thread tension
In the case of the upper thread, it is adjusted using the screw on the spring device. For work be sure to lower the foot to the surface of the work platform. After that, you can increase the tension with a screwdriver by turning the nut to the right or loosen it by acting in the opposite direction.
You can adjust the freedom of movement of the lower thread by removing the bobbin case from the mount. There is a special screw on the hook, turning it to the right can increase the tension, and to the left - loosen it. In most cases, you do not have to change the adjustment of the lower shuttle.
Usually, the desired stitch quality can only be achieved by changing the tension of the upper thread.

Terms of Use
The instructions attached to the sewing machines PMZ, tells in sufficient detail about how to properly use this technique. Among the main recommendations, the following points can be distinguished.
- The rotation of the handwheel during sewing should be done only towards the master. When changing the direction of the thread in the shuttle can get confused, creating a lot of additional problems.
- When the machine stops sewing, it is necessary to raise the foot and leave it in that position. Do not leave the presser in contact with the work platform.
- The machine must not be allowed to start without a cloth placed under the surface of the foot. This will cause the teeth of the engine to simply become dull. In addition, there is a risk of damage to the lower part of the foot.
- When sewing, it is necessary to ensure the preservation of the natural movement of the fabric. You can’t pull it, pull it - the needle will be broken.
- The biasing plate covering the shuttle compartment is always monitored during operation. To avoid damage to the mechanism, it is better to check the abutment of the cover.
- In preparation for the start of sewing, it is necessary to combine the upper and lower threads, and then stretch them to the side opposite from the seamstress. Material is laid under the foot on the work platform, then the foot is lowered, and when the flywheel shaft rotates, the needle pierces the fabric.

These are the basic rules that are recommended to be observed when working with PMZ sewing machines. They ensure compliance with basic safety requirements and extend the life of equipment.
Major malfunctions and their elimination
The mechanical design of PMZ sewing machines allows you to repair them yourself. It is enough to understand the design features, the principles of operation of the equipment and disassemble, and then assemble the equipment will be quite simple. Understanding which major problems you have to deal with most often helps study of the main complaints of owners of sewing machines.
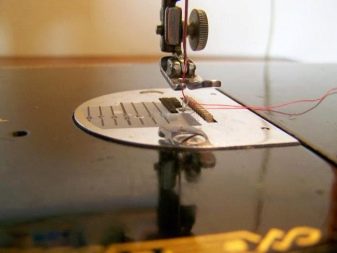
Machine crumple material
Especially often PMZ sewing machines with a needle plate under a zigzag jam thin or elastic materials. The fabric is pulled into the needle plate, damaged.
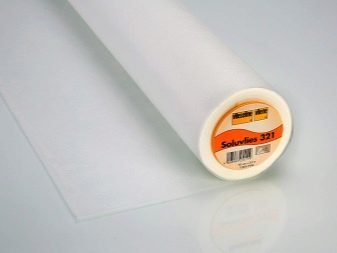
The use of a special water-soluble stabilizer or plain thin paper will help to fix the problem.
Stitch Skips
Among the stitch defects, one of the most serious problems is skipping stitches. This type of weld failure involves the presence of different types of breakdowns. Most of them, the master is able to solve independently, without outside help.
The machine skips stitches if the interaction settings that the shuttle mechanism and the needle enter are violated. For example, with an increase in the gap between these elements of more than 0.3 mm, the needle nose will move without touching the loop. The stitch will be skipped. Correction will help to fix the problem, during which you can use a magnifying glass. The procedure will be as follows:
- make sure the switch is on a straight line;
- remove the needle plate;
- dismantle the foot;
- turn the handwheel so that the needle moves to the lower position;
- adjust the clearance to 0.15-0.25 mm.

Sometimes skipped stitches are associated with improper needle selection. If her bulb has a round industrial shape or a smaller diameter, gaps will be inevitable. Correcting the problem will help installing the correct needle.
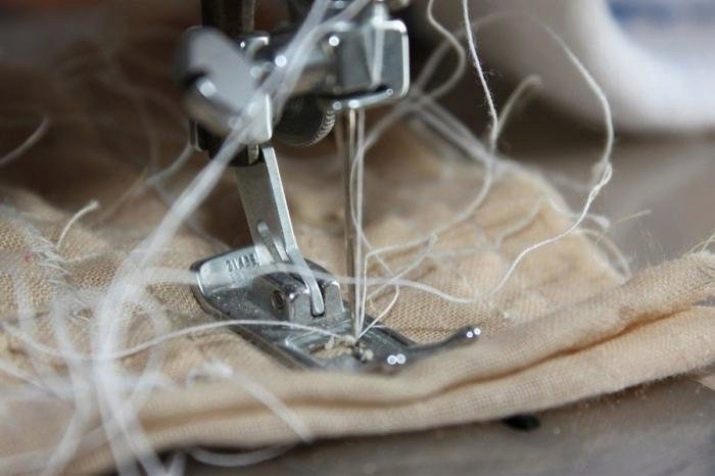
Thread break
If the upper thread is constantly torn in the PMZ sewing machine, there can be many ways to solve the problem, like its sources. First and foremost - over-tightening the tension adjuster. If the spring is compressed too tightly, the thread simply cannot move freely. Incorrect assembly may also be the cause of the malfunction, especially if the tensioner and spring are disassembled. It is enough to simply dismantle again and check the correct installation of all elements.
A common cause of thread breakage is also the use of low-quality threads. If there are obvious differences in thickness on them, problems will definitely arise during operation. In addition, the needle and thread may simply not match the thickness and density of the fabric.
Clippings can cause nicks formed on the needle plate or hook due to long operation.
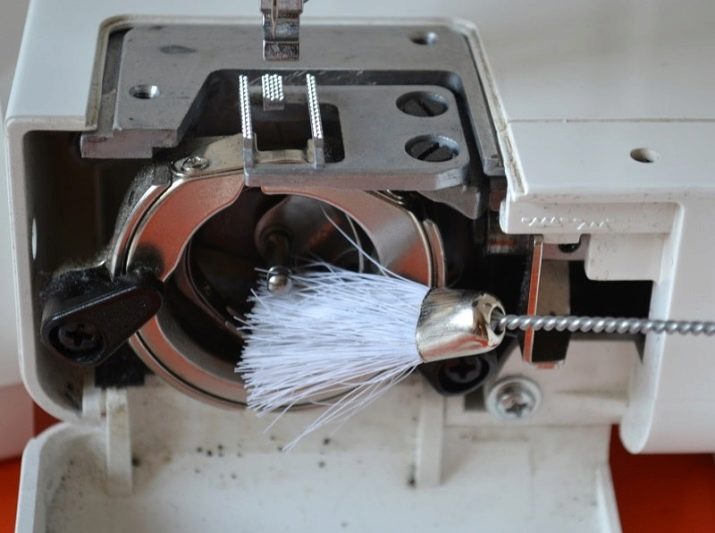
Clogged mechanism
For long-term operation, any sewing machine accumulates thread trimming inside, scraps of fabric. To remove them, remove all parts that do not require complex dismantling. You can remove the presser foot, needle, needle plate, front panel and hook. To clean the mechanism inside, a toothbrush is suitable. A clogged shuttle will not allow the machine to sew normally, the needle will jam.
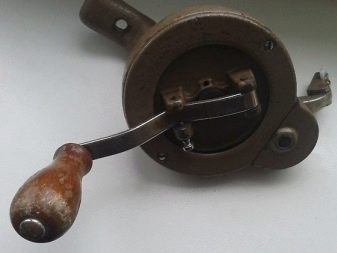
Manual play
If the design of the manual drive has a play, it hangs, the handle moves freely, you need to correctly adjust the mechanism. The hub screws are tightened first. They do it carefully lubricating the elements through special holes.
The loose crank is best repaired by specialists. It is necessary to flare the upper edge of the sleeve, but to do it yourself is quite difficult.
Incorrect needle setting
In most models of sewing equipment similar to Singer, the needle is set so so that the long thread groove looks to the right. But relying only on this rule is not worth it - in earlier versions the opposite position was also practiced. You can check which option is available by opening the shuttle compartment: when turning the handwheel, the nose of the shuttle is always located on the side of the needle blade.
If the installation is performed incorrectly, the machine simply will not sew.
The following video will talk about setting up an old sewing machine "Podolsk".


