
A beautifully decorated Christmas tree is the main symbol of the New Year, without which there would be no holiday. Modern industry offers Christmas decorations in abundance, but it is still worth recognizing that in many ways they are of the same type, a little banal and do not reveal the individuality of the owners of the house and the celebrating company.
If a person does not mind creating with his hands, then he can create New Year’s balls literally from improvised materials and it will turn out no worse, but one can feel real pride by answering questions about where these original decorations come from. The task is not as difficult as it might seem at first glance, so it’s definitely worth a try!

Description
Today it seems surprising, but they came up with decorating the New Year tree with balls not so long ago - the tradition originated in Germany just two hundred years ago. In those days, toys, of course, were only home-made, but many owners did not bother, but decorated coniferous branches with ordinary apples. History says that in 1848 a crop failure of apples happened in Germany, and New Year’s magic was in jeopardy.
Local glassblowers came to the rescue, who thought of blowing “apples” from glass. Citizens liked the innovation so much that they gradually abandoned real fruits in favor of beautiful glass counterparts - and Christmas balls appeared.


Folk craftsmen have so far come up with many different techniques for making and decorating New Year's toys, which allows the novice master to use the most convenient material for him and choose a method that seems the simplest.Engaged in the manufacture of Christmas tree decorations for the first time, a beginner should follow the prompts of the selected master class as accurately as possible, but then, when it starts to work out, it will be possible to make notes of his own creativity.
It should be noted that the production of home-made Christmas toys, although it is not particularly difficult, but still requires minimal practice. Be patient and prepared for the fact that the first time you should not expect an ideal result. That is why it is recommended to start manufacturing not a day or two before the New Year, but at least a week in advance - this is your guarantee that the tree will not be left without decorations.

Materials
The specifics of making Christmas balls is that they don’t have any physical load - they should just please the eye. Thereby the master can use absolutely any materials in the production process, able to keep in shape, higher demands on the strength of raw materials are not advanced! In this case, two large classes of homemade balls can be distinguished. If they are entirely made with their own hands, then most often they are made from foam, papier-mâché, cones, sweets, velvet, cardboard, foamiran and even wool.
A suspension for a toy is most often made from ordinary threads.

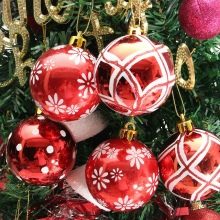
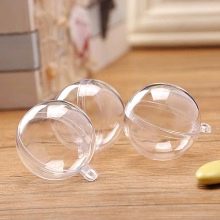
However, you can take ordinary plastic balls from the nearest store, which will be decorated with your own hands so that they completely lose their original appearance. To do this, they are most often decorated various windings from beads and sequins or satin years and paper. Alternatively, the toy can be painted paints. Outdoor decoration is relevant not only for purchased balls, but also for your own crafts, especially polystyrene, which without this would look too boring.
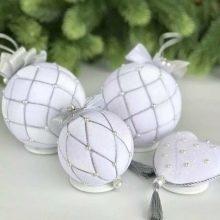
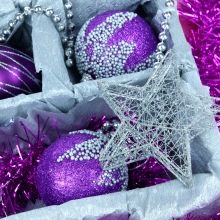
The same velvet balls are often decorated with sparkles to make them look even more fabulous.
Color schemes
Traditionally, there are no special requirements for the color design of Christmas balls. - as a rule, they are not black, but all other bright and festive colors are welcome. On sale sometimes even transparent toys come across, but you yourself won’t do this at home - unless you decorate a store item. Each master chooses the colors of toys himself, in accordance with his own preferences and needs, but there are certain patterns in the choice of colors.

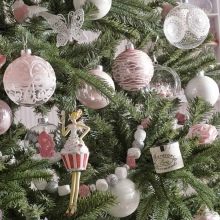
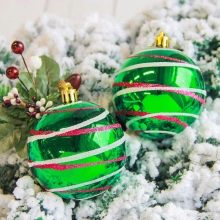
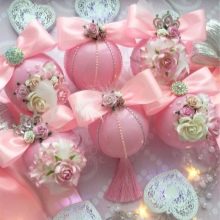
First you need to understand that the abundance of various bright colors and shades will surely appeal to young children, however, adults may not cause a feeling of comfort. If for you the New Year is a quiet family holiday with a fabulous atmosphere, it is appropriate to make toys even in pastel colors. Green balls will not be very catchy either, but it is advisable to make them slightly different in color from the needles. Noticeable, but monophonic balls of the same color will look a little brighter, but still not too defiant white, yellow or even red, just not interspersed.

Creating a holiday for children or just people who are not looking for peace and who do not appreciate too calm a celebration, create in a completely different way. This is where the abundance of bright colors will be needed - make balls of all the above colors, add violet, orange, pink and any others to them, if only it would be colorful and bewitching! Here, there is no longer a requirement that all balls be monophonic and of the same color, on the contrary, brightly painted and carefully decorated pieces will attract special attention.
The main rule can be formulated as follows: a calm "adult" tree at a glance conveys a sense of family warmth and homeliness, but a cheerful "nursery" catches your eye and makes you look at it again and again, because it looks different from different angles of view .

Workshop on manufacturing
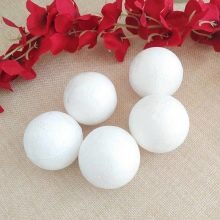
Making a Christmas tree toy with your own hands, even completely from scratch, is not so difficult, at least if you choose polystyrene for this purpose. The fact is that ready-made foam balls are sold in creative stores and although you still have to work on them, you already have a blank.
People with experience say that for a beginner, the diameter of the ball should not be less than 8 cm, while you should not choose complicated schemes for how to decorate it.
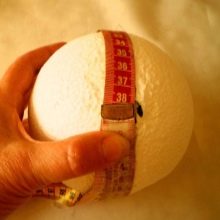
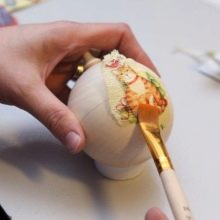
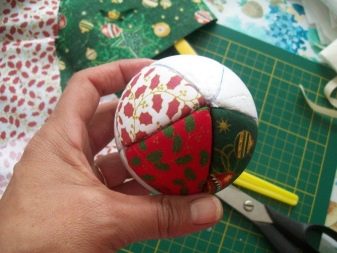
A great solution for decorating a foam ball will be kimekomi technique, which will be intuitive to every person familiar with the concept of patchwork. Styrofoam balls with ready-made grooves are sold especially for this craft, but even if there are none, this will not be a problem - cut them to a depth of about 7 mm yourself using an office knife. As a beginner, do not chase complex patterns, divide the ball into several segments, this is enough. Expand the grooves made and seal with the non-sharp side of the spreader.
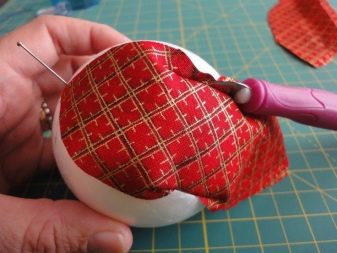
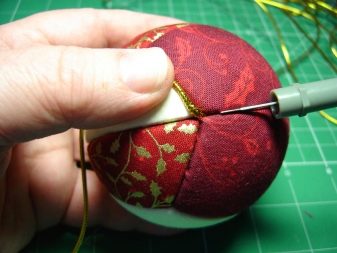
Next, you need to make a set of scraps in which the toy will be “wrapped”. The edges of the fabric will be hidden in the grooves you made - this will be their fasteners, because each patch should be slightly larger than the segment allocated for it. Experts advise cutting the fabric, directly pricking it with needles on the ball, so as not to make a mistake in size - traces of punctures on the foam will still be hidden by the fabric.
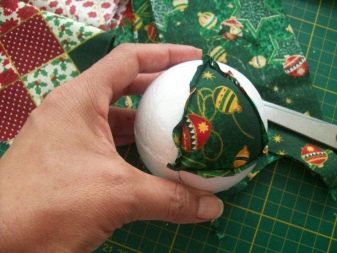
Cut the fabric carefully, remembering to leave an allowance of several millimeters on all sides. Carefully tuck the “excess" edges of the patches into the grooves, and when you release the edges of the foam section, the material will compress the fabric.
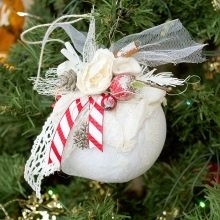
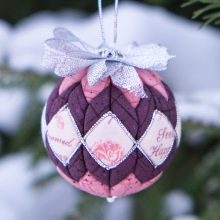
No matter how skillfully you complete the work, all the same, the junction of the rags over the former grooves will look imperfect. This is not a problem - just in this place you need to add outdoor decor. You should choose decorative material according to your preferences or according to the state of the joints - sometimes they can be hidden with ordinary braid, in other cases whole bows of lace will be needed.
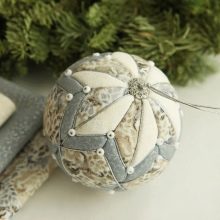
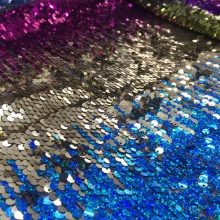
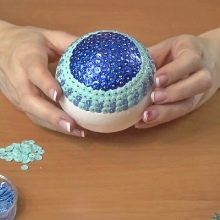
Another alternative option for processing a foam ball is to stick it with sequins. For this method, you will need a huge amount of not only sequins, but also special tailor pins - those that have a bead-shaped head at the end. One sequin is put on each pin, after which the sequin is pinned to the base. There should be enough sequins and pins to completely hide the original surface of the ball under them. Thanks to this, the toy can not be painted at all, and yet this method allows you to "paint" it with any pattern, using different colors of sequins.
The task requires meticulous work, but on the other hand, the result can exceed any expectations.

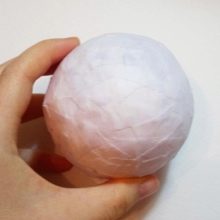
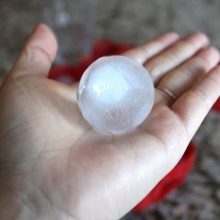
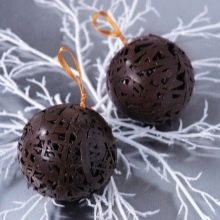
The absolutely stunning idea of making a ball that can make not only children, but also adults gasp, is an openwork toy made of chocolate. For manufacturing, you need an ordinary balloon, in which they collect a little water and send it to the freezer. Having frozen, the water forms a rounded ice blank, which must be removed and carefully cleaned of rubber.
Chocolate icing needs to be prepared in advanceto quickly apply it with an arbitrary pattern on ice. To make it even more attractive, chocolate designs are often decorated with kandurin - a special confectionery paint, which in this case is most appropriate in gold tones. Due to the cold emanating from the ice, the glaze will harden quickly, but the ice itself will gradually melt and flow, leaving only a chocolate figure.

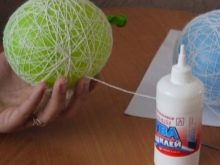
A balloon can become a blank for openwork New Year’s art without chocolate - with its help you can make a hollow inside a ball of delicately curled threads. To do this, the balloon is inflated (usually not completely), tied and coated on the outside with ordinary PVA glue.Wrap with fresh glue with thread - it is desirable that they be thick enough, but at the same time they are confidently saturated with glue.
It is not necessary to follow a certain wrapping order - it will turn out beautifully in any case, if only the ball could be carefully removed at the end of the procedure. Once saturated with glue, the threads harden and take a stable shape, then the ball is gently blown and removed to the outside, and the thread contour remains and can be used to decorate the Christmas tree.

Decorating Ideas
Above, we generally examined how to make a ball from scratch or decorate an already finished product. However, the simplest and most obvious ideas are given above, here we will consider more original solutions that are less common. We will not deliberately consider luminous toys and other decorations worthy of a master, instead Let's talk about simple solutions, the implementation of which is available even to a beginner.
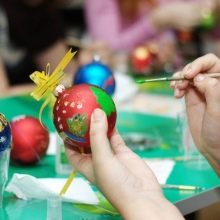
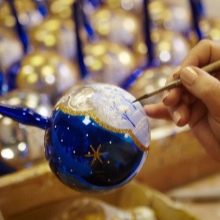
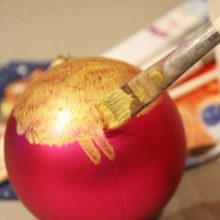
The simplest solution is colorize the toy. For home-made products, unless they are made of felt or other colored material, this is generally a prerequisite. However, you can buy monophonic jewelry and put a painting on them. What it will be is up to the master to decide.
The simplest solution for painted balls is spot painting, simulating snowfall, some experiment even with ordinary balloons, not fully inflated. If you want to present the craft of a company that will have to celebrate without you, you can write your name on the ball - such personalized gifts will mean that you are as if present with everyone.
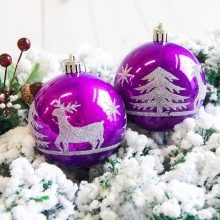
If you know how to draw, you can make a craft with the symbol of the coming year.
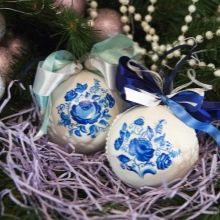
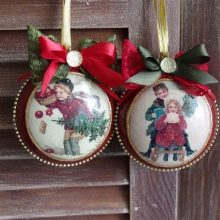
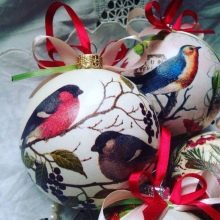
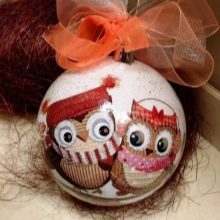
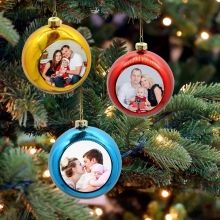
Often, shop or homemade balls are decorated with photos - at this moment they inevitably become unique and memorable. What kind of photograph it will be, think of it yourself - you can paste the toys with photographs of relatives and friends, last year’s memories and dreams of the coming. Some do vintage ballsUsing printed old photos of New Year's theme for this - if the whole surroundings are generally maintained in the same spirit, it turns out very colorful and at home.


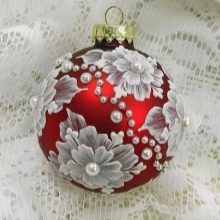
For people with a penchant for creativity in all its manifestations, there are no limits at all - decorating a Christmas ball, they can use absolutely any ideas that only come to mind. If you wish, you can even decorate the product with stucco molding, using any convenient material for this, most often it is, of course, clay and various clay for modeling.
Such a solution requires dexterity and the availability of appropriate skills, but the result will be voluminous, even more interesting from an artistic point of view.
Beautiful examples
In creativity, the most important thing is to try, but in order to stop doubting and begin active actions, you need to see what can happen in the end. For you, we have collected some of the most unpretentious examples of how you can show your creative inclinations in the manufacture of Christmas toys.
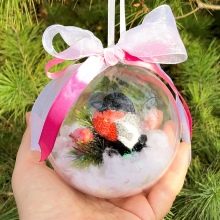
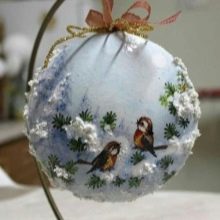
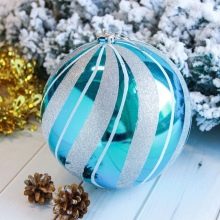
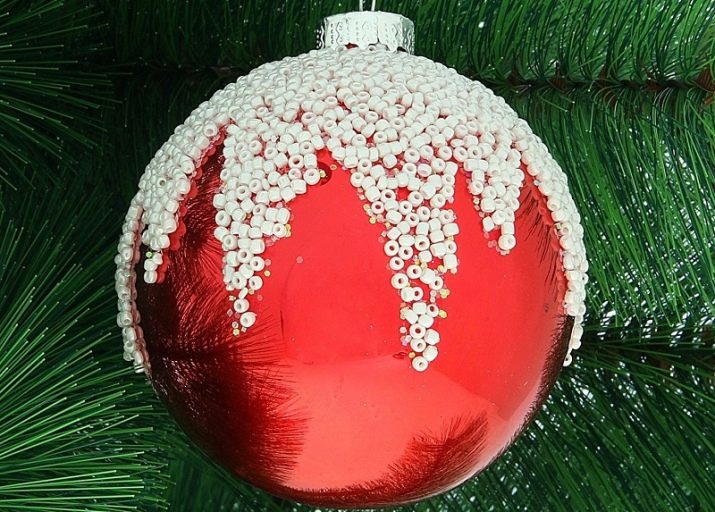
The first example shows how to improve an existing toy without much effort. If a monophonic ball seems too boring for you, chop a little polystyrene foam, making it “snow”, cover the part of the toy with glue and rub it with artificial “snow”. That’s the whole task!
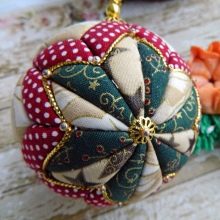
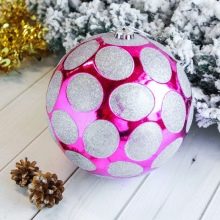
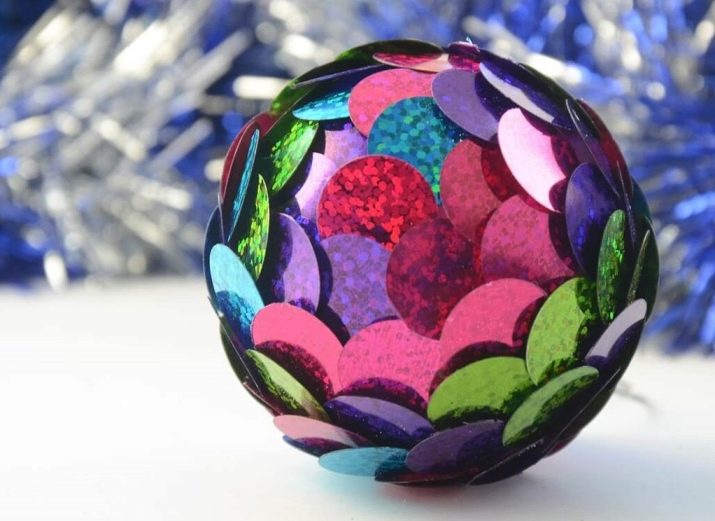
In the second photo, the ball is pasted over with bright shiny circles, which is why it resembles a toy made using the kanzashi technique. What was taken as a basis, we do not know, however, inside there can be either a simple foam ball from the store for creativity, or just an old jewelry that has scratched and lost its luster over the years, and now has a second life.
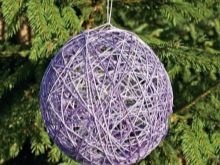
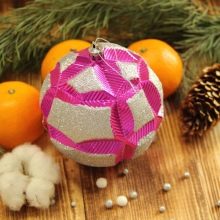
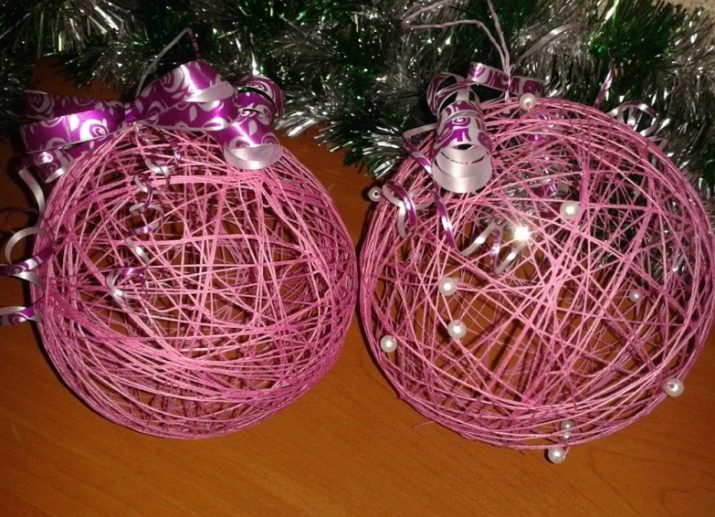
The third example is the same ball of thread, the manufacture of which we considered among other workshops, additionally decorated with a bow made of ribbon. The threads can be wound and thicker, but still it is beautiful and interesting, and even simple.
You can find out how to make a Christmas ball out of Kazan-style ribbon with your own hands in the next video.


