The original style of any interior involves not only an unusual design, but also an interesting decor. Own-made items look very impressive - thanks to their inherent uniqueness and thoughtfulness, they harmoniously fit into any room.
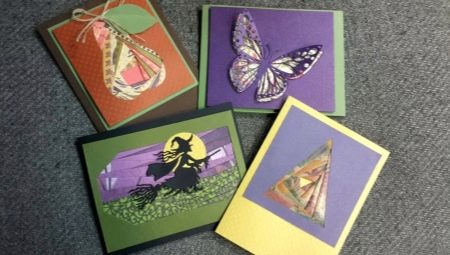
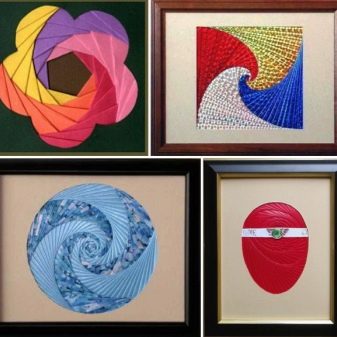
One of the most popular techniques today in creating decor items for rooms has become an application called the Iris Folding. Using this method, you can create small paintings, as well as pretty impressive panels.
What it is?
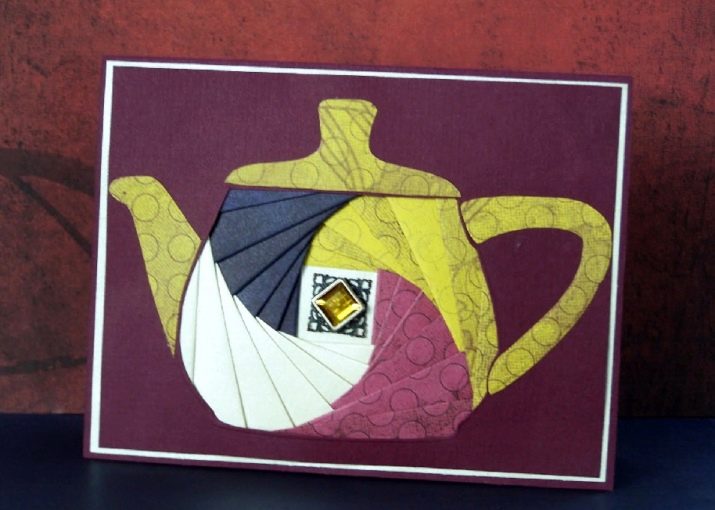
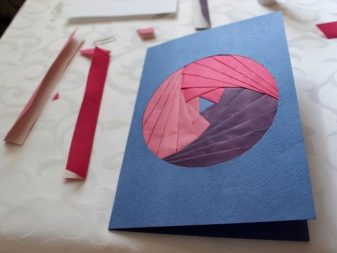
The name of the technique involves the so-called rainbow folding - multi-colored stripes of paper in a special way are placed one after another in the form of a twisting spiral at a small angle relative to each other.
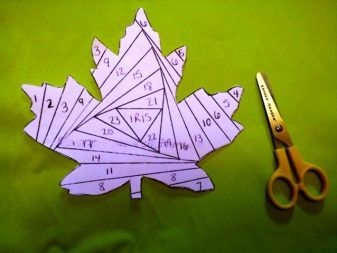
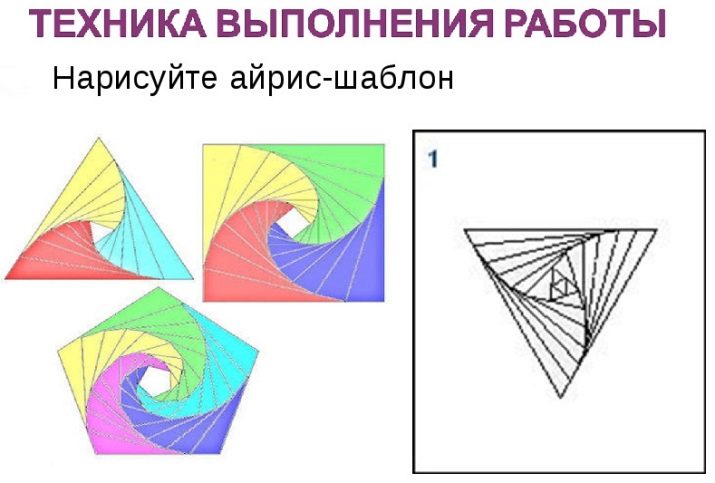
Each iris folding workshop includes several stages of work. To get started on cardboard designate patternwhich is then cut out along the contour. After that form special patterns, the form of which should coincide with the model of the completed work. All elements of the template are denoted by numbers - this is necessary so that the sequence of gluing multi-colored stripes is clear.
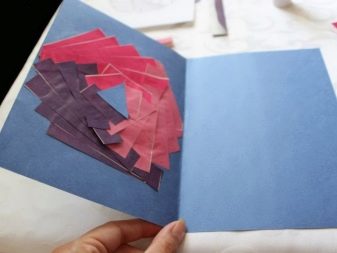
Further cut out the required number of color fragments - this should be done with the expectation that the sheet will have to be folded several times to give the image volume and the necessary strength. Paper strips are fixed on the sides of the picture. so that each subsequent slightly covers the previous one.
Despite all the apparent complexity, in practice, mastering the technique does not present any problems even for beginner needlewomen, and experienced craftswomen can create real masterpieces in this way.
Initially, paintings using the iris folding technique were created from ordinary colored paper, but over time, the technique improved, and today, in addition to paper, masters often use satin ribbons and cardboard. Elements in the technique of iris folding are found in the form of decor in paintings, panels, as well as collages and postcards. However, they can be created as an independent composition.
History of occurrence
The homeland of Iris Folding technology is the Netherlands - The Dutch masters made of cardboard and multicolored paper large voluminous paintings with a spiral print. The resulting masterpieces were somewhat reminiscent of the diaphragms of cameras that were popular at that time, and were also visually similar to the iris of the eyes.
The technique quickly gained popularity among the Dutch masters, and soon came to other countries of the Old World. The secret to the success of iris folding is explained by the ease of studying the principles of the methodology, the availability and low cost of consumables, as well as the possibility of independently drawing up stencils and schemes.
Crafts in the direction of iris folding attract with their appearance and literally motivate for creativity. The simplest options are available for work to preschool children, they get acquainted with sophisticated models as early as adulthood.
This technique is very popular with young mothers and is becoming a constant hobby for girls and women, whose area of interest is related to the development of children. In addition, it is a source of inspiration for craftswomen who are in search of unconventional techniques and to develop methods for combining the already studied.
Technicians
There are two basic directions of iris folding, depending on the method of forming the picture.
In the first performance the spiral scrolls so that an empty space is formed in the core in the form of a small figure. This unoccupied area is usually sealed with a piece of cardboard, cloth or a piece of paper. In accordance with the second method of work, the strips are placed so that the middle at the end of the work is completely filled - this technology is in demand for the manufacture of notebooks, postcards and photo albums.
If desired, each craftswoman can easily complement the iris folding with any other popular needlework technique.
Materials and Tools
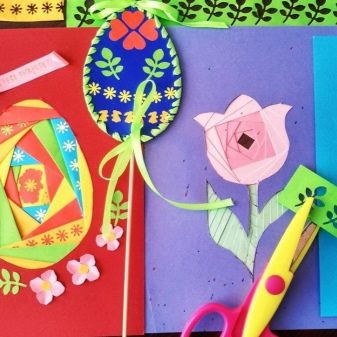
Before you begin, you need to decide on its subject. For example, you can make cards for the New Year, name day, or Valentine's Day.
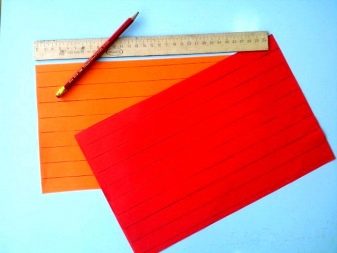
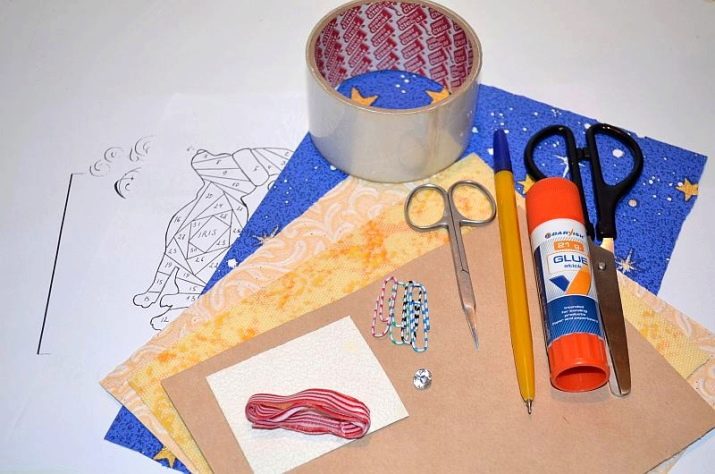
In order to work on a project without interruption, Prepare a set of necessary materials and tools in advance. You will need:
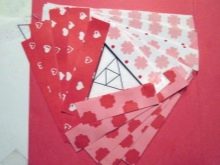
- single-sided colored paper of 4-5 tones;
- hard cardboard, which can be used as a base;
- ruler;
- sharp scissors;
- ordinary paper clips;
- pencil;
- scotch tape or glue stick;
- sharp knife.
Additionally, you need a dense base that protects the table from scratches and chips when cutting.
Schemes and patterns
Any work performed by an Iris Folding craftswoman involves use of a working template or a combined composition of two to three templates. The simplest stencils are superimposed on a pre-compiled thematic drawing. The basic patterns for inexperienced needlewomen are the simplest geometric figures - a triangle, square or circle. The basic element of Dutch technology is a rectangle or a triangle.
For drawing design the necessary number of elements should be preparedwhich should differ in size, shape and color. Next is the process of placing them on the prepared template, as well as fitting and finishing fixing.
There are a large number of ready-made templates. The direction of iris folding has its basic rules - thanks to the existing variety of stencils, the shape of the finished product is limited only by the flight of the artist’s imagination and the wealth of consumables.
With some work skills you can always create your own template so that it perfectly matches the dimensions of the craft. To do this, you will need:
- a piece of paper in a cage;
- a simple pencil;
- eraser.
Before you get started, it is necessary to choose the main form - it can be a circle, triangle or square. Experienced craftsmen can use more intricate shapes.
Let us dwell in more detail on the pattern of forming a stencil based on a square:
- draw a square with a side of 14 cm on a piece of paper in a cage;
- mark 10 mm on each side to the left of the corners;
- as a result, you will get 4 points that need to be connected together - thus, you get a "squared squared";
- in the second square, again mark the points on the left at a distance of 10 mm, they also need to be connected and form the third square.
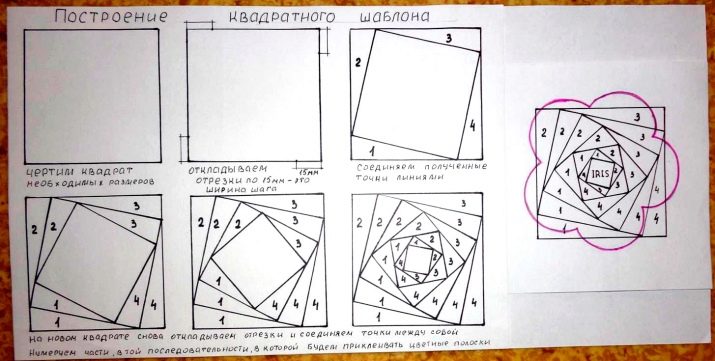
All manipulations are repeated until a small square remains in the central part.
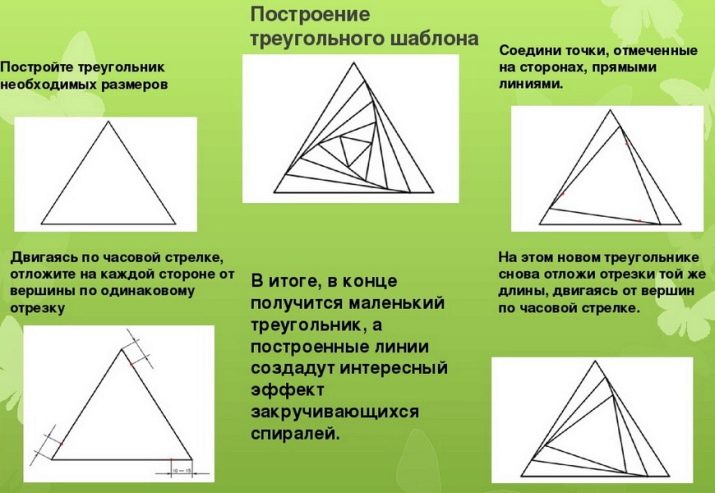
Similarly, triangle-based work patterns are created. We pay attention to the fact that it is not necessary to make a step 10-15 mm wide - it can be anything in the range from 7 to 25 mm, depending on the idea of the master.
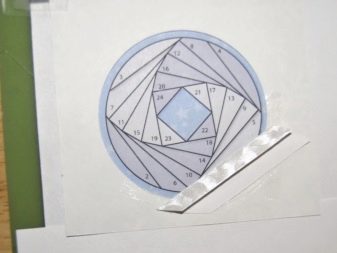
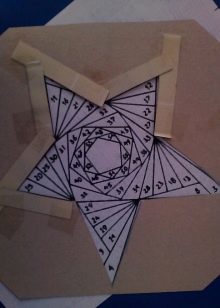
On complex stencils usually affix numbering - it shows what the sequence of laying out of cooked multi-colored stripes in bright shade schemes should be. Templates are additionally marked according to color wishes.
How to make crafts?
Depending on what kind of print you plan to do, iris folding involves several consecutive steps.
- First you need to select a picture, which you will lay out later.
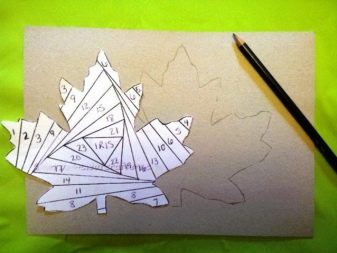
- The drawing is transferred to a cardboard or a sheet of hard paper. You need to circle it, and then cut it so that a window forms - in it you will place rainbow ribbons.
- Next, choose a template that matches the picture.
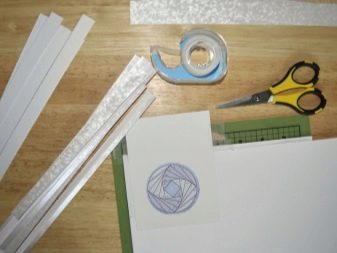
- A sheet of paper with the outline of the pattern cut out on it is placed on the stencil with the back side up. Then the whole structure is fixed with paper clips or with tape so that the template does not move during operation.
- Next, you need to make paper strips of all colors from which you plan to lay out the pattern.
- The strips are folded twice in length so that the cut points are not visible.
- In strict accordance with the template used, the strips adhere to the paper until all areas are completely filled. The strips must be fixed with an overlap, that is, with light layering, laying one on top of the other.
- Next, a sheet of paper with a laid out print is removed from the template and glued to the wrong side with cardboard.
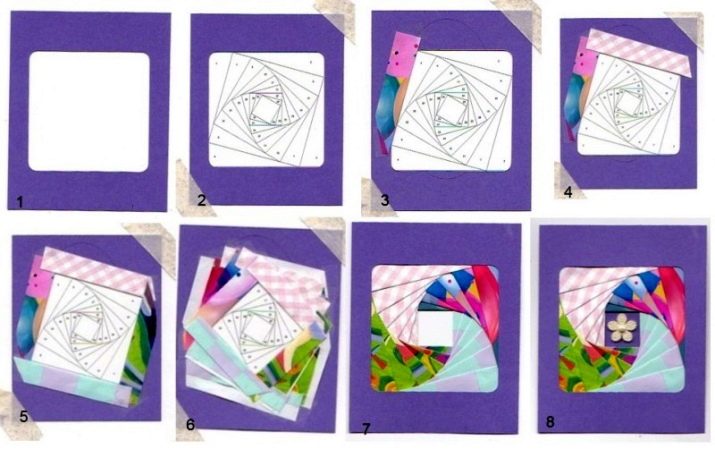
The drawing is finished on this - you can turn your work over and enjoy it.
Happy new year
In the style of iris folding, you can easily make a Christmas tree, it will turn out even for inexperienced needlewomen or small children. Making such a card involves several successive steps.
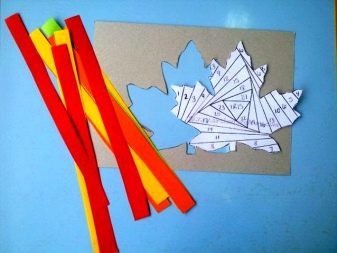
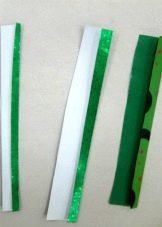
- Colored paper of several shades is neatly cut into strips of 4-5 cm wide. Initially, at least 10 strips of each color should be made, and their final number can be adjusted in the process of further work. Each strip must be folded in half.
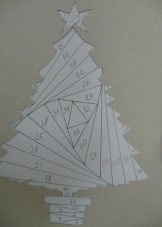
- A Christmas tree is drawn on a piece of cardboard and carefully cut out along the contour with scissors.
- A suitable template is selected, then cut out and placed on a cardboard on the back, tightly fastened with paper clips.
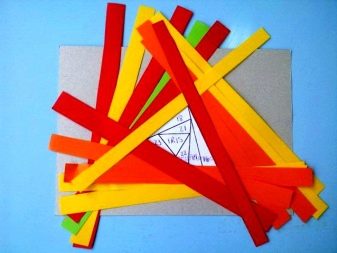
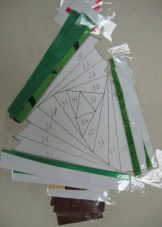
- First, lay out the trunk, for this the strips are placed one on top of the other and fixed with glue.
- Strips-branches are fastened exactly according to the pattern, they are laid out as accurately as possible. The central part is made out with a tint slightly different from the rest of the tint palette.
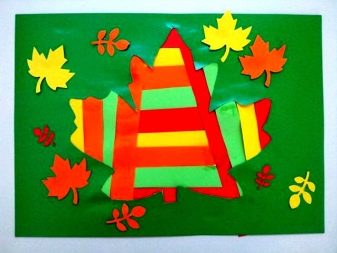
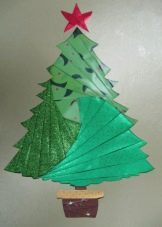
- The finished craft is turned on the outside of the workpiece and designed to your liking, the back side is covered with plain paper. Most often, Christmas trees are decorated with artificial snow, glitter, as well as contrasting beads.
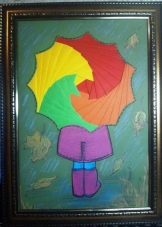
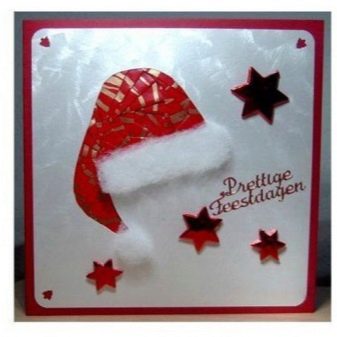
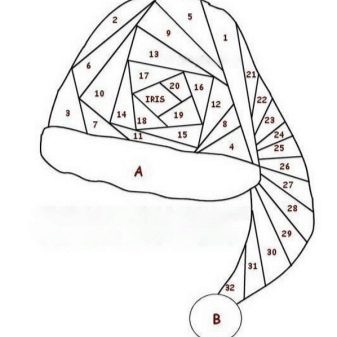
As a holiday card for primary school students or even pupils of the senior kindergarten group, you can offer to make a cap of Santa Claus. It’s not difficult to draw such a blank - manipulations should begin from the middle of the cap in front of the fold.
- The lines should diverge in different directions by analogy with the sun's rays.
- Multi-colored stripes are cut in a rectangular shape, with each folding twice on the long side.
- The overlapping of strips is performed from top to bottom, using a scheme with alternating multi-colored and plain parts.
- When the entire module is completely sealed, the work is turned over and a sheet of cardboard with a cut out hole of the desired shape is laid on top.
- The craft is decorated with cotton and pompom, and the voids are decorated with snowflakes or asterisks cut out of foil.
By March 8
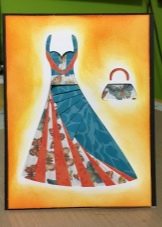
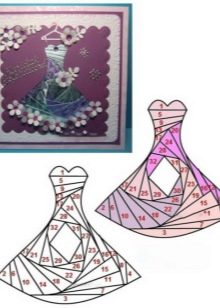
- To create this unusual postcard in the form of a female silhouette, you can take braid or tape of two colors instead of paper.
- Having drawn the outlines of the dress, one should outline the layout of thin strips of matter, starting from the strapless and bodice zone.
- After that, draw lines in the diagonal direction, moving from the top of the bodice to the middle of the hem.
- When gluing a satin ribbon, one must act in the same way - they begin fastening from above, first lay out the bodice, and the last part is engaged in the design of the lower part.
- At the junction of the beams, a bow is attached.
- Cutting the crafts along the contour, it is desirable to make wavy lines on the white cardboard at the bottom.
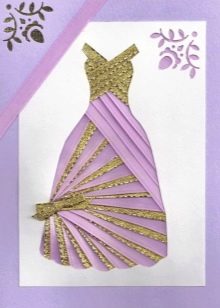
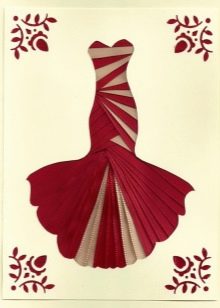
This is a simple craft, and if you alternate ribbons of different colors, then it will look pretty impressive.
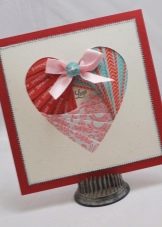
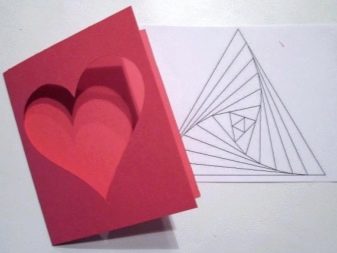
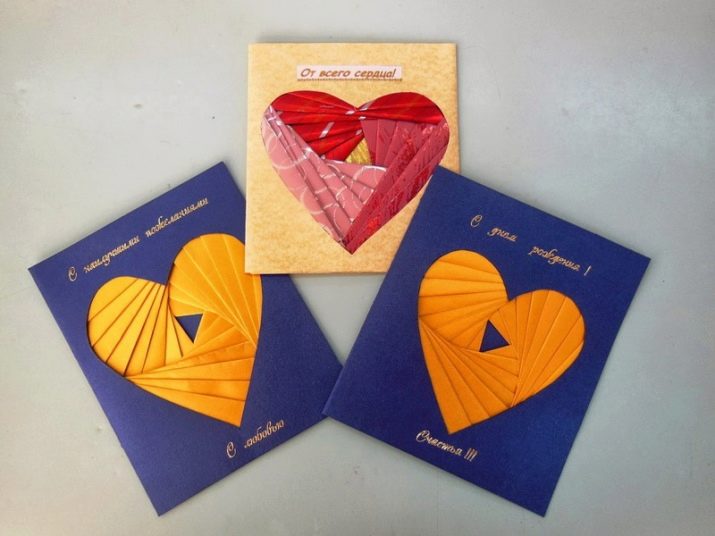
For valentines day
For inexperienced craftswomen it is better to use ready-made craft templates - they can always be found on the Internet or drawn by yourself.
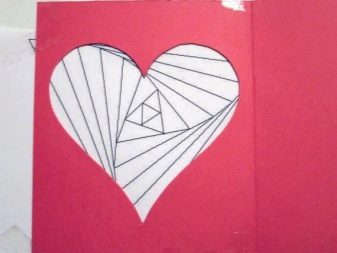
- The template is laid on hard cardboard, outlined in pencil and cut out the heart in the center.
- The resulting template is attached to the cardboard with paper clips.
- Next, you need paper in three colors, it is cut into strips 4 cm thick, each of them is folded in length - so you prepare blanks for your Valentine.
- Multi-colored strips are laid out in turn in accordance with the color scheme, fixing them with glue or tape.
- After all the blanks are over, the middle is laid out with any color scheme suitable for the tint range.
- The card is almost ready - you just have to turn it over, decorate the front part according to your own taste, and seal the wrong side with any plain paper.
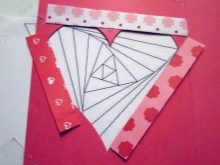

If desired, such a heart can be made plain, without adding any other colors. To give more decorative, instead of plain paper, you can take corrugated or satin.
By February 23
As a gift for February 23, an iris folding star is often made. Step-by-step instructions assume the following actions.
- First you need to copy the template and transfer it to half a sheet of A4 format.
- After this, the maximum distance between the individual sections of the star is measured, and a couple more millimeters are added to the obtained value - they will go for corrections and gaps. The resulting value will correspond to the width of the multi-colored stripes.
- Then you need to take paper in 3 different shades and cut into equal strips in accordance with the previously calculated width parameters.
- The sticker starts from the corners, moving sequentially towards the center.
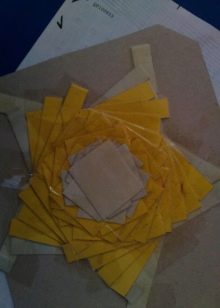
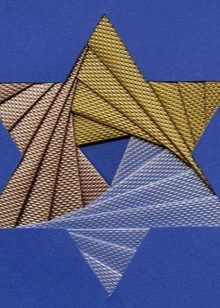
The output should be an elegant festive star.
When creating images using the iris-folding technique, you need to keep in mind the following nuances:
- be sure to consider the location of your future crafts in order to properly think through all the possible ways to mask the back of the product;
- at the end of the complete filling of the stencil with colored stripes on the back, you can attach a cloth flap, as well as velvet paper;
- the front part is usually decorated with stickers, beads or ribbon.
They look very creative Home-made decor elements made using felting technique from wool or scrapbooking. It is advisable to glue all volumetric elements using a hot thermal gun. To design lace elements, you can use decorative hole punching.
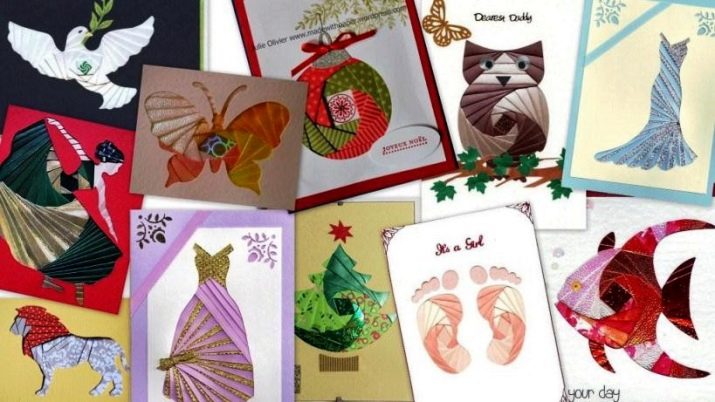
Beautiful examples
The technique of iris folding is very exciting. In addition, it forms patience, as well as perseverance, scrupulousness and accuracy - this is especially true when it comes to children of preschool as well as primary school age. Iris folding helps to reveal hidden creative possibilities, work allows you to relax and fully enjoy creativity - we can say that the process of creating a picture using the rainbow folding method gives the craftswomen a real moral satisfaction.
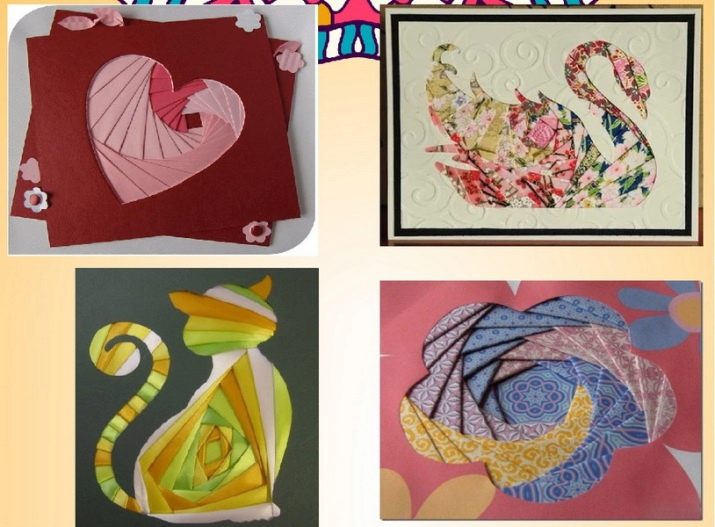
- Particularly beautiful in this technique is obtained heart.
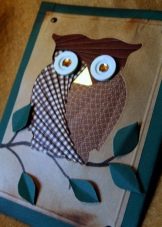
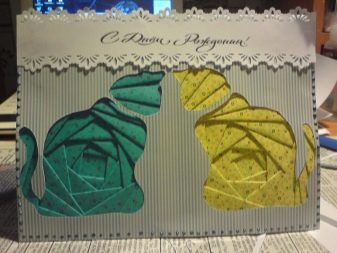
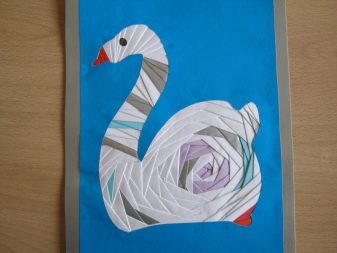
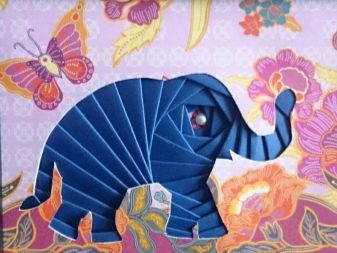
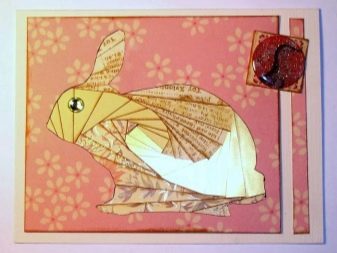
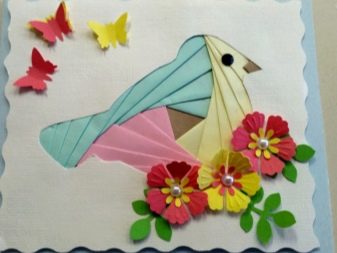
- And the kids probably will like the idea of folding out of paper swan, cat, owl or apple.
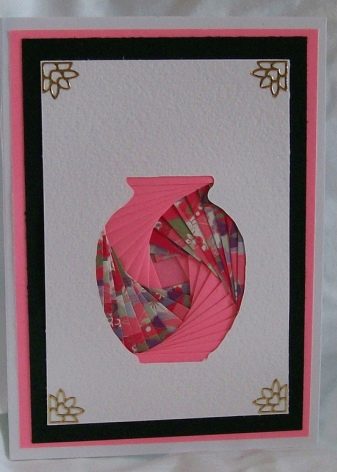
- In the direction of iris folding is even made interesting vases.

Cards, panels, collages, and covers for books and photo albums created in this style will be a good present for loved ones from children, and for adult craftswomen will be an impetus for expanding the circle of communication, developing unique master classes and participating in creative events.
See how to make an application using the iris folding technique in the next video.


