Manicure with a feather: options for a stylish design and a description of the technique of nail design
A manicure with a feather attracts with its unusualness and lightness. Here are just not everyone will dare to repeat it on their nails. It seems that drawing it neatly and beautifully is very difficult. But knowing some tricks, any fashionista will be able to surprise everyone with an exquisite picture on her fingers.

Stylish Design Ideas
In addition to the pen itself, you can also provide interesting manicure design options. With a competent combination of technology and design, you will get an original design option and realize the most daring ideas.
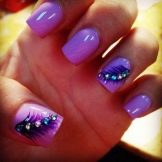
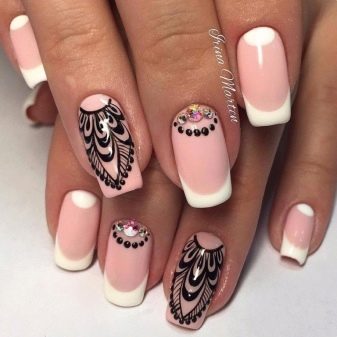
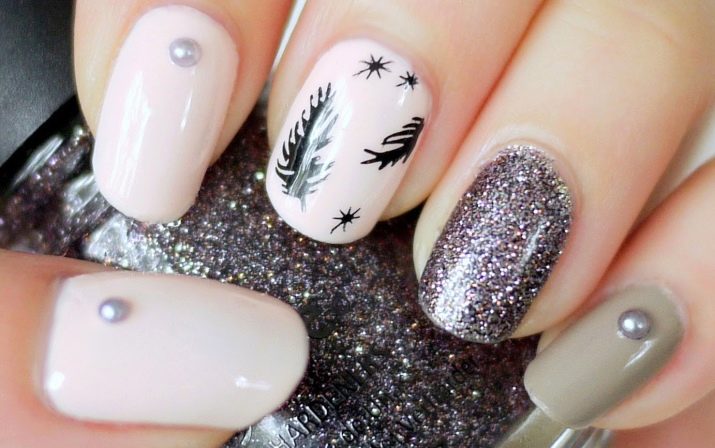
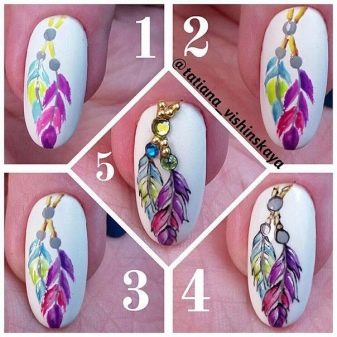
Rhinestones perfectly complement the manicure with a feather. And although in wildlife you will not find birds with stones in plumage, it looks very natural. After all, rhinestones may well imitate drops of water that fall on feathers and shine in the sun. The exact size and color of the stones to use depends on the overall style and size of the pen itself.

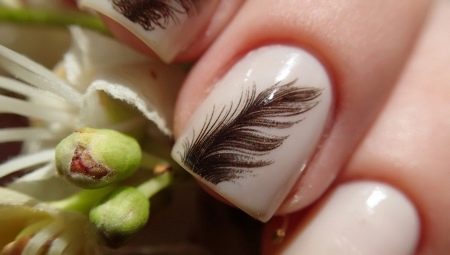
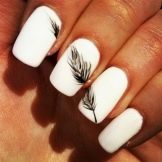
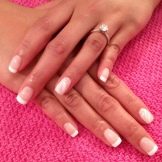
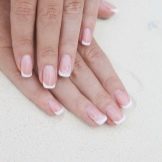
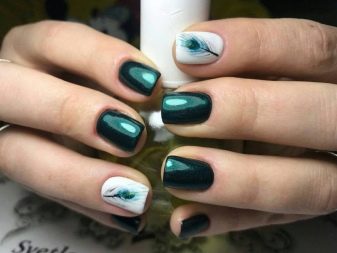
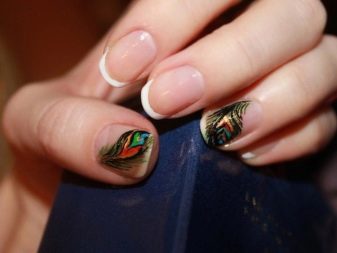
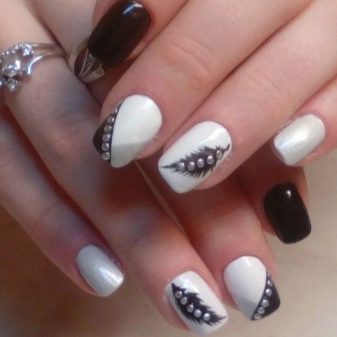
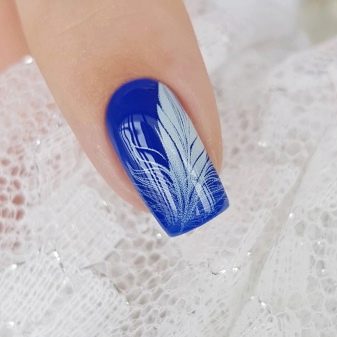
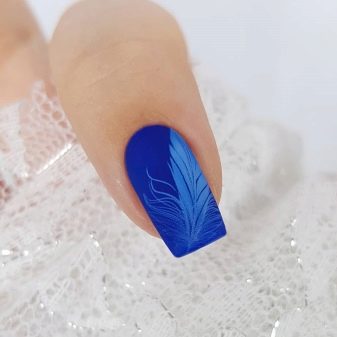
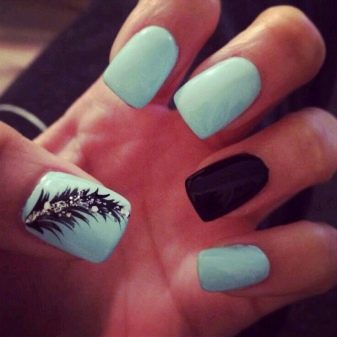
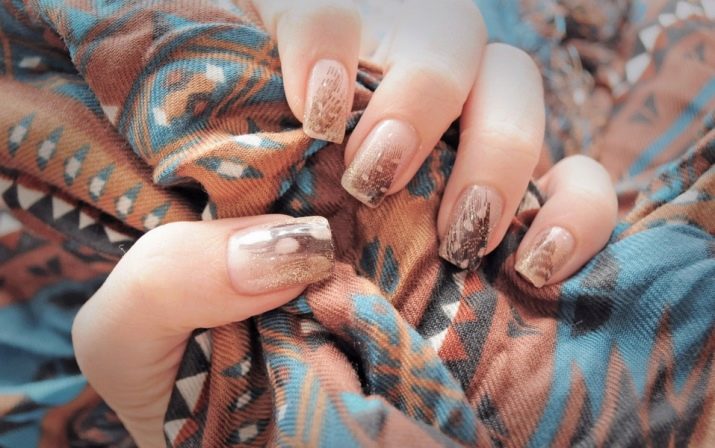
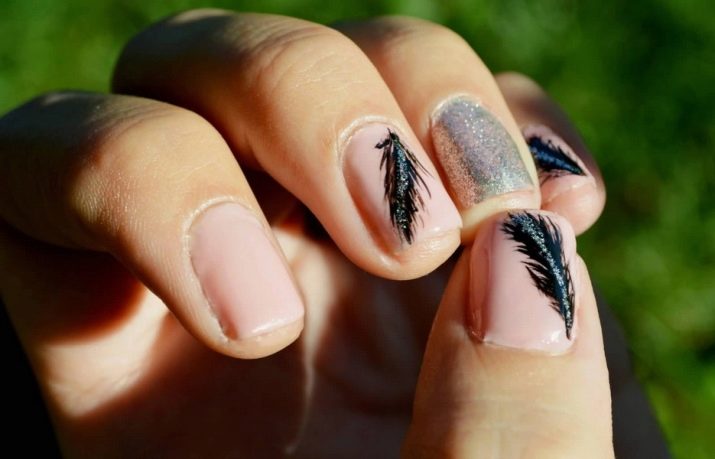
Classic French manicure can be complemented by a weightless feather. It will look very feminine. At the same time, the pen itself can be decorated in dark colors, so that it is clearly visible on a light background. Do not repeat it on every nail. It will be enough and one feather on the hand to emphasize.
Spangles are combined with almost all kinds of feathers and their colors. By applying them along the contour of the drawing or by drawing individual elements, you will achieve the effect of volume and natural shine.
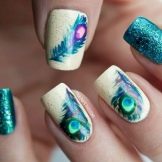
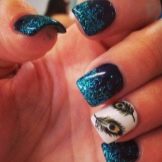
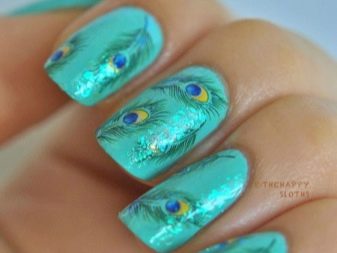
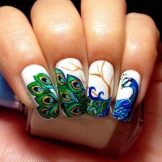
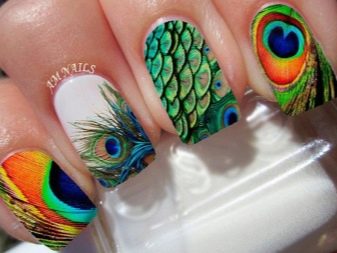
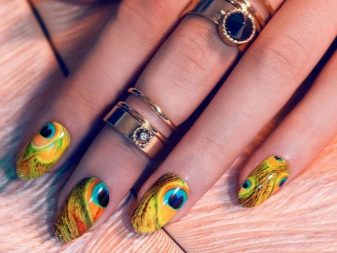
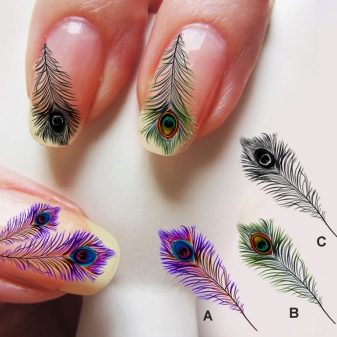
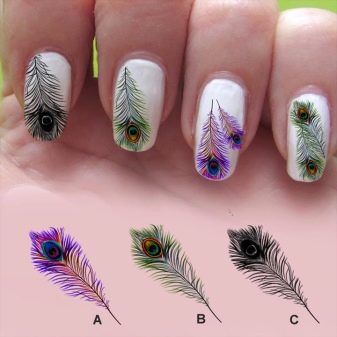
Peacock feather - a very bright accent. Strengthen it can be emerald varnish on the remaining nails. A feature of such a manicure is that not every image will look harmonious in a duet with it.Therefore, think in advance of the wardrobe that you can try on. It’s better to do it under a certain (festive, thematic, etc.) bow.
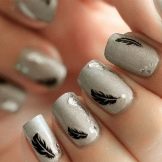
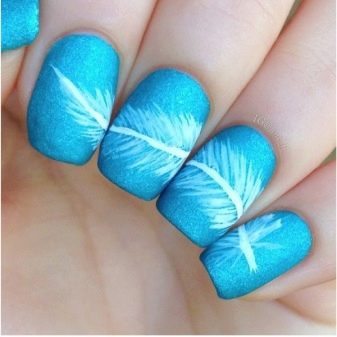
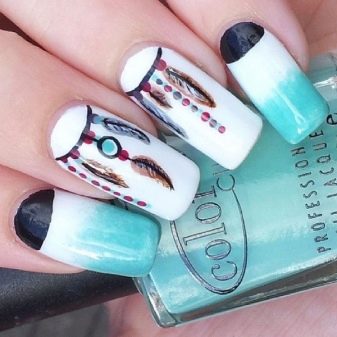
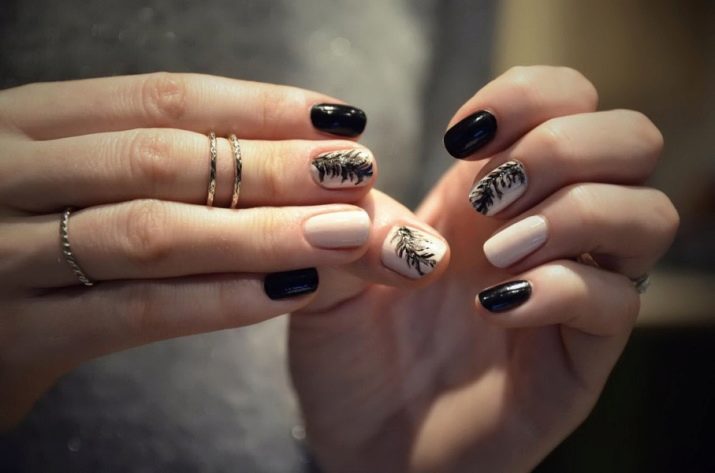
One pen on several fingers looks very interesting. When you connect your fingers, a single pattern will be added. Separately, only individual elements will be visible on the fingers, which also looks aesthetically pleasing. you can draw it yourself. The main thing is to correctly draw the center line (rod) so that it is located at the same level with the fingers connected together.
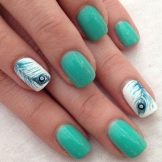
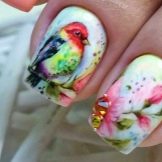
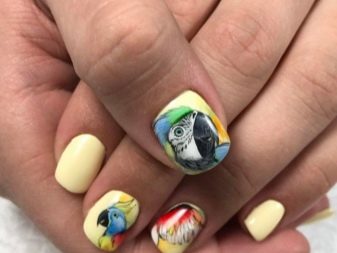
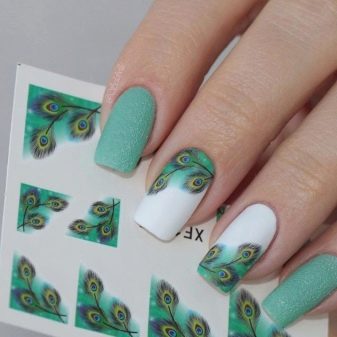
In addition to the image of the pen itself, you can complement the design with sliders with the image of the bird itself or other thematic objects. Brushing such small elements with a brush will be difficult, so using stickers (or sliders) is the best option.
You can draw feather and broths. Fine grains of sand will not stand out against the general background. At the same time, you will provide bulk and unique interesting design. They can be used on the pen or separately from it. For example, they can be laid out corners of adjacent nails (the color is selected in the tone of the pen).
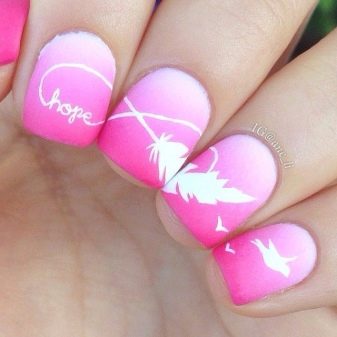
Feather manicure is an ideal option for those who want to diversify their everyday look, while not allowing too bright or catchy design. A white feather on a fairly light background will be almost imperceptible, but such a highlight will only decorate and add sophistication to the image.
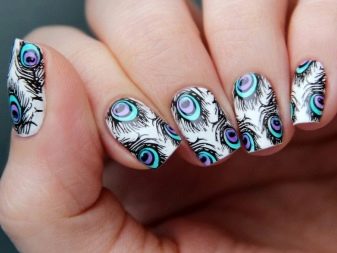
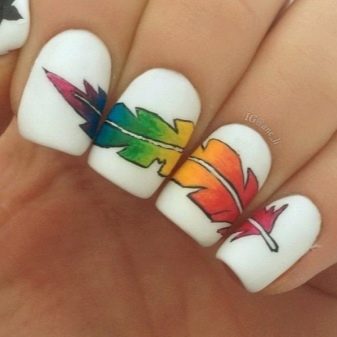
If you want to try luxurious design options on your own nails, feathers will come to the rescue here. This design is not as “hackneyed" as animal prints (leopard, tiger, etc.). In this case, a peacock feather or just bright colorful drawings that mimic the color of exotic parrots will suit you.
If you know how to use acrylic, then easily create a three-dimensional image of the pen on the nail. In this case, some skill is required to draw the fine details of the fan. Otherwise, it will be visually heavy.
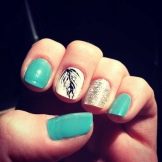
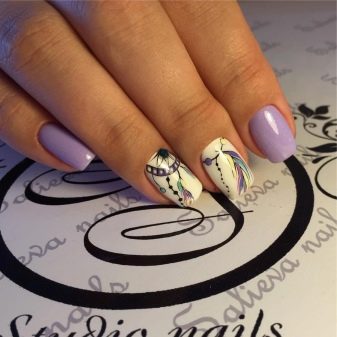
Ethnic manicure can be supplemented with an Indian feather. Graphic drawings on other fingers will help emphasize a given topic. It should be understood that he will be absolutely inappropriate with a strict business suit. But with clothes in hippie, ethno or boho styles, it will only emphasize the individuality and unusualness of the image.
Matte finish gives a special aristocracy and restraint to the whole image. Manicure with a feather is no exception. Just complete the procedure with a matte finish, and you will see how much the overall impression of the created design will change.
Ways to create a picture
There are several ways to create such an interesting design on your own nails. Each of them has its pros and cons. Having become familiar with all of them, you can easily make your own choice, based on existing opportunities and preferences.
Brush
With it, you can create real masterpieces on the nail. The design will be truly authorial and unique. But not every girl can draw beautifully. This is the main disadvantage of this design, since for its implementation you will have to rely only on your own strengths and skills. In addition, you will need several shades of varnishes at once. Only in this case, the feather will look organic and natural.
How to draw a classic version of the pen, we will gradually analyze a little lower. Here we’ll talk about those advantages that this option provides:
- the ability to choose a color palette of your own;
- unique design, which can be different on each finger;
- the ability to draw a single pen moving from one finger to another.
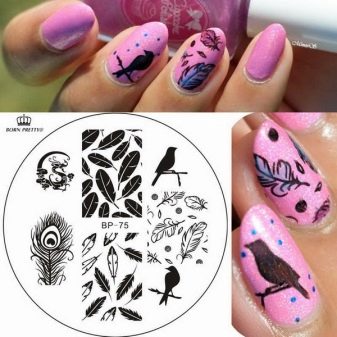
Stickers
The most simple and affordable option for placing any picture on the nail. In specialized stores you will find a wide selection of various designs and solutions. At the same time they are inexpensive. Choose the one that you like and transfer it to the nail. There is nothing complicated in the execution technique.We cut out the desired element, place it on a pre-painted nail. The last step will be the application of a protective (top) coating.
Stamping
Another fairly simple way to portray a beautiful feather on your own nails. According to its characteristics, it is closer to brush painting. Having applied the main contour with the help of a special stencil and stamp, you can add it with sparkles or other shades as you wish. In this case, no one will distinguish it from a hand-drawn one. And you can proudly say that you yourself painted it.
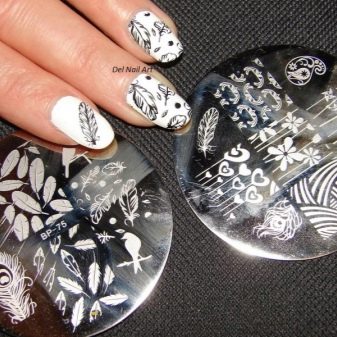
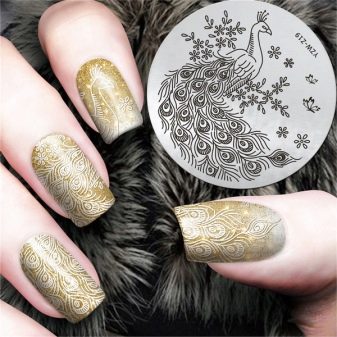
With its simplicity and decorativeness, this method also has a significant drawback. Buying a complete set for stamping is beneficial only for practicing masters, as its cost will quickly pay off. At home, it will be quite an expensive pleasure. Especially if you use it just a few times all the time. It is better to purchase the appropriate stickers or contact the salon.
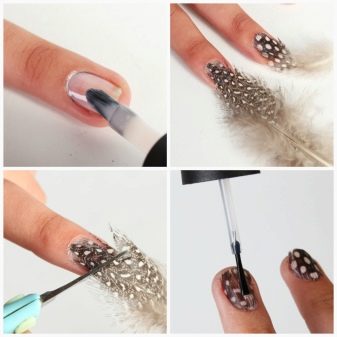
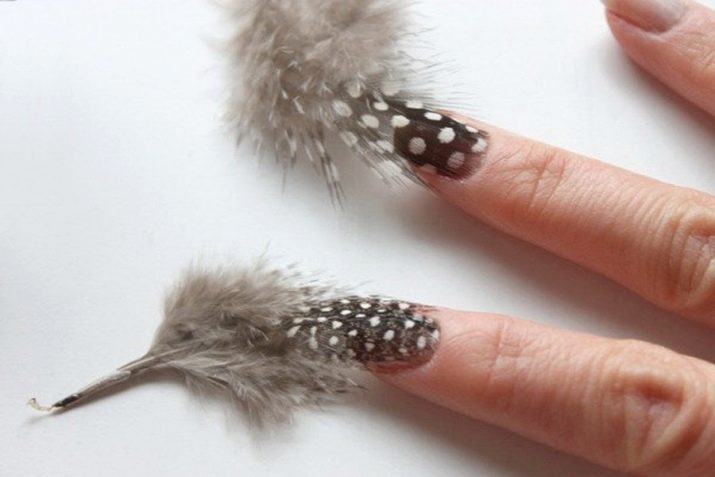
Natural material
To get a manicure with a feather, you can simply buy or find the pen itself. It can be both artificial material and natural. For design, only the upper part is used, since it is precisely it that is quite thin. In this case, it is better to still do such a manicure with gel polish, as it creates a more durable coating. After you try in which direction and how the pen will lie, the nail is covered with an additional layer of varnish or special glue. We apply the pen, with a stick, gently press it to the nail plate. All excess is trimmed with scissors, then a protective layer is applied.
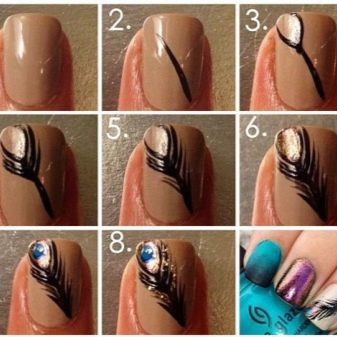
Step-by-step nail art technique
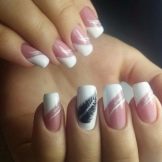
The technique of drawing and its design is very much. We will consider the classic version of creating a feather that will look neat in any color scheme. Here we will draw it in several shades to achieve the most natural pattern. If this is your first time doing it, try not to skip a single step. In the future, you will be able to adjust them and add your own elements.
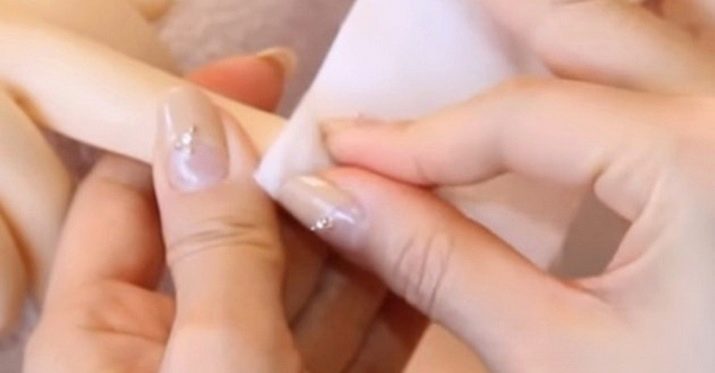
- It all starts with the preparation of nails. They should be even and have the same length. I must say that feathers look best on long nails, as the drawing takes up enough space. Remove the cuticle. Choose the most familiar way to do this. It can simply be softened with a remover and pushed aside with an orange stick, or you can make a full-cut manicure.
- Basic coating. Many neglect this stage, and in vain. A professional master will never begin to apply color varnish directly to the nail plate. Firstly, the base performs a protective function. It protects the nail from pigmentation (especially if bright colors are used). Secondly, due to this, the nail becomes smooth and the main color lays more evenly, without flaws. Wait for it to dry completely. If you have gel polish, then dry in a lamp.
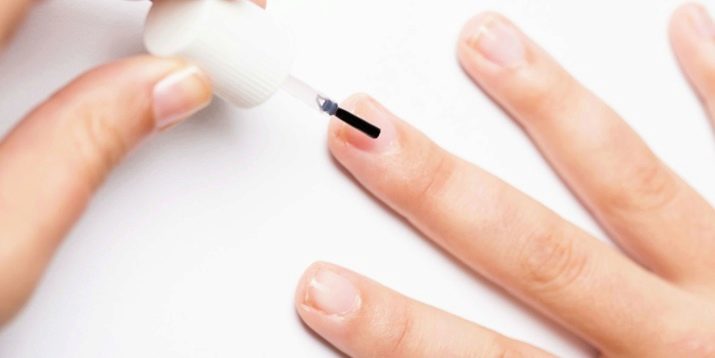
- Several options are possible here. You can cover all nails with one color, and draw a feather on one, or paint a nail with a pattern in a different color. In this case, it is necessary to ensure that all shades are harmoniously combined with each other. We cover the nails with a colored base in 2 layers, allow to dry well.
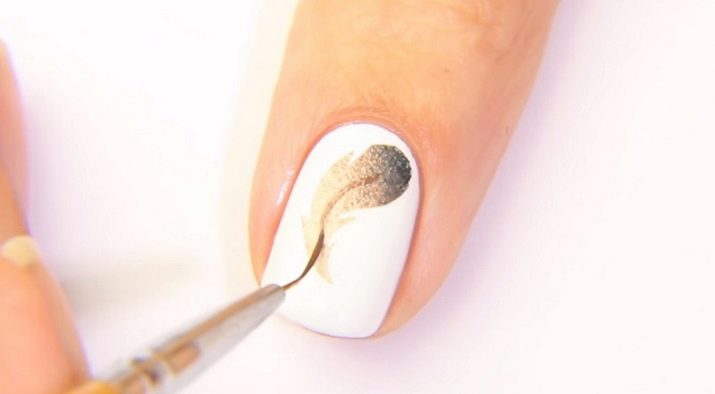
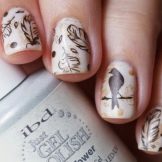
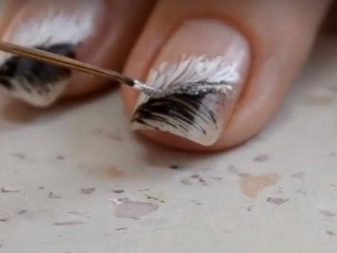
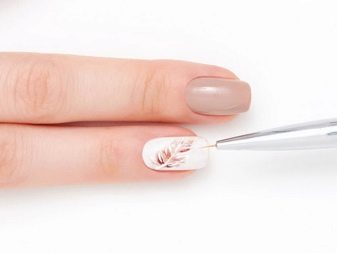
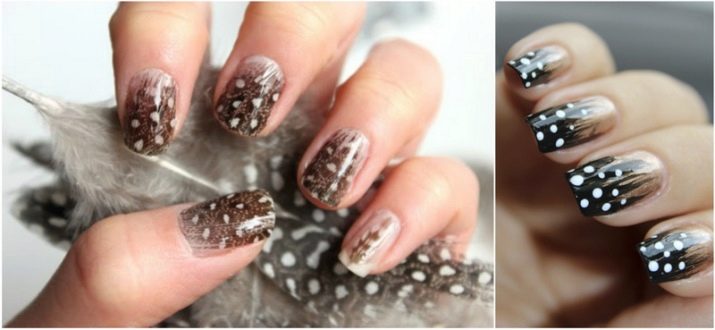
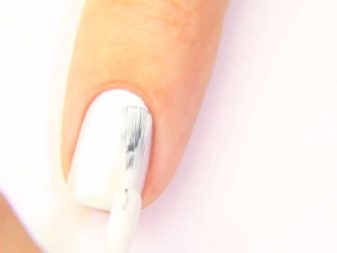
- The pen design we have chosen is best repeated on a light background. We take a thin brush and beige varnish. We collect the varnish on the brush and designate the contour of the future pen. It looks very much like a leaf of a tree. We draw the central groove.
- Draw the pen itself in the same beige color. To do this, moving from the center line of the pen to the sides, we make jerky strokes. It’s okay if they slightly go beyond the contour. But it is better to adhere to a given perimeter. As a result, the beige borders should be erased, and in their place appear the end of the individual elements of the pen.
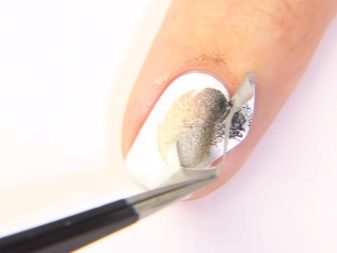
- Now we need 2 darker shades: red (closer to brown) and brown.First, draw strokes with a lighter shade, and then dark. The movements are identical to those performed by beige varnish. The brush can be taken a little thicker so that the strokes are more noticeable.
- If you want to give shine, then take the glitter and walk them in some places along the feather.
- We draw the core of the pen with a thin brush with white varnish. The line should be thicker at the base and turn into a barely visible thread to the end.
- After the drawing has dried, cover it and all other nails with a top coating. This will extend the life of the entire manicure and protect the feather.
Creating such a complicated design for the first time will be difficult. Therefore, for greater certainty, practice first on a plain sheet of paper. When you realize that the drawing is beautiful and neat, try your hand on your own nails.
Secrets of Perfect Cover
A major role is played by the quality of the tool that you work with. No wonder professional attributes are much more expensive. Firstly, they have a longer service life, and secondly, they provide high-quality treatment of nails (do not damage the nail plate, do not injure and do not stretch the skin, etc.). Therefore, if you perform a manicure yourself, do not save on materials.
For complex designs such as feathers, first practice on a piece of paper or nail templates. This will allow for more confident and clear lines. Use nail oil upon completion of manicure. After aggressive treatment, such skin care is simply necessary, in addition, the manicure will remain neat and beautiful longer.
Do not be afraid to experiment. Rhinestones, sparkles and broths will help to create a unique design. This does not mean that you should put them all the nails. A slight brilliant accent will be enough to revitalize the manicure. A feather manicure looks very gentle. It does not require a special style of clothing and special equipment to perform. No one says that you need to do it constantly. But definitely worth a try at least once.
For how to make a manicure with a feather with your own hands, see the next video.


