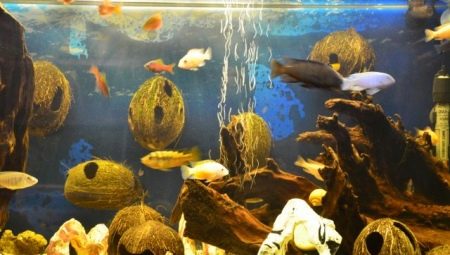
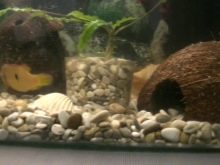
Aquarium is not only a permanent place of residence for fish, but also a kind of scene with "characters" for which you can come up with various scenes. The scenery and elements are natural materials. The action can take place in the open spaces of the Caribbean Sea, where ships and chests of gold were sinking. Or is it a bright underwater landscape at the bottom of a quiet bay.
And, perhaps, these are sunken architectural monuments of Atlantis. It all depends on the imagination of the aquarist. To help him - coconuts, from which, if desired, build magnificent grottoes, bridges and ships.

Benefits
As an element of the decor of the water "palace", coconut shell has a number of indisputable advantages:
- sinks to the bottom because it has negative buoyancy;
- It looks beautiful and harmonious in combination with other objects of the aquarium "interior";
- safe for fish, because it does not deteriorate in the aquatic environment and retains its properties for a long time;
- resistant to prolonged exposure to moisture.
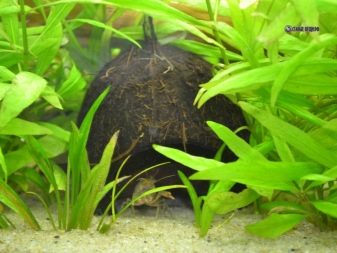
On the surface of the shell remain villi, which is not necessary to remove. If there are crabs in the aquarium, they will enjoy them.
What is used?
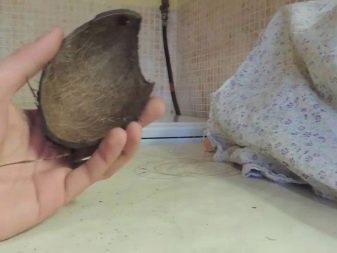
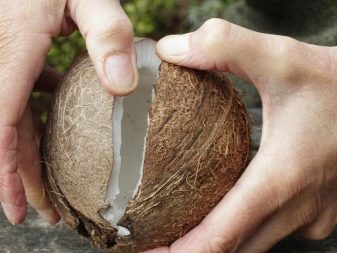
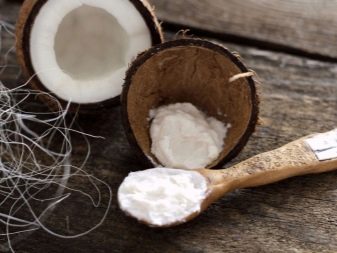
Coconut is a large fruit, which contains a dense, odorous coconut flesh and gentle milk. The liquid is drunk immediately, and you have to tinker with the white inner shell. The pulp tastes very good, but it is difficult to extract. Only shells are suitable for decoration in an aquarium. To create relief figures, you will need tools that are usually used in working with wooden materials.
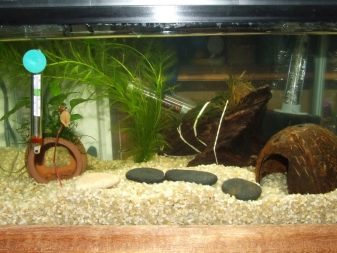
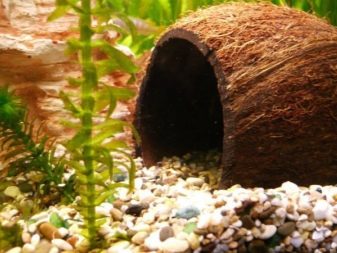
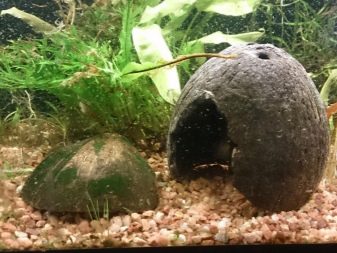
You can build crafts from any part of the shell. If you carefully saw off the lower and upper part, you get a ring. Having got rid of the top and bottom, and placing the shell side on the bottom, build a beautiful grotto.
After sawing the shell into 2 or 3 parts along, the segments are turned into ships. You just need to be patient and take some time to think through what materials you can decorate the sawn parts of coconut so that they acquire the finished shape of the conceived figures.
What tools will be needed?
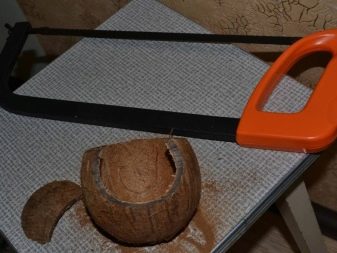
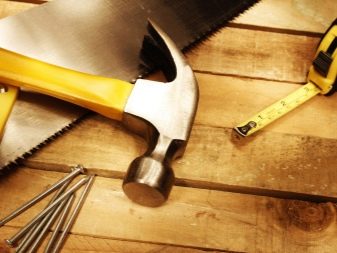
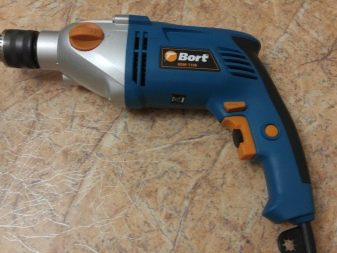
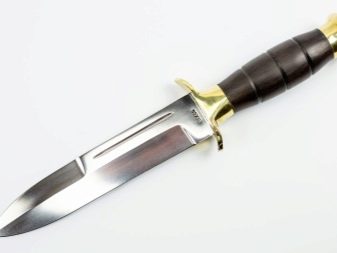
Depending on the task (straight cuts must be done or the edges and holes should be uneven) To work with a coconut shell you will need tools:
- knife;
- a hammer;
- pliers;
- drill;
- hacksaw.
Natural features of the fetus must be taken into account. If you carefully clean the pulp or cut the shell, it will split into curved segments, which will be difficult to give the desired shape of the skeletons of dead ships or grottoes. Therefore, all actions are performed slowly, with extreme caution.
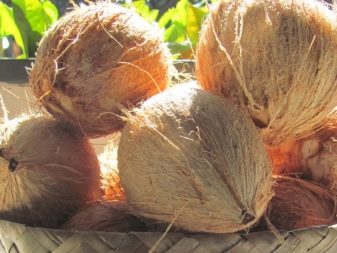
How to choose a strong ripe fruit?
When choosing the right material, be sure to pay attention to signs:
- the sound of splashing liquid inside - ripe coconut has a lot of milk inside;
- appearance - there should be no holes, dents, chips on the fetus;
- Strength - dents do not remain when pressed on the scalp;
- weight - full of milk, ripened coconut is pretty weighty.
There are 3 holes on the blunt end of a coconut: 2 of them are tight, 1 is soft. It is opened to pour a tasty liquid. If it is covered with mold or the fruit is already empty - this product is spoiled and not suitable for crafts. Of the unripened coconuts, too, nothing happens.
Where to begin?
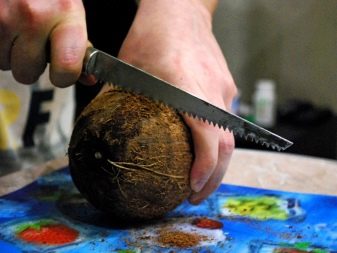
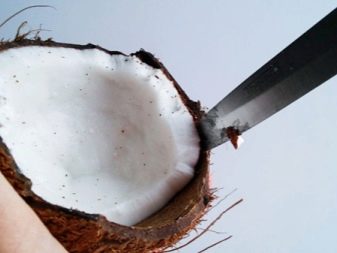
When the milk is poured, the coconut is opened with a hacksaw and proceed to extract the pulp. To impatient aquarists, logic will tell you to carefully cut it with a knife. But this is a very time consuming process. You can use the following methods:
- fermentation - put parts of coconut in a bag, tightly wrap so that air does not enter and remove for 4 days in a warm place (after this time, the flesh will easily separate from the dense shell);
- natural cleaning - this rather exotic method involves the use of red ants and consists in placing the shell in an anthill (small insects eat on the odorous pulp).
If for some reason these methods are not suitable or there is no time, then accurate grooves are made with a knife: the blunt side of the blade leads to the center and then makes several circles across. With the sharp tip of a knife, gently pulp the pulp and gradually peel it off the shell.
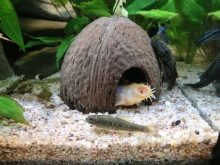
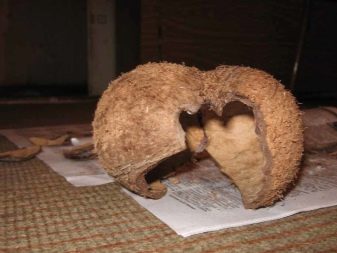
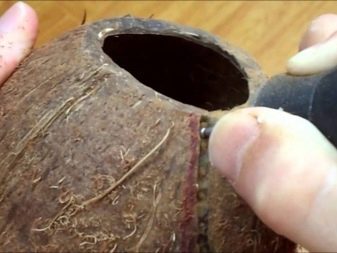
After this stage, the shell gives the desired shape: the holes can be round or uneven, in the form of arches or through holes. For this, a drill or pliers are used. First, holes are cut out with even outlines, and then pieces of shell are broken off until the desired shape is reached. The edges must be treated with sandpaper or a file - living creatures, scurrying in the "houses", can easily get hurt.
Shell preparation
The next step is the removal of residual pulp and disinfection of the shell. To extract the remaining white grains, use a sponge with a hard surface or a metal brush or soak the shell in water for two days, periodically changing the water (at least 2 times a day).
It is necessary to prepare a free container and pour water into it. Purified coconut is immersed in a liquid, which is brought to a boil. Cook the shell for at least 5 minutes. This is done in order to disinfect the shell and prevent the ingress of coloring matter from the shell into the aquarium water.
The colored water is drained and the action is repeated 3-4 times. Using your own hands to clean the outside of the shell from lint is easy with sandpaper, but you can do without this procedure.
Decor
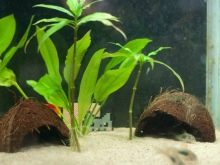
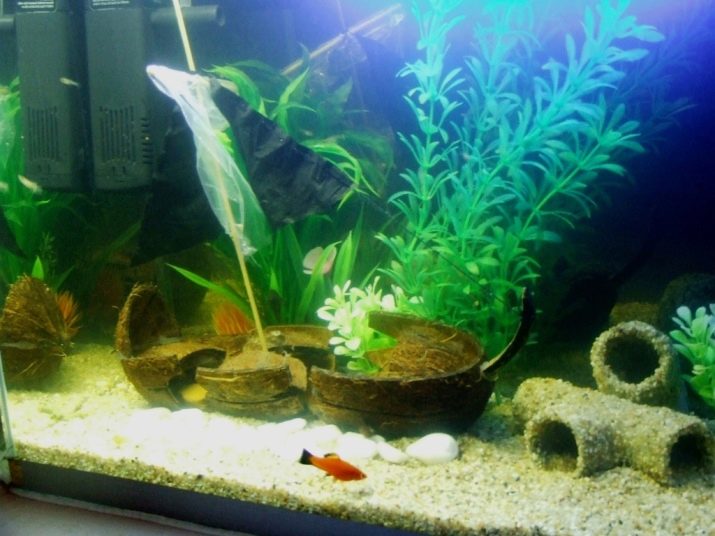
“Masts” are attached to the “ship”, they are covered with stones, Javanese moss.Nearby you can place chests with open lids and “gold coins” shining in it. In the grotto-house - if the shell is divided lengthwise into 2 equal parts - the arches are cut from both sides (it is easier to swim and swim from the living creatures from there). The bridge is built from a ring and a part, sawn from it around the circumference and then divided in half. One such segment - this is the bridge, which is fixed with two ends at the edges of the ring, and then decorated.
You can make additional lighting, highlighting the winning parts of the decor or composition on the back of the aquarium. Very beautiful boats are made of 3 segments: longitudinal lines are drawn near 3 holes from the blunt end (a natural fault line can be used) and cuts are carefully made on them.
It is not necessary to completely cut the shell - you can carefully mark the lines with a hacksaw closer to the narrow base of the coconut and then gently tap in these places with a hammer. The fruit itself will be divided into 3 parts.
Thorough preparation of the shell is required so that foreign substances do not enter the water and rot processes do not occur in it. In a poorly cleaned and prepared shell, the multiplication of pathogenic bacteria will lead to diseases and death of the inhabitants of the aquarium. Useful algae, which can be placed in shells stylized as flower pots, have a beneficial effect on water. They can be suspended or located at the bottom.
Following the rules and following useful recommendations for processing natural materials, aquarists turn the water into fabulous 3D paintings from which it is impossible to take your eyes off. And the fish in such kingdoms-states live very comfortably, because they remind them of their natural habitat.
How to make a home for fish from coconut, see the video below.


