Road safety depends on each of us. The use of turn signals on a bicycle will clearly indicate your intentions and will help to avoid misunderstandings on the road. The best models of wireless bike-mounted turn signals on the steering wheel make you noticeable even in bright sunlight. Let's see what kind of turn signals exist. Tips for choosing this part will help you not get lost with the purchase.
Appointment
The primary goal of every road user is to be predictable. This concerns cyclists first of all, because they are not protected by a durable steel body. You can indicate the direction of rotation with your hand, but this method is not always safe, since you sometimes need to release the steering wheel with your leading hand. Also, you can not indicate the direction of rotation for a long time, and drivers may not notice a short wave. In addition, you need to slow down before turning, for which it is advisable to use both hands.
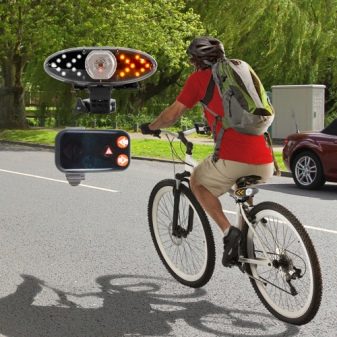
These problems are solved by special turn signals. With their blinking light, they attract the attention of drivers of other vehicles, thereby increasing safety.

Usually they are combined with reflectors or rear clearance. In addition, the use of unusual reflectors and turn signals will make your bike individual.
But such details are not without drawbacks. Of course, additional expenses will be required. In addition, the turn signals have some mass and, therefore, reduce speed. And inexpensive models are visible only during the day. Using gestures during daylight and turn signals in the dark will protect you from collisions as much as possible. These accessories are recommended for frequent use at dusk or at night. Especially direction indicators are needed for an electric bike. This type of transport moves fast enough, often along the same road with cars. In this case, following traffic rules is highly recommended.
Device and installation
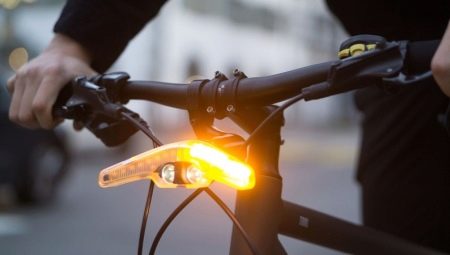
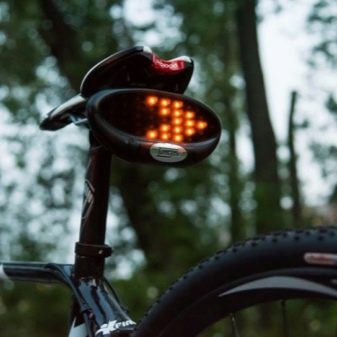
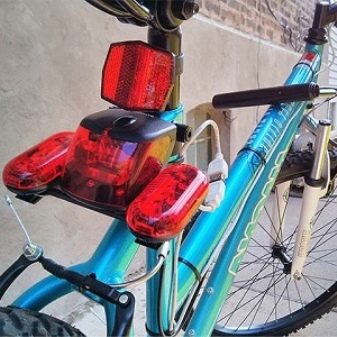
Typically, a turn signal consists of 2 orange direction indicators and a red clearance between them. The latter is needed to separate the luminous flux so that the signal signals do not merge. For this reason, the width of the device should be as large as possible. Usually it is mounted on the trunk or seatpost. The device is controlled by buttons or a toggle switch. The buttons are more convenient, since they are closer to the hands, but the device of such a control unit is more complicated.
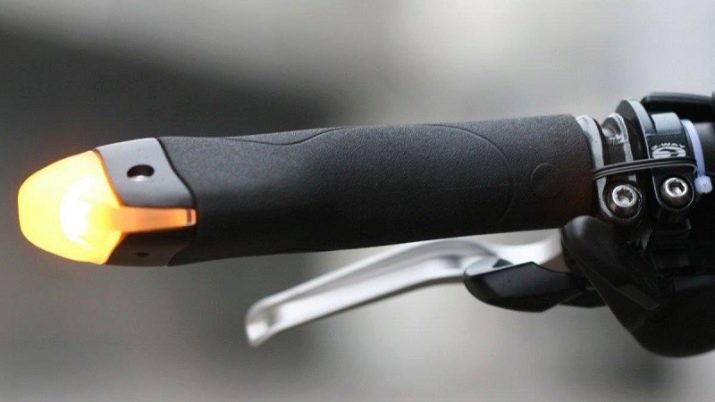
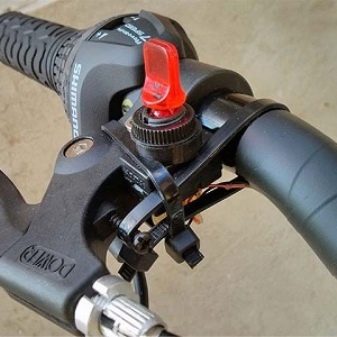
The toggle switch is usually set to take out the steering wheel, but can also be installed near one of the grips. There are models built directly into the steering wheel. This is the best option, since the direction indicators are far away from each other, their light does not merge and is visible to all road users. The disadvantage is that they are difficult to find on sale.
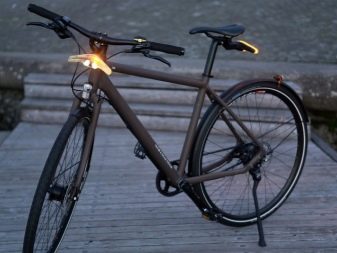
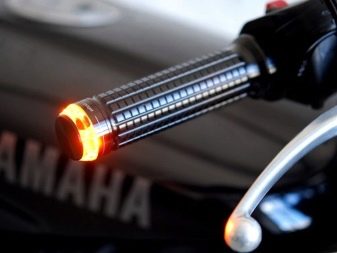
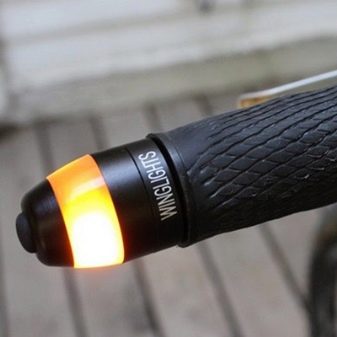
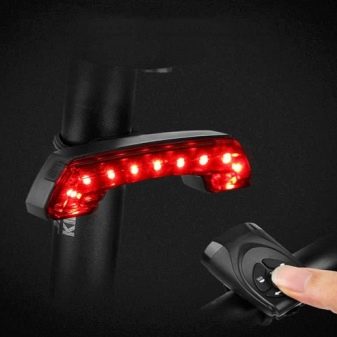
Wireless pointers
This is a further development of turn signals, and they are devoid of many shortcomings. Their light is much brighter than wired counterparts. This makes it possible to use not only in the dark, but also in bright sunlight. The absence of extra wires not only makes the bike more aesthetic, but also eliminates the risk of damaging the wire to a branch or other obstacle. In addition, installation is greatly simplified.
Wireless direction indicators are characterized by higher reliability, since all components are removed inside the case. The presence of additional functions such as a laser or emergency gang is also a significant plus. In addition, some models allow you to recharge your mobile phone or player. And the most advanced turn signals are equipped with an accelerometer, so that the light can light up automatically when braking or turning. Only one drawback is the high price. Therefore, such riders use experienced riders or cyclists.
Do it yourself
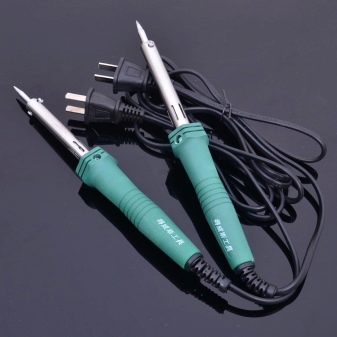
This accessory can be made with your own hands, while it is not necessary to have great knowledge of electronics. This option is ideal for design purposes. As materials, you will need 2 flashing yellow or orange lights and a non-flashing red marker, which is installed between them. It should be noted that the distance between the direction indicators should be the largest. You will also need a toggle switch, preferably waterproof. Well, wires, clamps are also needed. You will need solder and rosin. Of the tools, the main thing is the presence of a soldering iron. Then you will need a screwdriver, a penknife. The glue gun will not damage either.
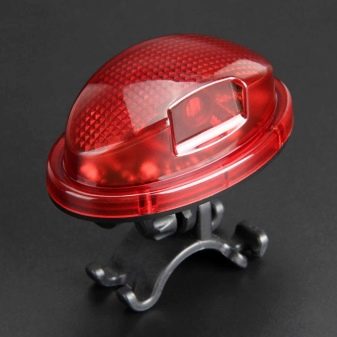
Simple rear bicycle lights are great as donors. The main thing you need to do with them is to bring the control button out of the case, on the toggle switch. Well, it doesn’t hurt to remake them from red to orange. These light indicators can be attached to the feathers of the rear triangle or fastened together.
For fixing, you can use screws with nuts, clamps or hot melt adhesive.
Next, attach the toggle switch to the steering wheel. You need to correctly choose its location, so that it is convenient to use. We make the battery compartment separately or use the ready-made one in the housing of our turn signals. We connect all the wires, covering all the joints with hot-melt adhesive or heat shrink. Check the health of the product.
Predictability is the most important requirement for all road users. Proper use of direction indicators will provide a comfortable and, most importantly, trouble-free ride, even with heavy traffic.

In the next video, you will find an overview of the turn signals and brake light for the XC-408.


