Not only the original appearance and pleasant natural aroma of home-made wooden dishes makes it valuable and preferable - it is equally important that it can carry a positive charge of energy, make food more tasty and healthy, and in some cases change the person’s attitude to many things.

Pros and cons of wooden utensils
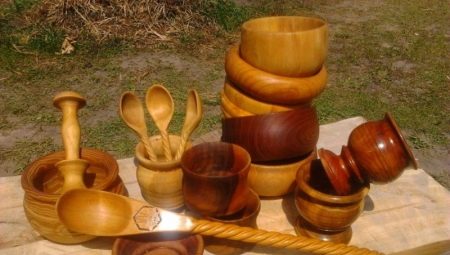
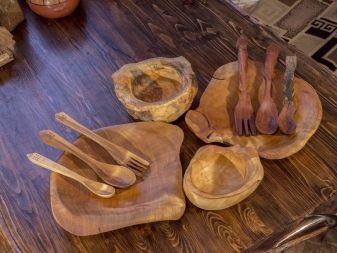
Plates, bowls and cups made of wood have several advantages, which can not be ignored:
- they are useful for use already because they are created from environmentally friendly natural material;
- wood has high mechanical strength and at the same time is light in weight, in addition, such material is able to keep food fresh for a long time;
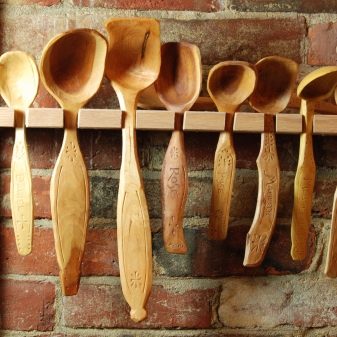
- The tree itself is distinguished by an aesthetic appearance, and, depending on the breed, has an original natural ornament - such dishes become a real table decoration, and it’s nice to eat, but even as a decorative element such an unusual attribute looks great;
- due to the fact that the tree does not conduct heat, it is impossible to get burned about it, and the food remains hot for a long time.
Another advantage of DIY wooden utensils is the ability to create any conceivable forms according to the most unusual sketches. At the same time, the material itself is not too expensive, so independent production is considered financially advantageous.
The disadvantages of wooden products are their shorter life compared to glassware and polymer fiber, wood can darken and crack if it is used and stored incorrectly. For a thing to last as long as possible, it needs competent care and periodic restoration.
Material for making
Basic material requirements for the production of wooden utensils:
- high-quality and plastic wood with high strength characteristics, and such it happens when harvested recently, that is, it still retains freshness;
- the tree must be of the first or second grade, there is a minimum number of knots on it;
- unacceptable marriage is the presence of cracks, chips, rot and blue;
- in the manufacture of dishes for food, only live forest is used, and dead wood is not suitable for this, especially since they can be infected by bark beetles;
- The large diameter of the tree is also important for the craftsman making the product, as it enables the production of a large number of table accessories.
Soft grades are more flexible and plastic, they are well cut during processing, but are not used due to the lack of sufficient hardness and strength.

Most often, such breeds are used for production as elm, oak, birch, maple, mountain ash, juniper, cedar, larch or aspen, olive and bamboo are considered suitable material.


How and from what did the ancient Slavs make dishes
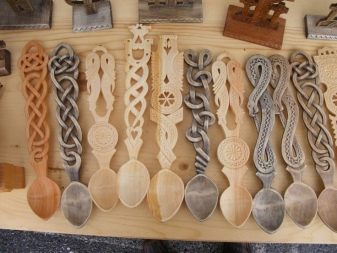
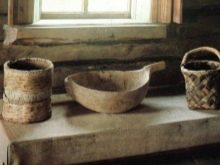
In the distant past, our ancestors made different types of dishes - cut, chiseled, hollowed or cooper, which was assembled from staves, and then fastened with hoops. The most demanded in Russia was chiseled wooden dishes - this method produced plates, mugs, mortars and glasses, as well as cutlery (pestles, spoons, scoops). In addition, the ancient masters attached considerable importance to the healing and magical properties of individual tree species, which is why they took for their work:
- a birch, dishes from which was intended mainly for women, as it could cure infertility;
- a nut that helps to make loyal friends and give life energy in return for the expended energy;
- olive helped to eliminate migraines, opened up new opportunities;
- oak, symbolizing a strong masculinity, helped to get rid of ailments of the genitourinary organs and liver;
- girls who wanted to get married faster tried to eat from dishes made from the trunk of an apple tree - it was believed that a female tree would help find the other half.
Perhaps modern masters should use the methods of Rusich and create products that can not only serve as tableware, but also cure diseases, change the person’s fate for the better.

Necessary tools
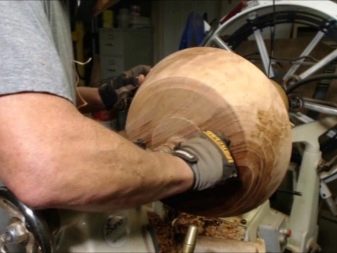
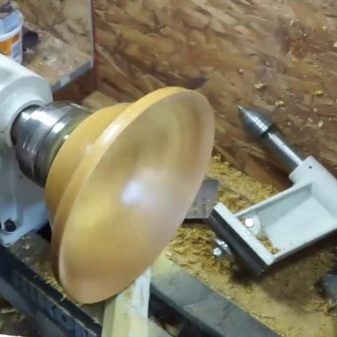
If it is planned to produce a large batch of wooden utensils, it is best to do it on a lathe. However, before this, preparatory work will be required, including the procurement of material, preferably of high quality, and therefore:
- inspect lumber;
- remove excess knots and minor defects;
- logging - divide transversely peeled whips into multiple parts, in accordance with the required length of the workpieces.

After turning on the grinding or turning device, the product will need to be varnished (if desired, with a pattern).
But if it is supposed to manufacture a small number of products or a piece copy, when performing manual work, you can do with a minimum of tools:
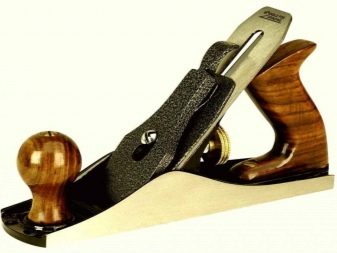
- planer for processing a wooden surface - a planer;
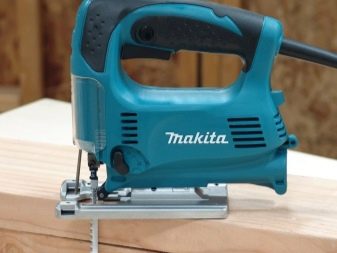
- for sawing the workpiece you will need a jigsaw;
- a set of hacksaws of different sizes with different teeth;
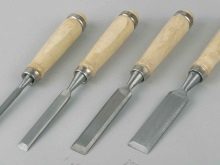
- several chisels (cutting hand tools);
- a set of cutters necessary for mortising and planing;
- emery cloth for grinding wood.


As a material, a full-fledged beam, boards are selected, but waste that is suitable in size can also be used. To do the job, much less tools can be used if the master is well acquainted with the manual manufacturing process.
Technology features
For those who are just starting to master the production of wood utensils, it is better to start with simple products.
Stages of work.
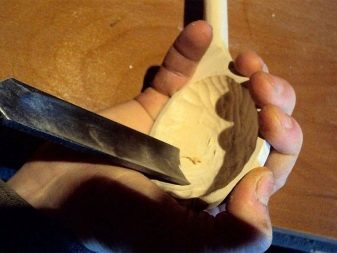
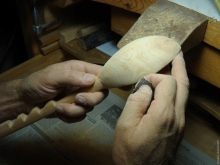
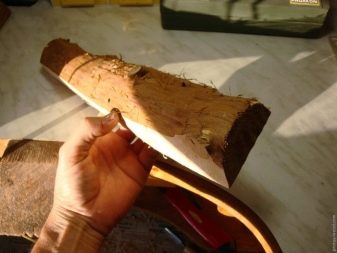
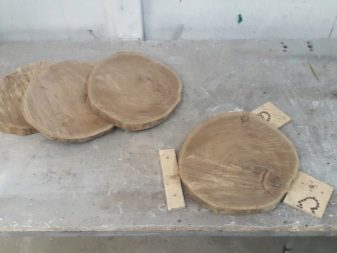
- First, make the required workpiece, cutting off the unnecessary part from the lumber, but leaving a reserve, since the wood still has to be processed. If this is a plate, then it is better to take a saw cut of a tree of the required diameter.
- Marking of the future thing is applied to the workpiece with a marker.
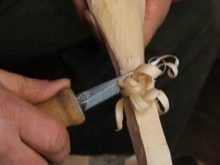
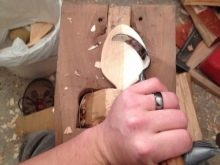
- After that, the workpiece is fixed with a vise and cut off excess parts, including recesses and a special relief.
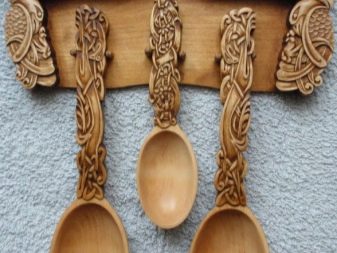
- After marking the side contours, they begin a more subtle process using a chisel or curly cutters.
- It is advisable for inexperienced craftsmen to securely fasten the workpiece and work carefully, since any inaccurate movement can lead to the removal of the excess layer.
As a result, the plate acquires its originally conceived shape, but it still needs to be properly sanded with sandpaper and paper (the canvas is used to process curved and internal surfaces).
If a drawing (ornament, spot painting) is expected, then it should be done immediately before impregnation and coating with varnish or a coloring composition.
A protective layer is necessary because the dishes are intended for food, which means that the food can be hot or liquid. This may adversely affect wood. But the antiseptic agents commonly used for this in construction are toxic, so linseed oil is used for these purposes. They need to saturate the product and wait at least 24 hours until it completely penetrates its structure. This is done simply - the finished accessory is immersed for several seconds in boiled oil, two times in a row.


Another coating option is a special food varnish that is not exposed to ultraviolet radiation., water, fungal microorganisms and insects. This is a durable tool that will help protect wooden utensils from low and high temperatures, the range of its use is from -30 to +60 degrees. If paints such as acrylic or gouache were used for painting, the varnish is applied on top and perfectly preserves the ornament. Also, the tree is allowed to be coated with special glue, which is an impregnation of vegetable oil and beeswax.

See how to make plates of wood with your own hands in the video below.


