To make a gift out of paper - what could be more boring, many will think. And they are wrong! Gone are the days when it was possible to buy colored paper and cardboard in the stationery department, but nothing more. Metallized, corrugated, crepe, velvet, designer, scrapbooking paper - there are a lot of options. From such material can be made from a simple, but bright, beautiful, stylish postcard to a paper layout of Hogwarts.
What do you need?
Consider the option of a set of materials if you are going to seriously engage in the manufacture of decorative objects from paper and cardboard. Suppose you want to make such homemade gifts in the future, because you expect to stock up on materials and tools thoroughly.
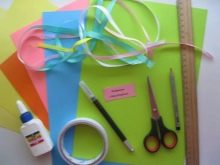
- A pair of sets of designer cardboard / paper. They are sold in the departments of goods for creativity. You can find sets in A4 and A3 format, in one pack - from 10 sheets.
- White cardboard. As the basic material is always needed. It’s great if it’s cardboard with an interesting texture: embossed, imitation of watercolor paper, etc.
- Glue. A glue gun is always needed, a bottle of PVA glue and glue stick are also useful.
- Colored paper of different textures. Be sure to buy a set of corrugated paper, metallized, crepe, glossy. The more textures - the more choices you have and creative possibilities.
- Scissors. Two pairs are enough: large and small. Very convenient and inexpensive scissors can be ordered on Asian sites.
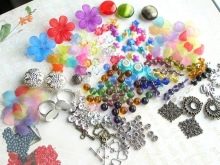
- Braids, ribbons, cords, laces for decoration. Here you can add buttons, rhinestones, beads, sequins, which should be in stock.
- Paints, brushes, pencils, markers, felt-tip pens.In a word, everything that will help put the final touch.
This is a basic set, which in the process of creativity will grow, replenished with new interesting materials, tools.

Original paper gift ideas
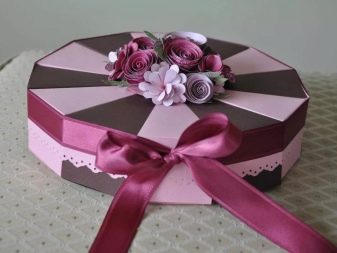
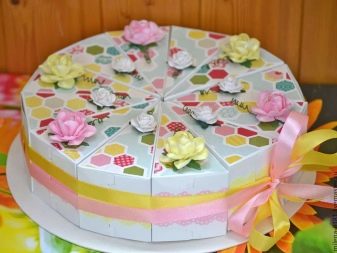
If you are going for a birthday, what gift seems like an undeniable classic, always uplifting? That's right - the cake. And it can also be made of paper. Either a dense designer variety, or soft cardboard. The same “triangles” of the cake are made according to the template, which are subsequently decorated with rhinestones, beads, lace braid, etc. In each piece of paper cake, wishes for the hero of the occasion can be twisted and tied with a thin ribbon.

There are many other options that differ in the scope of work.
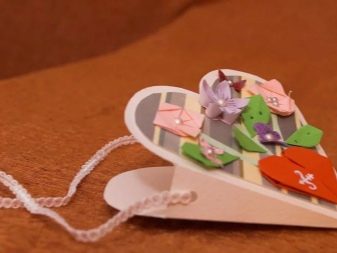
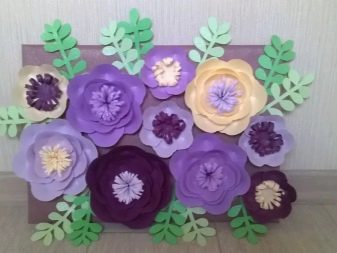
- Paper flowers panels. This is something from which the author himself will receive unspeakable pleasure, and the birthday boy will be happy for sure. At the preliminary stage, the author cuts flowers or even individual petals from watercolor paper. Then he must make them colored: for someone it will be saturated petals, lush poppies and bright cornflowers, someone will make the flowers beautiful with their fading, subtlety, he will decide in favor of nude shades. When everything is ready, the flowers are pasted onto the canvas base, previously toned. It remains to arrange all this in a frame (or somehow otherwise).
The work is long, energy-consuming, but incredibly beautiful.

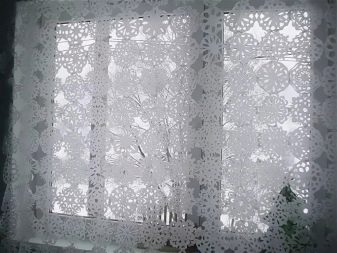
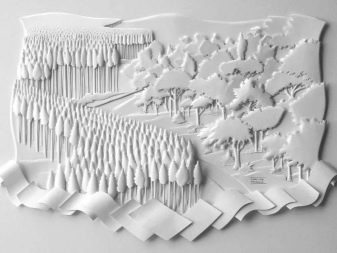
- Paper curtains. This is a purely decorative product, but it may find a place in the interior. If the apartment has a small window, they will "settle" there. Paper curtains also look good in the boudoir zone. On a large sheet of paper (a special format is acquired), a sketch is first drawn with a pencil, the slits in which are then carefully cut with a special knife. The thing is unique, work without exaggeration - subtle.

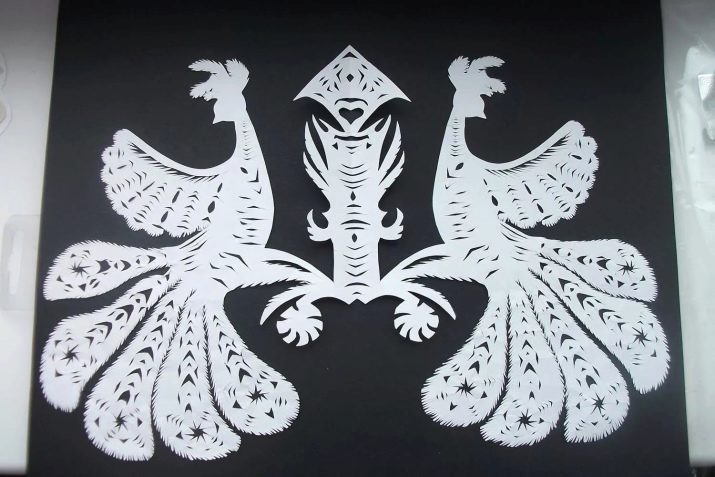
- Vitantine. The principle is the same as with paper curtains, but the amount of work is different. Elegantly carved drawing (most often - plot) is pasted on a contrasting background, framed.
- Volumetric paper picture. Each element of this picture needs to be cut out (in some cases, made colored) and glued at a distance to create a volume effect.
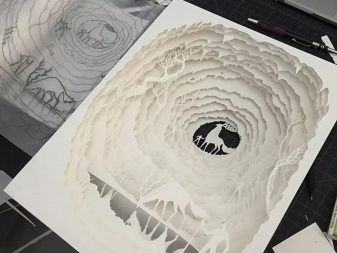
The proposed work is difficult to do in one evening. They require effort, serious work, but the result is impressive. Some works turn into family creativity.
How to make a small souvenir?
Suppose you want to attach a card with a surprise inside the main gift. If such a gift is supposed to be given on behalf of a child, there are simple options for him, for example, a Christmas card with a dancing snowman. It turns out to be very funny, unexpected for an adult, it is always a pleasure to present such a gift.
A surprise card (snowman) should be done strictly step by step.
- Take a piece of heavy colored paper or cardboard. Fold it with a little book.
- From a white watercolor paper, cut one large snowdrift and two small ones visible in the background. They subsequently need to be glued to the first sheet of the card, but not in a continuous layer, but only along the edges.
- At the bottom of the first sheet with a clerical knife, you need to make a cut - such that a wooden medical spatula passes through (but does not hang out). Glue a snowman on this spatula, drawn on cardboard and cut out as you like. The size of the snowman should be such that he could completely hide behind the central snowdrift.
- Glue the snowdrifts on the central sheet without touching the snowman on the stick with glue. Draw snowflakes all over the sheet (you can sprinkle the sheet with sparkles, rhinestones, etc.).
- Inside the card must be with wishes.
When such a gift is presented, the snowman is not visible - only the wand is visible. It is necessary to show the person who receives the card how a snowman can protrude due to the snowdrift.This will surprise both small and large: the best bonus to the main gift is emotions, a smile. Children like to make such “toy” cards; it’s easier for them to work with A4 sheets. Although you can make mini-versions of postcards.

The following is another video on how to make a postcard with a snowman.
Turn-based homemade volumetric crafts
Corrugated cardboard is a godsend for lovers of handmade art. What earlier they just didn’t do from colored paper, so that it somehow changed its smoothness to relief. Now such tricks are not needed - you get corrugated cardboard, make an applique or a three-dimensional figure with your own hands.
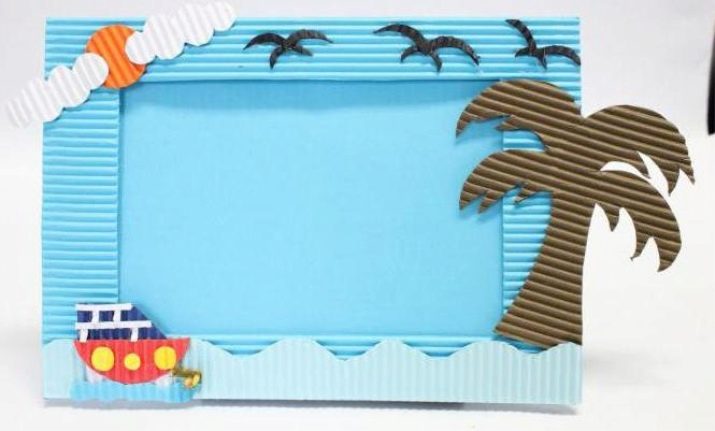
For beginners to work in this genre of cardboard, you can make a photo frame.
- Decide on the size, taking into account the standard parameters of the photo. Cut the base sheet. Most likely, it will be the same corrugated cardboard, the wrong side of which is smooth.
- For example, you can make a marine-style photo frame. Then the background should be blue or blue. From the same cardboard, cut out the stripes that will be the frame of the frame. They gently adhere to the base: the smooth side is glued “face” to the smooth background (that is, the frame will be corrugated).
- From all the same cardboard you cut out decorative elements: a boat, a boat, seagulls, clouds, a palm tree, waves. If you want to add other materials to the work, use braid (wavy is great for creating waves), buttons, sparkles. You can stick parts with glue stick or glue gun.
- The gap between the base and the frame should be such that it can be put into the photo frame and it is held tight enough in the frame. You can make such a card with your child: everything is quite simple, no special artistic skills are required.
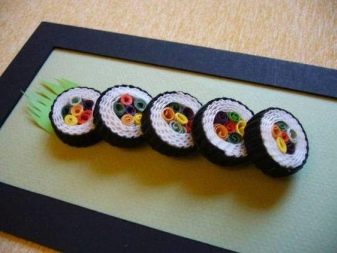
A very interesting gift can be “corrugated food”. And if the idea with a cake is considered not so original, then how do you like sushi from corrugated paper? If the gift is addressed to the lover of such a dish, it will obviously be flattered. The main thing is that this artwork does not take much work and time.
You need to place the rolls on a sheet resembling a plate or an elegant stand for this dish. Usually a plate is made on a sheet of white and very thick watercolor paper, and the frame for it can be made of black velvet cardboard (there is one too!)
For the rolls themselves, you need some not very thick strips of multi-colored cardboard. Many small narrow multi-colored stripes are twisted into a roll, fastened with glue. This is the filling. Around them is a white layer of “paper rice” made of white corrugated cardboard. And all this is crowned with a fixing black strip of cardboard (algae). Five of these rolls are stacked on top of each other, under the bottom you can lay ginger cut from plain cardboard. It turns out very close to the original!
Moreover, such rolls can be done not only by children. Once a young man made corrugated sushi for his girlfriend's birthday, and in one of the rolls the girl found a ring - such a gift with a surprise inside.
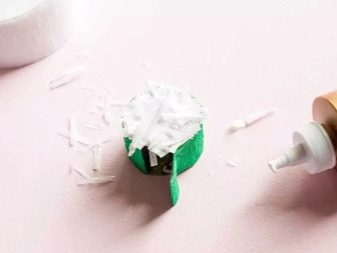
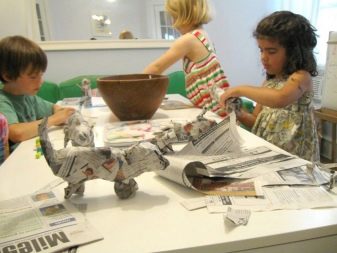
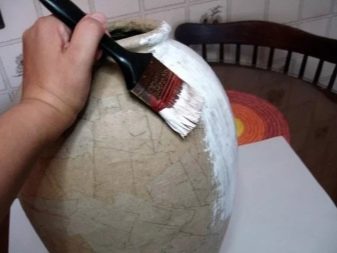
If you do a craft with a child, accustoming him to manual creativity, you can remember the good old method - papier-mâché. Anything could be made of toilet paper and glue - usually they started with vases. To do this, you do not need a scan, designer cardboard and other things that may not be found at home. The child learns to glue, learns to wait (working with papier-mâché requires patience), learns to decorate the blank. At a certain stage, an adult can relieve himself of all obligations - the child likes to finish it himself.
Teach children from a young age not to stay away from gifts close to people. And let the adults give something material, and the child invests his work in crafts, drawings, postcards. Parents help, but he works. This develops not only artistic skills, but also industriousness, responsibility, self-discipline.


