Many women dream of long and beautiful nails, however, not every girl can grow them quickly. That is why nail extension comes to their aid, which at any time can be done in salon or at home.
Necessary equipment
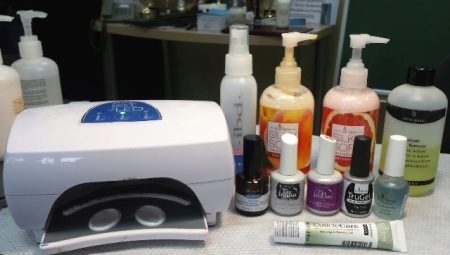
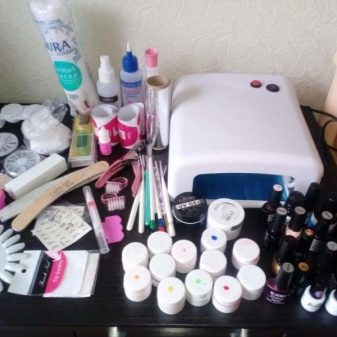
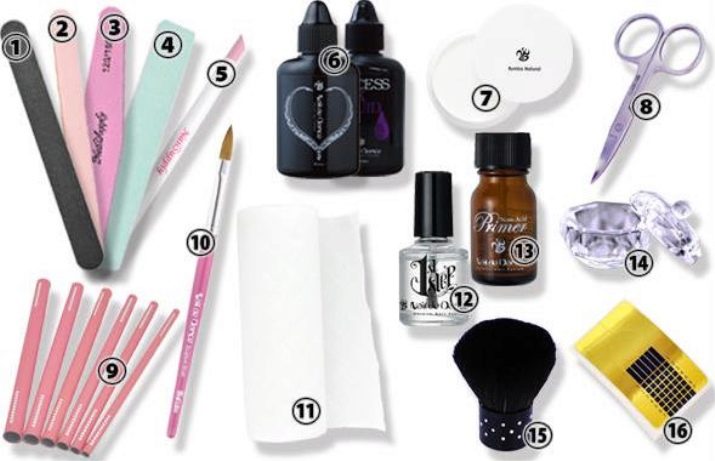
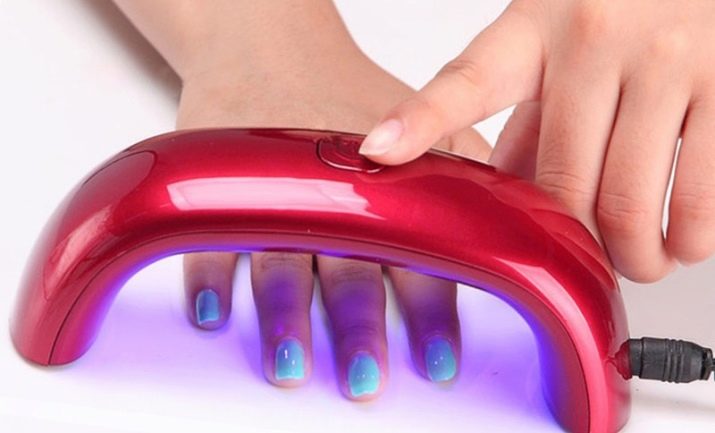
In order to build nails requires a set of tools and supplies for all necessary work. One of the most important accessories for this procedure is a UV lamp. This device should be purchased with great care, since the speed and quality of polymerization of the nail coat and the comfort during the procedure depend on its power and effectiveness. The lamp can be used when working with shellac and acrylic, in addition, it is often used to dry the gel coating.
If you are just taking the first steps in a manicure, you can purchase the most primitive unit without any additional options, although the power of the device should be high: at least 24 watts, and best of all - 36 watts. Such a device will become the most impressive expense item, however, it is certainly a matter of fact, since it is rather difficult to make a quality build without a lamp.
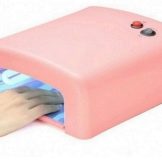
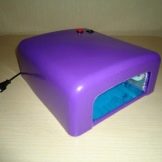
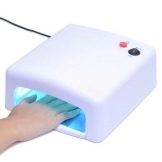
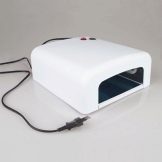
But if you plan to make money on a manicure, then you should take a closer look at the models, supplemented by the functions of blowing, a touch monitor, as well as a timer and other "excesses". They make the procedure for using this lamp comfortable, however, such equipment is expensive, so if you need a lamp only for personal needs, then you are unlikely to be able to recoup such an investment.
We make a reservation in advance that substituting ultraviolet nails covered with the most ordinary decorative varnish does not make any sense, since the UV lamp does not dry, but only polymerizes. It does not affect the coating at high temperatures - that is, you will not reduce the drying time, but you risk getting the color clouding.
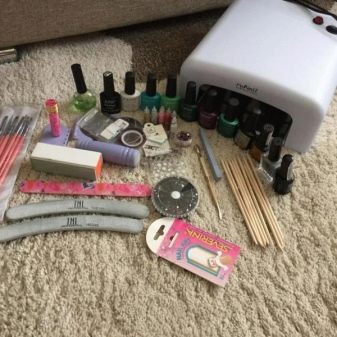
In addition to the lamp, many other tools are needed, the following items are included in the minimum starter kit:
- a set of files;
- buffs;
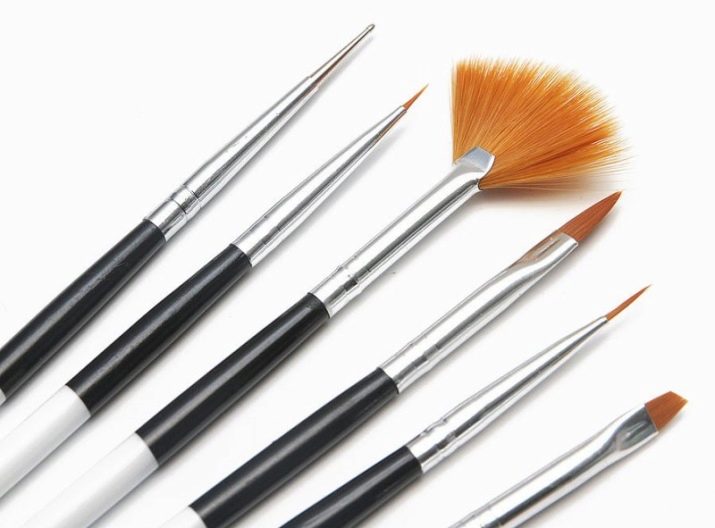
- brushes with hard fibers for stylish modeling;
- pusher.
The list of materials looks like this:
- base gel is colorless;
- special modeling composition;
- fixing coating.

In addition, you will need a primer, as well as a dehydrator and a bonder. Most inexperienced masters believe that this is one and the same, however, this is far from the case. The primer is necessary for degreasing, removing the smallest particles of dirt and preparing the surface of the nail for adhesion due to a small rise in the scales. The dehydrator removes excess moisture, improving adhesion, and the bonder is an effective fastening component, due to which the gel fits well on the nail and is attached to it, so that the built-up elements do not fly off from the first mechanical impact.
And, of course, not a single extension can do without manicure glue. Let us dwell in more detail on the most important materials and the features of their choice.
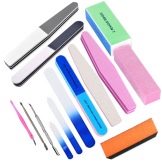
- Nail Files - are used to give the nail a desired shape, and, in addition, to polish the entire surface and seal the tip of the plate. In previous years, metal devices were often used - today this technique is recognized as ineffective, because it leads to delamination of the nail plates. Experts recommend the use of products made of ceramic or glass. For a good manicure, it is advisable to take a few files with different levels of abrasion, which is calculated in grit - the lower this value, the rougher the nail file.
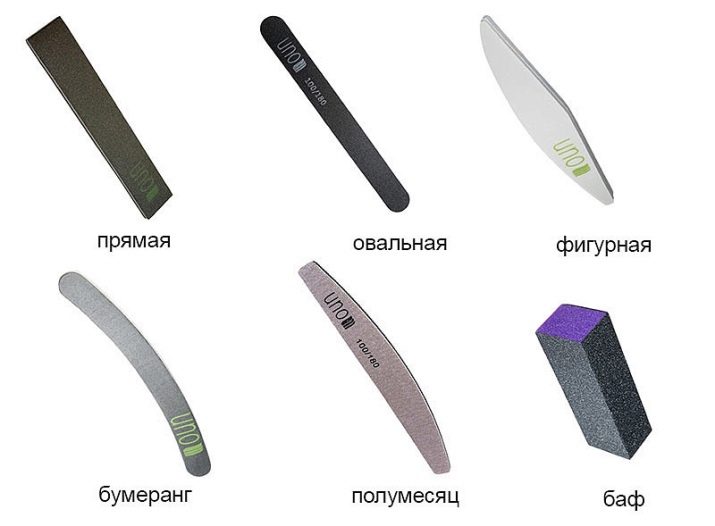
To work with artificial coatings, files with parameters 80/120 grit are used, and their own natural ones are filed with a tool with an index of 240 grit or more. As for the appearance, it is advisable to use elongated files to give the desired shape to the free edge, to grind a nail near the cuticle, you should give preference to products in the form of a boomerang, and a rectangular nail file is suitable for polishing the surface.
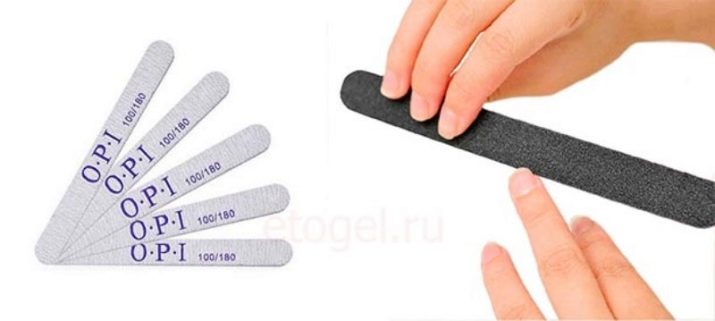
If you intend to do a manicure regularly, then it makes sense to immediately purchase a large number of nail files of different roughness, since they soon become unusable and need to be constantly changed.
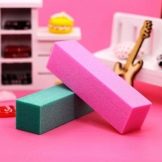
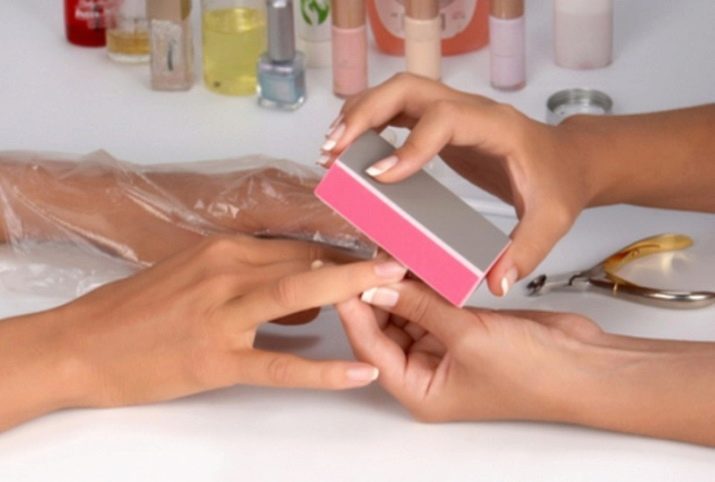
Separately, you should buy a buff file, which is used for polishing natural nails, such processing is necessarily carried out before building, so the tool belongs to the category of necessary. Buff is a piece of four-sided foam rubber, and each surface has its own degree of abrasiveness. Such a consumable is effective both for contact with natural nails and artificial ones.
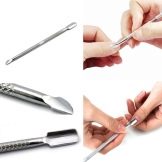
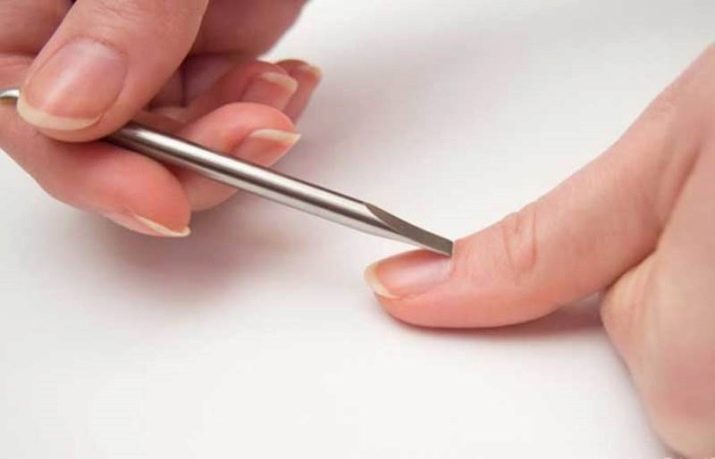
- Pusher or scraper necessary in order to push back the coarsened cuticle and prepare the nails for gel coating. For an effective manicure, it is best to take a metal device with an ergonomic corrugated handle. Usually one tip of the pusher is made in the form of a spatula, and the second resembles a sharp arrow tip. If you bought a scraper, then here one of the planes is executed in the form of an hatchet.
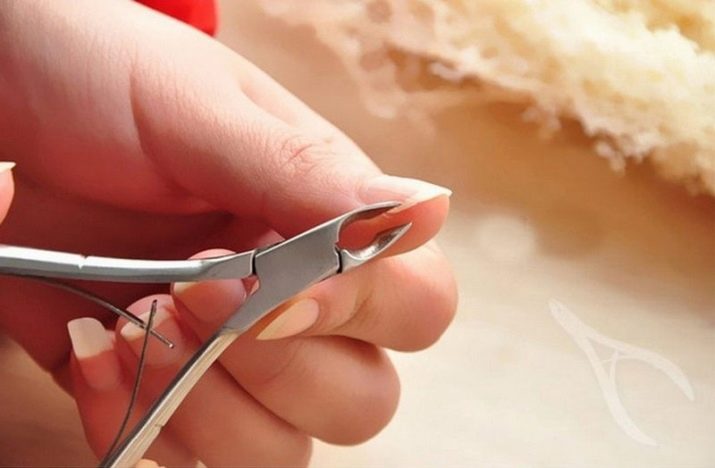
- Tweezers or nippers - These working tools are required to cut the cuticle and get rid of painful burrs, as well as the corners of the protruding nail plates. This tool usually has a well-honed surface and is considered much more effective than manicure scissors with rounded tips or a trimmer.
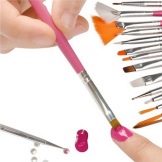
- To carry out the building and decoration of nails, you need to purchase brush set: some should have a straight synthetic pile, others should be thinner, and you will also need a brush with a narrow tip.
- In building many masters use tips, in this case you need to purchase tip cutter, with which you can simulate the edge of the free edge.
- After adjustment and grinding polymerized shellac dust often appears, it must be removed from the surface of the nail - this is done using a manicure brush with a special synthetic pile.

All of the above tools are required when building in any technique, regardless of what you work with - with tips, gel or acrylic. And now let us dwell in more detail on specialized consumables that are required for each individual type of building.
For gel extension
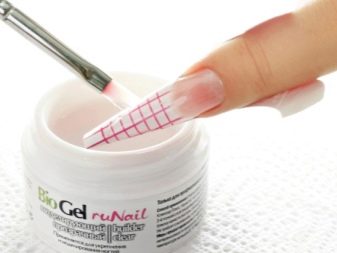
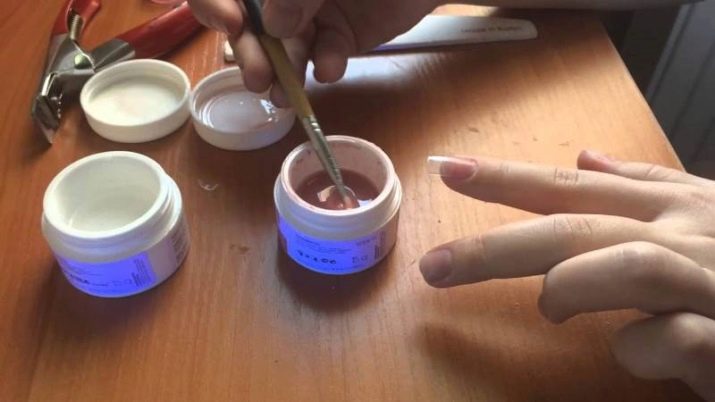
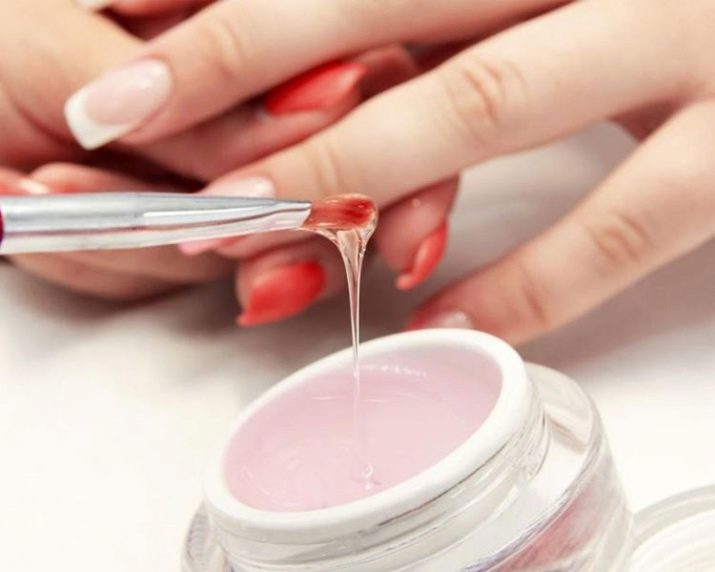
The gel is considered the easiest to use polymer, which is more suitable for inexperienced craftsmen than others. It has a lot of advantages: it does not emit harmful substances and does not have a pungent chemical smell, which is why the material stably holds the palm among all other types of coating. To work with the gel you need to prepare:
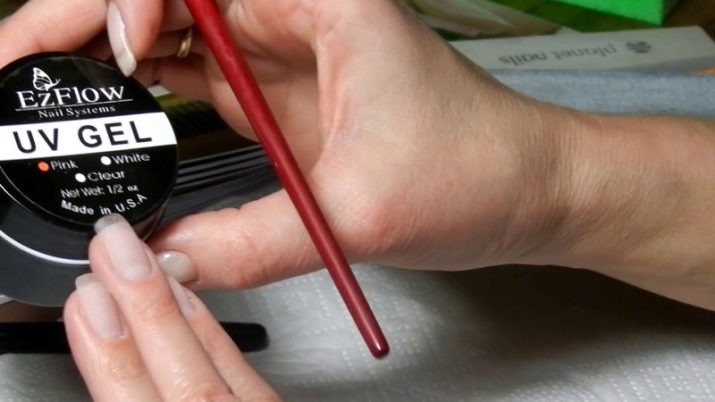
- base gel - for beginners it is best to purchase a single-phase composition, which does not create any difficulties in application, but for more experienced masters it makes sense to dwell on two - or three-phase;
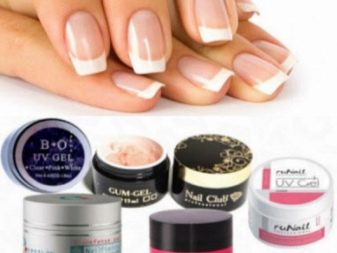
- camouflage gel - usually use white, beige or pink;
- top coat - it is necessary to give shine and evenness to the nail plates;
- concealer for degreasing the sticky layer;
- shellac remover.
In addition to the above materials, a special moisturizer for the cuticle is useful to you: it softens the keratinized layers of the epidermis and prevents the appearance of burrs. Also, you will need cotton disks, lint-free napkins, acrylic-based paints for decorating your fingernail, as well as shine, glitter, rhinestones and other interesting little things.
When using acrylic
When using acrylic, you will need a different set of consumables:
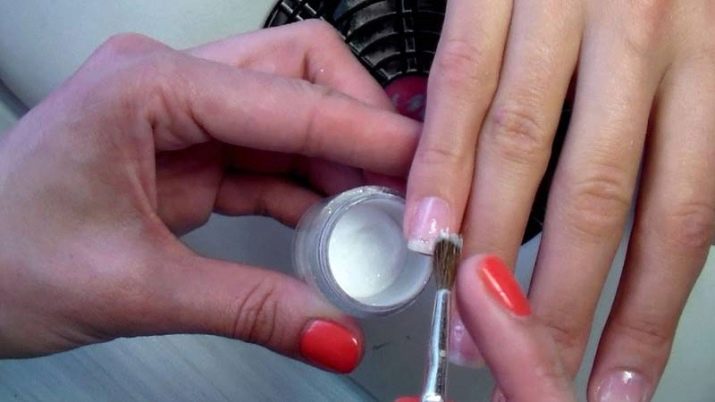
- monomer - a special acrylic liquid;
- acrylic powder - composition of a transparent, pink or peach color;
- a means for dissolving acrylic, which will be required when the work requires a slight adjustment.
In addition, you will certainly need a container where you will combine acrylic liquid with powder and clothespins with clips.
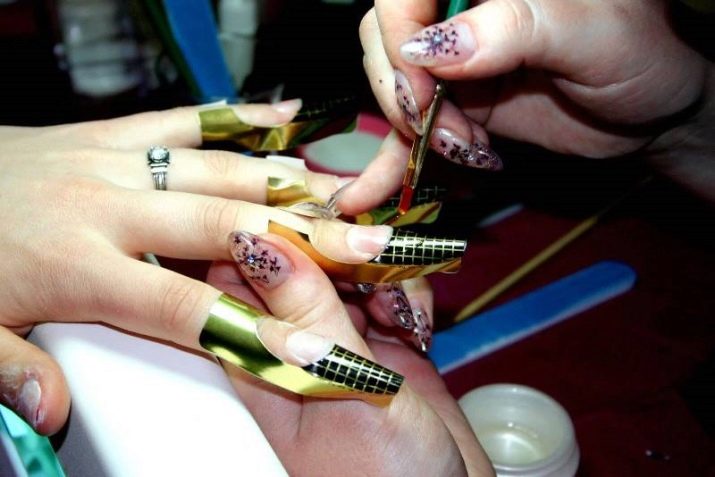
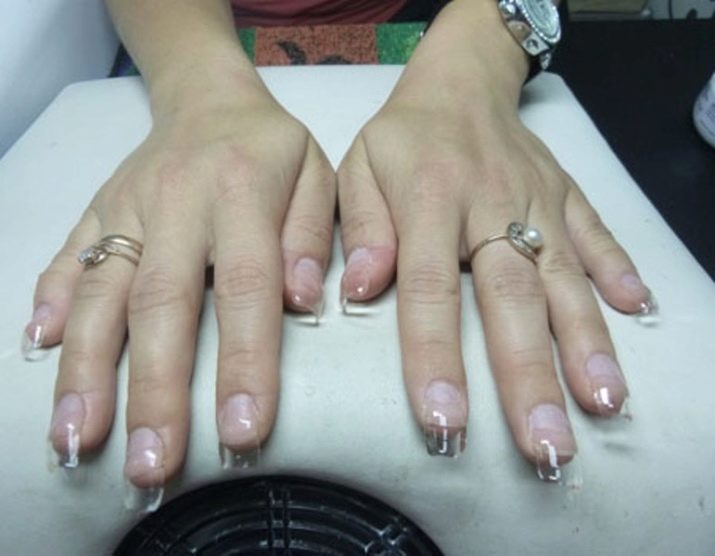
On the form
Nail extension using a form is considered to be a more complicated way than manicure using tips. Nevertheless, when using the highest quality materials and the availability of professional skills, getting a good result is not so difficult. For such a building, first of all, special forms are needed. They are one-time and reusable: the first are made of paper and have a relatively low cost, and the second is made of teflon on a wire frame.
It is imperative to stock up on manicure napkins: they are thin sections of cloth without lint, which remove the sticky layer well and remove the remnants of decorative varnish.
Features of the procedure and possible problems
Now that you have purchased all the tools and supplies you need to work, you can proceed directly to nail extensions. The easiest way is to use a gel-based technique, in which case all visual defects of the nail can be easily removed. The extended surfaces have a lot of advantages: they do not delaminate, do not crack and do not break. Artificial coatings are exceptionally high strength, so chips rarely appear on them.
The use of artificial nail plates gives the nails the desired smoothness and allows you to successfully resist such serious problems as bumpiness and unevenness of the coating.It should be noted that even the ancient Chinese were engaged in the technique of nail extension, a little later the technique improved and spread to European countries. For a long time, acrylic was used for this procedure, but today the use of gel is considered to be a more modern and effective technology. Due to its high elasticity, the nails are very strong, but at the same time thin. The flickering of the gel completely imitates the natural color and structure of the nails, thanks to this, artificial coatings look very natural.
The use of gel compositions for nail extension has a lot of advantages:
- the whole procedure lasts no more than 2 hours;
- the output coating is very strong and strong;
- due to the high elasticity of the drug, the nails have a rather long wear period;
- correction of gel nails takes about half an hour;
- the prices for such an increase are much more democratic than the cost of similar work with other compounds;
- when applying the gel, the nail plate does not collapse, moreover, the nails become stronger, which allows them to grow quickly without the risk of brittleness and delamination;
- when applying the gel, all cracks and ugly reliefs on the surface of the nail are filled with drugs;
- gel-based products give nails a pleasant shine;
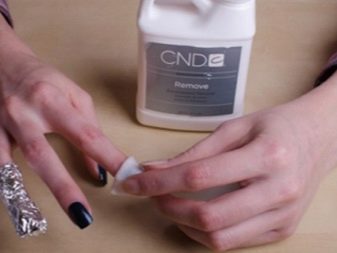
- gel nails are very easy to remove;
- the material is able to pass oxygen, so the native nail plate does not dry out;
- the use of the gel effectively protects nails from the dangerous effects of ultraviolet radiation, as well as household chemicals and various kinds of mechanical damage;
- a gel is a hypoallergenic material; its structure includes resin of needles, which has pronounced fungicidal properties and helps to prevent fungal diseases;
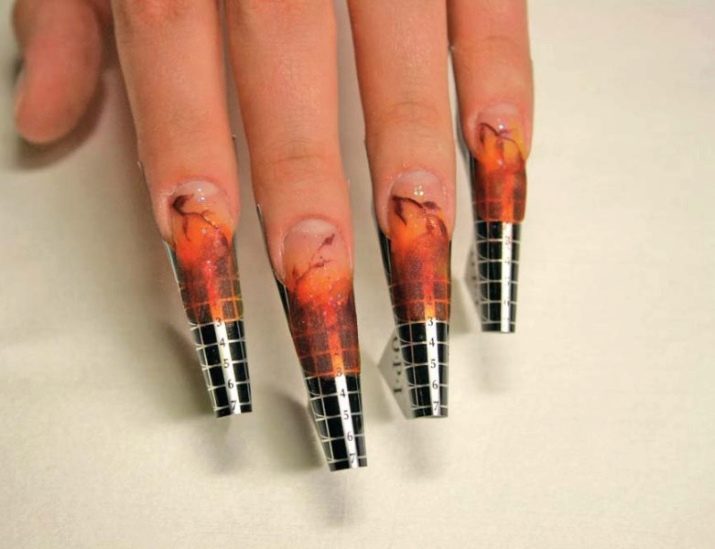
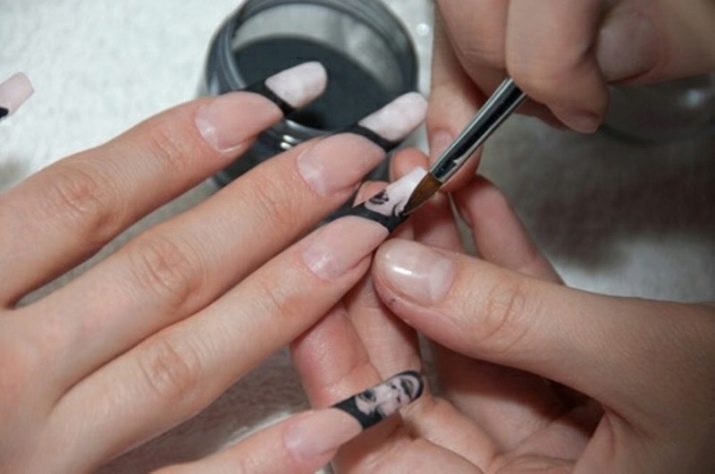
- and, of course, the gel can easily draw a wide variety of decors and drawings of varying degrees of complexity.
However, it was not without minuses. So, during polymerization, a painful burning sensation sometimes appears under the UV lamp, and if the nail breaks, then it cannot be repaired, a complete replacement of the coating will be required. Only a master can remove gel nails, doing it yourself without damaging the native plates is quite difficult, because you need to cut them, and with little experience in this case, damage to your nails can be done.
Also, with sharp fluctuations in temperature, gel coatings can be deformed. However, all these shortcomings are more than compensated by the experience and professional skills of the master and compliance with the rules for caring for nails. Step-by-step nail extension is carried out as follows.
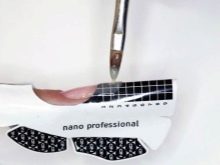
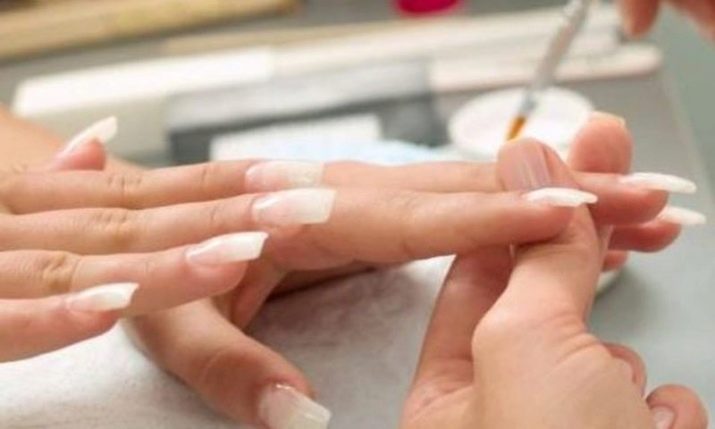
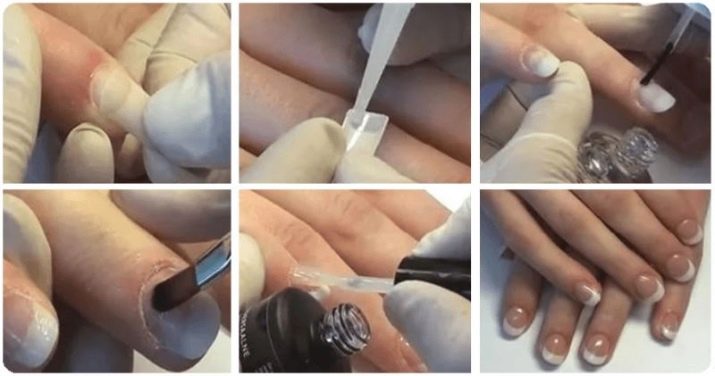
- The overgrown edge of the nail plate is adjusted with a nail file so that a length of about 2 mm remains.
- The keratin layer is thoroughly buffed until completely removed.
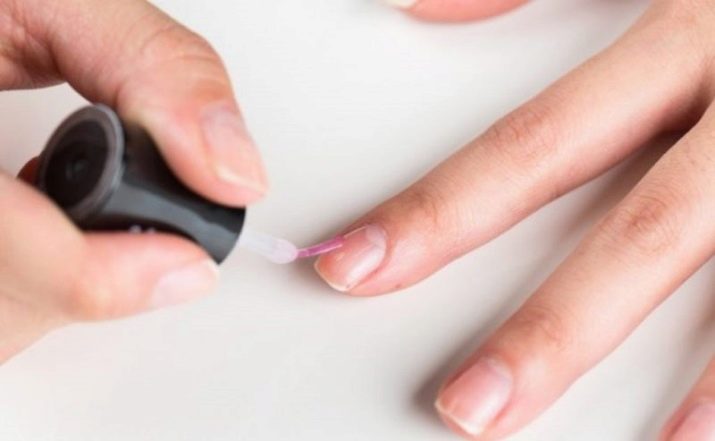
- Next, degreasing is carried out and a primer is applied.
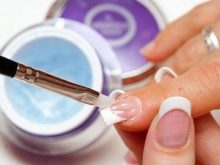
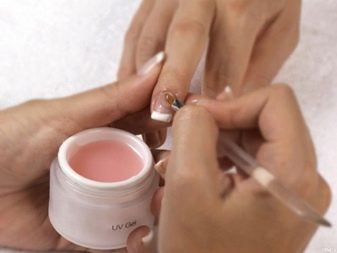
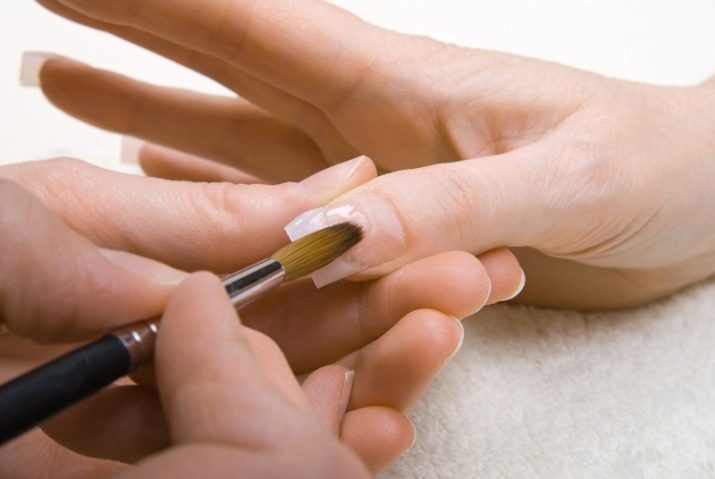
- The gel material is applied in a thin layer and then polymerized in a UV lamp.
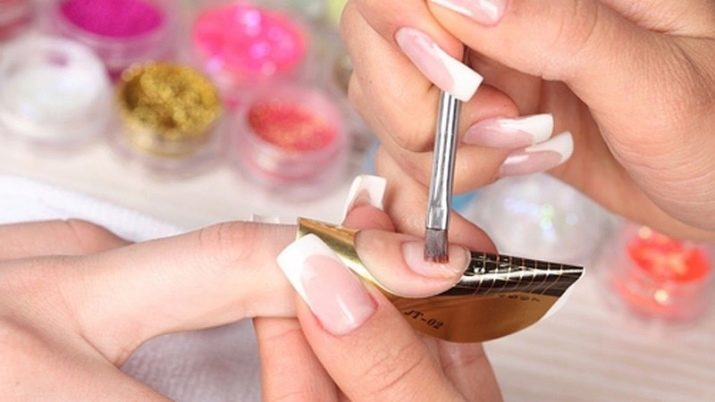
- A template is installed on the cover; it is very important to put it on correctly; A thin gel substrate is made at the border of the nail and the shape, then it is processed in a lamp and the sticky layer is removed.
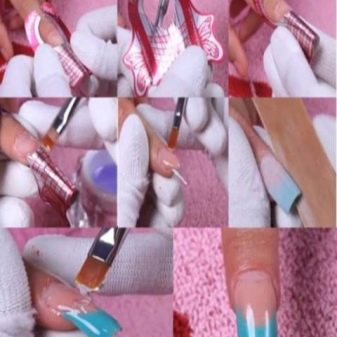

It is very important to distribute the drug on the surface of the nail so that its main part falls in the middle, and at the edges the coating remains thin.
- After drying with a nail file, a smile line is drawn and the base is applied.
- Templates need to be removed and put on cosmetics.
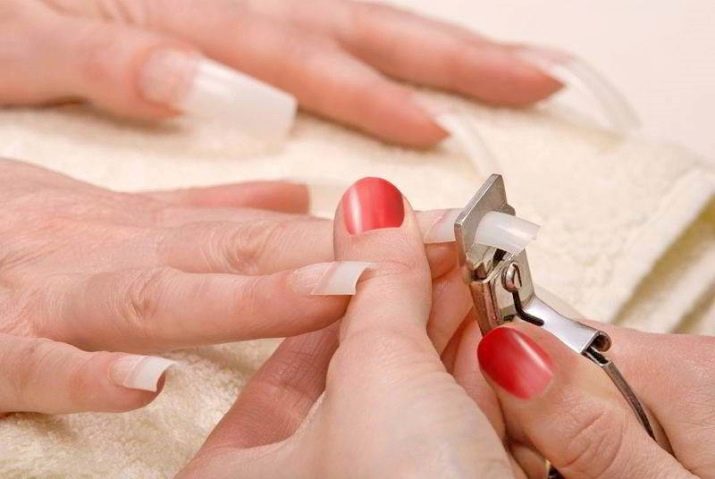
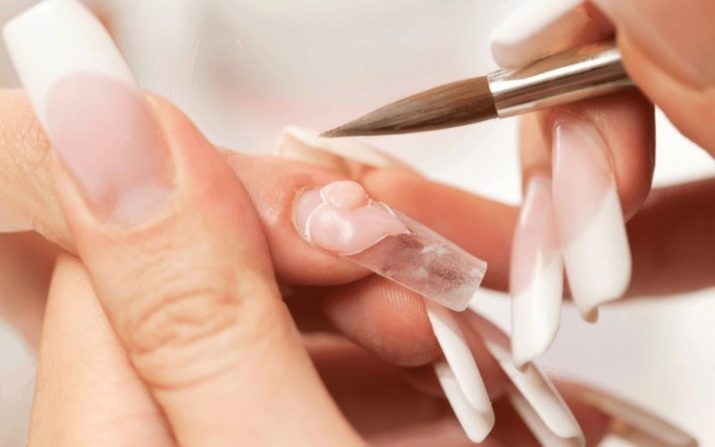
If the nails are built using tips, then the technology looks a little different: the peculiarity here is that tips are not removed at the end of the procedure, they need to be glued to the nail plate. This technology is considered universal, tips are often used even on damaged nails, but working with them is quite difficult, because artificial nails should ideally match real ones in size, otherwise the coating will cling to everything.Yes, and the appearance will be untidy and unaesthetic.
When building nails at home, you need to follow a few basic recommendations:
- the top layer of the nail plate is cut off with a buff until the nail becomes matte;
- in the course of work, you should constantly inspect the nails at different angles so as not to leave unnoticed and unprocessed even the smallest transitions and steps;
- after the entire keratin layer is cut off, the resulting nail dust is removed with a brush, otherwise the coating will be inaccurate;
- the pour time of the preparations in the lamp varies depending on the chemical composition and manufacturer, so be sure to read the instructions for them before work.
Selection tips
Unfortunately, women rarely boast strong and healthy nails. Professional etiquette, a huge number of household duties and the need to care for children become an obstacle to the cultivation of nail platinum, so building becomes for them a real salvation. Modern technologies allow ladies to choose the type of building that will be optimal in each case.
The cheapest option is false nails, even an amateur master can cope with such a technique without any special skills. However, this option is unreliable and unaesthetic, such nails are sold in large ribbons-sets and include plates of different shapes, widths and lengths, but even a large selection does not always allow you to choose nails that will ideally match the dimensions of the nail plate. As a result, they look very artificial.
Manicure glue is also required for building a house.
Another form of finished nails is tips. They differ from invoices in that they are the basis for further modeling and are not attached to the entire nail plate, but only to its edge. Tips are made from more reliable material and are characterized by the necessary flexibility. Tips nails look more natural than false nails. Modeling is considered the most modern method of building-up, it is performed using materials such as gel, acrylic or bio gel. The simulated marigolds look exceptionally natural, while the coating is more durable and durable.
Nails can be increased using acrylic compounds, this material is characterized by strength, and in addition, has a relatively affordable cost. For acrylic, elasticity is not characteristic, so correction has to be done quite often. In addition, acrylic smells bad and this smell accompanies you not only at the time of building, but also for several days after it.
Gel preparations are considered safer, they are more plastic than acrylictherefore gel nails have a longer wear period. Such an increase is, of course, more expensive, but the adjustment will have to be done much less often. The most modern modeling option is considered a technique based on biogel - a substance that combines both acrylic and gel, so that the nails are strong and beautiful. The combination of these materials makes the nails much stronger and at the same time elastic, this procedure will cost quite expensive, but the result is, no doubt, worth it.
About what you need to build nails, see the next video.


