Professional drawings on the nails adorn the female set and often give it a special status. A novice master sooner or later has to deal with such decoration. The purpose of this article is to familiarize the reader with the basic nuances of drawing, which can become the basis for learning.
Fashion trends
Before you start painting on nails, you need to know some points of manicure. The drawings today are not random - they are selected based on the seasonality of manicure or some significant event. For example, it can be a snowman or a deer for the New Year set, a kawaii cat with eyes-hearts for Valentine's Day, or a floral design for March 8th.
With regard to seasonality, it is important to get into a particular month of the year. Otherwise, the manicure will look at least inappropriate.

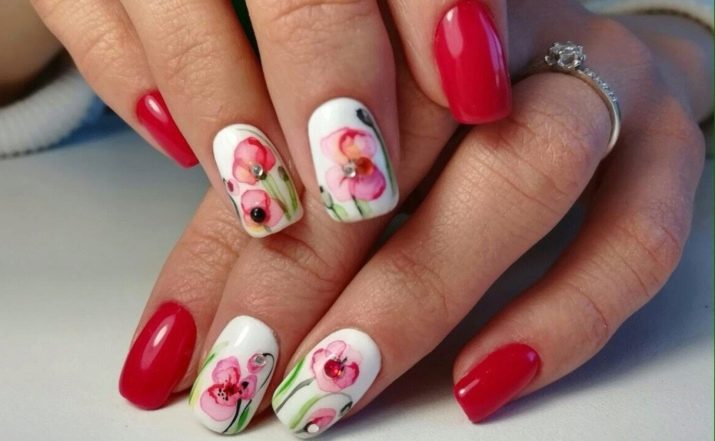
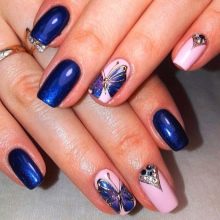
Another nuance is the correct execution. She implies strict dosage drawings. Besides being images do not have to decorate all the fingernails; they cannot be repeated. They take a single theme as a basis. In the design, one nail will be decorated with the main picture, and the remaining accents will become its combination with the manicure technique, taken as the basis for the design.
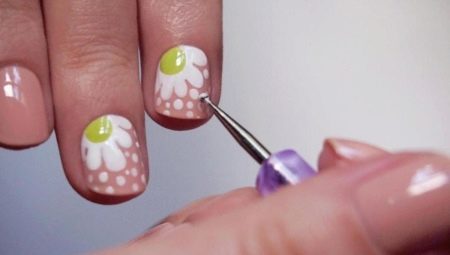
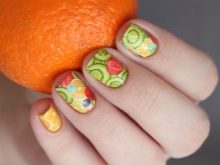
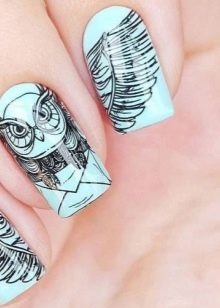
For example, when they draw manicure with an owl (today's fashion design), no more than three out of ten nails are assigned to the design. Nail plates without a pattern are monophonic, so that against the general background the design becomes more expressive. The owl is drawn on only one nail plate. Drawings on bundle nails can depict bird feathers made with paints that painted the bird itself.The view of the feathers can be different, as well as the size.

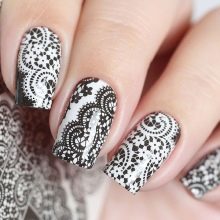
If the design is in the form of monograms or lace curls, it is difficult to achieve identity. Here they monitor that the image is not complicated by the technique of manicure. For example, it is difficult to fit both the pattern and the gradient and the “smile” of the jacket onto one nail plate. In this case, the pattern is correlated with the size of the nail plate, choosing one or the other (either a gradient or a jacket).
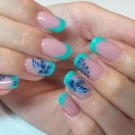
Here, a great way to play can be called a technique for making a fantasy “smile”. Let’s say, it is possible to distinguish an accent nail not with a traditional one, but with a lace “smile”, drawing the finest lace, and emphasizing the edges with a contour. The remaining nails can be made using the ombre technique, classic or in French design, whether it is a traditional or inverted jacket. Today it is very fashionable to highlight the “smile” zone with drawings, emphasize the design with a contour stroke, and combine with tear-off foil. For example, instead of the traditional “smile”, you can portray foxes, seals, snowmen, flower elements, leaves, stars.
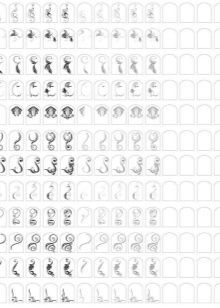
Training cards
Difficulties in drawing can be associated with different sizes of nail plates. In this case, training cards with various patterns will be an excellent solution for the novice master. Tracing one picture after another with a brush, the master will develop skills in drawing small elements.
Such cards can be issued online today or downloaded from the Internet by printing on a regular printer.

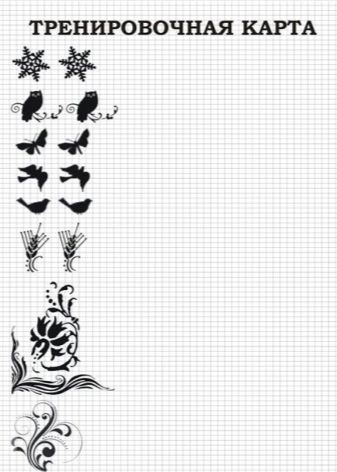
Cards are sheets with images that are somewhat similar to school prescriptions. Each row consists of several conventional nails with the same picture. At first, it is completely traced, it remains only to circle. As you approach the end of the row, the master has to perform more and more elements on his own.
These training cards are very convenient, they increase the skills of the master, because when drawing on the nails there should be no flaws. Each line will be drawn once, without painting, and therefore the cards can be called a tool to achieve confidence in drawing.
It is worth noting that today their subject matter is not so extensive, but if you wish, you can practice by studying the basics of monogram turns, straight lines of geometric design, animal prints and New Year's images.
What is required?
Each design uses its own set of work, which will include a dehydrator, primer, base, pigments, top.
Hybrid coatings are best used: they stay on the nails for at least two weeks, and look like they just completed a manicure.
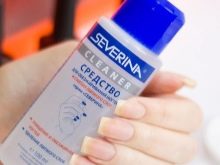
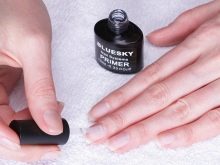
The dehydrator is needed for degreasing the nail plate, the primer will be a kind of primer or adhesive material, providing a high adhesion of the coating to the nail. The base will be responsible for the durability of the coating, pigments are used to create a color base, and the entire design is sealed with a top.
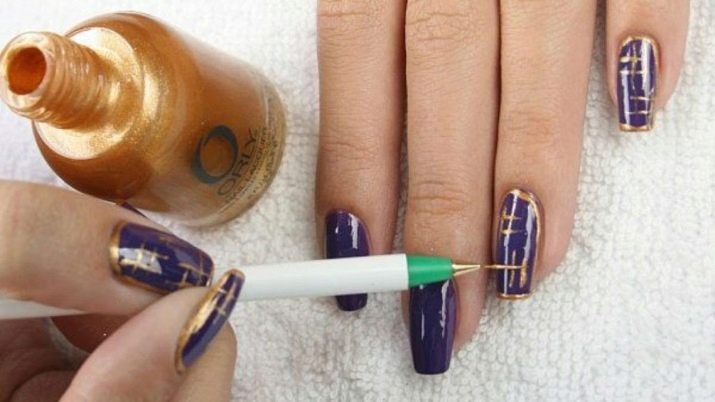
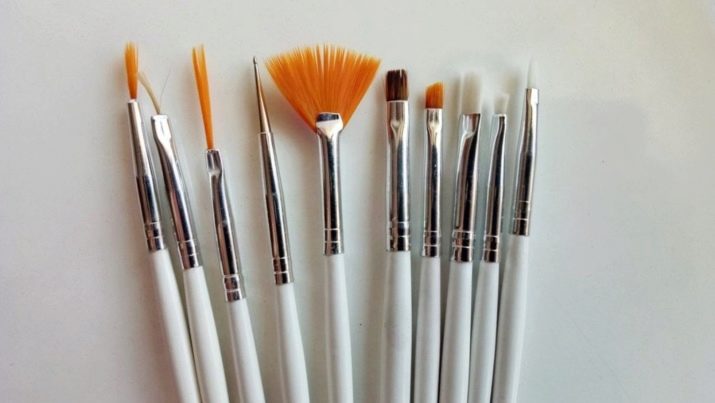
Directly for drawing, you may need dots (special sticks with nozzles in the form of metal balls) of different sizes, manicure brushes with different lengths and thicknesses.
They are numbered for the convenience of the master and have their own names.
For example, fan-shaped form the basis for the ombre design, Gzhel is painted flat square, Chinese painting - beveled. This brush is used for drawing in the technique of a single stroke. For artistic painting, brush liners are used, consisting of 7-20 hairs.
In addition, one of the painting techniques (wet design) involves the use of conventional bottle brushes that apply gel polish. Wooden toothpicks and ordinary hand needles can become home drawing tools. The options are not the most convenient, which proves the quality of the finished pattern.
Brushing lines with a liner is easier. In addition, they are more even.
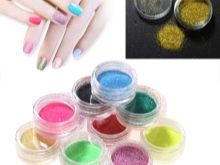
As for the pigments for drawing, their choice depends on the preferences of the wizard.You can draw on nails with water-based acrylic paints (options in the form of sets for artists, not school paints), special hybrid gels that are dried in a UV or LED lamp. In addition, gel polishes themselves can be used for drawing. So that the quality of the picture does not suffer, pigmentation of the colors should be sufficient: transparent material is difficult to draw.
In addition, it must be taken into account that when it is diluted with a top, it will become not only thinner, but also more transparent. In addition to pigments, you will have to take care of the presence of a palette. If one is not available, you can make it from a piece of food foil. If you plan to use acrylic paints for drawing on nails, you need to prepare a small container with plain water. Such paints harden after drying, and if you do not wash the composition off the brush in time, you will have to throw it away.
To work with helium dyes, you need to prepare a gel polish remover. In the process, it can clean the brush or dots. In addition, lint-free wipes for manicure should be purchased in advance. For volumetric equipment, modeling gel of different shades is used. Also, you will need a special fluid, which is used together with a modeling gel.
Interesting tools that you can use in your work are special pens for drawing. They can have not only a writing rod at the ends, but also stamps with a simple pattern. Such tools are convenient in their cost-effectiveness, however, for professional design it is still worthwhile to purchase brushes and dots.

Features of different techniques
Immediately it is worth to outline the basic techniques of drawing. Dots can draw hearts, lines, dots. The type of element will depend on the size of the ball at the end of the tool.
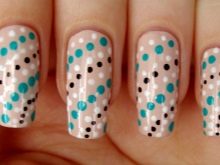
Spot painting is the simplest and most suitable for beginners. It remains to add that it is very popular today due to the relevance of the patterns of mehendi and boho.
To make the design look professional, you need to use dots with different size balls. Whole compositions can be laid out from points, using a set with balls of different diameters. The lines are drawn with thin instruments. As for brushes, here the important points are their length and thickness. The liner draws thin and straight lines. Shorter brushes perform drawing.
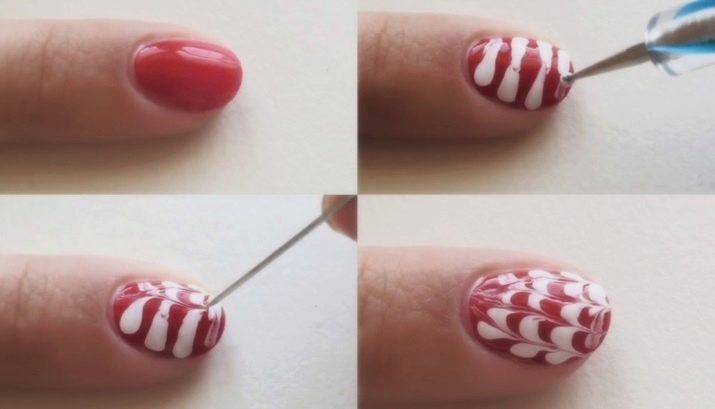
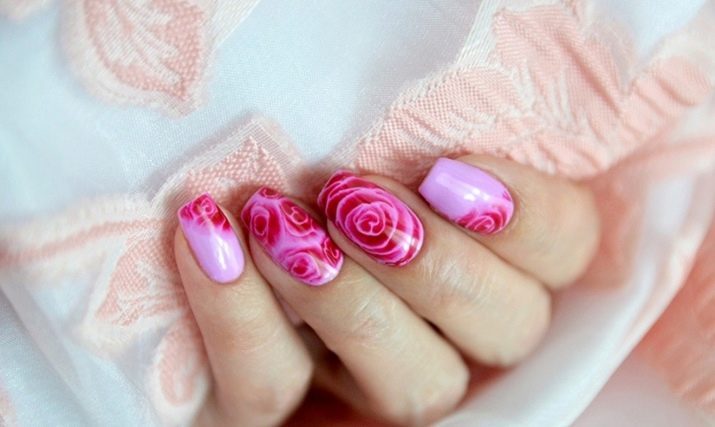
Learning to draw drawings correctly and aesthetically attractive, like nail service professionals, is within the power of every woman who has patience, accuracy and perseverance. Painting techniques may vary. For example, several techniques are relevant today: Chinese painting, mehendi, wet design, and watercolor painting. As for the latter, they use artistic watercolor for her and draw on a wet, rough basis.
For the wet version use special bases (white or transparent color) with flowering effect. Such drawings look masterpiece, and they are obtained from ordinary drawn stars and stripes. Delivered commas, following in a circle, instantly turn into a rose with a smooth transition of halftones. The lines are immediately converted to irises and lilies.
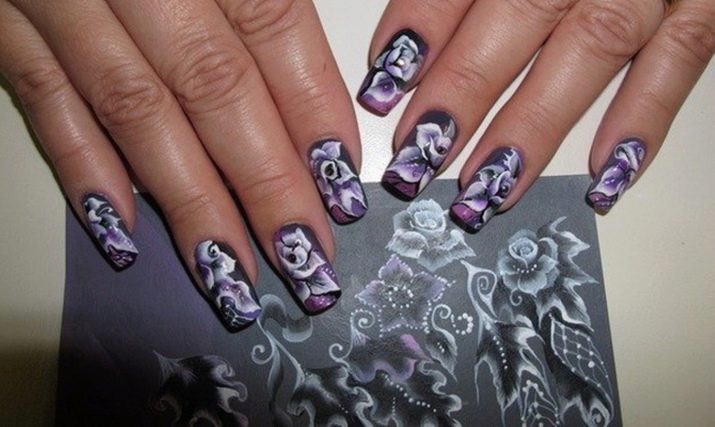
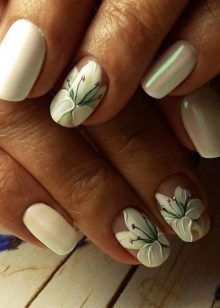
In Chinese painting, two contrasting paints are applied on both sides of a beveled brush. With one stroke, flower buds and open petals, as well as leaves, are formed. Such a pattern looks gently and effectively, as well as professionally. By this principle, you can draw different flowers, including lily, tulip, orchid.
Smooth lines are drawn with a brush with long hairs. Convex patterns are created with short-bristled brushes, as well as analogues of 20-30 hairs to create a light relief (for example, when you need to draw a gilded crown or monogram on an accented nail). Thin brushes (00) draw especially thin lines and small elements of the picture.
An interesting nuance is the fact that under some drawings it is necessary to perform under-painting beforehand.
Beautiful ideas
Drawing is a creative activity, and therefore it knows no boundaries. However, the images must be appropriate for a particular set.
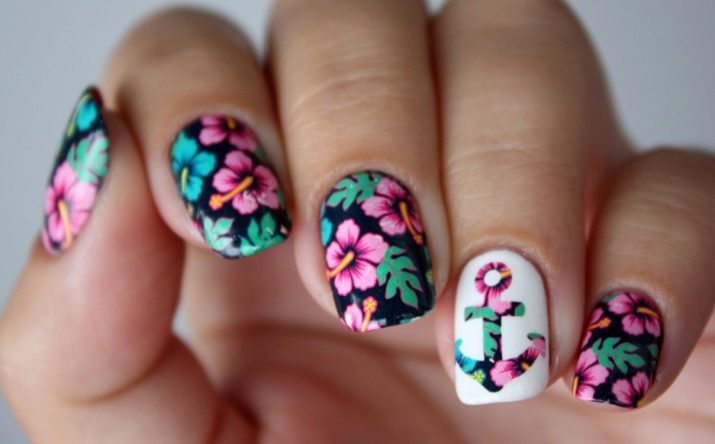
In the summer it can be flowers:
- Lilies
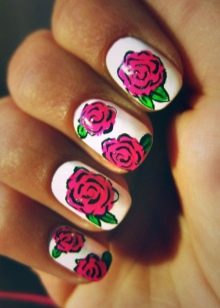
- roses;
- dandelions;
- daisies;
- poppies;
- irises.
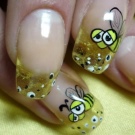
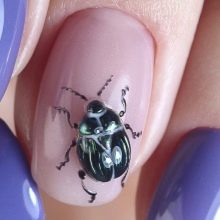
All kinds of insects will also be a good idea:
- May beetles;
- butterflies;
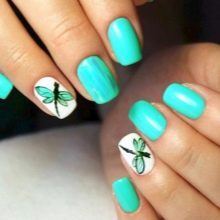
- dragonflies;
- spiders.
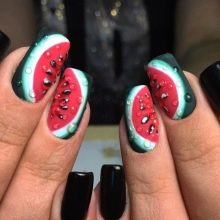
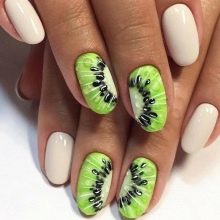
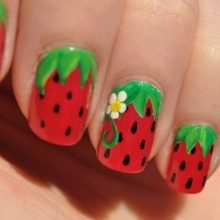
Different fruits look great in summer design, for example:
- Strawberry;
- slices of kiwi, apple, watermelon, lemon.
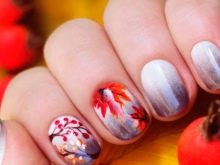
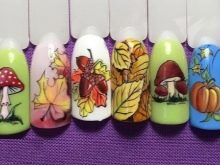
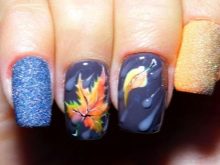
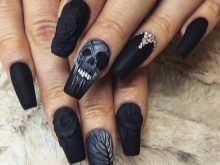
Autumn manicure can be decorated with colorful leaves, raindrops, drawings of berries, mushrooms. For an autumn Halloween set, you can draw a scorpion, ominous pumpkins, skulls, cobwebs and similar attributes.
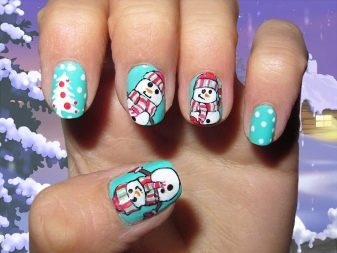
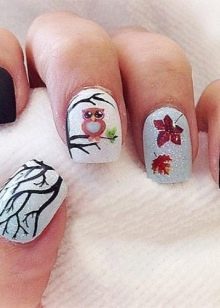
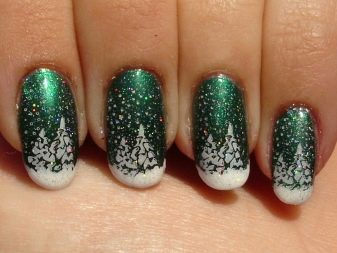
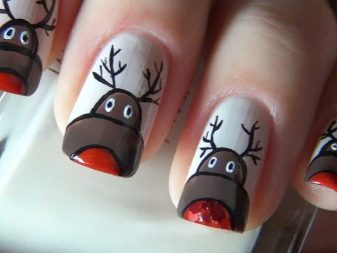
In winter, you can perform a voluminous design for a knitted texture, draw New Year's toys, fir branches with snow, deer, snowmen.
In spring, you can resort to floral themes.
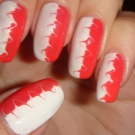
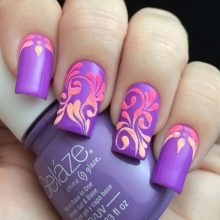
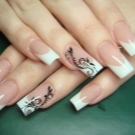
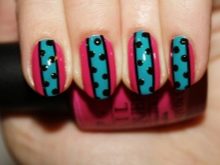
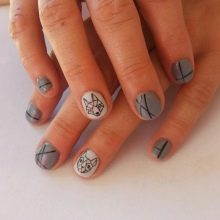
You can also draw geometric images on the nails. Elongated triangles, lines with dots on them and hollow geometric shapes, as well as animals drawn in geometric style are especially fashionable today. Fashionable ethnic patterns created by dots and lines.

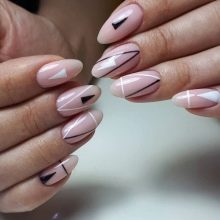
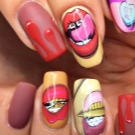
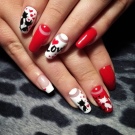
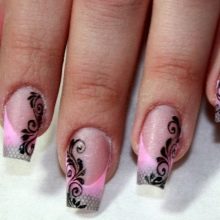
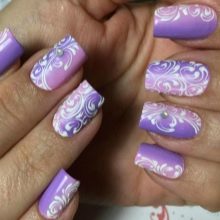
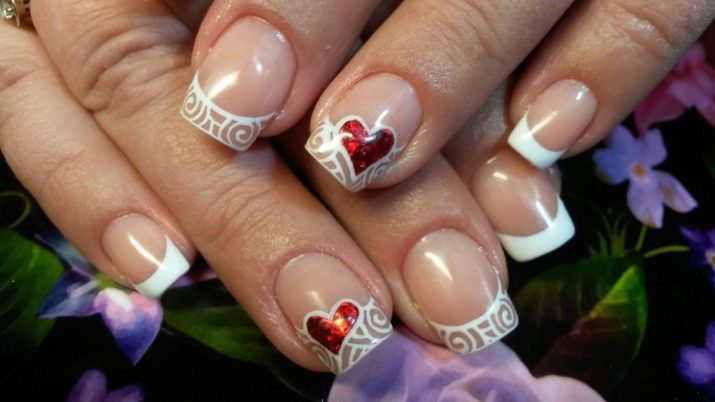
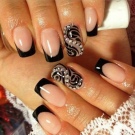
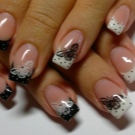
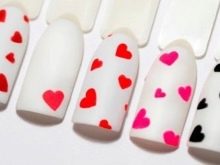
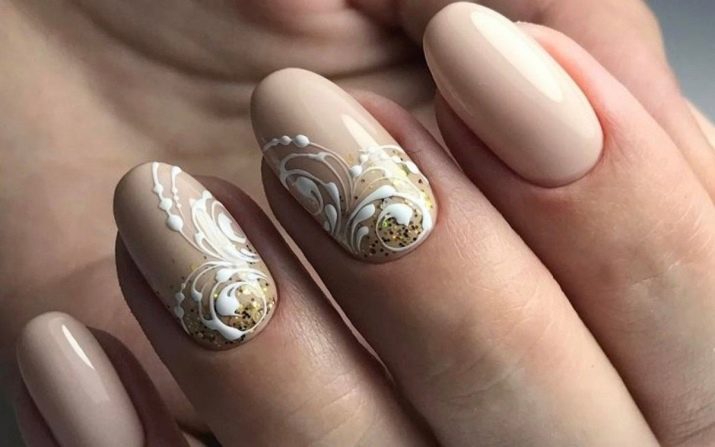
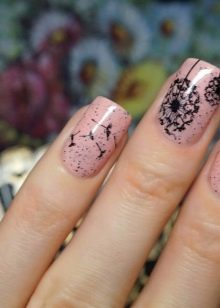
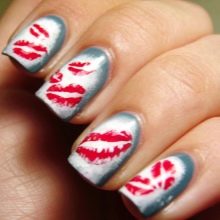
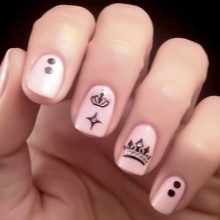
Incredibly popular are lace, monograms and voluminous flowers. Shells, bird feathers, eyes, crowns, lips, seals and hearts are relevant.
How to draw?
To make the figure convex, you need to make undermining. For example, for a gold crown, you will first have to apply a black outline to the drawing, and only after that you can apply gold paint on top of it.
If you plan to use a modeling gel, they will not have to draw as much as sculpt the image using a brush.
For these purposes, the material must first be applied with a drop on the nail and then wielded with a brush, modeling the shape.
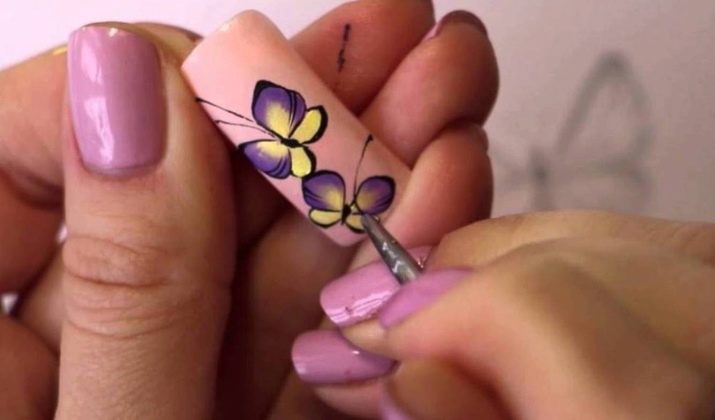
If you plan to make a flower, you will have to type a gel for each petal, laying it out in the right place and stretching it a little with a brush. You can take color gel. If you want to draw a rose on the whole nail, you need to perform a kind of spiral, picking up the gel and doing it petal by petal. When a butterfly is drawn, the accumulated mass is stretched with a brush. Such a manicure can be decorated with small rhinestones and broths.
To make a straight line, you need to pick up a liner (a brush with long hairs). Conduct it on the nail plate must be quickly and confidently. If you need a curved line, it must also be a single, quickly executed, without painting. Liners are very convenient in work, the typed paint falls on the nail evenly and evenly.
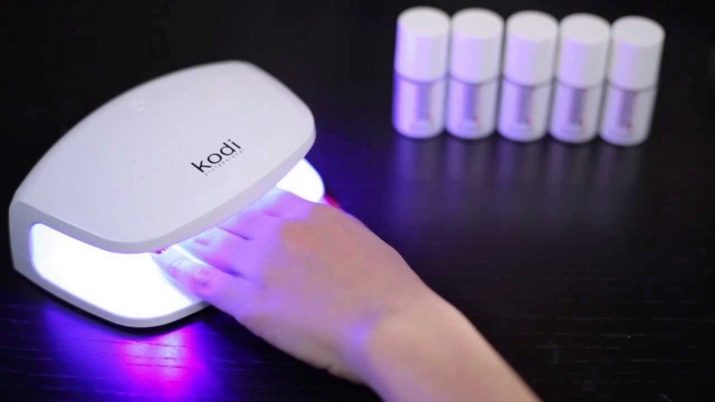
Any drawing has its own nuances of execution. For example, after each stage of drawing, you need to dry the design in a special lamp so that the paint does not smear into an incomprehensible color spot.
Consider the basics of creating multiple images.
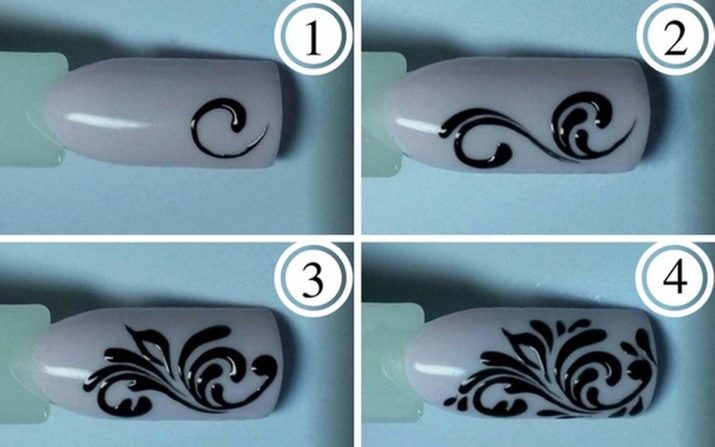
Curls
Curls of various kinds can decorate even the most concise manicure. At the same time, in order for them to look beautiful and professional, you will have to learn to use brushes with long hair. For thin lace, use 7 hair brushes. They draw paint on a brush, put it in the right place and draw a curved line. At the same time, a beautiful narrow droplet will be obtained at the beginning, and the line will end very thinly, which will make it possible to make various bouquets and interlacing from curls.
By this principle, you can create curls and spiral type. In addition, they can really be combined into a single pattern that extends over the entire area of the nail plate. After drying, the curls can be silver plated with silver lacquer. If you want to add volume to the painted lace, you can immediately after drawing sprinkle them with acrylic sugar and dry in a lamp. The design will turn out to be very beautiful and unusual.
If desired, it will be possible to decorate it with pebbles or broths.
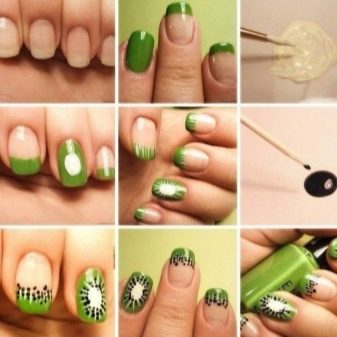
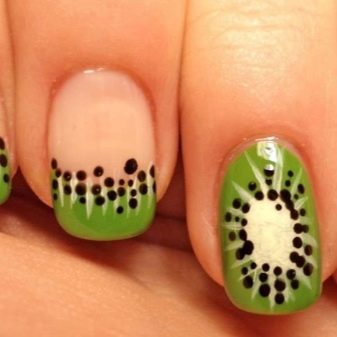
Fruits
Fruits can be drawn in different ways. Moreover, they look especially beautiful in a cut form. If you need to draw, for example, kiwi, first make a background substrate of green color.Then they take a brush with medium-length hair, dip it in white paint and draw the core of the fruit in the form of a semicircle. After the white paint is bred with a top and veins are drawn, drawing lines from the edge of the nail to the core.
Next, black paint is bred with a top and the veins between white are painted with it. Then they take the white pigment and, without spreading the top, paint the veins brighter. After that, black grains are placed in the dots, white glare is placed in them. They take the base and put drops with the help of the dots. After seal design.
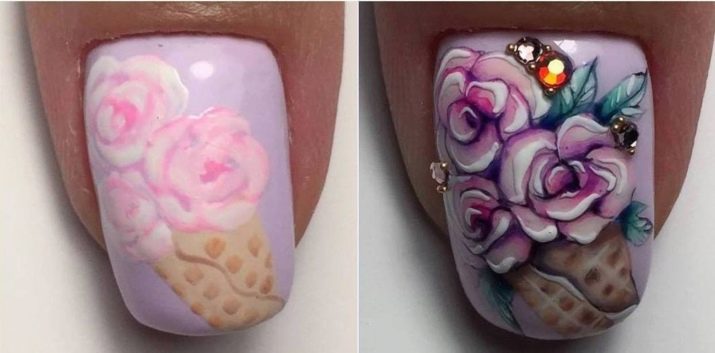
Flowers
Flowers made using the flowering technique look gorgeous. You can make them in just a couple of minutes. After staining the nail, a special base is applied to it with the effect of flowering (spreading). Immediately after that, a snowflake with six rays is drawn with a thin brush with an average length. In this case, each is withdrawn from the middle. For drawing, varnishes with a spreading effect or gels are used.
The drawing will spread, the lines will turn into petals in literally half a minute. As soon as the desired spreading result is achieved, the design is sent to the lamp. Then, another line is drawn between the petals, this time drawing them towards the middle. Again, wait until they spread and turn into petals, and immediately dried in a lamp. After that, it will only remain in some places to draw the contours of the petals with white paint.
In the middle, you can glue rhinestones or sparkling pebbles.
You will learn about how to draw flowers on marigolds from the next video.


