Undoubtedly, one of the most burning topics for girls and women has always been and most likely will be the topic of nail design. Today in the nail art market you can find a limitless variety of all kinds of variations, even for the most wayward lady. Among the most relevant is an ombre-style manicure that always looks special in an unusual way. However, in order to look beautiful and at the same time maximally correspond to modern trends, it is important to know some techniques and rules for combining colors. This article just gives answers to these questions, and also talks about how to make such a gradient manicure yourself and presents some of the most striking ideas of stylish ombre style nail design.
What is and how is it different from a gradient?
There are always things that, despite the rapid fashion movement, have not lost their relevance for many years. A classic and neat ombre manicure is one of them. Among the fair sex has long been a special sympathy for such a sophisticated, but at the same time very modern decor of nails.
The design technology itself is pretty simple. and is a smooth blending or transition of colors from one to another with blurry borders between them. This design of nails can also be called “stretching” or “gradient”.
It is worth noting that, however, there are differences between the ombre (from French - “dimming”) and the gradient.
If the first assumes flawless transitions of tones, then for the gradient the visible borders of colors that are completely different in palette are perfectly acceptable. To a greater extent, of course, the technology is the same, but qualified specialists will certainly tell about the difference between these types of manicure.

In addition, there are several more varieties of this design of nails.
Degrade means the transition from bright colors to paler or darker.
If you believe the historical data, the first to use the services of a personal master of manicure was the Egyptian queen Nefertiti. Moreover, it is she who is credited with the idea of gradient nail design. And although the materials in those days were very different from what it is customary to use for manicure today, excavations suggest that the queen used this decor - at the base of the nail the color was more saturated and gradually became paler.

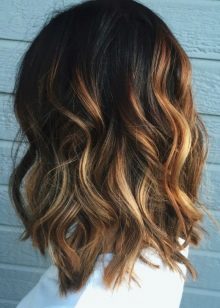
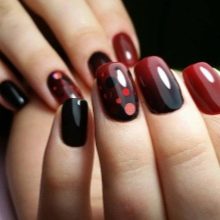
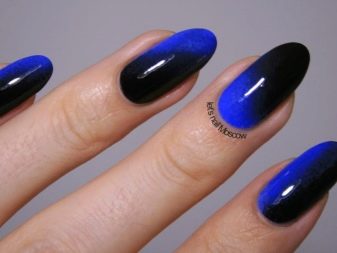
Nowadays, ombre manicure owes its popularity to the popular 80s actress Rihanna Daimond, who, at the Oscars, completed her bow with gradient nail art in the style of a gloomy vampire image. After which there was a boom in such a manicure. And then in the 2000s, this idea was adopted by hairdressers, inventing fashionable and stylish hair coloring of the same name.
Among the characteristic features of this type of manicure:
- universal combination with any shape and length of nails;
- the borders of blurring colors can pass both vertically, horizontally, and diagonally or from figure to figure, which greatly expands the scope for choosing the original decor;
- suitable for everyday manicure, and for a festive event, depending on the chosen color palette;
- the gamut of colors is possible and bright acid, and soft warm, and contrast;
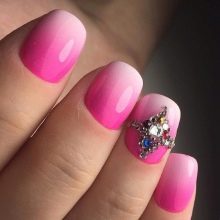
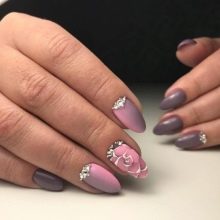
- Nail design can be complemented by decor in the form of rhinestones, sculpting, beads, drawings, etc .;
- It is possible to combine with various manicure techniques: French, lunar, metallic, etc.
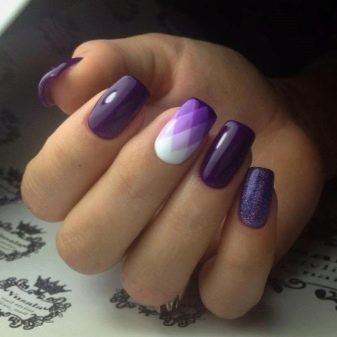
- gradient transition can be performed both on all nails and on one or two fingers;
- a winning option for short nails, since such a design visually extends the nail plate;
- the simplicity of technology allows you to independently make such a manicure, thereby saving on visiting salons;
- a thousand and one variations of the ombre manicure will allow you to choose the most optimal option in accordance with the desires and purpose.

With all the many positive characteristics, although minor, but still disadvantages are distinguished.
- Ombre coating involves a long application process, so if it was decided to stay on this decor, you should be patient and have free time.
- The selection of colors and textures for the transition is extremely time-consuming.
For the first time, it is recommended that you still seek the advice of specialists or familiarize yourself with the rules for direct color combinations, which will be given below.
Carefully approach the issue of choosing decorative elements with which there is also a danger of overdoing it. Then, no matter how neat the manicure is, he will lose all his charm due to, for example, lurid rhinestones or huge flowers.
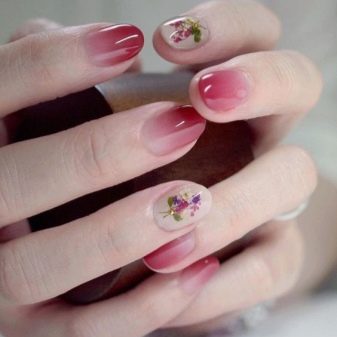
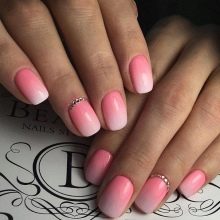
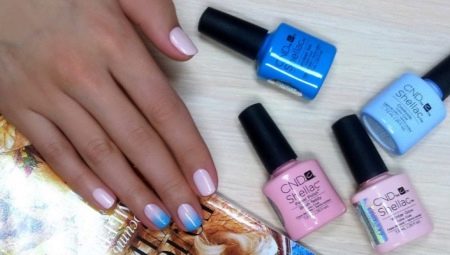
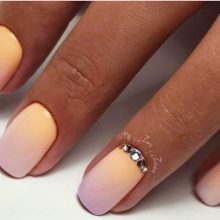
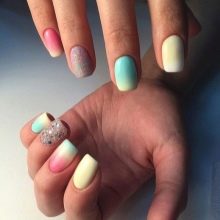
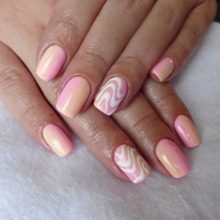
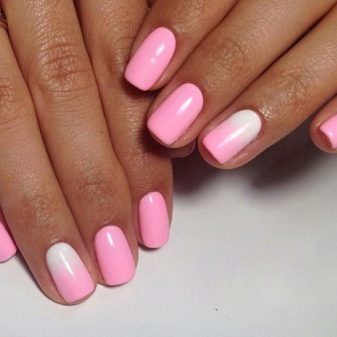
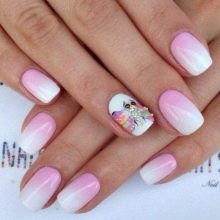
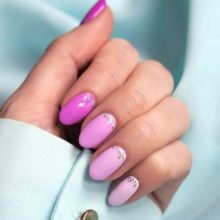
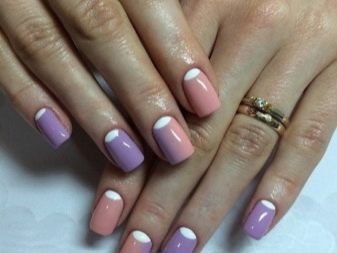
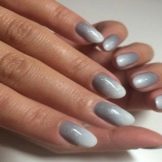
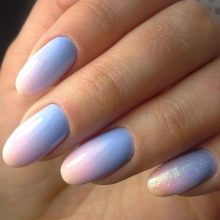
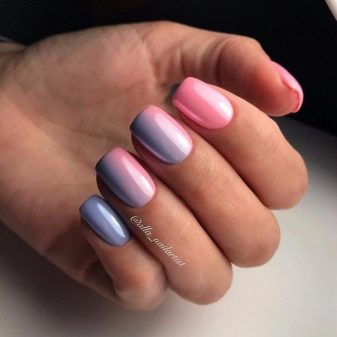
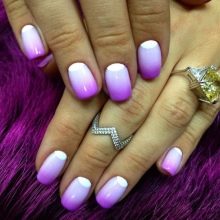
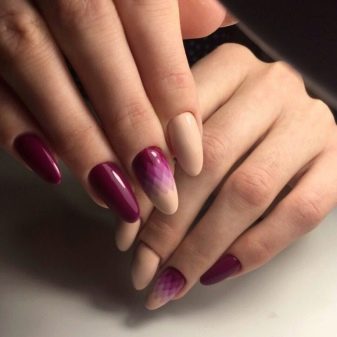
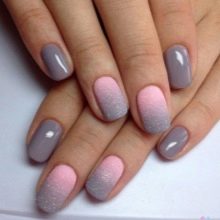
The classic ombre manicure is characterized by calm pastel colors, among which beige, soft pink, peach and others in this gamut. It is noteworthy that even such a seemingly gentle manicure can be combined with brighter shades. The main thing is to choose the right color palette.
Of course, the gradient on long nails looks more spectacular. This form will expand the variety of colors. For short, it is optimal to stay on two varnishes so that the manicure looks more neat.
Fashion trends
Modern manicure can rightfully be considered a whole art with all the variety of methods and ways of its execution. Specialists of the fashion world declare the democratic requirements of the current season for the design of marigolds. Today, the trend is creativity and originality, but at the same time succinctly combined with accuracy and naturalness.
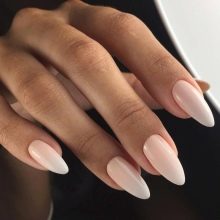
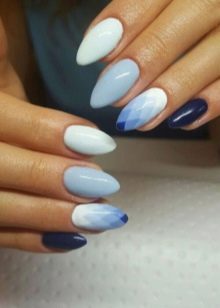
And if there are still certain requirements to the shape and length of the nails, then there will be few of them in terms of color. Oval and almond-shaped nails with a length of 3-5 mm are not only the most natural, but also relevant for this season.

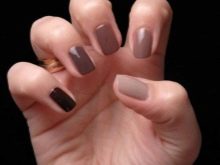
Regarding the range of shades, preference is given to laid-back nude tones. Among such solutions, one can consider a light gradient transition from a beige-milky shade to a tone of coffee with milk or cocoa. For contrast, such a palette can be combined with a varnish shade of dark chocolate.
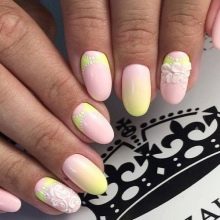
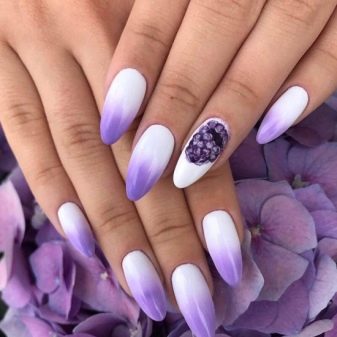
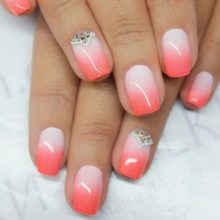
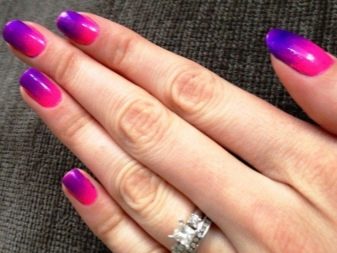
In the trend, of course, are other light-tender shades. Bright and effective ombre in such a palette will turn out when adding saturated berry flowers. Among such fashionable nail designs is a combination of delicate peach and juicy plum or cherry.
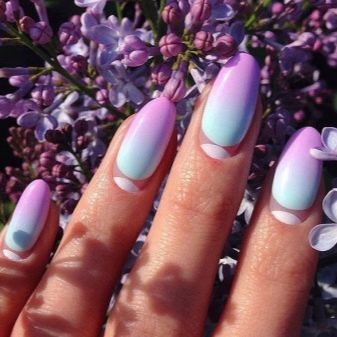
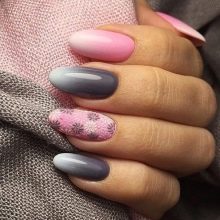
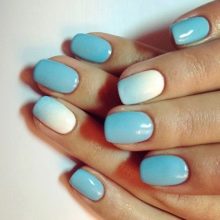
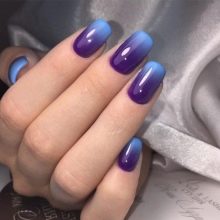
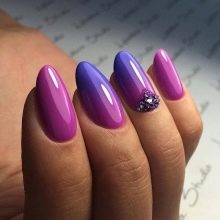
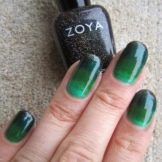
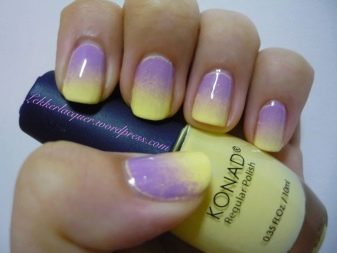
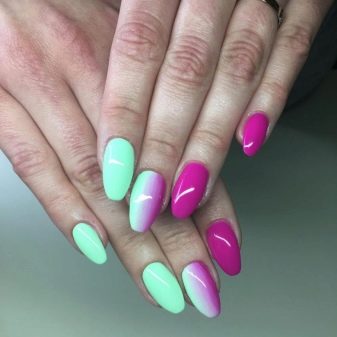
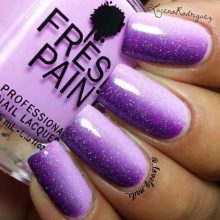
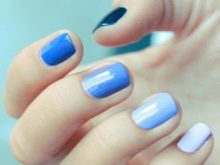
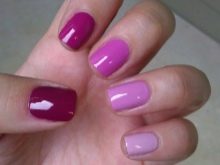
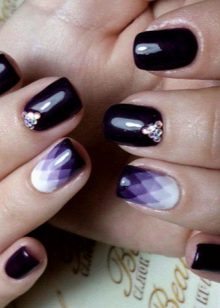
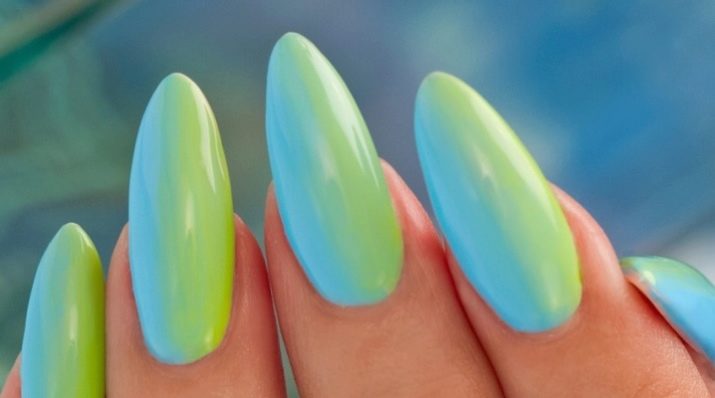
Beauty experts are also advised to use the same color scheme for ombre manicure. Dark violet can be combined with pale purple, and light mint can be translated into coniferous green.
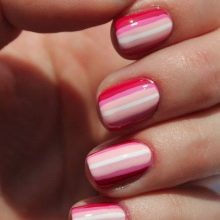
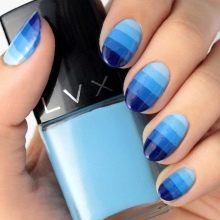
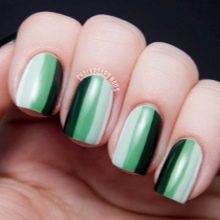
Another recommendation is a linear ombre manicure. For him, a palette of one color scheme from 6-8 shades is selected. It is noteworthy that the transitions with this design are not made smooth - the borders from color to color are preserved.
And each subsequent strip is applied from the lightest and most tender to the most saturated of the entire palette.
Despite all the fashion trends, it is more important to choose a manicure and color scheme in accordance with your own preferences and desires, while observing a sense of proportion.
Several options for the most fashionable ombre manicure.
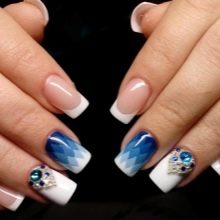
- Combination of airbrushing ombre with french design. It is possible to add patterns and several rhinestones to one or two nails.
- The vertical ombre in combination with the lunar design effect looks very advantageous and stylish.
- Ombre manicure rubbed with pigments. This design is applied to a pre-made stretch, after drying of which pigment is driven in with a brush.
- Acrylic powder in an ombre manicure is one of the popular options.
Design
The effectiveness and attractiveness of the result will depend on how carefully the design is thought out. Tasks to be solved before the direct implementation of the ombre manicure:
- choice of colors;
- location on the nail plate;
- selection of texture options;
- whether decorative elements will be used.
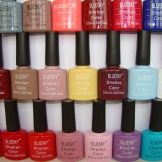
First you need to deal with the base color palette. Manicure specialists advise to choose yellow, blue, red, green colors for nail design, and to expand them with a mix of black and white varnishes to expand the palette of shades.
In addition, the type of shade is of great importance. Distinguish between warm, cold and neutral.
Warm ones are represented by a range of red shades.
Among the cold - a palette of purple, blue, green and their shades.
Brown, nude or gray colors are neutral.
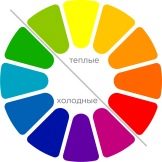
You can combine with each other both cold and warm colors, and individually. It is important that the selected color is fully combined with the intended look, make-up and accessories. To do this, you must take into account the rules for combining the color palette, which is already spelled out in a special shade table.
Another danger is busting with decorative elements, which even taking into account compliance with all the norms and rules of color combination can spoil the appearance of nails.
Then, taking into account the rules for combining colors, the colors of the future manicure are combined. There is also a division of technology.
For monochrome combination, shades of one color scheme are characteristic. For ombre, this is a classic option. In this case, you can use about 2-5 colors.
For example, orange goes well with brown, lilac - in combination with lilac.

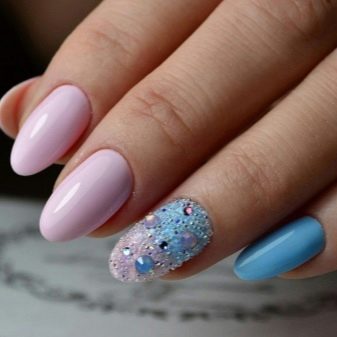
The achromatic appearance is distinguished by the basis of a white or black varnish coating, on top of which a more saturated shade is applied. It can be bright red, blue, mint, which is applied over a nude, white, gray or black base color.
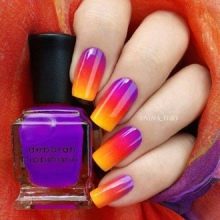
Another variety of color combinations is the complementary type. It is a contrast of two colors in one key. An example is the transitions from bright yellow varnish and purple. Among the popular combinations are coral with turquoise, green in combination with red.

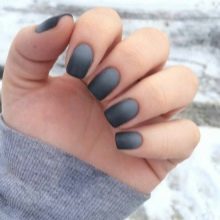
In addition, a combination of textures can also be attributed to such a variety of types of manicure. The complementary design technique can be presented as combinations with a mother-of-pearl, matte or cream coating.
The three-color type speaks for itself by its name. This is a combination of three different colors. At the same time, such a somewhat extraordinary combination with the skillful choice of gamma creates a harmonious and vivid contrast. An example is transitions from red, blue, and orange or yellow.

For a competent combination of shades in manicure, you can use special tables that will certainly tell a fashionable and sophisticated combination for manicure.
The technique of directly arranging flowers on a nail plate in an ombre manicure is also diverse, thereby expanding the space even further to find the optimal design. Depending on this feature, such gradient positions are distinguished.
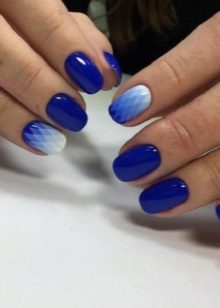
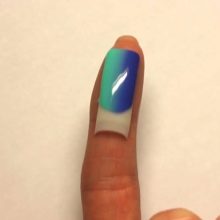
Vertical transition
This gradient stretching is carried out vertically from the base of the nail to the opposite edge from top to bottom. It is considered one of the simplest methods for creating an ombre manicure, as it greatly simplifies the process of shading.
Varnishes for such a gradient manicure should not be very thick, but at the same time not very liquid. It will be much easier to work with such material, and the result will be more accurate.

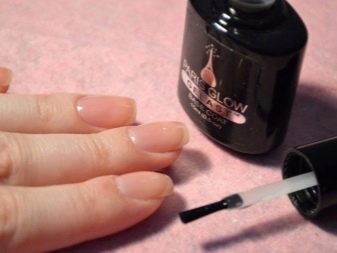
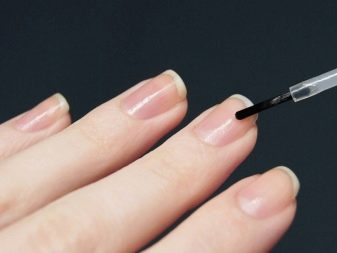
To apply a vertical gradient to the nail surface, the following materials are needed:
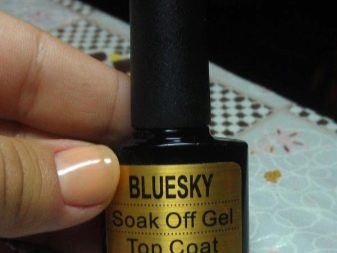
- top and base for varnish;
- varnishes of the selected palette;
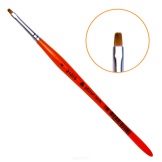
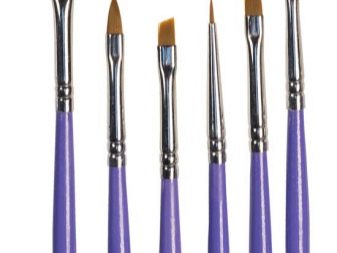
- brush (flat);
- place for mixing varnishes (palette).
You can make a vertical ombre yourself like this:
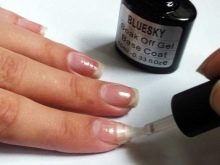
- coating the nail with a base for varnish;
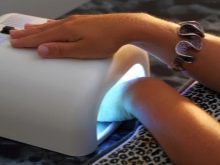
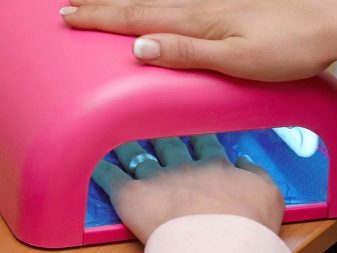
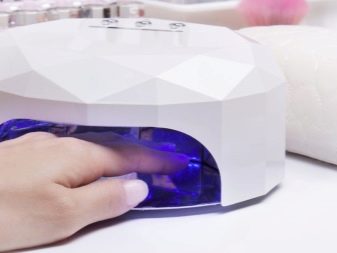
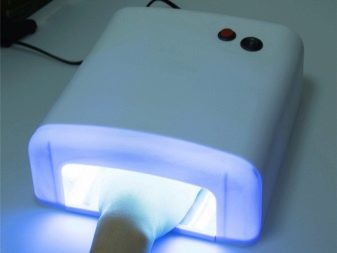
- drying with an ultraviolet lamp;
- you need to alternately dip the corners of a special brush in the desired color of the varnishes;
- heading from bottom to top, draw a brush along the central part of the nail plate so that the colors mix;
- dry in an ultraviolet lamp;
- repeat several times;
- to cover with a protective colorless varnish.
In this way, you can decorate both one and all nails. Moreover, the color palette may be different on different nails.
The main thing is that this combination is harmoniously combined.
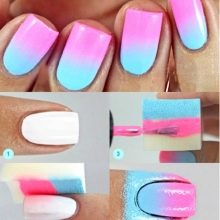
Horizontal transition
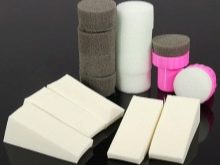
This method is somewhat more complicated than a vertical gradient manicure. To perform an ombre, you can use a brush, sponge or sponge. In accordance with this, the technology of applying the varnish coating on the nail plate also differs, one of which allows you to make transitions smoother, rather than sharp. Such a gradient stretch is provided by applying varnish to the surface of the nail with a sponge or sponge.
To implement such a horizontal ombre manicure, you must perform such actions.
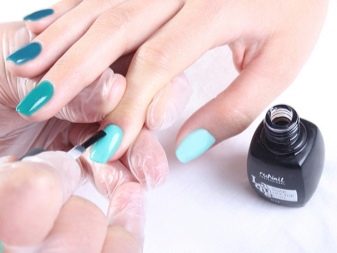
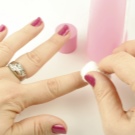
- Apply a special product to the skin of the fingers and cuticle, which prevents varnish from entering the areas outside the nail plate. After completion of the coating procedure, this agent is easily removed at the edge of the film.
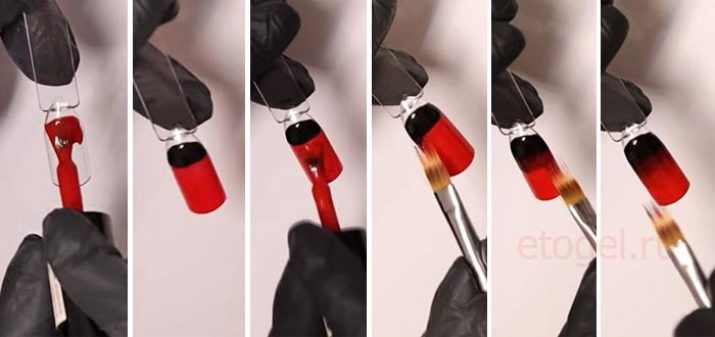
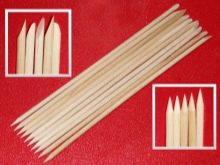
- Specially selected varnishes with an orange stick mix a little at the borders, thereby forming smooth transitions.
- Then a sponge or sponge is lowered into the mixture of colors.
- Next, the sponge is transferred to the already prepared nails and blotted with a soaking motion on the nail plate.
- Ready shading is dried under an ultraviolet lamp.
- The procedure is repeated again.
- A top or protective varnish is applied to the horizontal ombre.
Another horizontal design technique involves using a brush. However, it is worth remembering that the boundaries of such a manicure are more noticeable.
Diagonal gradient manicure
If there is already a practice with vertical and horizontal transitions in an ombre manicure, then this option for nail design does not seem difficult. The principle itself remains the same, the only moment - the nail is now divided into sectors diagonally depending on the number of shades. A manicure is performed using the same sponge and brush, applying and blending smooth transitions between colors. This decor looks unusual and attractive.
Gradient all over the hand
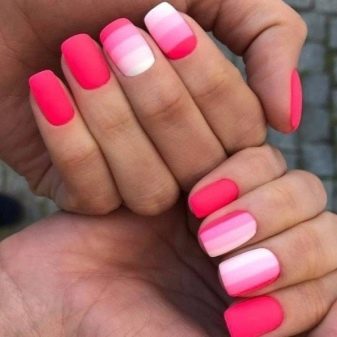
This technology consists in coating each subsequent surface of the nail with varnish darker or, conversely, lighter than the previous finger. At the same time, the process of selecting and mixing colors is laborious.
Moreover, it is important not to forget that on both hands the shades should coincide symmetrically.
You can embody such a decor on your hands.
- Coat the nail plates with a base and dry using a UV lamp.
- Choose a varnish coating of the desired shade.
- Apply the darkest varnish to the thumbs.
- To prepare a lighter shade for the next nail, use the toothpick to mix the original shade and a drop of white on the palette. Quickly apply it on the nail plate until it is dry.
- The procedure is then repeated, adding one drop more for each subsequent nail in the original color.
- Apply a fixing coat and dry.
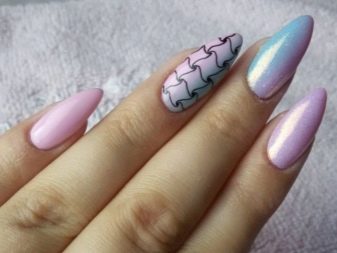
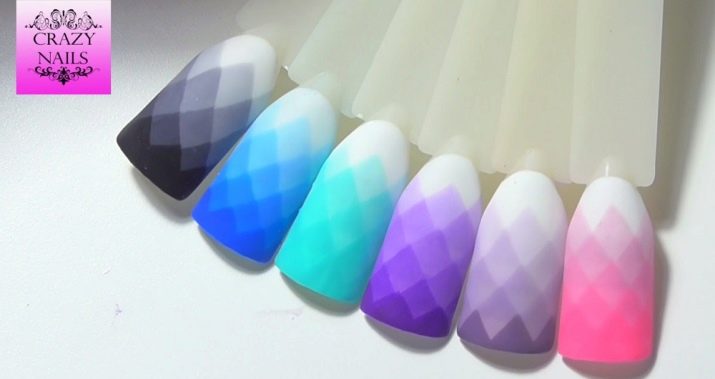
Geometric gradient
A peculiar and not so often used version of the ombre technique. Transitions of shades with this design are carried out from one geometric figure to another.
A notable feature of the manicure is the presence of clear, unshaded borders between the elements. It is recommended to try to execute it on the sketch before starting the painting.
The method of applying geometric ombre manicure.
- Preparation of plate surfaces and base coating.
- Drying in a UV lamp.
- White nail polish.
- Next, you need to mix in the palette the varnish of the desired shade with white drop by drop of each and with the help of a brush depict a small geometric figure, starting from the cuticle. Run the entire row along the base in a similar way, painting over the elements with the resulting shade.
- For the next row, the white coating is already mixed with two drops of colored varnish, forming a new shade, which is applied to the nail by the same principle.
- Subsequent actions occur according to the same scheme, adding color varnish one drop more each time.
- For the extreme row, the original non-mixed colored varnish is used.
- The surfaces of the nails are dried under the lamp and covered with a colorless protective varnish.

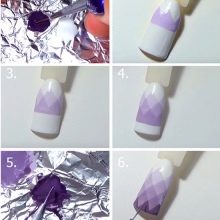
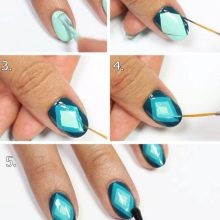
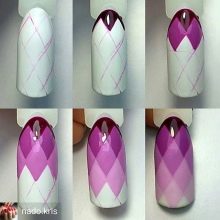
As geometric figures for manicure, you can use triangles, rhombuses and other figures.
Behind such a laborious and lengthy process is a spectacular and truly original looking manicure.

Instruments
A set of tools is very important for a quality ombre manicure.
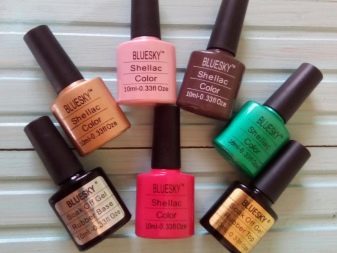
- Varnishes of one color palette (several pieces) and preferably white varnish.
- Thin and flat brushes.
- Base coverage.
- Fixing colorless varnish.
- A few toothpicks or orange sticks.
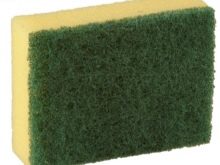
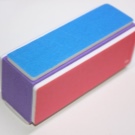
- Sponge or small sponge for blending transitions between shades of varnish. You can use a sponge to wash dishes, but it is recommended to moisten it before use.
Gradients made using sponge are smoother due to its density.
- Cotton pads.
- A palette serving as a place for mixing varnish coatings. You can use a plastic cover, a small saucer, or a piece of paper.
- Nail polish remover.
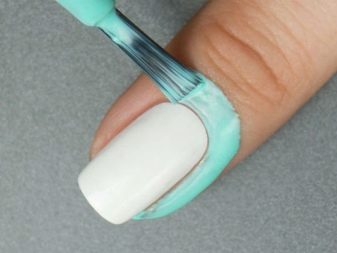
- Cuticle protector or PVA glue. It allows you to protect the cuticle and the skin around the nail from excessive pollution from varnish. The product must be applied in a thick layer and, after the end of the manicure, carefully removed along with excess varnish.
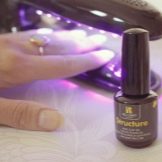
- Ultraviolet or LED lamp for drying gel polish.

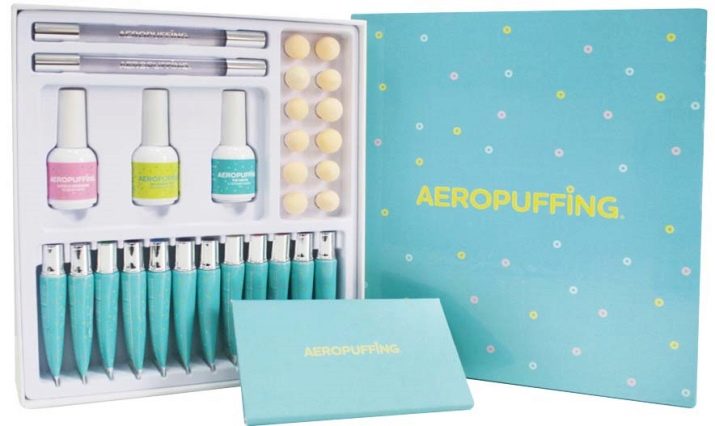
An optional, but convenient tool for performing gradient nail designs is an air -uffing kit. With this kit you can create volumetric images and spectacular gradients. The secret of the set lies in a special device - a stylus in the form of a pen, to which a variety of sponges are installed (round or teardrop-shaped). Due to the fact that the device is two-sided, several colors can be used simultaneously, which is very convenient for this type of manicure. The kit also includes a variety of stencils.
How is it done?
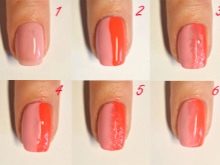
From the above numerous types of design it is clear that there are a lot of options for performing ombre manicure. The step-by-step instruction of one of these methods involves the following actions.
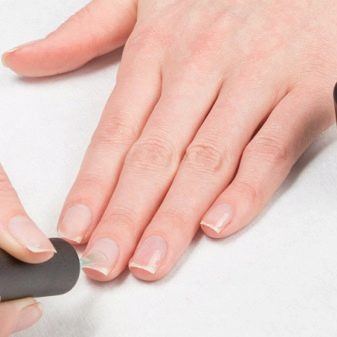
- Prepare the surface of the nails by removing the previous coating and adjusting the shape.
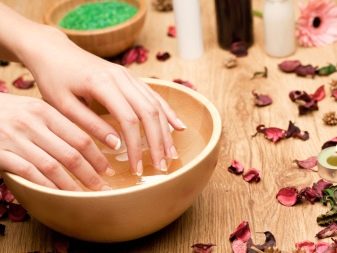
- Remove the cuticle by first steaming the nails in a hot bath.
- Apply a base coat of the selected color (often light). The shade brightness directly depends on the number of layers.
- Separately, mix the desired shades in the palette, placing a darker color at the end, which, due to the fact that it is applied to the tip of the nail, will visually give an additional length.
- Using a toothpick or brush, gently mix the borders of varnishes of different colors. This stage must be carried out extremely carefully to avoid sudden transitions.
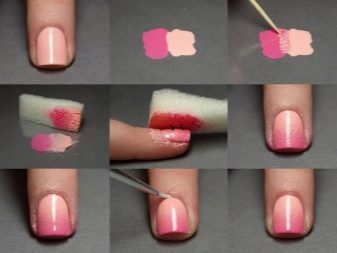
- If a sponge is used, then moisten it and, having soaked in a palette with mixed varnishes, transfer it to the surface of the nail with a few patting movements. It is not recommended to strongly press the sponge to the nail plate, as it absorbs all the varnish.
- Repeat for each nail.
- Before the varnish completely dries on the surface of the nail, it is important to cover them with colorless varnish, which will smooth out all the bumps from the sponge.
- The last, but no less important stage is drying. Experts advise using a UV lamp or at least special sprays. If such options disappear, you can use ordinary cold water, into which hands fall. This action will reduce the drying process of the varnish.
- If after the manicure procedure there is a trace of a colored coating, it is recommended to remove it with a nail polish remover and sticks.
However, from the very beginning it will be most rational to use a tool that protects the cuticle, or an ordinary adhesive tape, which can be used to glue the areas around the nail.
The technique for performing the following method, although not very different from the previous one, has its own characteristics. It involves mixing varnish not on the palette, but already directly on the sponge or sponge itself. Among the disadvantages of this technique is the speed of drying the varnish on the sponge is much faster than using a palette, so after 2-3 nails the procedure will need to be repeated.
To brush the borders, the already varnished sponge can be lightly applied to the paper or palette.
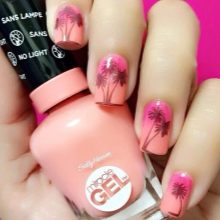
After the main part of the gradient manicure is done, it is possible to supplement it with drawings, give a matte effect, use rhinestones or voluminous figures.
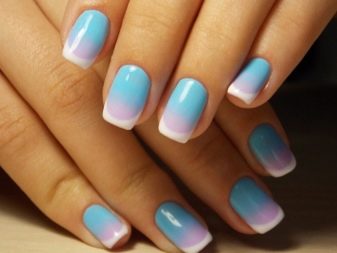
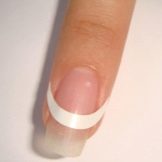
French-style ombre works especially well on long nails. The gradient in this case is located on the tip of the nail plate, so it will be more accurate to use the option of vertical color transition. To perform a manicure, you must:
- cover the nail with a base or special light varnish for a French coat;
- wait until the varnish dries;
- stick special stencils on each nail;
- separately on the palette or on the sponge with the help of a thin brush, strips of the necessary colors are applied;
- carefully transfer strips of varnish to the tip of the nail, without going beyond the boundaries of the stencil and placing them vertically;
- the procedure can be repeated several times, so that the manicure will become more saturated;
- coat all with protective varnish.
Such a gentle manicure will look very original and feminine.
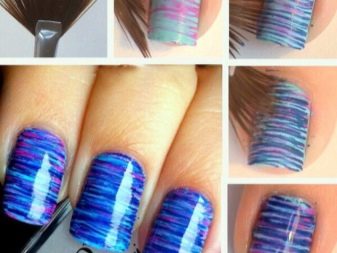
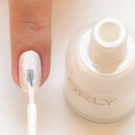
If you still don’t have a sponge or sponge at hand, you can use a brush with a rare pile on the tip. The smoothness of the color transitions on the nail plates depends on how tight the brush is. A way to carry out such designs for manicure.
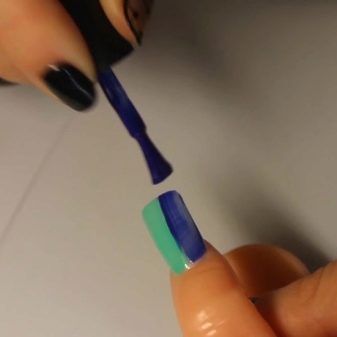
- After applying a transparent base double layer, dry the nails under ultraviolet. Pre-select a combination of colored varnishes.
- Apply a thin layer of the first on one half of the nail plate, moving vertically from the cuticle to the free part of the nail. Repeat the procedure with a second shade, covering the second part of the nail.
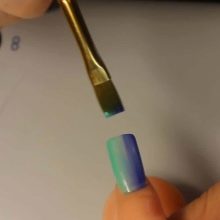
- Using a flat brush, make a vertical extension and connect the colors. The smoothness and lightness in the movements of the brush is important, and you need to hold it almost parallel to the surface of the nail. Before creating a gradient, the brush can be slightly moistened in the clincer.
- After the area with the shaded varnish becomes softer, you can dry your nails in a UV lamp.
- Repeat the process of applying varnish and creating a gradient with a second layer.

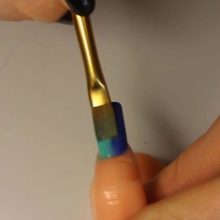
After each step, it is recommended to clean the brush from varnish using a lint-free cloth. If you want the color to look as saturated as possible, you need to cover the nails with a third layer.
Finish the manicure should be a protective varnish.
In addition to a thin brush, you can use a fan. Accordingly, the effect will turn out to be different in the end. Work order:
- prepare the base coverage;
- one of the colored varnishes is applied to the upper part of the nail in the interval from the cuticle to the middle of the nail or slightly higher;
- the second shade of varnish is for the remaining half of the nail;
- after the varnish is slightly dry, with light movements horizontally from one side of the nail to the other, shade the transitions between the varnishes;
- repeat the action by applying several layers;
- fix everything with a colorless coating and dry the result.
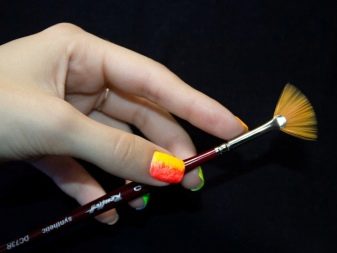

Among the dangers of this method of performing manicure there is also the possibility of strongly pressing the brush on the varnish.
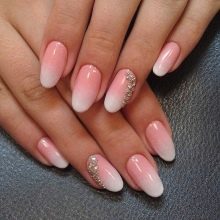
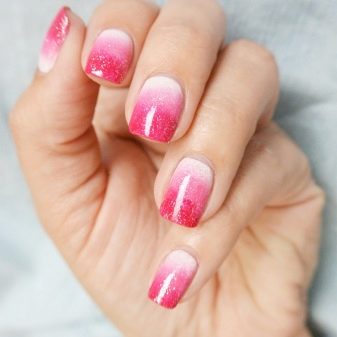
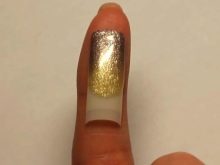
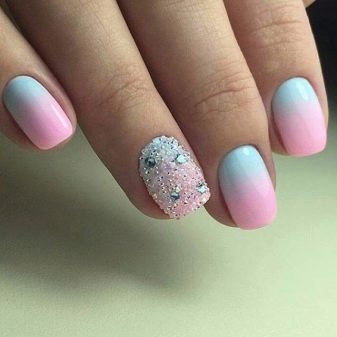
Among the options for applying ombre, one of the most festive and bright is the way to perform a gradient transition using sparkles.
The sequence of actions for such a manicure.
- Prepare the surface of the plates for applying varnish and cover them with a base, and then dry them under ultraviolet rays.
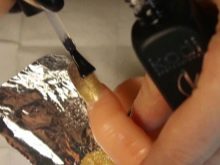
- The selected shade of varnish is applied in two layers and dried again.
- Such decor is possible with the use of both dry spangles mixed for manicure with a top, and already finished varnish with sparkles. They are applied to the area from the cuticle to almost the middle of the nail plate.
- For the remaining uncovered part of the nail, a simple glossy top is used.
- Using parallel movements of the nail with a thin brush, you need to carefully stretch the spangles from the base of the nail to the edge, without overdoing the transition.
- Coat painted nails with a protective varnish.
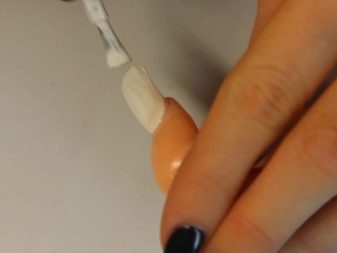
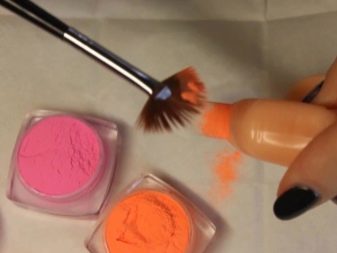
In addition to sparkles, for gradient manicure, you can use acrylic powder in various shades. Application Method:
- perform a basic coating (recommended in two layers; usually white lacquer is used for this);
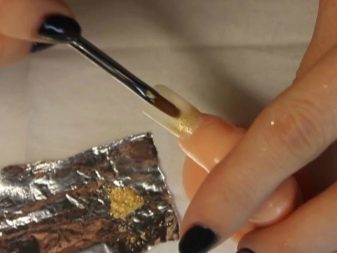
- dipping a special brush in the desired shade of powder, apply it on the nail plate in the part near the cuticle;
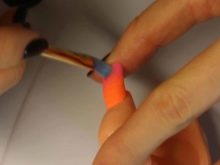
- slightly overlapping, repeat the action with a different shade, covering the area a little lower;
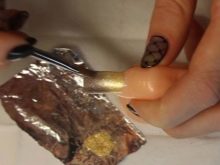
- Feather the transition between shades of powder by vertical movements of the brush from the cuticle to the free part of the plate;
- remove excess powder;
- fix with a protective varnish and dry in a lamp.
Among the distinguishing features of this design of manicure can be noted airiness and romance.
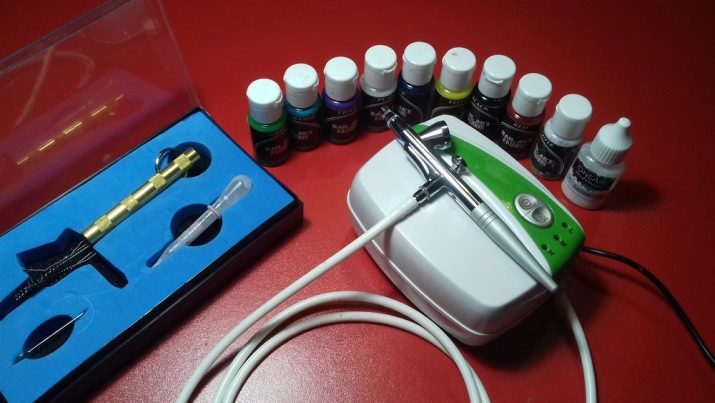
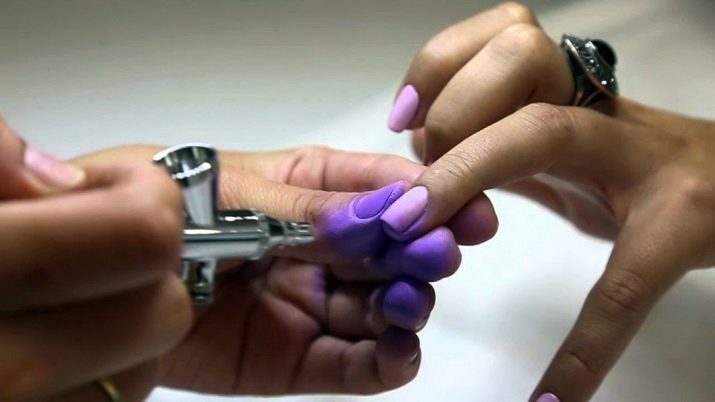
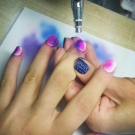
Custom design for manicure in a gradient style can be implemented using the so-called airbrush device. The machine is a special spray gun, shaped like a pen. Various nozzles of various sizes are put on the airbrush - nozzles that determine the extent of spraying.
For gradient design using such a device, nozzles with sizes of 0.2 and 0.4 are suitable.
After use, the airbrush must be cleaned. For this, special brushes are used. It is also necessary to prepare special paints for a typewriter, a primer, a special base base and color dyes for the complete set for airbrush design.
Instructions for creating a gradient design using an airbrush:
- prepare the nails;
- apply the main coat and dry in UV rays;
- cover with a basic shade;
- dry the surface of the nails;
- apply top and after drying remove the sticky layer;
- using a buff, lightly clean the nail plate with the top;
- spray on the nail plate, heading towards the center from the free edge;
- using an airbrush, dry the coating;
- after drying, use a buff to clean off excess paint on the cuts of the nail;
- walk with a primer along the zones of the sides and sections of the free edge of the nail plate;
- touch up the chipped nails after using the buff, using a white gel polish, and then remember to dry everything under the lamp again;
- finally apply several layers of the top and after drying remove the sticky part along with the paint around the nails.

If desired, such a manicure design can be combined with rhinestones and voluminous figures. The main thing is not to overdo it, since this manicure already looks very impressive.
Before using an airbrush, you need to check its work on paper.
It is also worth noting some of the secrets of high-quality homemade manicure with your own hands.
- Good care plays a key role in the appearance of nails. A variety of therapeutic baths and nourishing creams will prevent their fragility and lamination. In addition, so that the nails are in perfect condition, it is important to follow some recommendations of specialists regarding the removal of varnish, hygienic manicure, compliance with shape and length.
- It is recommended to wash the usual coating with a nail polish remover, not containing acetone.
For gel polish, the situation is slightly different, therefore, before removing it, it is better to first study the possible ways of doing this and choose the most optimal one.
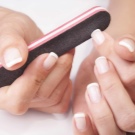
- The ideal shape and length of the nails is attached using a nail file and buff. Among all the variety of forms in this area, there are trends. Today there is a greater interest in the moderate length and rounded shape of the nails.
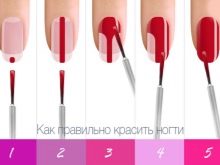
- Apply varnish very carefully. Moreover, experts advise after each next nail to get varnish from the bottle. And the painting itself should begin a few millimeters from the border of the cuticle and move to the free edge. It is recommended to apply varnish in three strokes - first the middle, then the edges. The second layer will give the manicure saturation.
- At home, it is very convenient to experiment with the decor, so do not be afraid to use rhinestones, stickers and other elements.
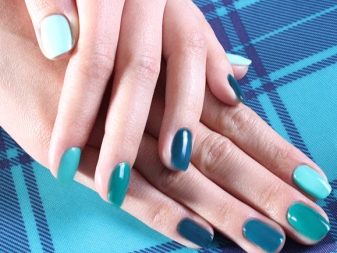
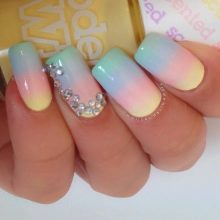
Beautiful options
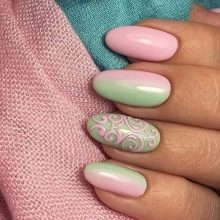
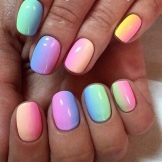
Options for a classic ombre manicure design.
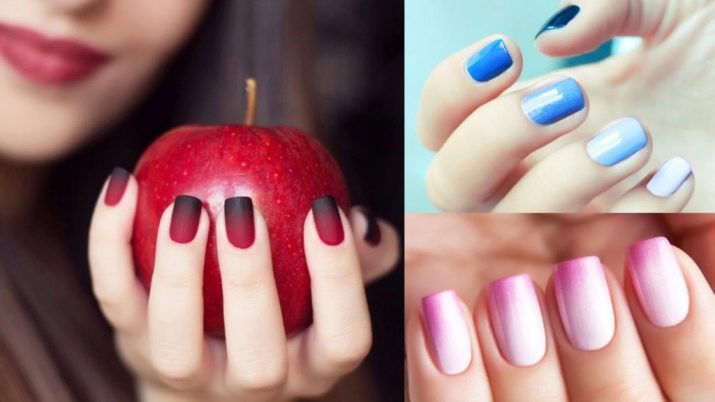
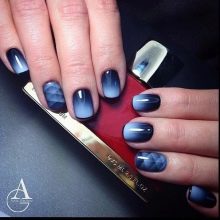
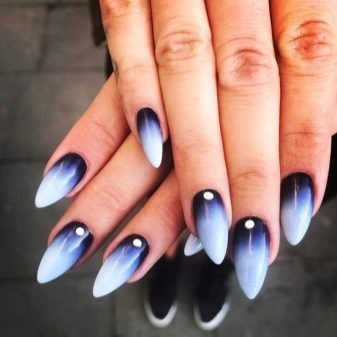
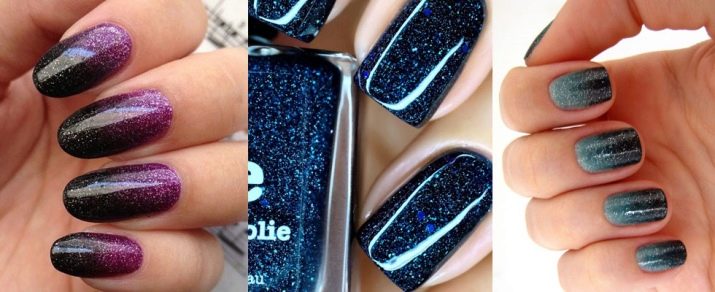
A gradient in the style of the starry sky will give the image of festivity and mystery.
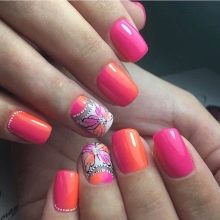
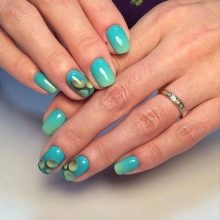
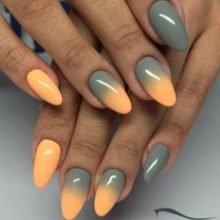
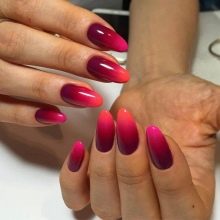
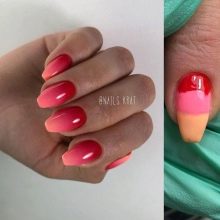
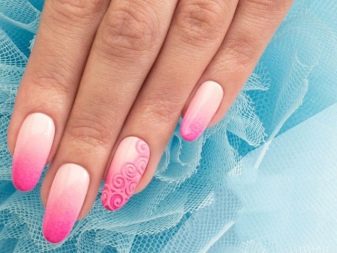
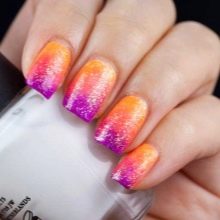
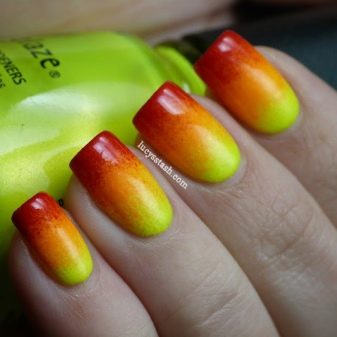
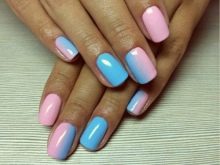
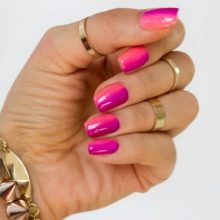
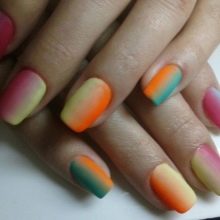
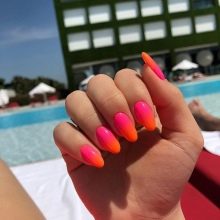
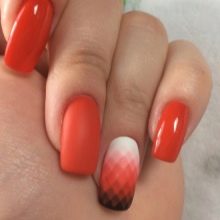
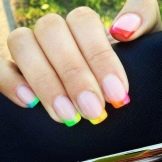
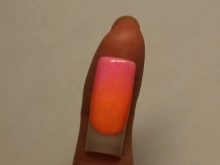
A vibrant summer ombre made using the vertical transition technique is an excellent option for the summer season.
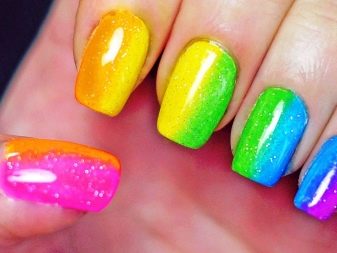
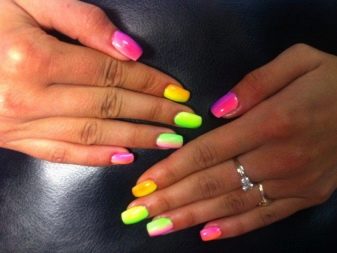
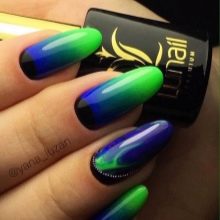
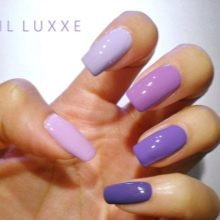
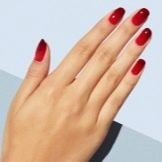
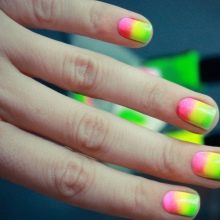
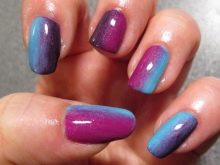
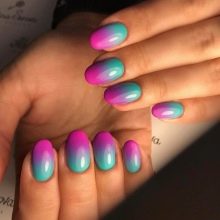
Intense pigmentation gradient manicure.

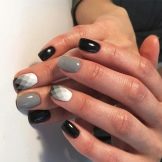
Neat geometric ombre.
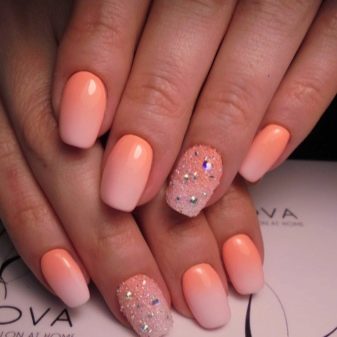
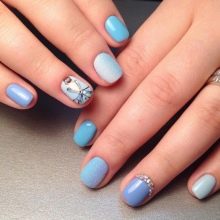
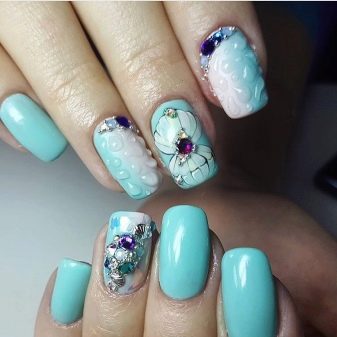
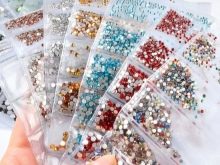
Decor rhinestones on the background of a gentle ombre manicure.
See how to make a perfect gradient (ombre) on nails in the next video.


