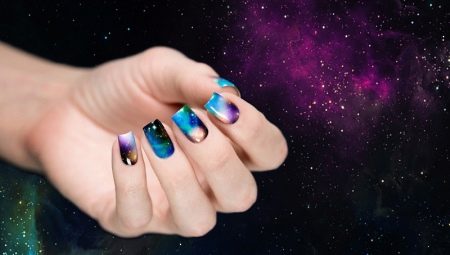
"Cosmic" manicure. What associations arise when you hear this? “Awesome”, “bombing”, “bombing” and many other “fashionable” words - this includes space. But what if the truth is about manicure in the style of "space"?
Options for "space design"
This type of design appeared not so long ago, but acquired, please forgive the involuntary pun, truly cosmic popularity. And this is no coincidence, since he has a lot of advantages.
- Each version of this manicure is unique and inimitable.
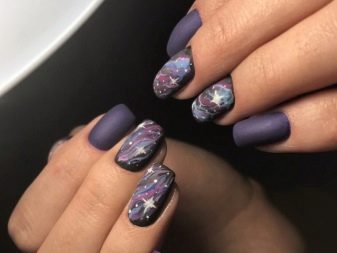
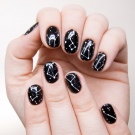
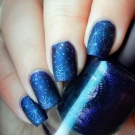
- It is perfectly "mounted" with any dark substrate: burgundy, emerald or coniferous green, ultramarine, black, ink.
- It is good both solo - on all ten fingers, and as an accent - on a pair of nails or even a strip.
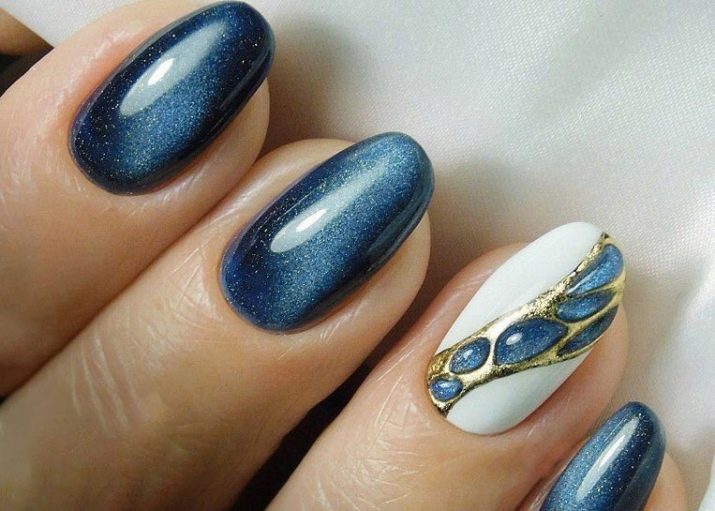
- Companions to the “galaxy” can be a monophonic coating (the same color as the substrate or contrast), and “cat's eye”, and rhinestones, and broths. It all depends on your imagination and professionalism of the nail service master performing your manicure.
Among the disadvantages of this coverage, it should be noted that it will not suit those girls who are forced to comply with the dress code due to the work being done. The “cosmic” design looks very bright in any of its designs, therefore, in those organizations where the color of the nail polish is strictly regulated, it will not work. as well as the “galaxy” is hardly suitable for girls who prefer a strict classical style in clothes. Still, such a manicure involves courage, originality and creativity of its owner.
To create this unique type of design on the nails, you should understand what the trick of applying it is and how to master it. There are a lot of photos of the “galactic" manicure on the Internet, and each one is unique in its own way. After all, you can vary the application as you like: by choosing one or several colors as a substrate, acting with a sponge or sprinkling nail plates with glitter (or using both methods), applying the design to all nails or underlining one or two fingers with it. Depending on all of the above, your unique design will turn out.
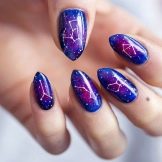
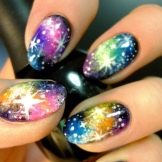
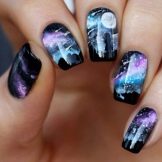
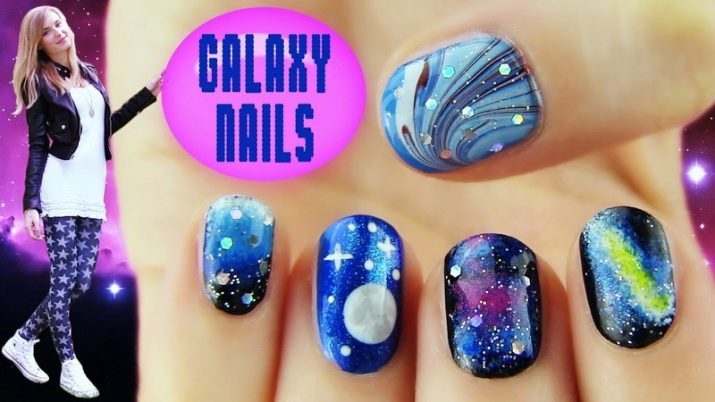
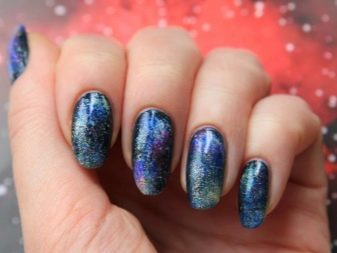
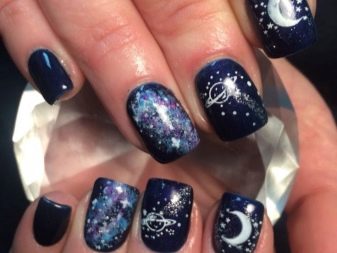
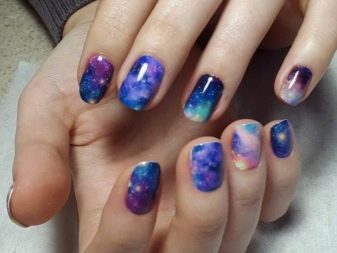
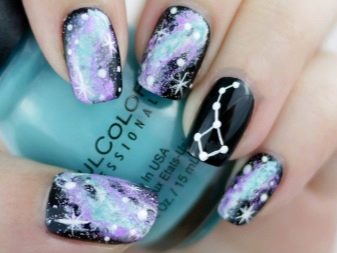
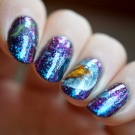
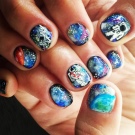
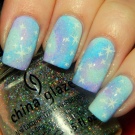
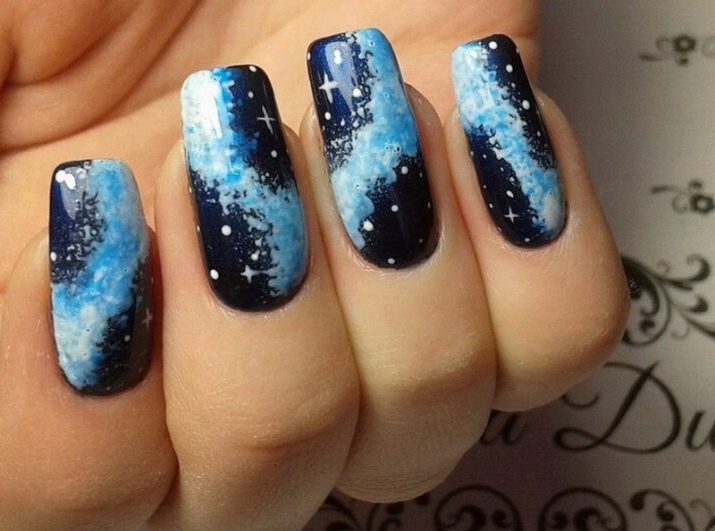
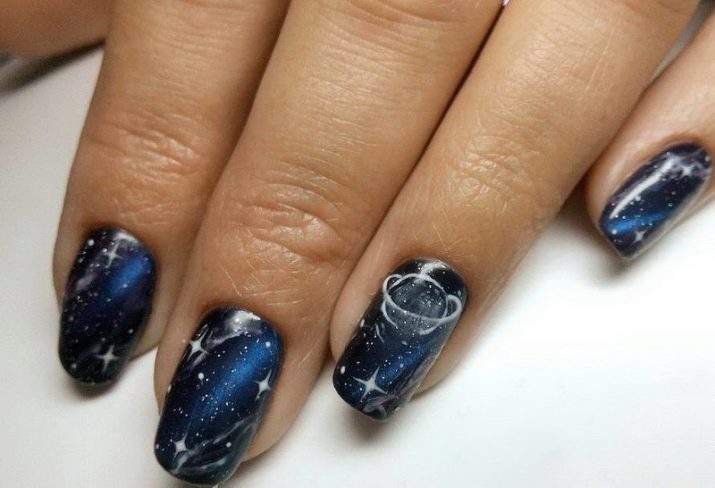
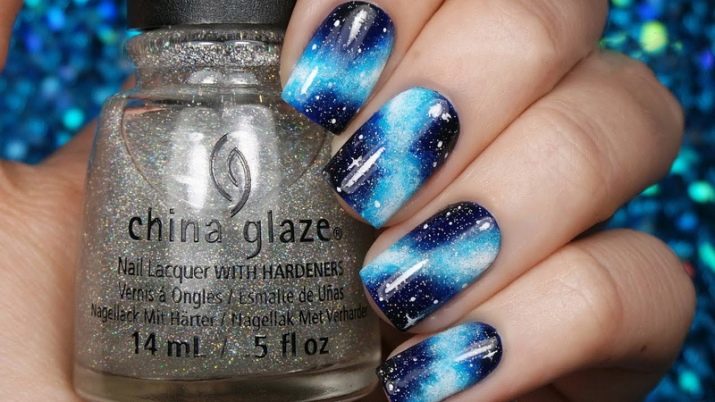
There are countless options for a “galactic” manicure: on a black substrate, on ink blue or green; one-color or mixed from two to three to five shades; shiny, iridescent or matte; shrouded in misty haze or glossy; dark or white; with and without stars - you choose. In the creation of a "space" manicure, varnishes with shimmer, glitter, sparkles and foil will help. The use of chameleon varnishes that change color when moving with your hands, depending on the angle of incidence of the light, will give manicure greater depth, and the top-coat with sparkles will make it more voluminous.
If you have the appropriate skills, you can “stretch” the galaxy to all five fingers, when the nails look like a solid canvas. If you do not risk placing space on all nails, you can highlight one as an accent, and cover the remaining nail plates with one-color varnish: the colors of the substrate or, on the contrary, contrast.
Coating Methods
Sponge
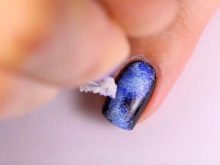
Using a sponge, you can create both the ombre effect (or, as it is called, the gradient), and a star galaxy. To do this, we use both individual pieces of sponge, each painted with its own shade of varnish and applied to the nail alternately, and a whole sponge, on which, in fact, the entire “galaxy” is applied and transferred to the nail. The main requirement for sponge: it must be tight, not loose and impeccably clean.

It is unacceptable to use sponge, which previously applied tonal foundation or other cosmetics on the face.
Glitter
Glitter - small and large spangles - gives the nails a radiance. Glitter (as well as its smaller “fellow” shimmer) can either be contained in varnish (or topcoat), or packaged separately in jars. Accordingly, it can be applied both with varnish and on top of it. The intensity of the application depends solely on your desire: whether your path from the stars will be in your “space” or whether the entire galaxy will be covered with stardust, you decide.
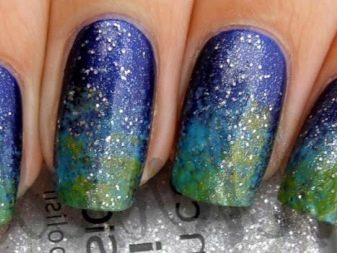
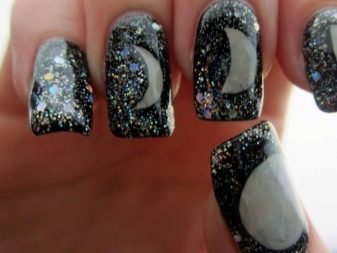
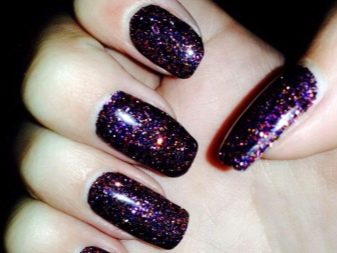
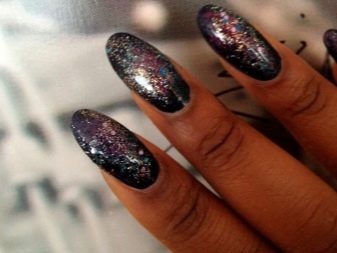
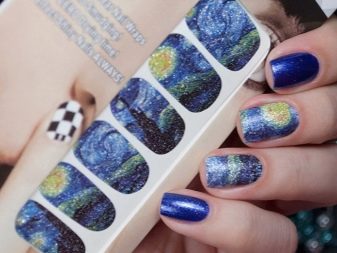
Photo design
If for some reason you don’t want or don’t know how to paint with gel varnishes, but really want to see a “cosmic” design on your nails, a solution exists for you. The easiest way to create galactic nails is to use sliders, which are now sold in great numbers in all professional cosmetics stores. They can be used on ordinary varnish and gel polish. There is only one technology: you need to wet the slider, and then carefully separate it from the paper substrate and transfer it to the nail plate. Further, if the nails are covered with gel polish, a top is applied to the slider, and the hands are dried in the lamp. If the manicure is done using ordinary varnish, the slider is covered with top-dryer and wait for the natural drying.
Step-by-step nail art technique
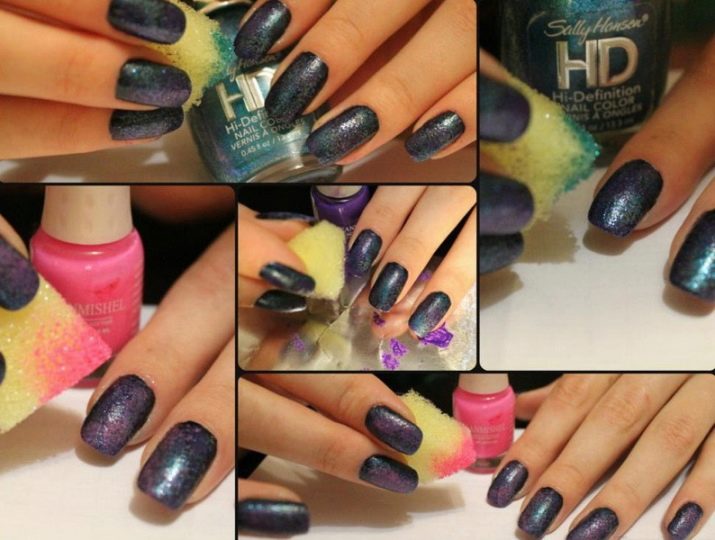
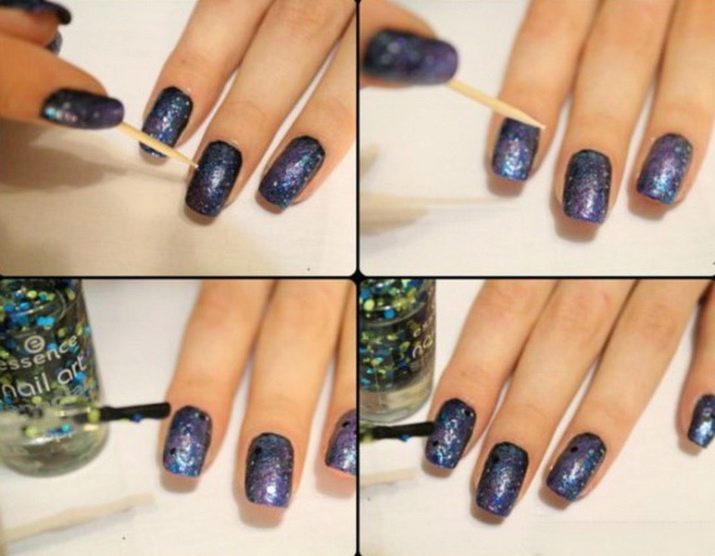
Despite the apparent complexity and “tricked out” of space manicure, it is quite easy to do at home, and there will be little material needed. First of all, this is a gel polish that you will use as a substrate. Or a few varnishes. In addition, you will need a palette where varnishes, a sponge or a piece of a new unused kitchen sponge will be mixed, glitter or a top cover with sparkles, individual rhinestones in the form of stars and tweezers for applying them. It is also good to have a supply of liquid latex to protect the skin near the nail plate from staining with gel polish.And, of course, you can not do without a lamp for polymerization - UV or LED.

Step-by-step implementation of galactic design takes place in several stages.
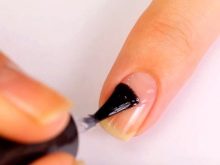
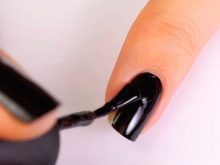
- Make a manicure in the usual way: hardware or trim. Apply a base coat, level it and dry in a UV or LED lamp.
- Cover the nails with a layer of gel polish, selected as a substrate for "space". Dry again in the lamp.
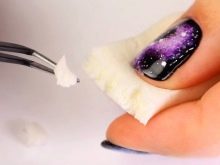
- Using tweezers to tear off so many small pieces of sponge, how many varnishes are chosen for the "galaxy". Dip each piece in the appropriate varnish and remove excess.
- In turn, apply varnish to the nail, using pieces of sponge. Movement should be patting, light. You do not need to press the varnish into the nail, nor smear it. Do not strive to make the “right” pattern, the “cosmic” design is just the case when any of your movements will be correct.
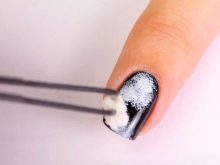
- After all the shades are applied using a sponge, it’s time to “revive” your galaxy with foggy haze. To do this, take a straight brush and, after mixing all the shades, draw a “whirlwind” on the nail. The brush should be clean, with no trace of previously used varnish.
- You can enhance the pattern with black or ink-blue varnish or, conversely, highlight it with white. The main thing is that the manicure is done as accurately as possible, there are no oily drops and smears, for this it is better to use thin and flat brushes.
- To imitate the stars, you can take rhinestones of the appropriate shape or use the usual white varnish and dots, putting neat dots.
- Use glitter if you want your galaxy to sparkle and shimmer. You can take individual sparkles and sprinkle them or use a varnish with shiny particles.
- When all the layers are applied, it's time to cover them with top, dry and proudly wear.
Beautiful examples
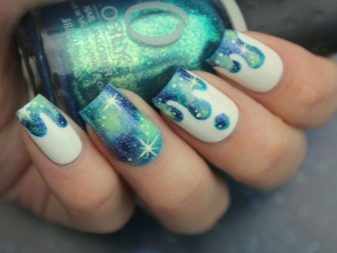
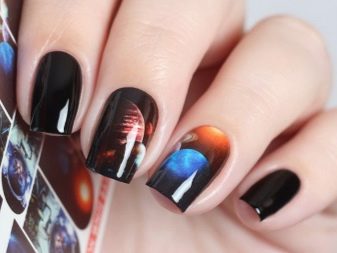
- “Blue” galaxy on an ink substrate - relevant for winter;
- space "cat's eye" for those who are not ready for radical experiments, but want to wear space on their nails;
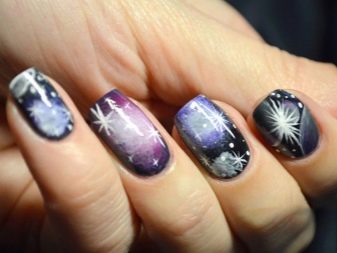
- “Ink” galaxy with stars and planets, as well as on a magnetic substrate;
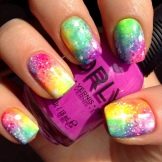
- multi-colored "cosmos" created using sponge;
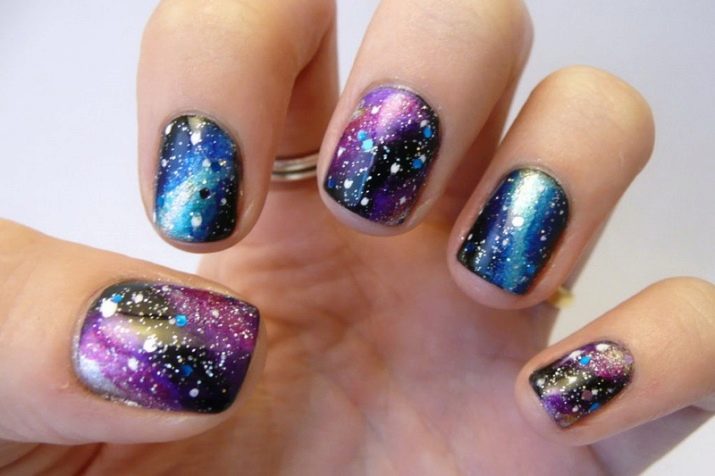
- galaxy of white, blue, dark blue.
See how to make a nail design in the Cosmos style in the next video.


