The desire to create something unusual with their own hands periodically arises among many representatives of the beautiful half of humanity. But what if there are no skills in classical drawing, painting, sculpture? You have to study for a long time, and you want to create beautiful handmade objects, to please yourself and loved ones right now. An easy-to-learn decoupage technique can be the perfect solution.
Features of the technique.
The word "decoupage" comes from the French decuoper, which means "cut, cut."
The main idea of decoupage is to decorate the item with carved drawings. The goal is to create an imitation of the drawn image on the product. The technique includes three simple steps:
- cutting out a picture, picture, ornament;
- imposing and attaching them to the subject;
- coating the composition with varnish for strength and durability.

What can decoupage? Absolutely any thing from any material. Depends on the flight of imagination and material ability.
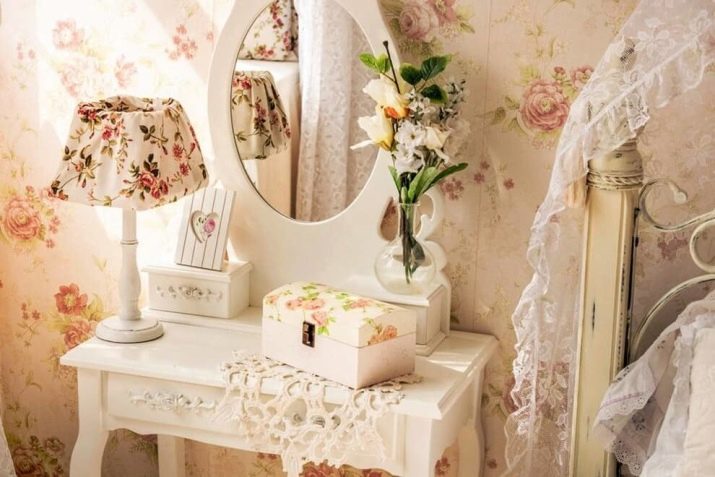
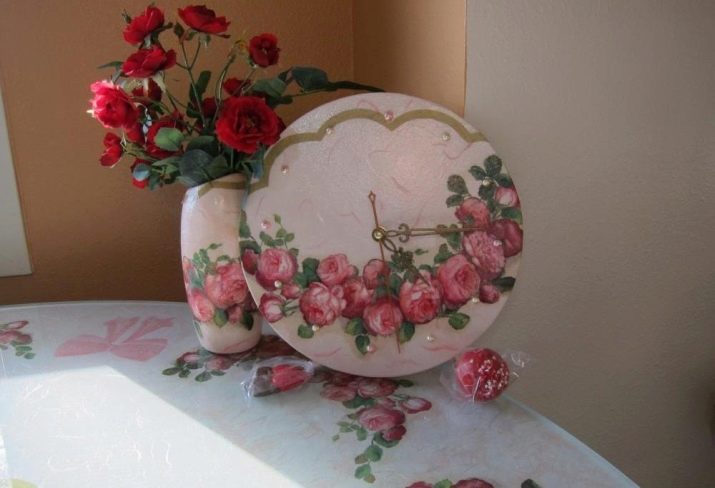
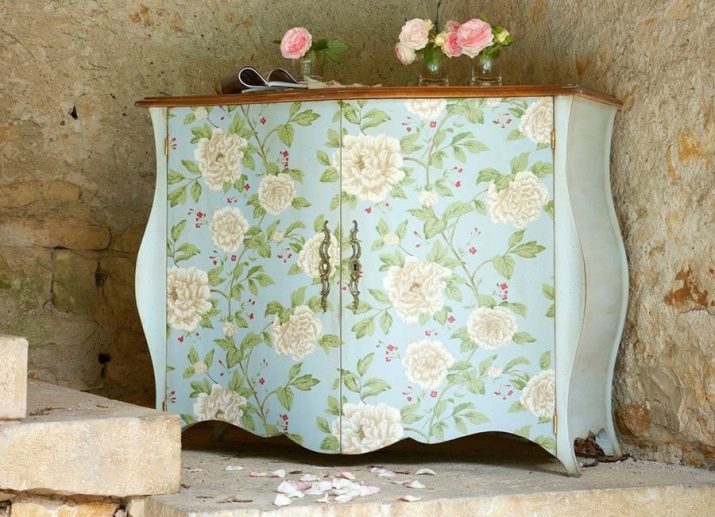
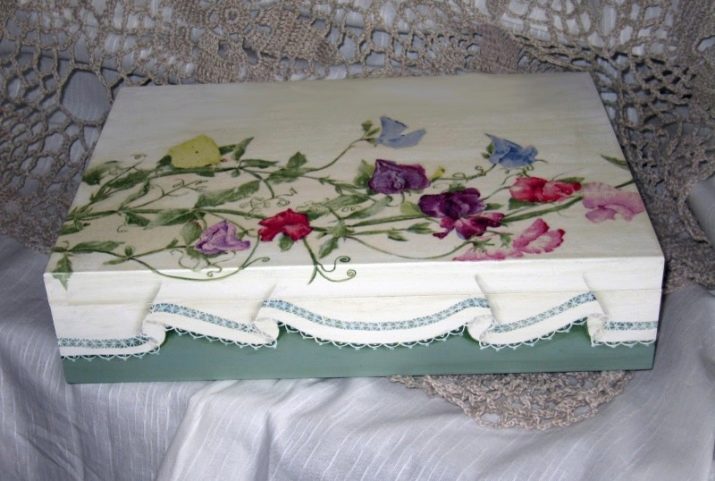
Candles, caskets, dishes, clocks, hangers, flower pots, watering cans, photo frames, caskets, furniture, doors, various decor items most often become the object of creativity in this technique.
Decoupage has great features.
With minimal cost, many things can get a second life, and simple objects can turn into real masterpieces of fine art.
There is an opportunity to transform the interior with your own hands, to make a luxurious gift for any occasion.
The development of new skills will allow you to find a fascinating hobby that develops creative abilities and a sense of beauty, make it possible to feel like an artist, creator.
With the development of skills to professional and a certain courage, hobby can develop into a favorite business, bringing additional income.
What do you need?
For the first samples in this type of applied art, it is enough to have a napkin with a beautiful image, the surface to be transformed, sharp scissors, brushes, glue and varnish.
In the process of mastering the skills, the list will expand and deepen, your favorite materials and techniques will appear.
The basis for decoupage. For the product, items are perfect:
- from wood;
- plywood;
- plastic;
- glass;
- cardboard;
- gland;
- porcelain;
- tissue.
The simplest decoupage can be done on an ordinary wax candle. Textiles - material for advanced craftsmen.
Decorated as old things that were in use, as well as special blanks for decoupage.
Depending on the degree of processing and surface structure, the need for additional materials, work and the amount of time spent is determined.
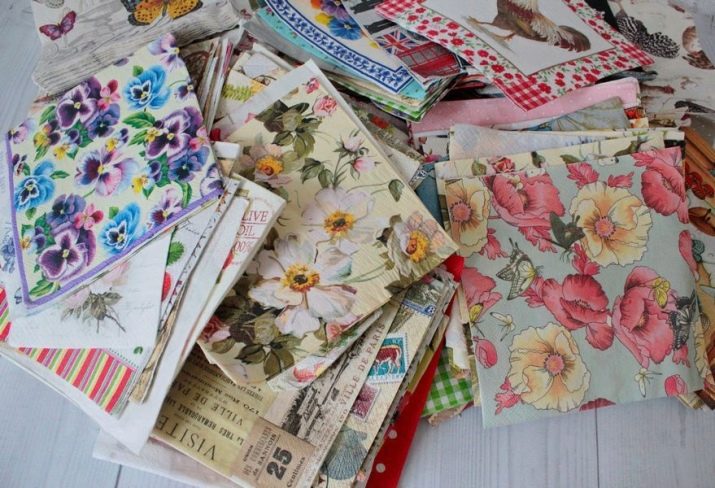
Napkins
In the decoupage use special napkins that have a colorful pattern, special material and texture. Conventional serving napkins may not be suitable. Some due to poor quality paper, others due to high quality.
Decoupage napkins vary in size and shape. The largest are square 40x40 cm, rectangular 33x42, round with a diameter of 32 cm.
Size and configuration are selected based on the surface area to be covered.
In the shops of goods for creativity, you can find the following.
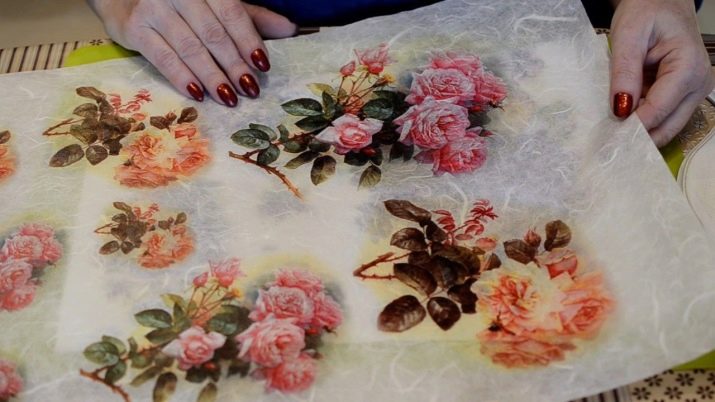
- Napkins for decoupage with the number of layers from one to four. The most popular are three-layer. The bottom two layers are not used. The layer that is superimposed on the surface is very thin and moody. It can crumple, stretch and tear at the most crucial moment. For beginners, coping with this task without a refined skill may not be easy.
- Decoupage cards on rice paper. A special base makes this material more flexible and obedient and does not allow deformation under the influence of liquids.
- Decoupage cards on paper. Good for use on a flat, smooth surface.
Instruments
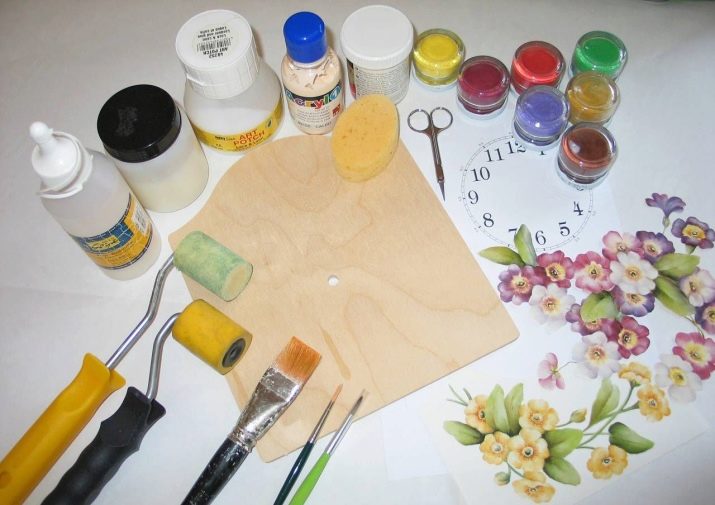
Extremely simple set.
The decoupage master will need:
- thin sharp scissors, which will be convenient to cut images;
- flat synthetic brushes with a tightly fixed pile and a size comfortable for processing a specific surface;
- small rollers a few centimeters wide, suitable for applying varnish;
- art brushes to finish the details;
- sandpaper (if necessary, grinding a wooden surface).
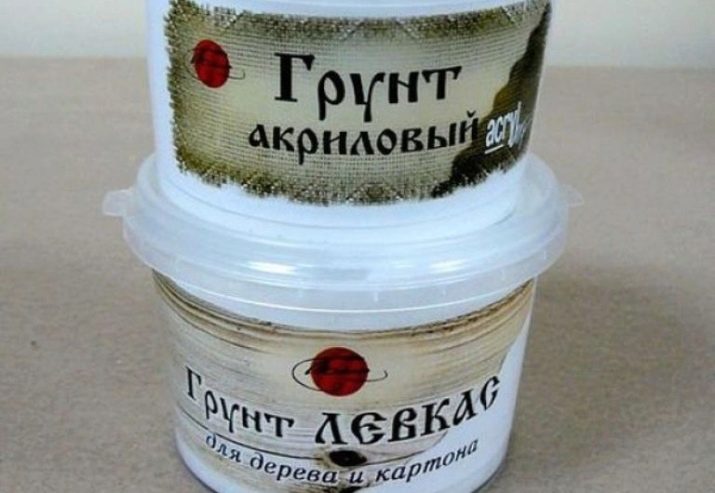
Priming
It is necessary to reduce the absorbency of wood or discoloration of the surface. Usually taken in white, placed in several layers.
It is selected by type of material.
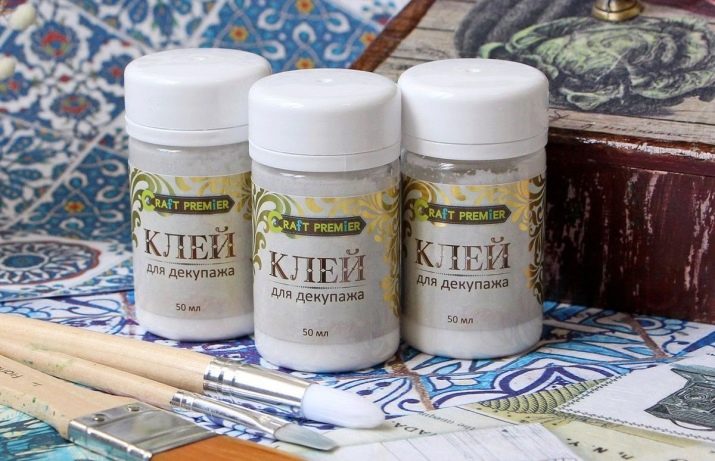
Glue
The main criteria for the glue: homogeneous consistency, neutral smell, transparent output result. You can use such varieties.
- Special glue for decoupage. In addition to its main purpose, it gives gloss and shine. The dishes decorated with it can be used for their intended purpose. Its disadvantage is the high price compared to other materials.
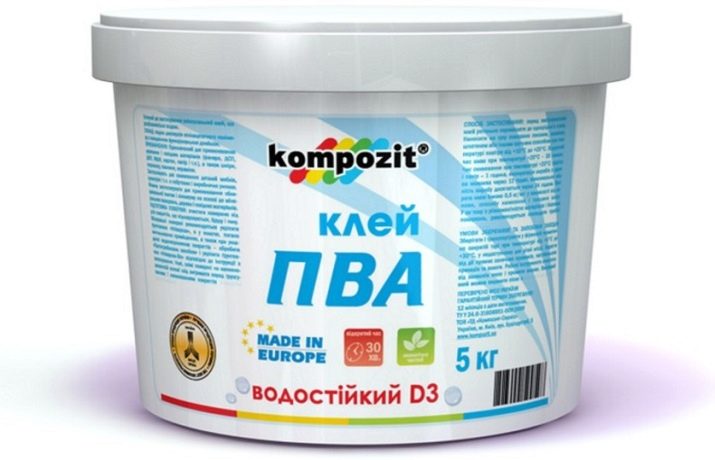
- PVA glue - the most popular choice. The quality is not inferior to special, but the cost is much more affordable.
It is better to use a building one.
It can be used in its usual form or diluted in a ratio of 2: 1 or 1: 1. Empirically, each master determines for himself which composition it is easier to work with.
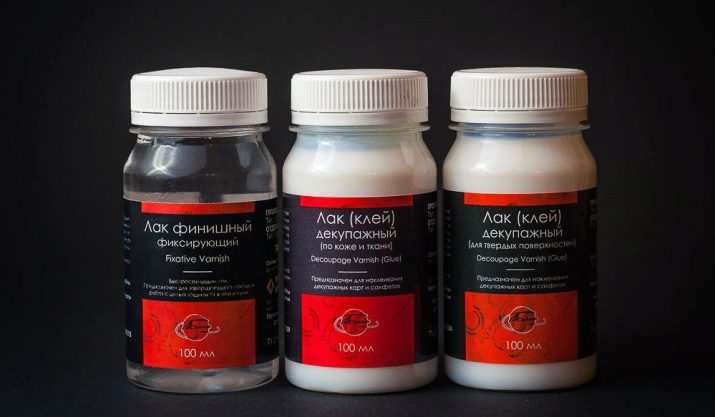
- Lacquer. The disadvantage of such an attachment of images is an irreversible result after drying. If defects can be eliminated when working with glue, this is not possible with varnish.
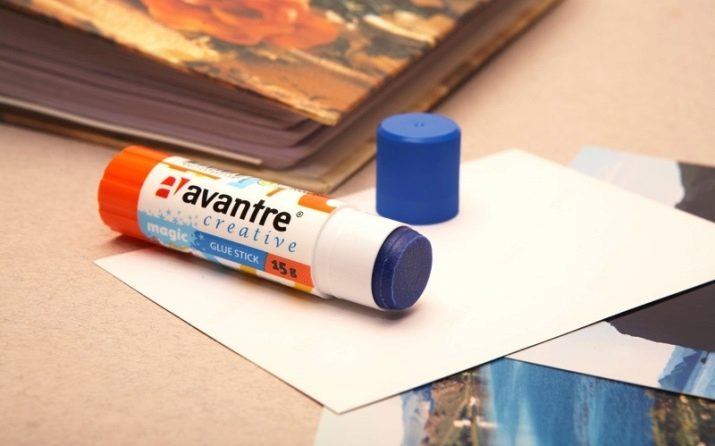
- Glue stick. Only suitable for perfectly smooth surfaces.
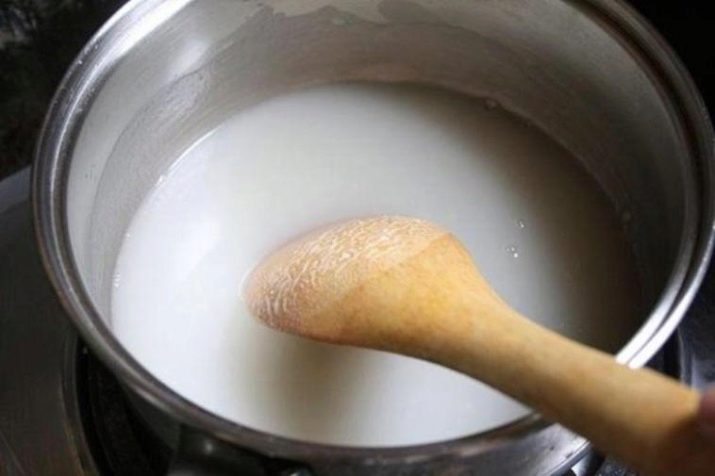
- Homemade glue. Acceptable economy option from the available products. Some recipes suggest the use of starch, water and sugar, others - egg white in combination with granulated sugar.
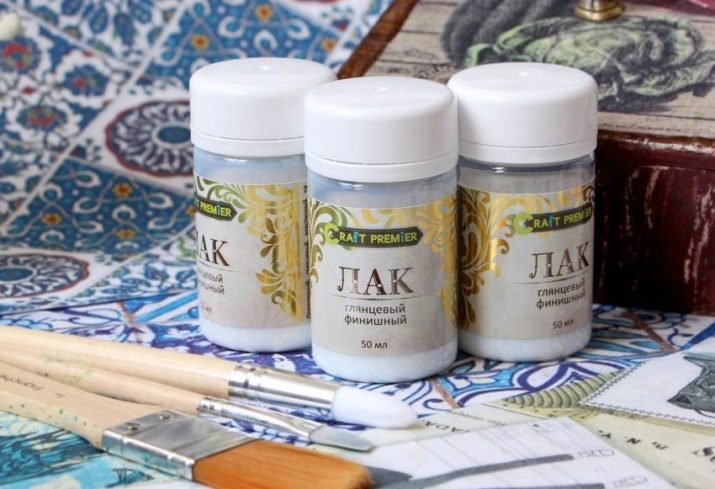
Nail polish
The best recognized acrylic water-based varnish. It is less toxic and easy to use.
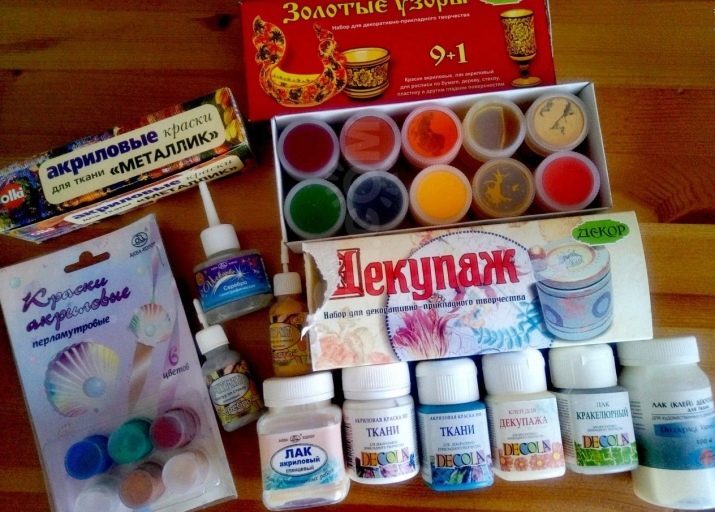
Acrylic based paints
May be useful for drawing individual elements.
Choose a style
The composition will look harmonious if all its details are sustained in the same style. In this case, the work will take on a complete and perfect look.
Consider the features of the most popular styles in decoupage.
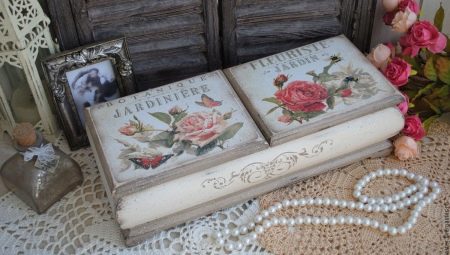
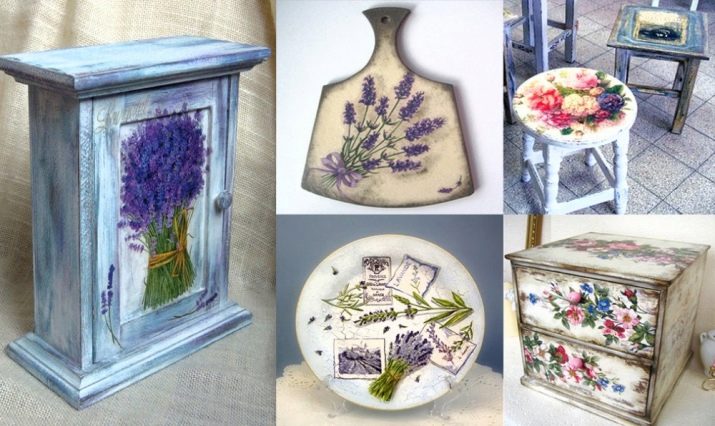
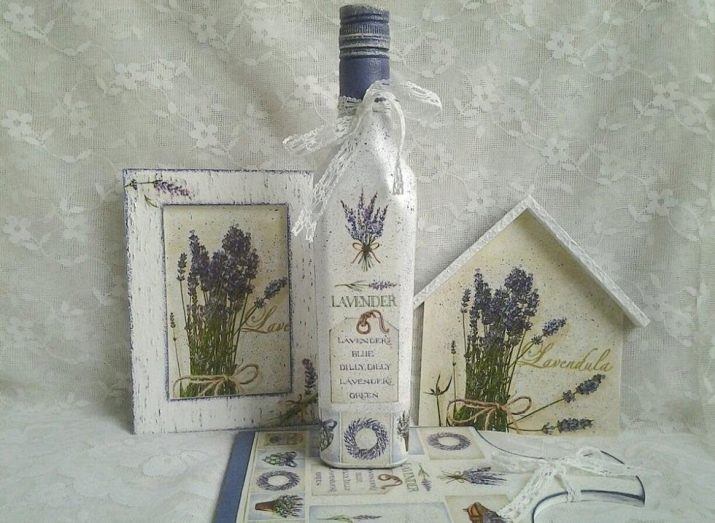
Provence
The direction was born in the south of France as opposed to the classic style of bustling cities. Simple, natural, rustic, cozy, sunny, soulful - adjectives that fully characterize Provence.
The main subjects of the images: rural landscapes, rural courtyard, delicate wildflowers, sprigs of lavender, sage, pets, hens, roosters, owls, kitchen utensils, still lifes, gifts of nature.
The colors used are tender, pastel, natural: bluish-gray, white, lilac.
Gifts and home decorations, decorated in this style, will give a feeling of warmth, care, simplicity.
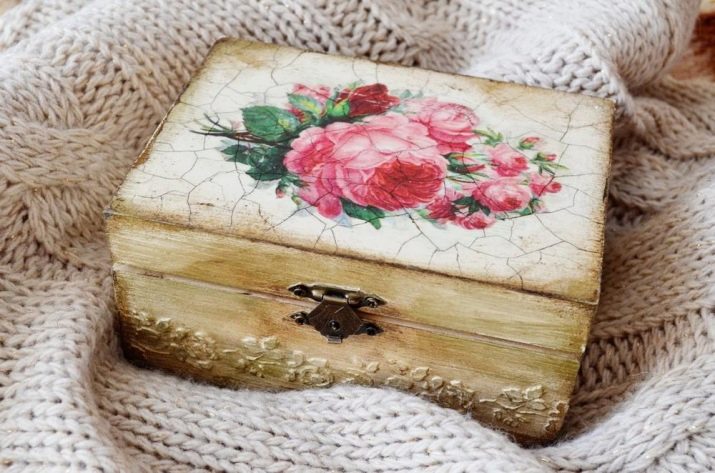
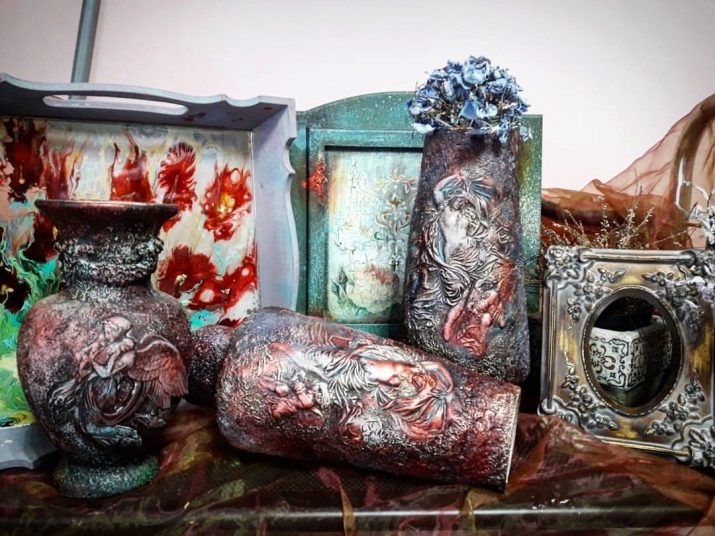
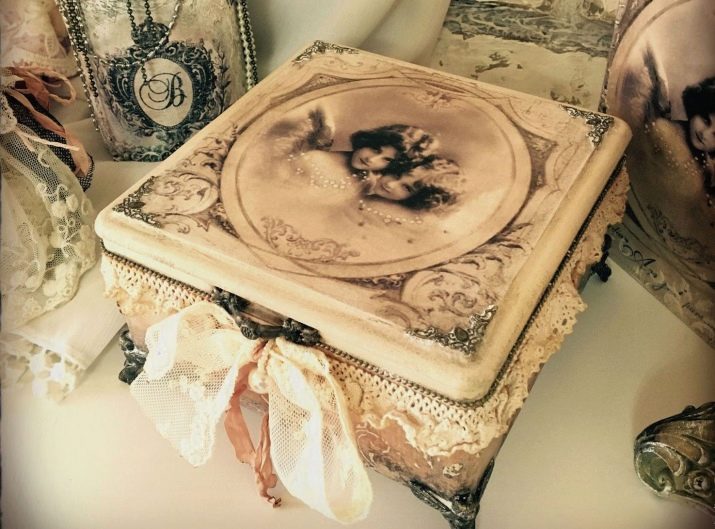
Vintage
Items in this style are designed in accordance with the once fashionable trends of "antique". In appearance, they should have a respectable age and convey the atmosphere of a past era.
The main thing in vintage is the individuality of the design, strict adherence to the displayed style of the past, unusually elegant and graceful lines and curves. Plant ornaments, roses, images of animals, insects are used.
The color scheme, as a rule, serves one color. The tones are muffled, soft, calm.
For vintage works, the creation of the effect of the naturalness of materials is characteristic, and most often used: wood, leather, lace, aged metal.
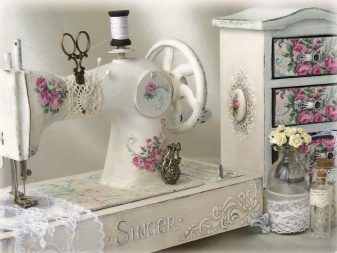
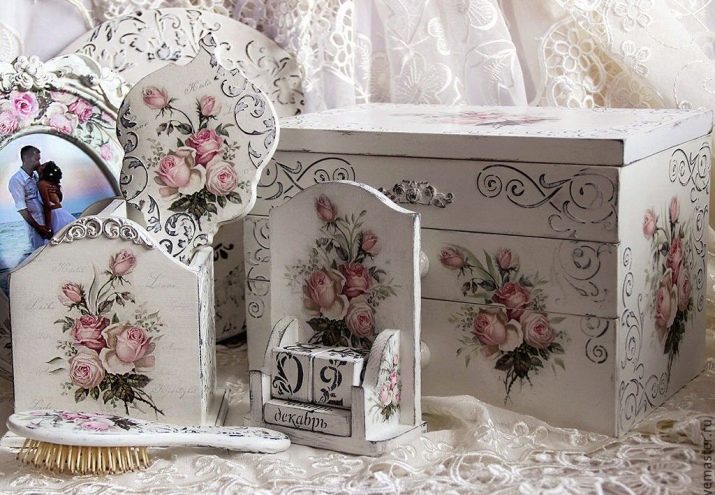
Shabby chic
A young and popular decorative style. Born in the late 80s of the last century in the UK. In the literal translation - "shabby chic." Combines elements of Provence, vintage and rococo. Things in this style look supported, faded, defective and at the same time high-quality and solid, creating the appearance of antiques.
Items are painted in light pastel colors: white, ivory, pale pink, blue, and are wiped in places. As a rule, several layers of paint are visible, as if the thing was painted more than once.
The main motives: roses, angels. Of the ornaments, only a barely noticeable cell and strip are allowed.
Shabby-chic items are often used for wedding photo shoots.
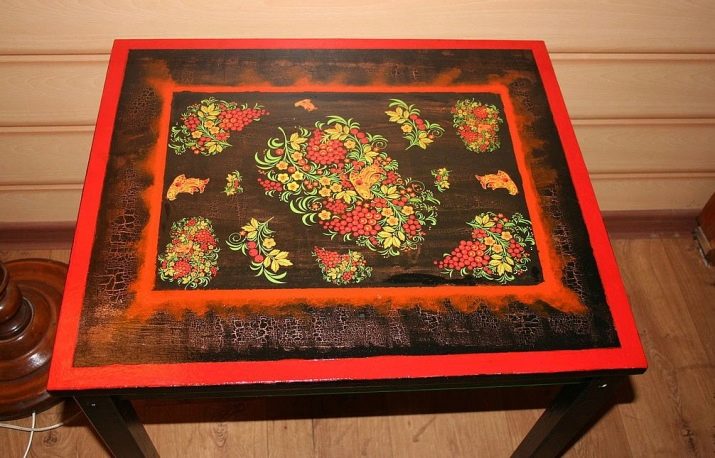
Khokhloma.
Familiar from childhood, native motifs of Russian folk art look fabulous and luxurious.
Khokhloma is characterized by the use of several juicy shades, most often red, gold, black; wonderful ornate ornaments from small details, smooth lines and shapes. The main motives are plant: flowers, berries, peas, spikelets, stalks give a state of a clear fresh autumn day.
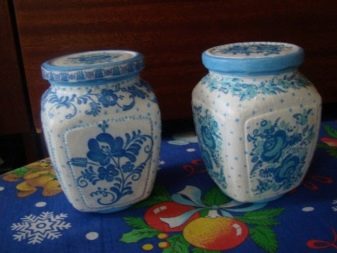
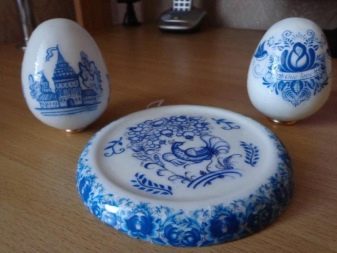
Gzhel
Incredible, snow-white gzhel with frosty blue patterns can simple glass vessels, turn ceramic dishes into elegant porcelain.
It is not to be confused with anything. Color range: from white to dark blue. Among the motives: plain pictures, landscapes, floral ornaments, birds.
Gzhel and Khokhloma are ideal for decorating picturesque Easter and Christmas compositions for yourself and as a gift.
Adhering to a certain style is not necessary. You can find or create your own decoupage motif.
The ideal work looks like this: the image fits in size, color scheme, harmonizes with the background, does not have unnecessary details.
Step-by-step instruction for execution
Having conceived the image, having decided on the style and choosing the necessary materials, you can begin practical work.
The decoupage process looks like this:
- skinning;
- degreasing (for glass and metal);
- padding;
- attachment of a picture;
- drawing a background and painting;
- varnishing;
- skinning;
- final varnish.
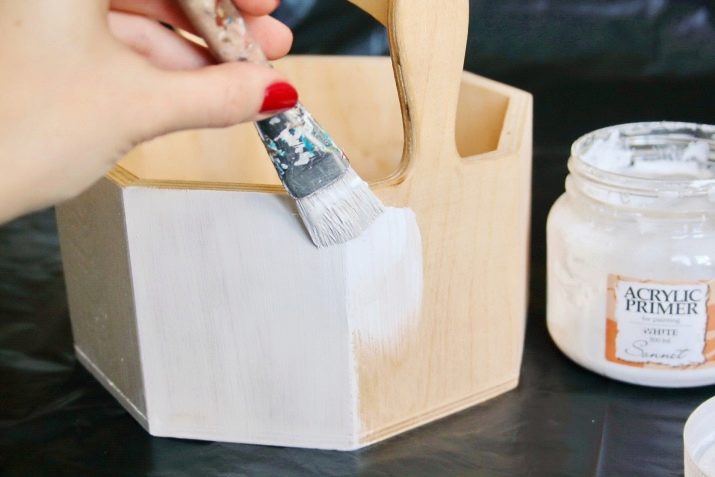
Soil coating is one of the most important stages by which it is possible to change the color and topography of the surface. The goal is to achieve a plain without smudges. Only a perfectly even, light wood product can avoid this procedure. Correctly, the primer is applied, without rushing, in several thin layers.
It’s worth starting the coating of the next layer when the previous one is already dry. This rule also applies to paints and varnishes.
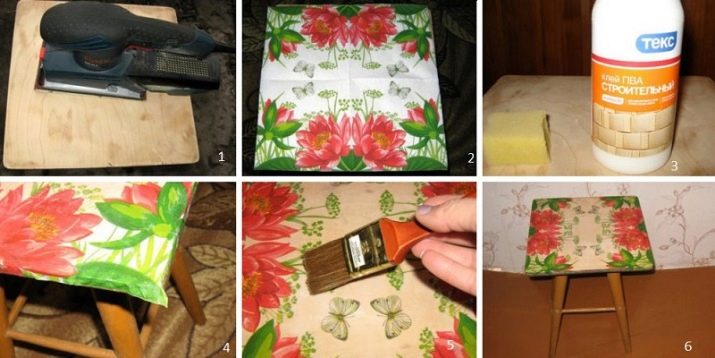
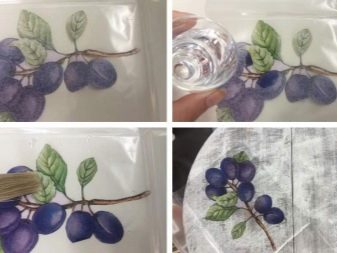
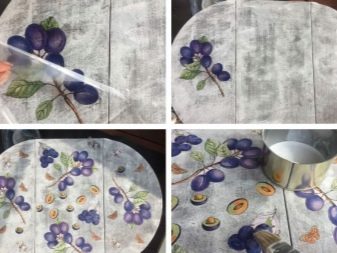
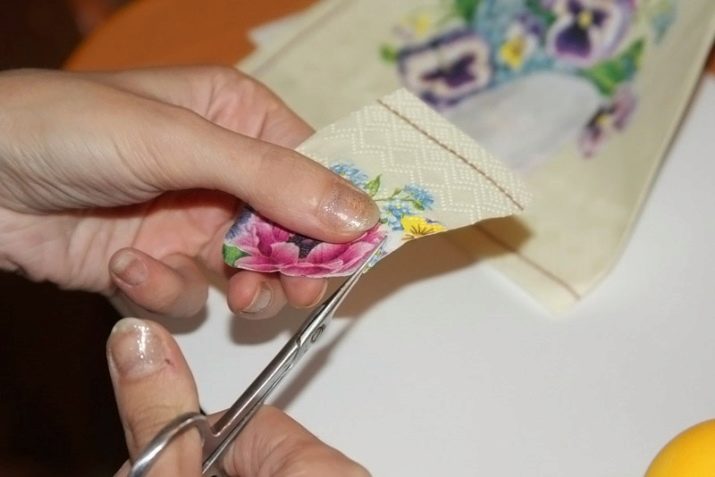
Glue a paper towel - the most responsible and painstaking action in the decoupage process. We will tell you in detail about the method of gluing with the help of a stationery file, which many masters loved for its simplicity, convenience and minimal risk of tearing a napkin.
- Fragment of a napkin with removed extra layers put “face” down on the file.
- Pour water on a napkin and waitwhen it gets completely wet, gently smoothing the wrapped edges with a brush. No need to regret the water. The napkin should float in a puddle. Wet, it sticks to the file.
- We drain the water. We apply the image on the file to the surface, smooth it and expel the bubbles. We carefully tear off the file. If the napkin stretches next, with a brush we press it together with the file to the surface and try again.
- While the napkin is wet, coat it with glue, doing this from the middle to the edges. We do this with the flat side of the brush gently and gently. Remember the fragility and subtlety of the material.
- After complete drying, varnish the product. The more layers of varnish, the better for protection and appearance of the work.
Masters lay up to 100 layers, achieving an excellent surface. At a minimum, the product must be coated from 5 to 8 layers.
Consider the features of working with some materials
On plywood
Plywood is one of the most convenient reasons for decoupage. It has a smooth, even surface. It is important that it is not varnished and not impregnated. You can buy ready-made plywood blanks, or you can make it yourself at home. The material is inexpensive, the price depends on the quality of the variety.
Key actions:
- putty (in the presence of chips, cracks);
- sanding surface with a fine-grained sandpaper along the fibers (with an uneven surface);
- apply a primer in several layers, each layer is dried and sanded, let it dry;
- glue the picture according to the method described above, gently, without folds;
- on the edges of the composition with acrylic paints we perform the background, let the composition freeze;
- coat with varnish, after drying, sand if desired.

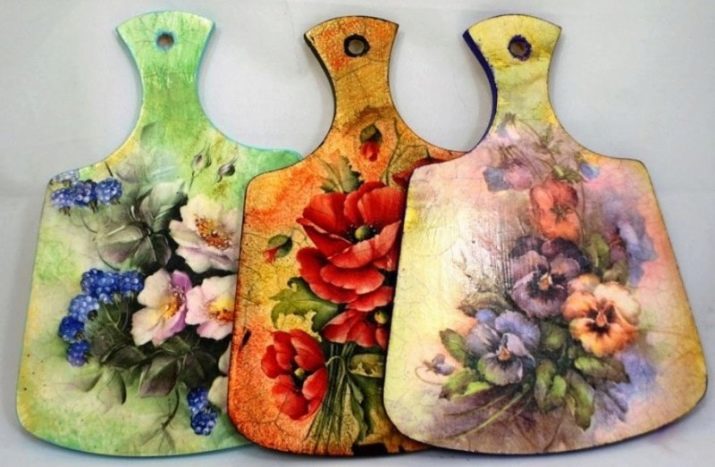
The simplest plywood product made using this technology can be a cutting board or crafts in the form of a Christmas tree toy. Using this technique, countertops, chests of drawers, wardrobes will heal a new life.
If you want to give the surface an aged shabby look, you can use special paints - craquelure.
And for advanced masters, you can offer to master the collage technique, which involves gluing images that differ significantly from the background in color and texture.
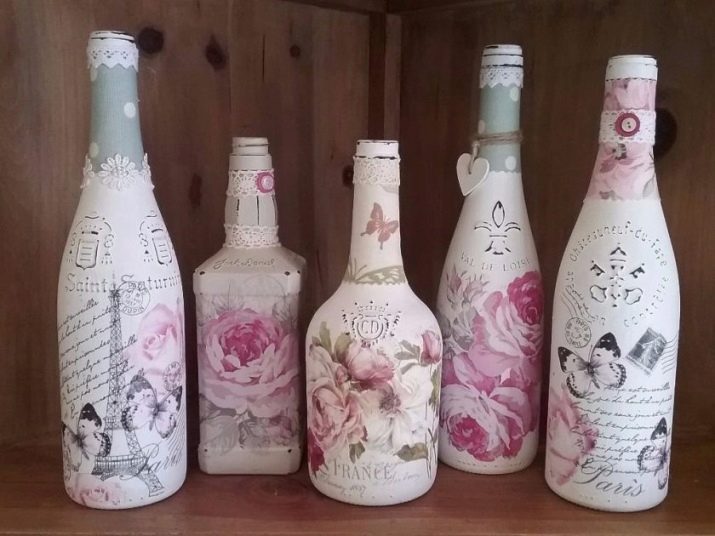
Glass work
The basis can serve as glass jars, bottles, vases, plates, cups, glass fragments of doors, mirrors.
It is better to work with glass with gloves so as not to leave fingerprints on the product.
To obtain high-quality work, the glass surface is washed from contaminants and degreased with alcohol, acetone or special means. You can walk a little sandpaper to form small scratches that will enhance the adhesion of the soil to the surface. The rest of the technology is no different from the usual.
On the Internet you can find various master classes. For example, how to turn an ordinary bottle of your favorite wine into an impressive luxury gift that will decorate a feast and serve as a decoration for many years, recalling happy moments.
With other surfaces
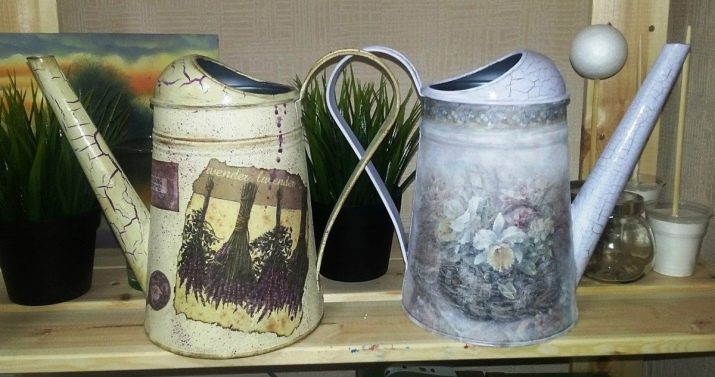
Interesting work on metal. Lying tin cans, watering cans and other little things, even heating radiators, can be transformed using decoupage.
When working with metal, the following features are taken into account:
- rust must be removed otherwise the drawing will begin to peel off;
- the surface is sanded and degreased;
- as a primer, a special tool is more suitable with a gypsum base or water-based paint - acrylic is not used in this case;
- if the object is supposed to be heated, then Heat resistant paints and varnishes should be used.
What can replace wipes?
In the process of mastering the technique, you may encounter the problem that the finished image on napkin does not fit:
- to size: surface area exceeds the size of the largest napkins;
- by color scheme;
- in a conceived image and style.
Bought napkins may contain unnecessary inscriptions, fragments that are problematic to remove.
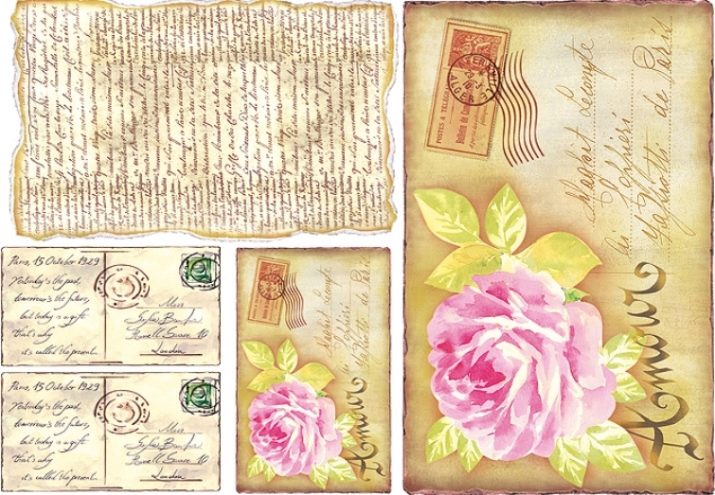
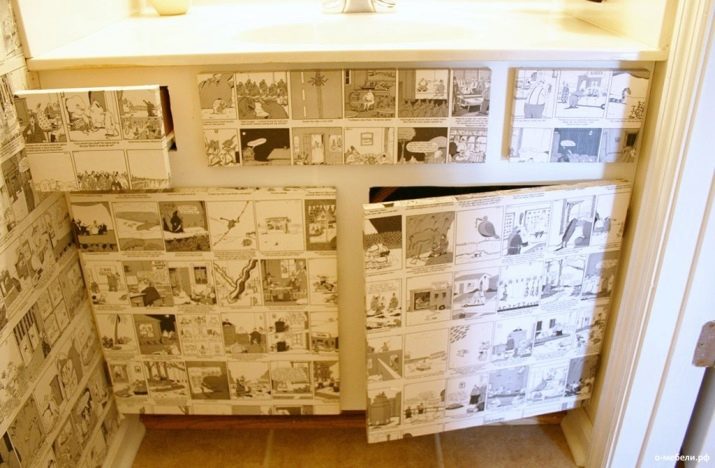
Replace fabric made using special technology for decoupage can:
- printed drawings, photographs, processed in a graphical editor;
- Images with wrapping paper, clippings from magazines, postcards, newspapers;
- wallpaper;
- thin cloth.
You can learn about the features of decoupage Easter eggs with napkins in the next video.


