In order for the hairstyle to look neat, women use all kinds of hair clips and hairpins. You can create the most beautiful accessories with your own hands using the kanzashi technique.
In our article, we will dwell on the process of manufacturing stylish accessories.
Features
Kanzashi-style hairpins first appeared in Japan at the beginning of the 17th century, they looked like hairpins and were decorated with expensive jewelry, a place of honor was given to compositions from ribbons. Today, this type of applied art has not lost its relevance.
Do it yourself with a do-it-yourself kanzashi hairpin. As a rule, inexperienced craftswomen begin by creating the simplest compositions, folding small bows from braid and attaching them to a simple elastic band. Needleworkers with experience make more complex compositions: voluminous bouquets, butterflies, dragonflies, ladybugs, school models are of particular interest.
Keep in mind: Despite the fact that Kanzashi’s technology is simple, it will take a lot of time, since for the manufacture of each hairpin you have to add a few dozen petals.
However, at the exit you will receive an exclusive jewelry that will adorn both the little princess and the matured girl.

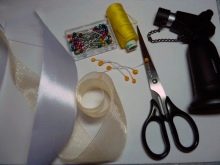
Tools and materials
Hair clips for curls using the kanzashi technique are made of any improvised components, although if desired, ready-made kits for collecting crafts can be purchased in needlework stores.
For work you will need:
- base for crafts;
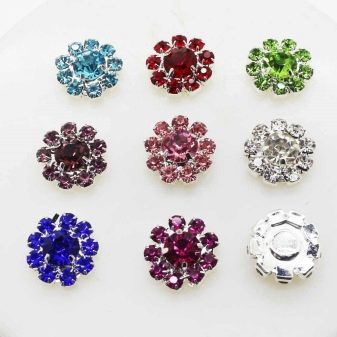
- stones, buttons, beads or beads - they are necessary for the design of floral elements;
- any decor items in the form of grass, cones, stamens or petals;
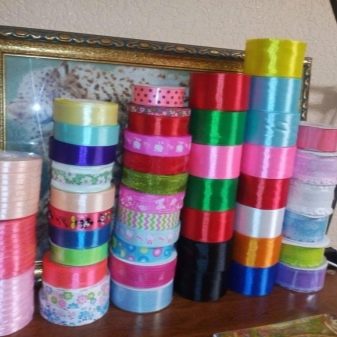
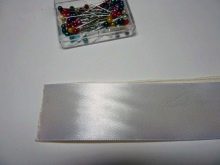
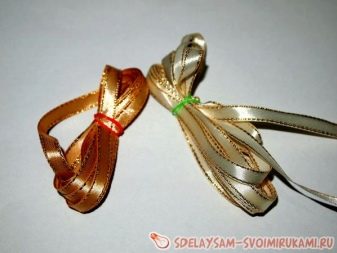
- satin ribbons of various widths;
- strips of rep or organza.
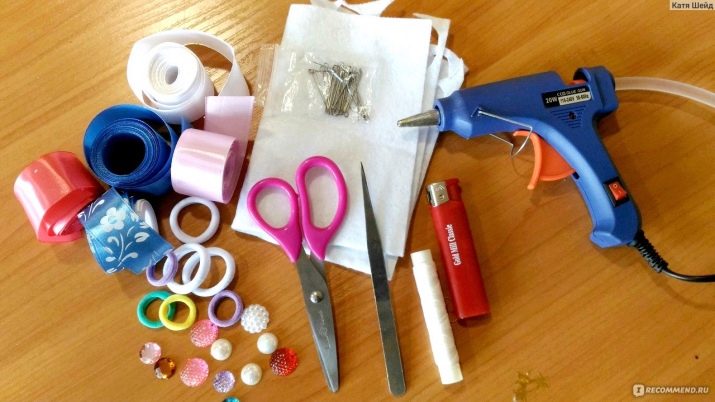
From the tools should be prepared:
- glue / glue gun;
- pointed tweezers;
- small pliers;
- needles of several sizes;
- ruler or centimeter.
Interesting ideas
We offer you the best workshops on creating unusual voluminous kanzashi hair clips - here you will find step-by-step instructions for both beginner craftswomen and experienced needlewomen.
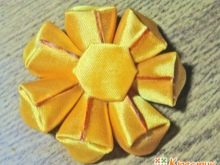
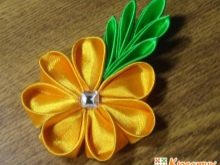
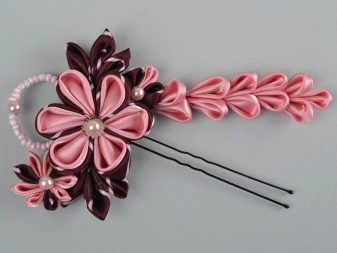
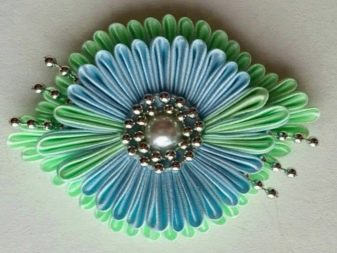
Flower
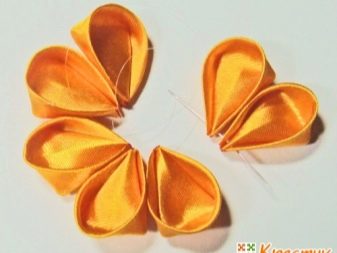
Getting started with kanzashi technique is best done by creating a flower hair clip. For work, you will need a braid of two different colors 4 cm and 5 cm wide: 8 squares 5x5 cm wide are formed from a wide one, 13 blanks 4x4 cm wide are made from a narrow one.
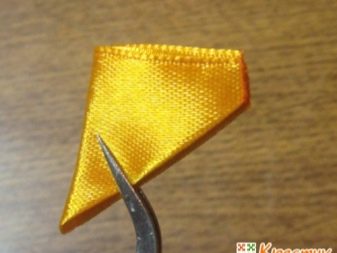
- Small elements are laid out diagonally, and the resulting triangle is folded two more times. The edges are trimmed and scorched with a lighter so that the material does not creep. In this way, 13 blanks are folded.
- The resulting petals are planted on the thread in such a way as to form a flower. To make the structure stronger, you need to cut a small circle from a tape of the same color and stick it on the back.
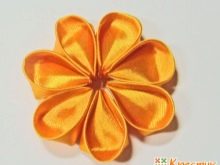
- Next, you need to collapse the second type of roses from 8 petals of a different shade and connect both flowers.
- To decorate the middle, use a stone or a large bead.
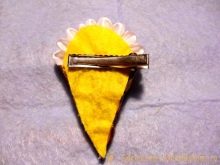
This decoration is ready - you just have to attach the resulting composition to a hoop or automatic hairpin.
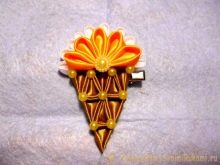
Ice cream
For decoration in the form of ice cream you will need wide satin ribbons of snow-white, yellow, as well as mustard shades, as well as mother-of-pearl semi-beads, a section of yellow and a cabochon of pale green tones.
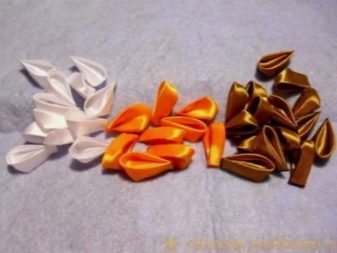
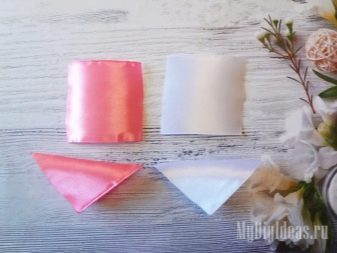
- To begin with, the ribbons are cut into equal sections measuring 5x5 cm. To create a glass of ice cream using the kanzashi technique, 9 mustard, 10 white and 5 yellow blanks are required.
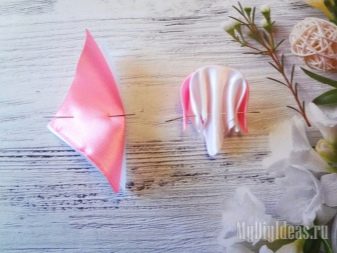
- The yellow blank must be folded so that a triangle forms.
- Holding the corner of the element with your fingers, carefully turn both sides of the triangle. Continuing to maintain the edge of the element, it needs to be bent twice again, focusing on the fold bands.
- The corners that you clamped with your fingers should be carefully cut. After all the steps, you will get a new multilayer element - it should be scorched above the flame so that all the edges are fused together.
- 4 mm are measured from the bending point and all the remains of the satin ribbon are cut with scissors.
- The resulting slices are scorched again - this allows you to strengthen the craft and prevent shedding.
- The element is ready - the same petals should be made from all other blanks.
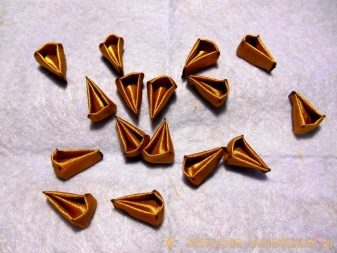
- White and yellow elements can be postponed for some time - you should start work immediately with mustard blocks.
- Take tweezers and glue them on the edges of the petal by 1-1.5 mm, melt the remaining tissue. Then, retreating 5-7 mm, make another clamp. Be sure to ensure that they are located symmetrically. As a result, the module takes a triangular shape. In a similar manner, all other mustard shades are processed.
- The resulting elements are collected in an ice cream cone. It is formed of three rows. To form the first, two parts are glued together, fastening them with the side parts so that the pointed edges are directed in different directions: one up, the second down. After this, the third workpiece is attached, it is also fixed along the side line. In the same way, the second row is assembled, only the number of parts used is more - 5 elements.
- After this, the finished rows must be connected to each other, and at the end of the first row, place one blank to give the hairpin the shape of a horn.
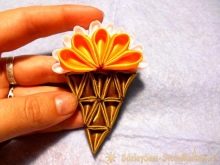
- White petals are folded in a semicircle and fixed along the wide edge of the cup.
- A small fan is formed from yellow blanks, combining all 5 elements. The resulting part is attached over white petals - thus, ice cream is obtained.It should be turned upside down, outline the contour and cut the appropriate size piece of yellow felt - it is glued to the bottom of your ice cream.
So you create a spectacular design of the accessory and fix all the places of accumulation of petals.
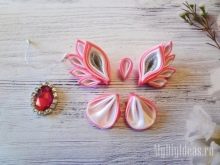
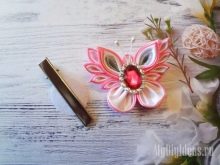
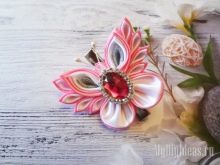
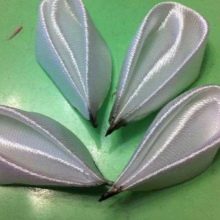
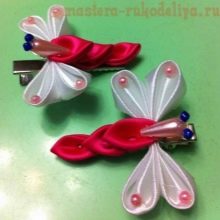
Butterfly
Kanzashi butterfly is made from simple petals of a rounded and pointed appearance. For work, you will need 20 cm of satin, as well as brocade ribbon 5 cm wide and accessories for decor with a set of standard tools.
- All parts are made from squares of tape - you need 4 squares of each shade.
- First you need to make a double sharp wing - for this purpose, brocade braid is folded diagonally, and then again folded in half.
- The triangle resulting from these manipulations is again folded in half and formed into a petal - its edges should be cut and scorched above the fire.
- The second layer is formed in the same way, folding triangles of satin material.
- To make a butterfly, you need a pair of leaflets of each type. The jewelry is fixed on a wide invisibility, a large stone is inserted into the center.
Bouquet of tulips
To create the Bouquet of Tulips hair clip you will need a ribbon of brocade of silver shade 2.5 cm wide, a white satin ribbon 2.5 cm wide, as well as finished stamens with large beads at the edges.
Creating jewelry involves several steps.
- To begin with, you should prepare segments 10 cm long - they are used to twist tulip buds. Such items need 6 pcs.
- Next, they form segments 6 cm long - they will go to the manufacture of outer petals, they also need 6 pieces.
- After that, you can proceed directly to the creation of the flower: one long segment is melted with a lighter in the places of cut, after which the parts are placed horizontally in front of you, turning the back side up. The corner of the left edge is bent towards the edge line, the resulting angle is folded in half again.
- A needle and thread form a neat stitch consisting of small stitches, it should be laid starting from the edge of the corner. The line should run along the entire element, not reaching the edge of 2 mm.
- The second scorched edge of the square segment should also be collapsed and all steps completely repeated, only on the other side. Without trimming the threads, the line is pulled a little bit, forming a pair of bastings.
- Starting from the corner, the segment is carefully twisted into a soft tube, the position of the tape is fixed with a needle and thread. The result is a small bud - the same blanks must be made from the remaining 5 long segments.
- From small segments form petals. To do this, place each part in front of you and tuck the corners on both sides. Holding the workpiece in this position with a needle, make a simple stitch along the entire strip, at the end it is necessary to pull the stitch and make a few knots so that the petal can maintain its shape.
- The resulting petal with glue is fixed on top of one of the buds.
Do the same with all other blanks - the result is beautiful tulip flowers.
Jellyfish
Little girls will surely like a hairpin made of ribbons, which in its appearance resembles a jellyfish. To make such a bow is not difficult at all.
You need to cook:
- 6 mm narrow satin ribbon;
- 2 mugs of felt with a diameter of 4 cm.
Also, foil and wooden skewers are useful in the work.
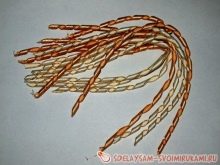
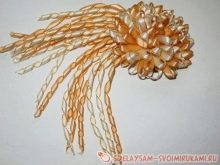
A jellyfish hairpin is assembled from two main blocks - a fluffy, formed from small segments of a satin ribbon, and elongated spirals.
- First, take a satin braid of two close shades and cut into pieces of 6 cm - 6 such pieces are needed for one hairpin.
- Long pieces of tape 25–26 cm long will also come in handy, about 10 pieces will go for one hairpin.
- Further, spirals are folded from the tapes - for this purpose, long segments should be wound on skewers and fixed at the edges with foil. The resulting workpiece is again wrapped in foil and placed in an oven or microwave for 15 minutes. When the foil has cooled, the tapes are carefully removed - you will get tight spirals.
- From the cuts of the braid to 6 cm make loops. To do this, their edges are fastened together and, gently supporting with tweezers, melted over the candle for bonding. The same manipulations are carried out with all other blanks.
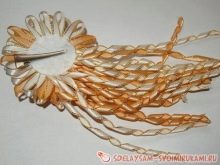
- After that, 14 petals are glued to the detail of felt around the circumference, they must be placed as close as possible to each other. Gradually, loops need to fill the entire base in a circle, usually about 6 rows are obtained. To hide a small hole in the middle, 5 loops are connected and fixed.
- After this, the workpiece is turned over and a number of loops are glued, spirals folded in half are attached from one edge.
- Further, it remains only to fix the second felt circle from above and the hairpin is ready.

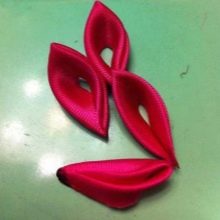
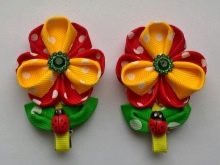
Dragonflies
Another interesting option for a kanzashi accessory is a dragonfly.
- MK traditionally begins by cutting the braid into squares. Then, round-shaped petals should be formed from white tapes. After that, the blanks are bent obliquely, and the sharp corner of the resulting triangle is carefully wrapped towards the center of the right corner. This element is fixed along the central line, the excess tape is cut off, and the sections of the cuts are certainly scorched. At the exit, you will form a round petal - wings will form from it, you will need 4 blanks.
- To form the body, you need to make an acute-shaped petal - a square cut is folded in half several times, the corner is trimmed and scorched above the fire. Such items will need 3 pcs.
Attach the body on top and adorn the dragonfly with beads.
Recommendations
Depending on the features of the future hair clips, you can take a variety of bases. They come in several forms:
- with a fastening automatic mechanism that can withstand a large volume of strands - decorating such an accessory will require the creation of a large composition so that it can hide a massive base;
- Invisibles with click-gag mechanism - fix small locks;
- hairpins made of high-strength metal - usually they are decorated with beads or foamiran;
- hair wreath or hoop;
- any metal base from an unnecessary clip for strands.
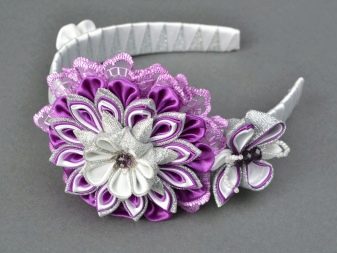
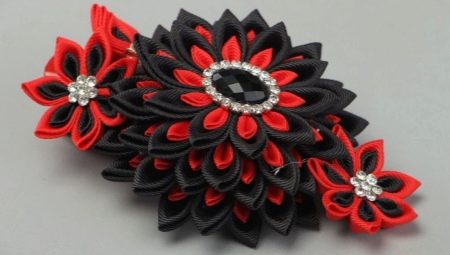
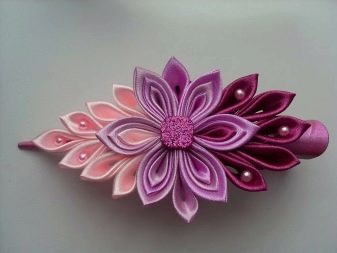
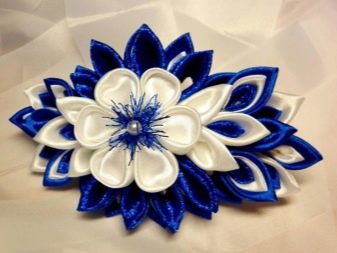
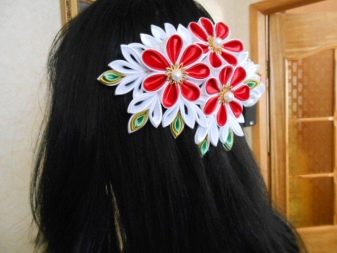
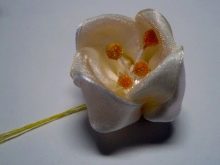
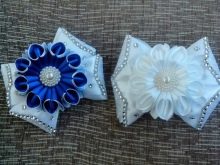
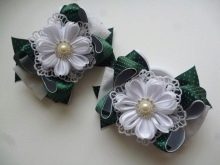
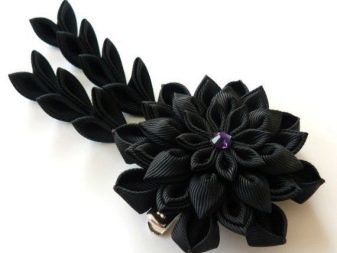
Beautiful work
We offer you a small photo selection of the most stylish kanzashi hairpins:
- children's hair clips look very nice;
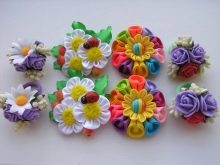
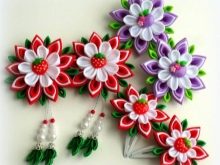
- many interesting solutions are offered for the school;
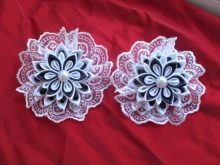
- novelties from foamiran look spectacular and unusual;
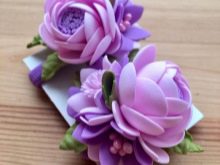


- For adult girls, you can also pick up interesting options.
Watch a kanzashi hair clip workshop in the next video.


