It’s not enough to choose a beautiful and necessary gift. It still needs to be beautifully packaged. The current consumer has everything necessary to make absolutely any present effectively. However, many people prefer to make gift wrapping with their own hands. Let's figure out how you can make cute gift boxes with your own hands.
Material selection
Make an attractive gift box with your own hands is not difficult. Such work rarely takes a lot of time, and the result is pleasantly surprising if everything was done correctly. Such gift wrapping will in no way be inferior to the store option. That is why home-made beautiful boxes are so popular today.
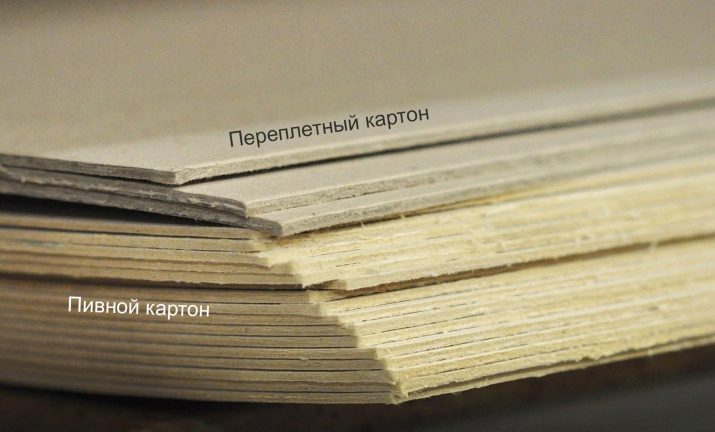
If you decide to make a gift box yourself, it is important to consider that for this you need to choose the right materials. They must be of high quality and reliable. The material of which such packaging is made must not fall apart or stick up. After all, it will be very disappointing if such an incident occurs at the time of delivery of the gift.
It is not recommended to make gift boxes from ordinary cardboard, which is sold in a stationery store. Such material is not sufficiently dense. In addition, the coloring of plain cardboard does not cause much enthusiasm, being not the most colorful.
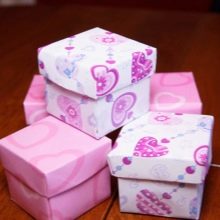
Recommended for gift wrapping special type of cardboard, characterized by high density. Further, such a box can be supplemented with various decorative details from paper intended for needlework. Cardboard boxes decorated with elements made using the origami technique look interesting.
In special shops for creativity, you can find everything you need to prepare a beautiful and high-quality box of any size and design.
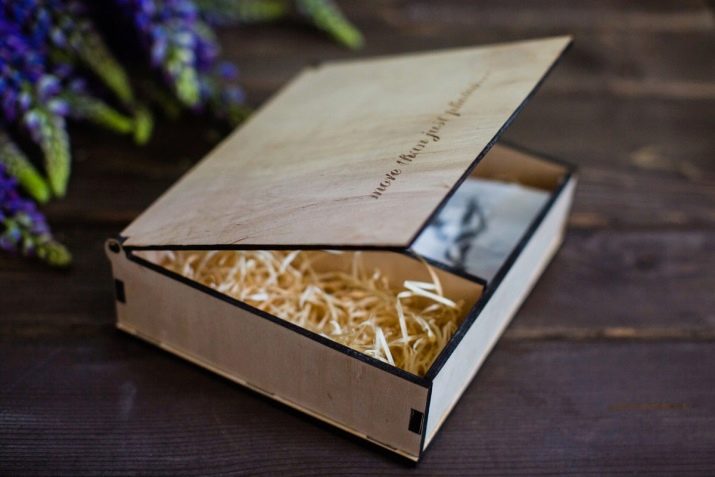
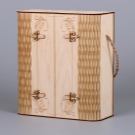
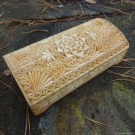
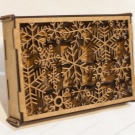
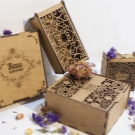
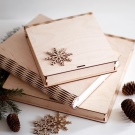
However, not only thick cardboard can be used to create a beautiful gift box. Wooden boxes of different sizes look very interesting in this role. They can be designed as you wish. Wooden boxes complemented by carved elements look especially bright and creative.
A box of wood can be made in the form of a small chest, a cute casket, a carved casket, or a small cabinet with opening sashes. Such gift wrapping will serve as an addition to the main gift, because later it can be used separately from the present. For example, in such a container, it is good to place jewelry and accessories for storage.
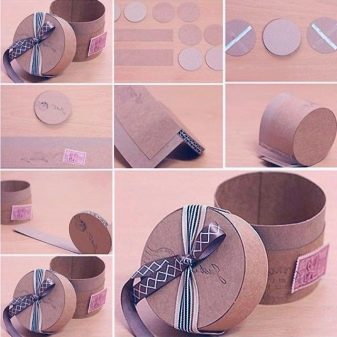
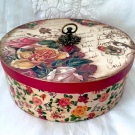
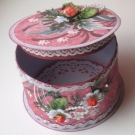
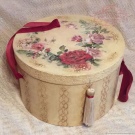
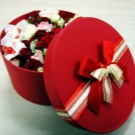
Step-by-step manufacturing of round and oval options
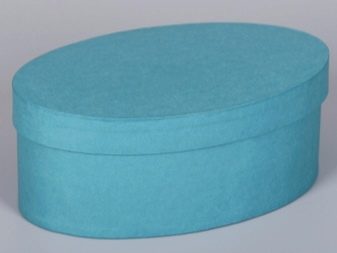
The gift box does not have to have a simple square or rectangular structure. There are such presents that are more convenient and beautiful to hand in the original round or oval box. A similar thing can also be done with your own hands.
We will analyze the points how to act in this case.
- First you need to prepare all the necessary materials. It is not recommended to make a round box of paper. It is worth using thick cardboard.
- First you need to carefully cut 4 circles out of cardboard. Two of them will be slightly smaller in size than the other two.
- Next, measure a couple of stripes. Their size should be slightly larger than the circle. For more - its own strip, for less - its own.
- Now those circles that are larger need to be glued to one another. Similar manipulations will need to be carried out in relation to smaller circles.
- Wrap the prepared circles with cut strips, and then glue them on the sides.
- After that, it will be possible to proceed directly to decorating the resulting box with various kinds of decorative details.
By a similar principle, you can make a more elongated oval box of cardboard, but here it is necessary to initially prepare not oval, but oval structural parts. Such boxes are made quickly and easily. They can be of any size. If the present is small, then the box can be made compact. If the gift is large, you will have to spend more material by making a large gift wrap.
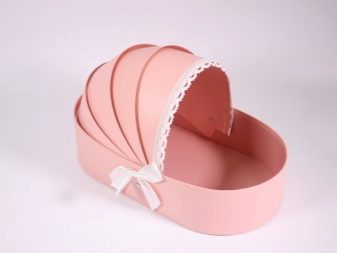
Jewelry for such gift boxes can be used in a variety of ways. It can be beautiful bows, gift ribbons of different colors, decorative paper and woven flowers, charming knots of colored shiny ribbons.
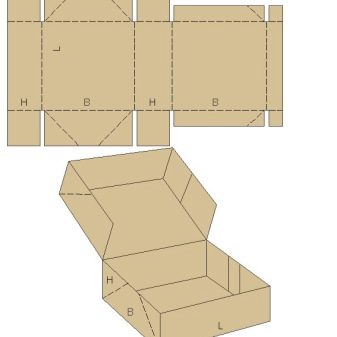
How to make a rectangular and square box?
Rectangular and square gift boxes are the most common, and they are made in literally 5-10 minutes.
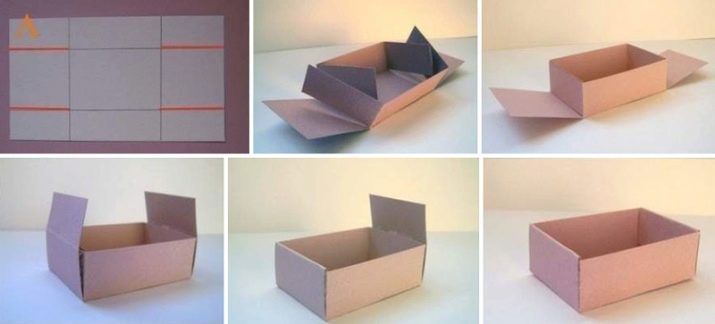
First, we will analyze step by step how you can make a rectangular A4 box yourself.
- First you need to cut a sheet of thick cardboard in A4 format in half. If the gift is impressive in size, and you need a larger box for it, then you should take a couple of cardboard sheets of the specified format.
- Next, from one of the rectangles you will need to carefully cut 5 millimeters from the length and width.
- Then each of the elements will need to be correctly drawn. Indent from the edges of 10-16 mm, draw a horizontal strip. This will need to be done on every edge. In the center should be a rectangle.
- After that, it will be necessary to make neat cuts. Along the line along the length of the rectangle and to the line located along its width. There should be only 4 such incisions (on each rectangle).As for the immediate length of the cut - it will directly depend on how many centimeters you took, drawing lines.
- Next, the sections must be folded and glued. The result is a neat and even box with the right lines
Similar box options are usually made with lids. They turn out so roomy and attractive that almost any gifts can be presented in them. For example, it can be beautiful branded clothes.
A workshop on manufacturing a rectangular box, see below.
Square boxes are made even easier. Such gift wrapping can be made for surprises of various sizes. Particularly elegant and attractive are small presentations packed in a neat square box of small sizes.
We will analyze step by step how to make such a package.
- First you need to prepare high-quality thick cardboard. Then you need to measure and cut two small squares. The size of the first should be 18x18 cm, and the second - 17x17 cm.
- Next, you need to carefully draw two diagonal lines from one corner to the other.
- Fold the corner. Its top should connect with the intersection of the diagonal.
- The same part should be bent so that the fold clearly lies on the diagonal.
- Now gently align the folds made.
- This procedure will need to be carried out in relation to all the corners made.
- The result should be 3 bends on each side.
- Then the opposite sides will need to be incised along the fold. In the center you get a square - it will be the bottom of the gift box.
- Corners, on which there are no notches, will need to be carefully folded towards the center along the folds.
- Now these same side parts will need to be wrapped inside.
- The ends must be wrapped and fastened.
- Similarly, you need to collapse the second cut square. The cover of such a box can be decorated at your discretion.
A small home-made box of square shape - a universal gift wrap. You can put any small present in it - jewelry, some beautiful accessory or something from cosmetics.
Schemes for custom products
Gift boxes of square, rectangular, oval or round shape are universal and the most common solutions. But this does not mean that there are no other options for making gift wrapping. You can make a more original, unusual box using non-standard schemes. We will analyze some of them.
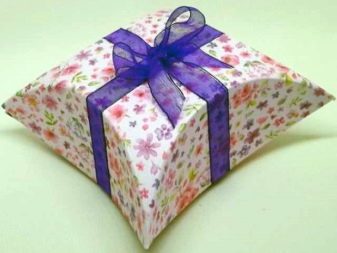
Neat gift boxes made in the form of a pyramid look nice. Such packaging will be the best solution for presenting small valuable gifts.
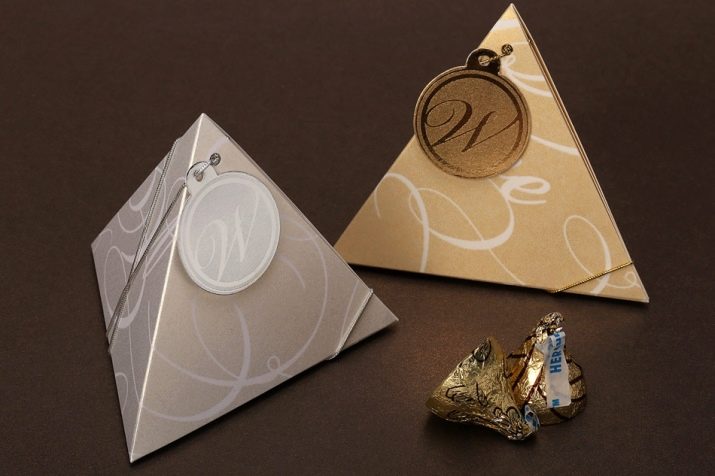
Let's take a step-by-step look at how to make such a box.
- First, it will be necessary to cut the blank according to the scheme on thick cardboard.
- Next, the cut workpiece will need to be very carefully folded along the available lines.
- Then on the petals you will need to make small holes.
- A beautiful satin ribbon should be inserted into the holes made. Further it will be necessary to tighten, crosswise, well, but not too hard. As a result, a neat pyramid is formed.
- In the resulting pyramid, you need to put the selected present, which you plan to give, and then tighten such a box with a ribbon and form a beautiful bow.

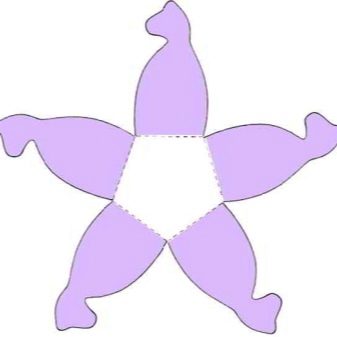
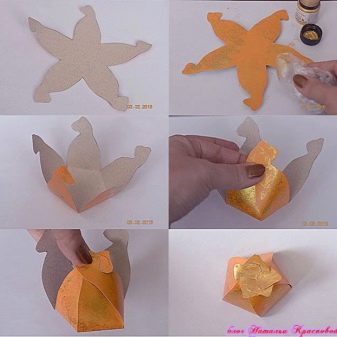
Homemade gift boxes made in the form of flower buds look very beautiful and unusual. Such a package can be not only small, but also larger depending on the size of the gift itself. Now let’s figure out how to make such a box on your own.
- First you need to cut the workpiece.
- Next, focusing on the dashed lines, you will need to make bends on the workpiece.
- Then, in the center of the blank you should put a gift that you plan to present. After this, you can proceed to the direct connection of the petals of the workpiece.
- Petals need to be bonded to each other so that the flower is completely closed.
- The front side of the flower box should be decorated with beautiful colors. It is acceptable to make spectacular paper decorations - ribbons and rhinestones.
From thick paper, you can make another unusual and effective gift box using a simple scheme. Let's look at how to make such a package for a gift.
- The first step is to sketch such a simple template.
- Next, the sketched template will need to be carefully and evenly cut.
- The fold lines will need to be pressed with any convenient item.
- After that, the formed folds will need to form the box itself.
- It is necessary to act very carefully and deliberately, so that the whole process does not end with the collapse of the box.
You should tie it with a beautiful ribbon of your favorite color and make a cute bow to decorate the presentation.
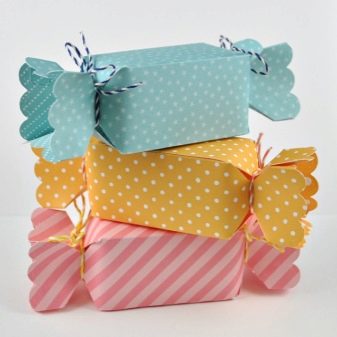
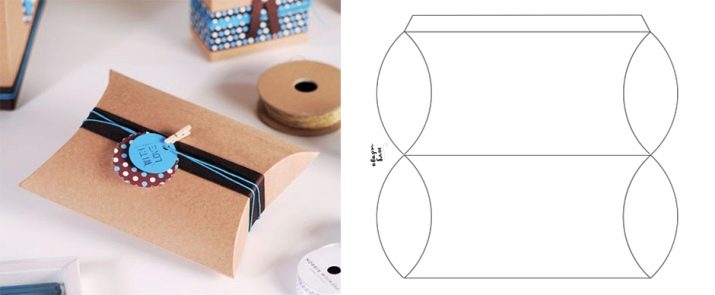
The original pillow box will turn out pretty. It can also be done quickly simply by using a template.
In such a package it is very convenient to deliver tasty sweets or small decorations. This box is made simple.
- Do not rush to tuck future gift wrap. First, scoring should be done on the fold lines - they can be pressed with a ballpoint pen or other thin object (but only not sharp). It is impossible to neglect this stage, otherwise it simply will not be possible to bend the material along a curved line.
- It is better not to print the diagram of the future box on the printer, but to sketch it yourself.
- To draw the valve lines, you will need to use some round object. But immediately after that it does not need to be removed. In the future, it can be used instead of a ruler when scoring, because by hand it will be much more difficult to do.
- The valves on one side will be easily pierced using a hole punch to insert a ribbon there. It is not recommended to glue them with glue, since it is almost unrealistic to press the valves together so that the glue can seize
The result is a very neat and beautiful gift box in small sizes. It can be decorated as you wish. For example, you can do something more original by supplementing such packaging with a constellation painted with a gel pen.
For a very small presentation, you can make a small gift box-envelope. Its production will take a minimum of free time. Most often, cash presents and gift certificates are placed in such boxes - such things fit perfectly in compact envelopes.
In this case, you need to use a simple scheme, transfer it to thick cardboard, and then cut and carefully bend all the available petals. You can decorate the resulting packaging for every taste and color. Particularly interesting and “lively” are home-made envelopes in which each edge of the petals is complemented by beautiful sparkles. You can apply them using a cotton swab dipped in glue.
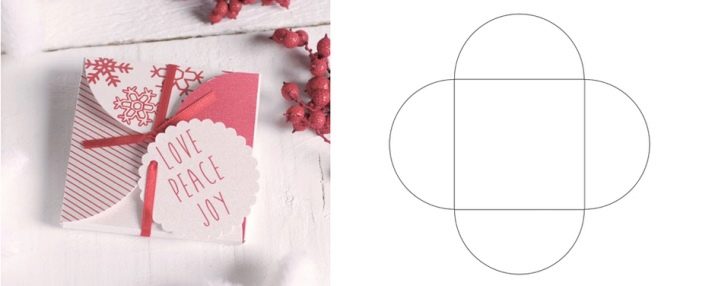
If your present is not absolutely flat, then such an envelope can be made with small walls so that the thing can fit into it. The height of the walls should be very small - just a few millimeters is enough.
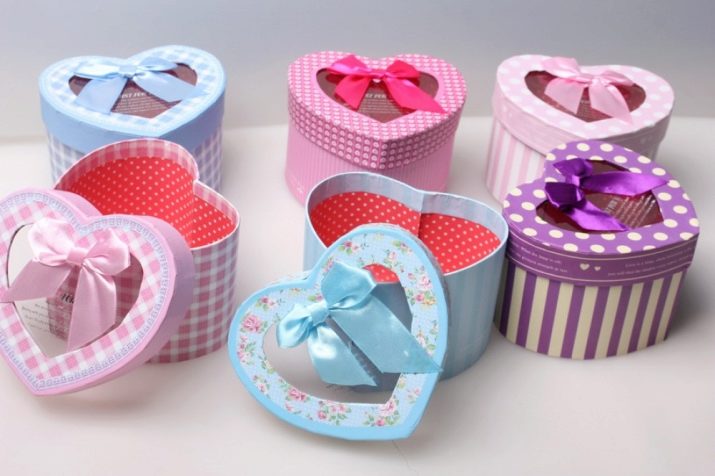
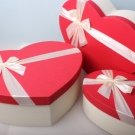
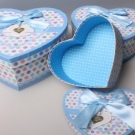
Very beautiful gift boxes are made in the shape of a heart. In this case, you should use a suitable scheme.
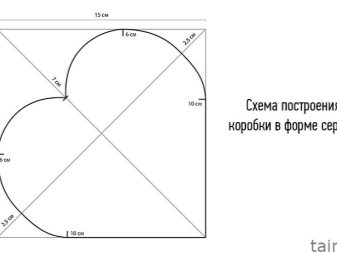
Having a good template, you can proceed to the direct manufacture of boxes.
- First, the heart diagram must be applied to a sheet of thick cardboard, and then you need to cut it very carefully.
- It is necessary to draw sidewalls separately. The depth of the box can be any, but in our case it will be 3.5 cm. Another 1.5 cm should be left to prepare the “cloves” that will stick to the base of the box. The length is recommended to be done with a small margin. If excess remains, they can be easily cut off after gluing the structure.
- Next, you need to make a scoring at the bend.Using a ruler, grooves should be pressed. In this case, use a non-sharp object. For example, it may be the reverse side of a clerical knife.
- After that, you will need to fold the cardboard strip, relying on the intended scoring.
- Cut the cloves. Glue the side part to the base of the box. Cut off all the excess parts, leaving a small ponytail so that you can then glue it with the second half of the wall.
- The wall will consist of two halves, so you will need to especially carefully coat all areas at the joints with glue.
- A similar method is used to make the box lid, but with slightly increased dimensions, so that the packaging can be easily closed.
- The walls of the lid can be made with a height of 2 cm - this will be enough.
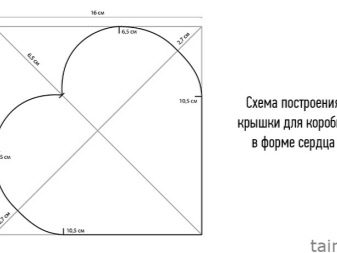
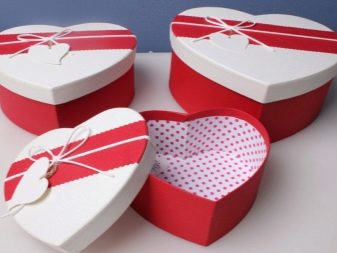
After that, the heart box will be ready, and it will be possible to proceed to the finishing touch - decorating it.
Decor Features
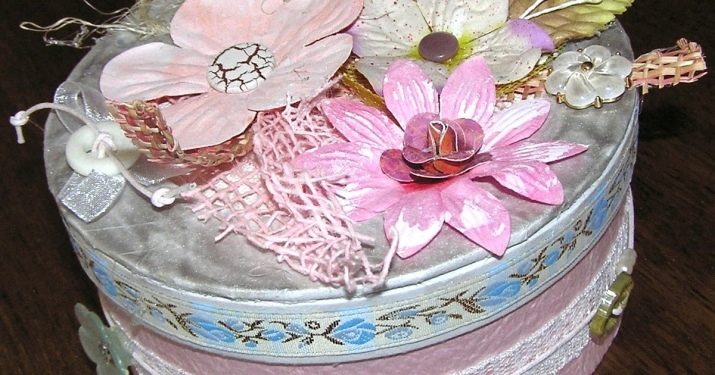
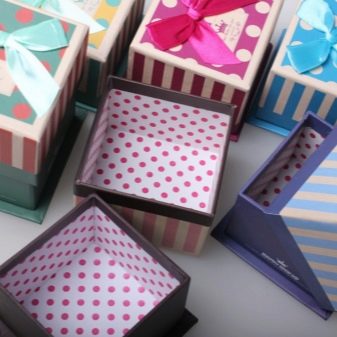
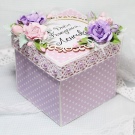
Decorating a homemade gift box is another important step in the manufacture of packaging. There are a great many ways to decorate a present box made beautifully and elegantly.
Here you can let go of your imagination using a variety of materials.
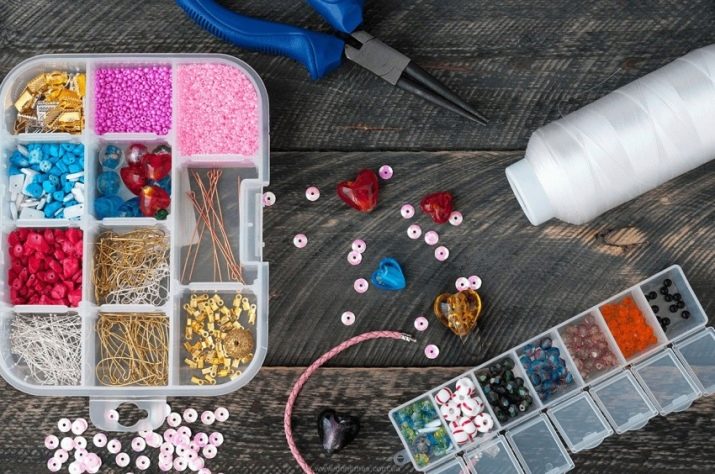
Consider several options for how to effectively decorate a gift box.
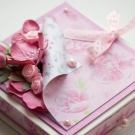
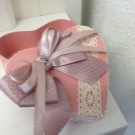
- You can decorate a gift box with beautiful bows of different sizes. Bows can be both small and magnificent.
- Multi-colored ribbons are a win-win option for decorating gift wrapping.
- You can collect a very beautiful and bright decorative composition of shining rhinestones or multi-colored beads.
- Drawn patterns or drawings look good on cardboard boxes. You can use different tools for this, but the most spectacular sketches are obtained using gel pens.
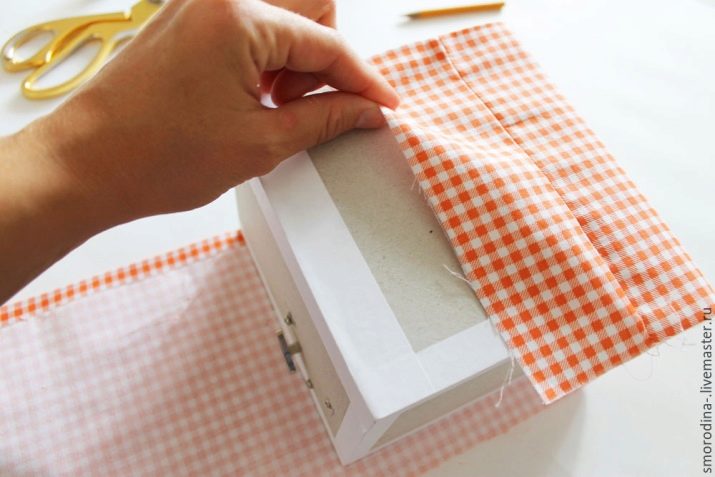
- You can wrap the box with cloth. It can be both light and airy material, and more dense jeans or denim.
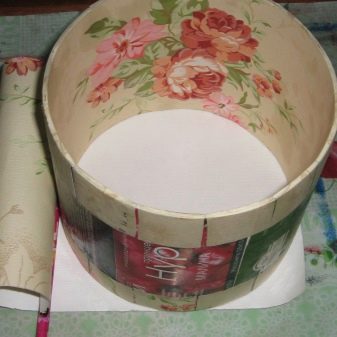
- A universal solution is a special gift paper, which is sold in many stores. She can arrange any box.
- It is also permissible to supplement the gift box with various stripes. For example, it can be multi-colored buttons of different sizes.
- If we are talking about a box for a New Year's present, then it can be decorated with a small Christmas tree branch or small Christmas balls.
- Decorative flowers made of fabric or paper look great on holiday boxes. Such parts can be either small or large. Especially spectacular look buds made of shiny and shimmering fabrics in the light.
- You can decorate the box with sparkles. It is permissible to apply them in various ways. More reliably and firmly shiny blotches will hold if they are put on glue. To do this, use a brush moistened in advance in an adhesive solution.
- If we are talking about a gift that is presented in the winter, then you should turn to paper decorations. Beautiful snowflakes of cunning shape should be made of snow-white paper. Similar elements can decorate any gift wrap.
Useful Tips
If you want to make a box of paper, rather than thick cardboard, then it is worth considering that such packages are more suitable for small and light presents.
If a box is being prepared for a gift to a man, then excessive decorations, sparkles and rhinestones will be inappropriate. It is better to make an attractive, but more restrained box.
Gift wrapping paper for box decoration should be chosen in accordance with the theme of the holiday. For example, for a New Year's present, it’s worth picking up shiny paper with the image of snowflakes, snowmen or Santa Claus.
If you finish the box with a cloth, then stick it on, without saving PVA glue. Otherwise, the material may begin to bubble.