Often, wooden objects, whether they are dishes or furniture attributes, attract a lot of enthusiastic looks thanks to a special decoration - an ornament of an unpretentious geometric shape carved on them. Such a thread, although it seems at first glance simple and consists of light lines and shapes, is still quite complicated in execution, time-consuming and energy-intensive.
Let us consider in more detail what geometric woodcarving is and how it appeared, as well as get acquainted with the types of patterns and the technical side of their execution.
What it is?
Geometric wood carving - Perhaps one of the most difficult types of decoration of wooden objects.
The peculiarity of this technique lies in the fact that the entire ornament consists exclusively of parts of a geometric shape and is performed by a cutter.
As a rule, if the master has enough experience and a solid hand, the geometry in the pattern is visible to the naked eye.
Of course, the age of modern technology allows us to manufacture such products with the help of special machines, but it is impossible to guarantee the quality and accuracy that can be traced in the work of a professional experienced craftsman. What can we say about the exclusivity of the product and the fact that such beauty can be created only from a pure heart by investing a particle of soul in the work.
The purpose of such items can be varied, as carving can decorate chairs, and cabinet doors, and front doors, as well as dishes, bench legs, a table, window shutters and much more.
It is worth noting that the thread itself does not carry any functionality and is used exclusively as a decor.
The history of development
Even in ancient Russia, the first objects decorated with geometric carvings appeared. And Russia is considered to be the birthplace of this woodworking technique, which subsequently became widespread around the world.
The thing is that native open spaces have always been rich in forests, so wood products that needed decoration were more than enough.
In addition, door locks were also made of wood, which were also decorated with carvings. One such copy, created in the 18th century, has been preserved to this day in one of the museums in Moscow.
It is also worth noting that the geometry of carving is rooted in a time when people worshiped pagan gods, therefore, absolutely all the ornaments applied to objects had a definite, rather deep meaning.
In the modern world, such objects are not endowed with any magical meaning, but in the days of ancient Russia they were used to protect the family, the talisman of the house, and sometimes even from damage and the evil eye.
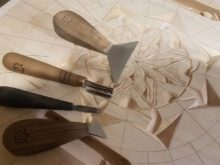
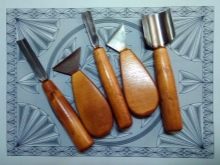
Necessary tools
In order to create a beautiful and high-quality pattern on wood, you must acquire the following tools:
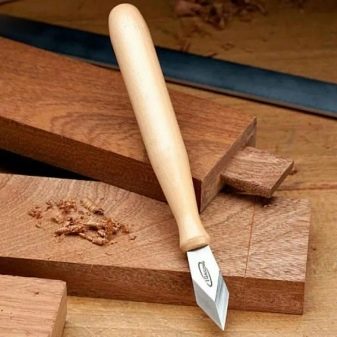
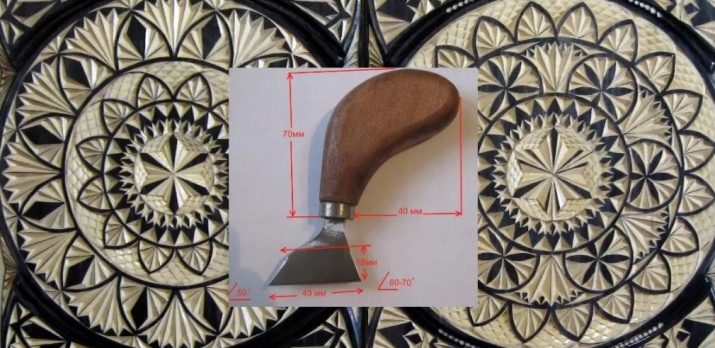
- knives with a beveled blade (also called “jambs”) allow you to create any geometric patterns on the surface of a tree;
- a small flat chisel, the width of which should not be more than 3 centimeters;
- for sawing out any elements and preparing wooden blanks a hacksaw is needed;
- files of different shapes will allow you to make the corresponding grooves, recesses and holes;
- a solid or flexible ruler may come in handy to create a symmetrical pattern;
- for marking, you need a simple pencil, which, if necessary, can be easily erased from the surface;
- for drawing a marking of a rounded shape it is worth arming with a compass;
- an eraser is needed to remove pencil strokes.
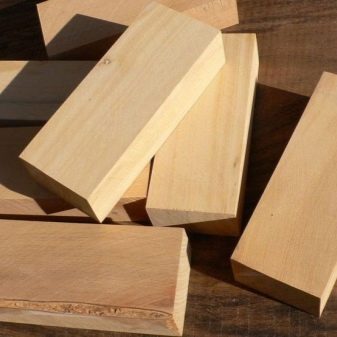
What wood to work with?
To work in such a carving technique you will need high-quality wood. It is divided into several groups according to some characteristics.
- Very hard wood is the most difficult to work, not even every professional is easily given a pattern on such a surface. But often the choice falls precisely on her, since she is famous for aesthetic properties and good resistance to decay. The most famous representatives of this group are oak, dogwood, and white acacia.
- Medium hard wood - The most commonly used raw materials. Most masters prefer this type of workpiece, because working with them is much easier, they have similar properties with harder grades, and also have a pretty beautiful structure on the slices. The brightest representatives of this category are beech, ash, birch, aspen.
- Softwood best suited to all types of processing, but has a significant drawback - it can be pricked when threaded. This type of raw material is suitable for beginners and for those who are just learning carving. In this group, the most famous representatives are pine, willow, alder, linden.
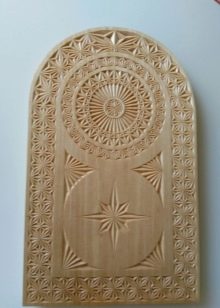
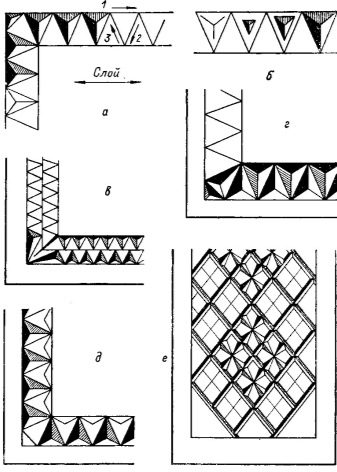
Types of patterns
To understand the main distinguishing features of a particular ornament made in the technique of geometric carving, you need to familiarize yourself with several types of patterns, as well as with diagrams and the basics of their execution.
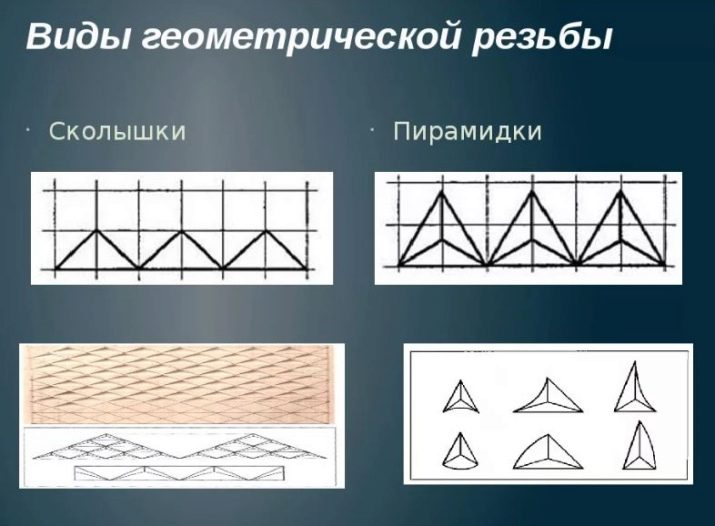
Pegs
The main elements to learn are pegs, representing a tattoo and pruning of wood parts.
Tacking is quite simple: you need to take the beveled knife into your working hand and, deepening its tip a few millimeters into the wood, you need to mark it in the form of a triangle or rhombus.
Then you can begin to trim, following the instructions.
- The cutting part of the blade must be applied to the left side of the triangle, and the beveled part should be in the region of its apex.
- Take the knife handle back without breaking the parallel between the right side of the triangle and the edge of the blade.
- We press on the knife and return the handle to its original position. When performing these actions, the part of the desired shape and size should break off.
Rhombic
Cutting a rhombus on a wood surface is quite easy, especially if you have already mastered the technique of working with pegs. The thing is that this figure consists of two triangles having one base, so it can be cut out, acting according to the principle described in the previous version.
In order to get a smooth ornament, you must first work out the top row of triangles, and then go to the bottom, forming the shape we need.
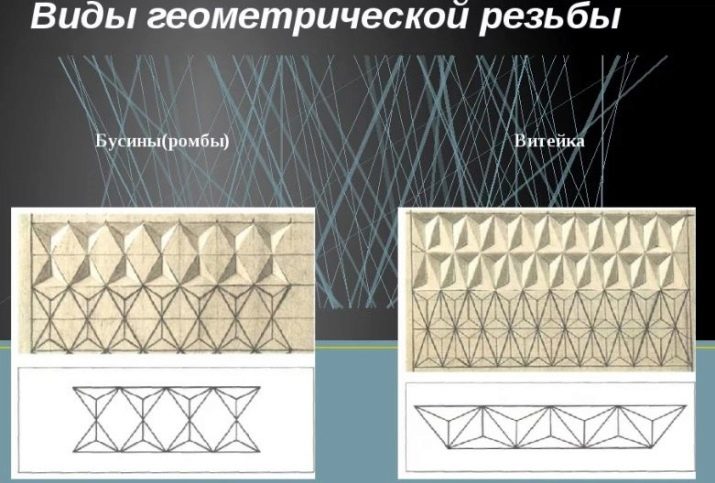
Viteka
Also a very interesting element, which is based on the principle of action used when working with pegs. The distinguishing feature is only that the triangles do not have a common base, but, on the contrary, are shifted in different directions.
The work also happens by applying two rows of triangles in turn, but in the end we get not a rhombus, but a winding openwork path, which is often compared with a snake.
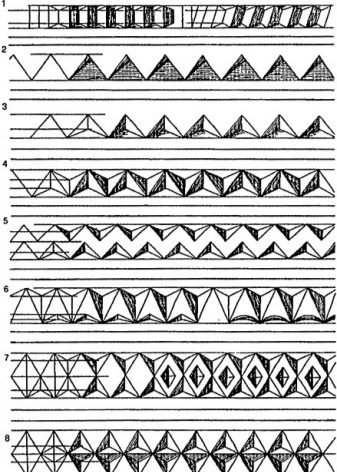
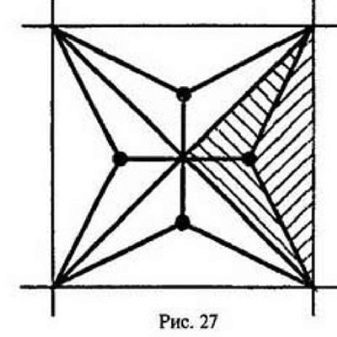
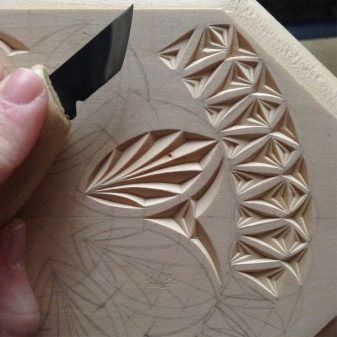
Pyramid
The pyramid is first complex pattern of those that you have to learn, comprehending the art of geometric woodcarving.
The work takes place by applying several triangles - subject to a certain order and the distance between them. At an equal distance from each other, three triangles are applied, two of which are in the upper part and have a common edge. In the middle between the figures, it will be necessary to designate the point of contact of the corners. The cutting part of the knife should occupy a central position, and movements must be made in the direction in which the natural layers of wood lie.
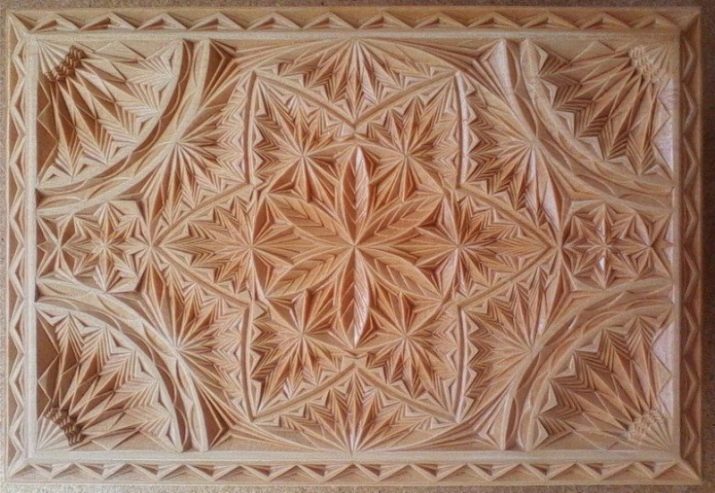
Star
Next to study figure is a bit more complicated because it is based on a larger number of trianglesthan in all previously studied options. But despite this seemingly important nuance, the principle of working with this figure does not change, and the foundation is still based on the creation of chips.
To create an asterisk, four or more triangles must be applied according to the principle used in working with the pyramid.
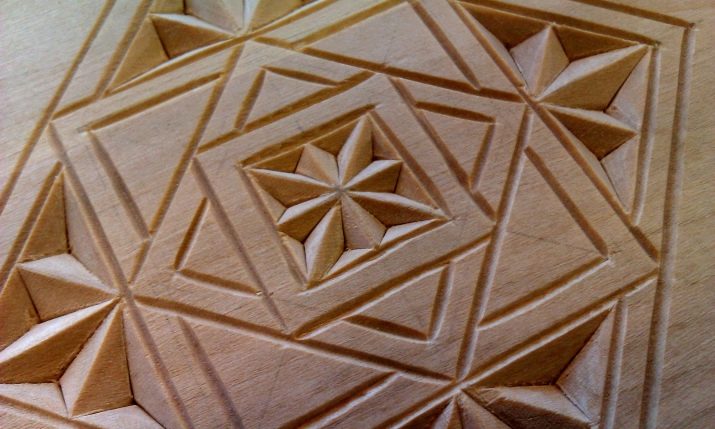
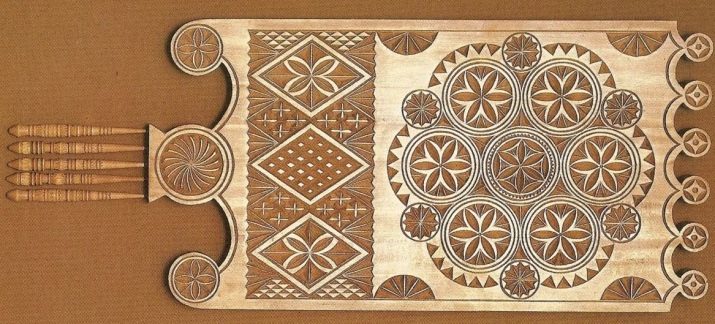
Squares
Creating squares is fundamentally different from working with all previous patterns, since a completely different technique is used - straw.
A distinctive feature of this pattern is that it can be either a separate element or used to frame the edges of the workpiece or as a kind of frame for another pattern.
To create a square, proceed as follows:
- after applying the marking, it is necessary to retreat from its edge by a couple of millimeters and at an angle of about 45 degrees, deepen the tip of the knife by 3 millimeters, then draw a cut along the line;
- further on the principle of specular reflection it is necessary to perform all the same actions on the other side of the marking strip;
- after this, it is necessary to position the knife vertically with respect to the workpiece and make two punctures (at the beginning and at the end of the line).
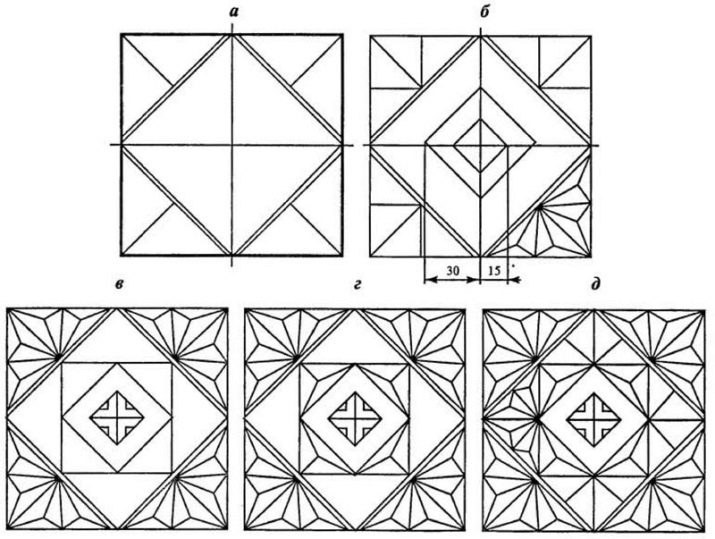
If you perform all of the above actions correctly, you will get a thin section in the form of straws, and after processing all the edges of the markings in this technique, you can create an interesting pattern of the shape you need.
Most often, this technique is used to frame products, respectively, of square and rectangular shapes.
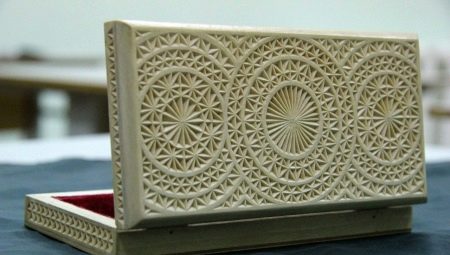
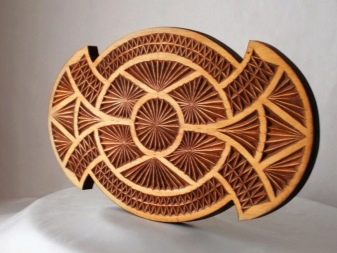
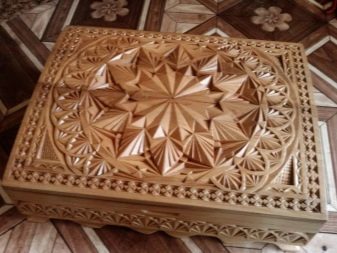
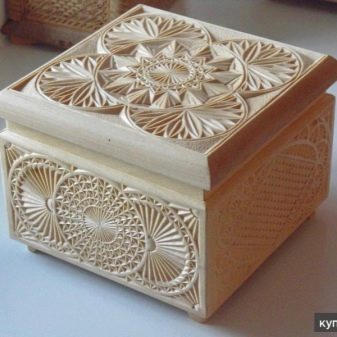
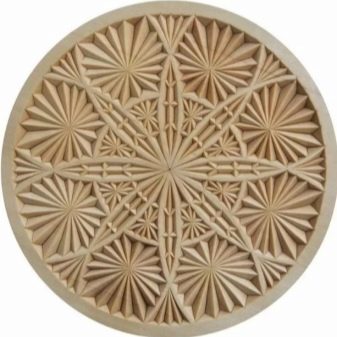
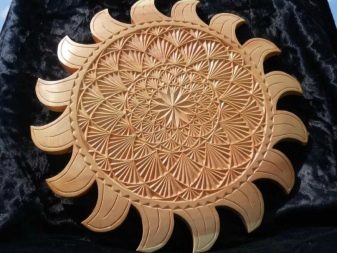
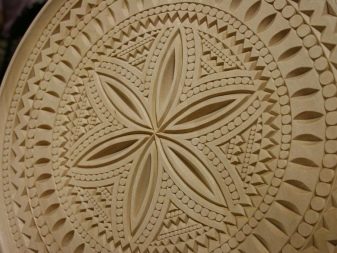
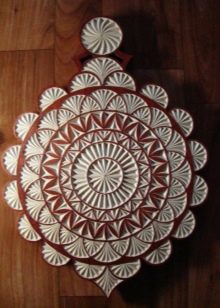
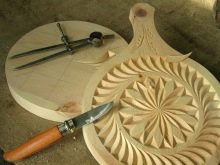
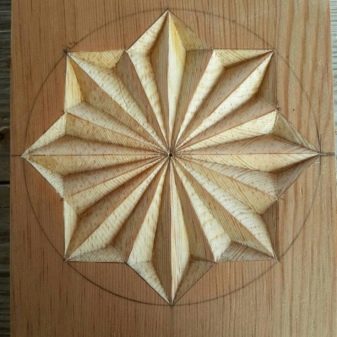
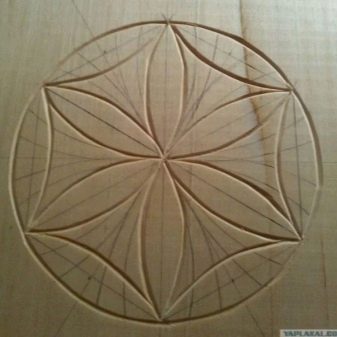
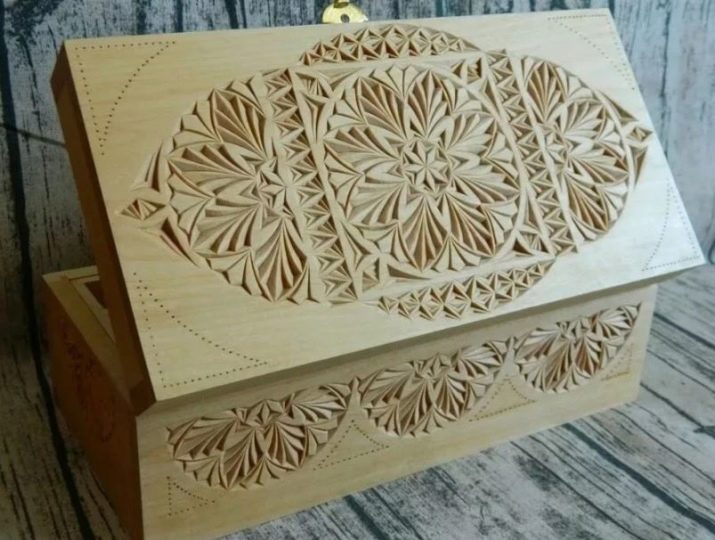
Socket
Perhaps the following geometric pattern is the most difficult to perform, and at the same time it can rightly be called the most beautiful of all the ornaments you already know.
To create a socket, you need to arm yourself with a pair of compasses and first of all designate the boundaries of a circle of a rather large diameter, after which you need to retreat 5 millimeters from the edge and outline another circle. Then both circles must be divided into 16 equal parts.
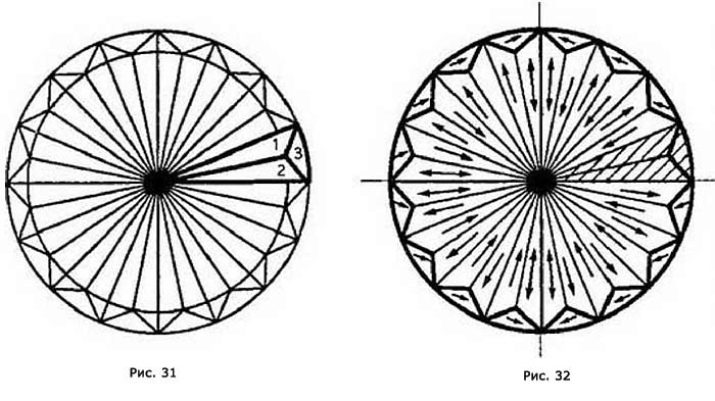
At the next stage, it is necessary on each segment located within the boundaries of the small circle to mark the middle and connect it with the points of contact of the segments with the boundaries of the large circle located on both sides of the center we have designated.
Having received the markup, we can start carving using the first learned technique for working with triangles.
Using this pattern, you can decorate the box cover, the bottom of the decorative plate, the surface of the round table and other products of a suitable shape.
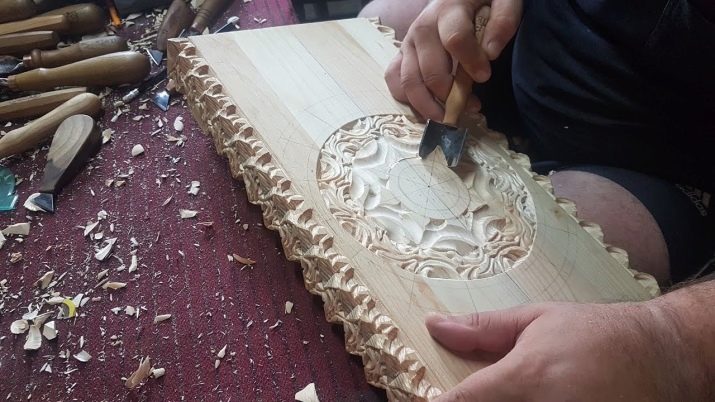
Where to begin?
Before starting work, it is necessary to prepare well in order to avoid possible difficulties in the process:
- First of all, you need to carefully check the list of necessary tools, collect everything you need and choose the right material for the job
- it is further recommended that you familiarize yourself with the technology of the work and consider detailed examples and sketches of the construction of certain figures;
- after you theoretically outline the upcoming actions, it is recommended that you mark up a suitable workpiece;
- Also (before you start cutting), safety precautions and precautions should be studied.
Since this lesson is quite dangerous, precautionary measures are an essential element in the learning process. Let's consider them in more detail:
- it is necessary to minimize the load on the area of the shoulder girdle, so movements should be performed exclusively by the hand;
- so that the hand can move quietly, it is necessary to give the working hand support, for this it is recommended to firmly press it to the working surface;
- in order not to accidentally injure the fingers of the free brush, it is necessary to remove the hand from the workpiece and only slightly hold it in the area remote from the cutting object.
If you follow these recommendations, you can enjoy the process, avoiding minor injuries.
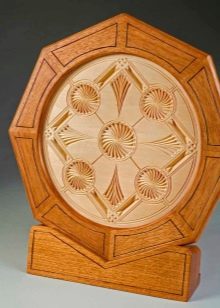
Finished work
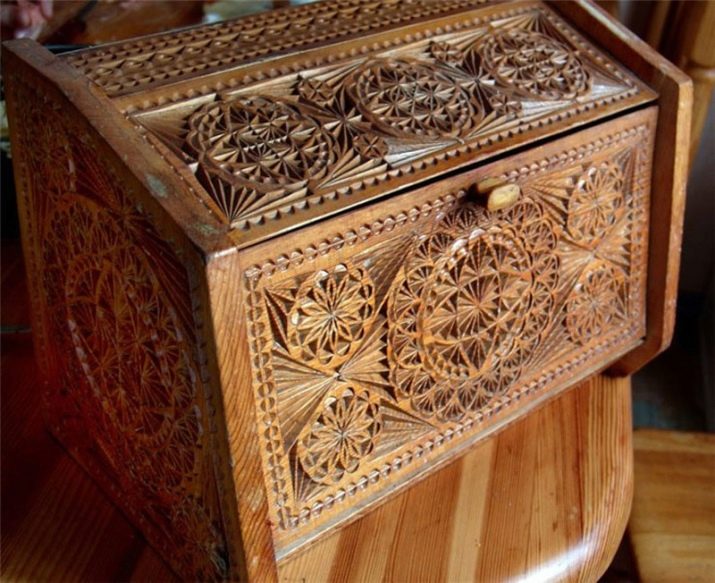
In order to represent all the beauty of geometric carving, you should familiarize yourself with ready-made examples of wood crafts:
- luxury chest small size can be used as a storage of food or personal items;
- no girl can resist such a graceful, but at the same time restrained jewelry box;
- but cutting boarddecorated in such a technique will become, rather, a decoration for the kitchen, as it will definitely be a pity to use it for its intended purpose.
How to cut simple geometric shapes, see the next video.


