The choice of fashionable hairstyles today is quite large. Every morning, women are faced with the choice of styling. Priority: ease, speed of execution, the main thing is that it looks neat and suits the owner. The choice is huge, you just have to decide on the type of hairstyle, and then try to repeat it.
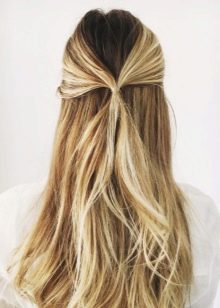
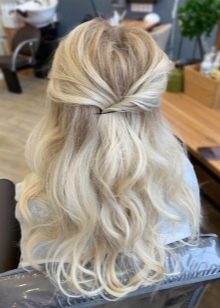
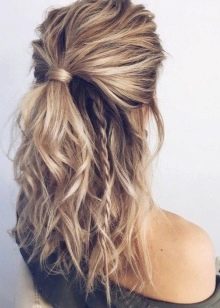
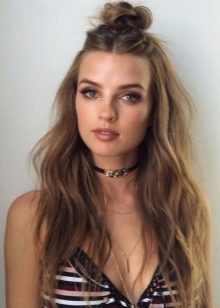
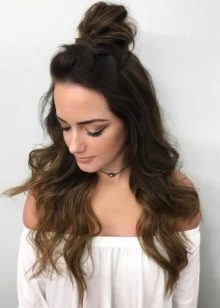
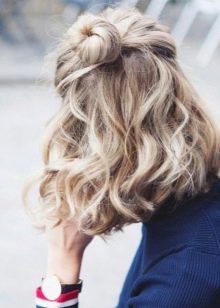
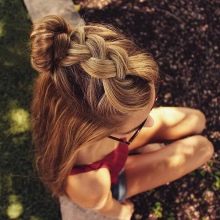
Today we look at one of the most common and simple hairstyles, it is called "malvinka". Suitable for absolutely every girl, it does not matter either the length of the hair or the type of face. It is versatile, simple and sophisticated at the same time.
Description
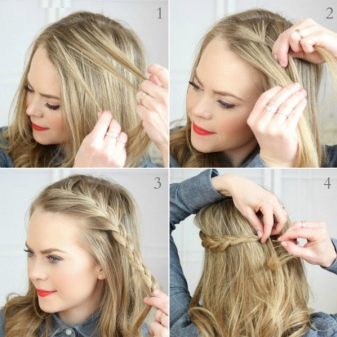
The execution of this hairstyle is not difficult. Consider two classic options, for which we need only one gum or a pair of invisibles and a comb.
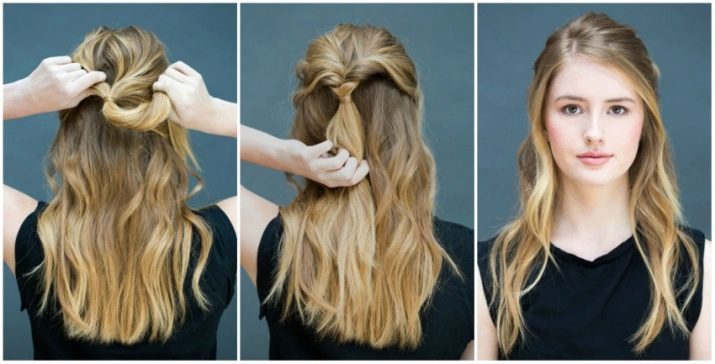
- Gather combed hair from ear to ear and tie the tail with an elastic band at the crown. For a larger volume, you can comb a little strands of hair, and only then tie a rubber band or fasten with invisible hair.
- Comb your hair, grab a medium-thick strand from both ears, pull it back and tie your tail.

Who is it for?
Due to its versatility, it is suitable for all girls and women. For more mature representatives of the floor, a well-combed version with a tail wrapped in a shell in the back or a regular tail twisted in a tight bun is suitable. Some even hide the bald spot on the crown, combing their hair and securing it. Different variations are available to young girls: with a tail, with a bundle, with various types of weaving.
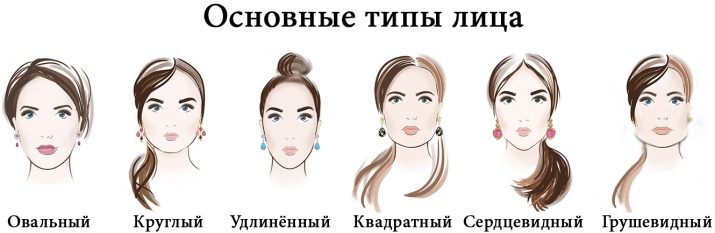
Regarding the type of person "Malvinka" fits any form, oval, square and triangular. To hide or emphasize features, you must use the variation of hairstyle you need.For example, a square type with pronounced cheekbones is suitable for straight hair, but for owners of the correct type of face it is preferable to curl hair.
Hide a long face will help bangs.
Varieties
There are many options for "Malvinka". With such a hairstyle, you can go not only for a walk with friends, but also for a romantic dinner, party, celebration, wedding.
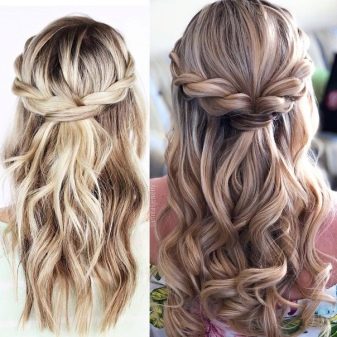
Classic
The source of the classics consider the option fixed with invisibility:
- to start, comb the hair well, if necessary, spray it with varnish or brush with a small amount of foam to make it fit well;
- separate from the forehead part of the hair, comb it a little, attach with invisibility on both sides;
- fasten the taken lock near the temple on the back of the head so as to hide the invisibility, do the same with the opposite side;
- wind your hair if desired.
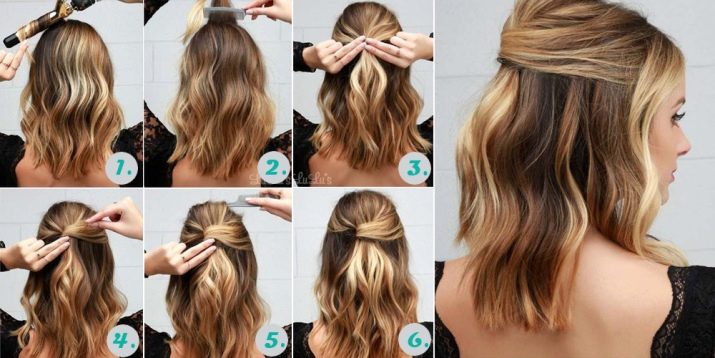
This variation is suitable for morning and evening walks. An important role will be played by styling the upper hair bundle. Volumetric bouffant looks more romantic, smoothly combed hair - this is a more rigorous option.
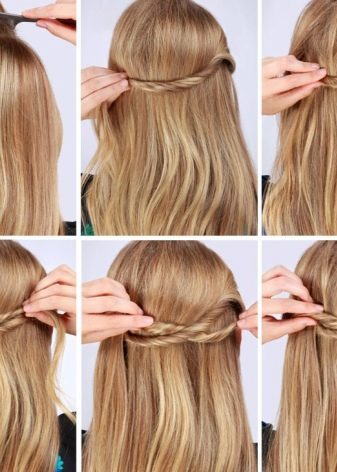
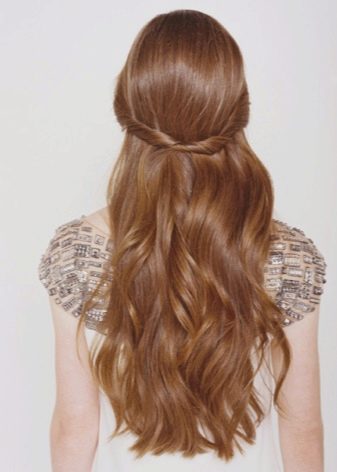
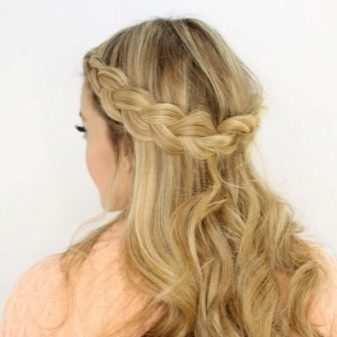
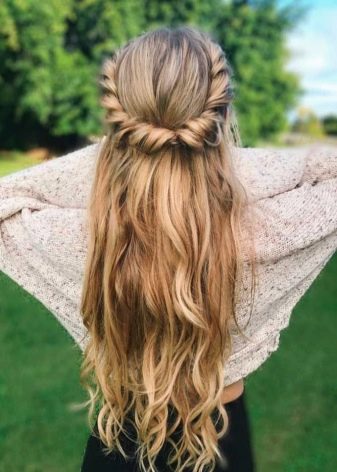
From harnesses
The option of the harnesses is no different from the classic, made with two strands. You just need a comb and rubber or invisible to fix, you can also use a hairpin-crab:
- to start comb the hair, use a fixing agent;
- separate two symmetrical strands and twist them inward, tie them together with an elastic band at the back or fasten with a crab;
- you can twist first one lock, securing it with an invisible back on the other side, then the second and fix it symmetrically to the first;
- You can decorate such a hairstyle with various hairpins, scallops and other accessories;
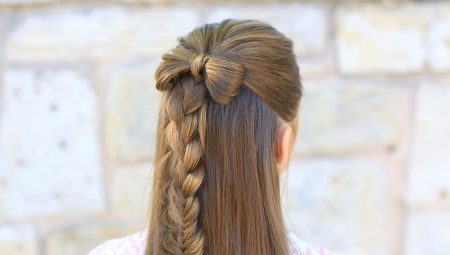
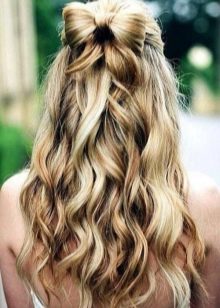
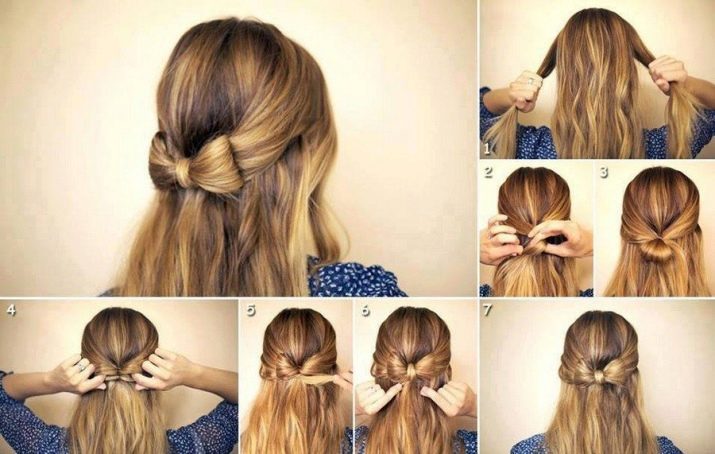
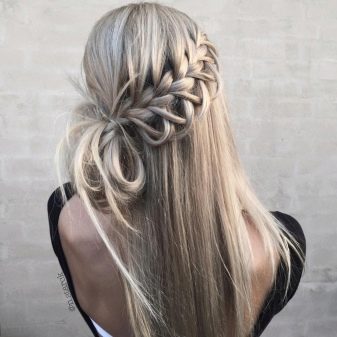
With bow
Of particular prevalence is gaining a "malvinka" with a bow. The bow itself will be made of hair, for this we need a comb, an elastic band and a few invisible ones:
- comb your hair well, then take two wide strands and tie them on the back with an elastic band so as to leave a small loop;
- divide the resulting loop in half, fasten the halves with invisibility to maintain the shape - these will be the “wings” of the bow;
- take the remaining tail and wrap between two loops, fix it;
- can be decorated with a beautiful hairpin with a rhinestone or a single bead by placing it in the middle.
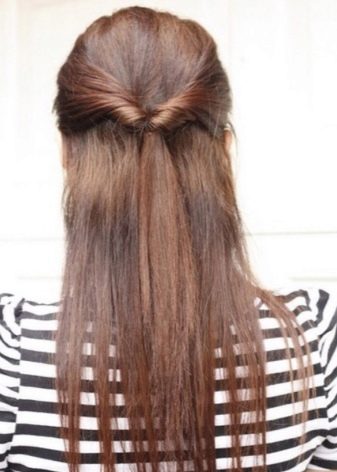
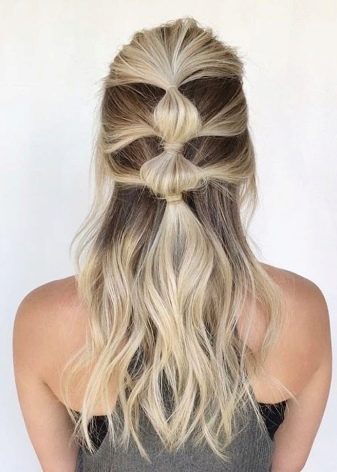
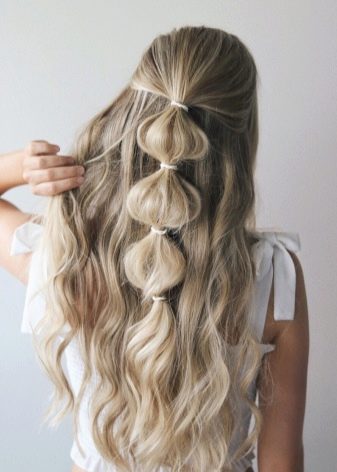
Inverted tail
Another one of the quickest, easiest options is inverted tail:
- first comb your hair carefully, then comb it back;
- make a ponytail at the top of the head, leaving the lower part of the hair intact;
- make a hole a little higher than the elastic and twist the tail into it;
- hide the elastic by wrapping it in a thin strand of hair. Secure with invisibility.
Hairstyle "malvinka" from inverted tails.
- Separate a pile of hair from above and tie a tail at the back of the head. Then it should be turned out through the hole made above the gum.
- Gather the remaining hair from the temporal part, picking the already tied tail above, tie it into one common tail. Make a hole again and twist the collected hair into it.
- You can decorate with beautiful crabs or hairpins with rhinestones, ribbon bows.
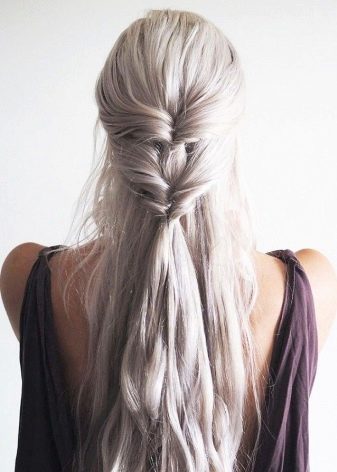
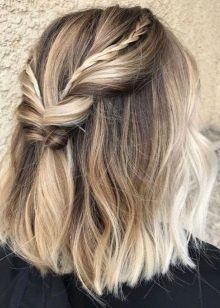
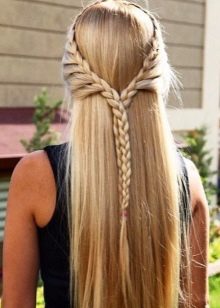
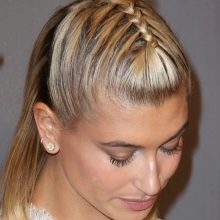
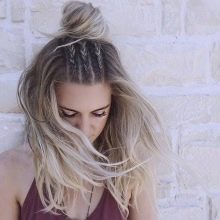
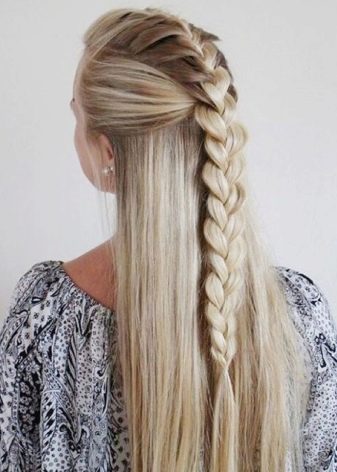
Weaving
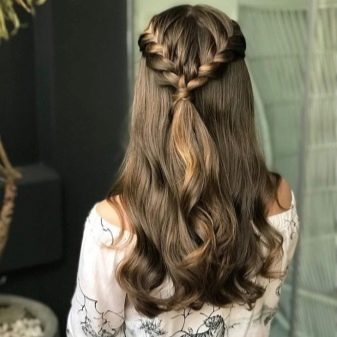
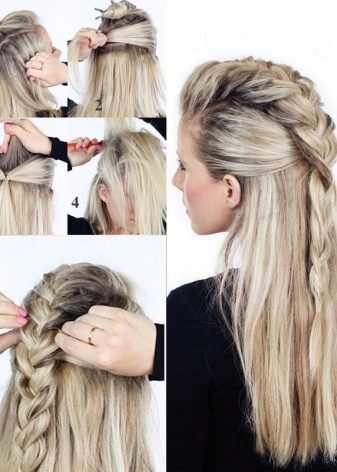
It is very popular to use weaving in hairstyles. You can weave both ordinary braids and delicate braids. Let's consider several options.
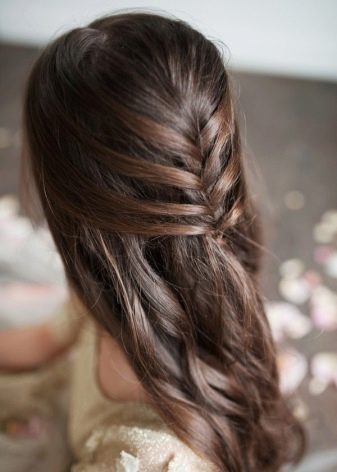
Plain weave
- After combing your hair, take a small strand from the temple and braid an ordinary pigtail-spikelet.
- Do the same with the opposite side.
- Fasten the two braids together at the back, tie them with an elastic band.
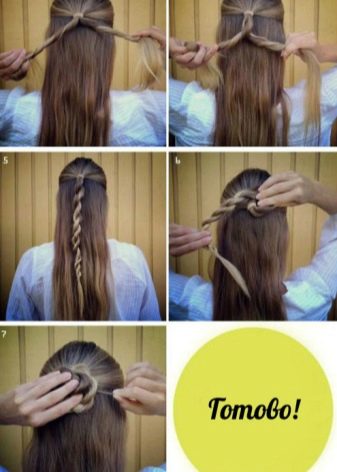
As a tourniquet
- Take two strands from your temples and twist them into bundles, fix with an elastic band, then you can braid a spikelet from the tail and tie it again with an elastic band. Or weave a braid and twist it into a flower, wrapping around, securing with hairpins, and hide the remaining tail in a flower.
- Before twisting the tourniquet, separate from each bundle a small thin strand and braid the usual two pigtails.Twist the harnesses, tie them together with pigtails.
- Use a regular tape, wrapping it in a tail, fasten with a beautiful crab, an elastic band. Hairstyle is ready, fix with varnish.

Classic
For him, you need to comb your hair well, dividing them in half. Then, on one side, take a small pile of hair and divide it into three strands. Weave them together laying strands on top of each other. Then, with the next binding, add locks of hair only from above. Weave like this until the middle of the nape. Weave the other half as well, fix both braids together with an elastic band, separate the strand, wrap it around the elastic band, securing it with a hairpin.
Tracery
It is not weaved upward, crossing strands, but underneath. Add locks only from above, as you finish, finish the braid. Tie on one side with silicone rubber bands. Gently pull the strands out of the braids with your fingers. Fasten one of the braids on the opposite side with hairpins, do this with the second braid, hide the tails.
Braided harness
For him, divide the hair in half, on one side take a strand of hair and divide it into two more identical strands. Twist them with each other once. Before the next scrolling, add the hair from the total mass to the lower strand.
Add and scroll the strands to the back of the head, do so with the other side, and then tie them into a standard “malvinka”.
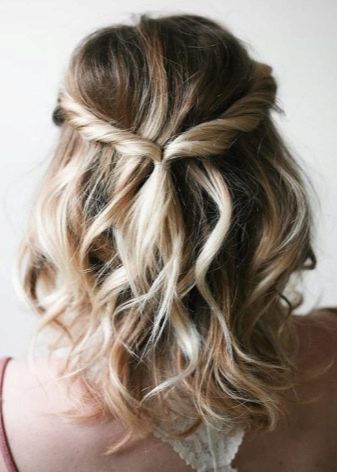
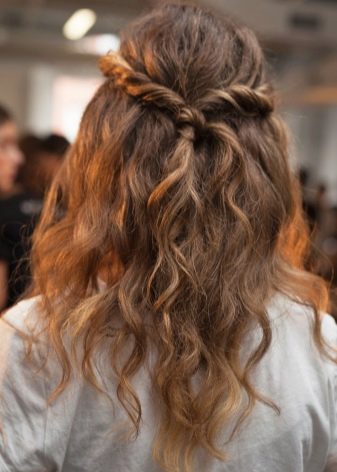
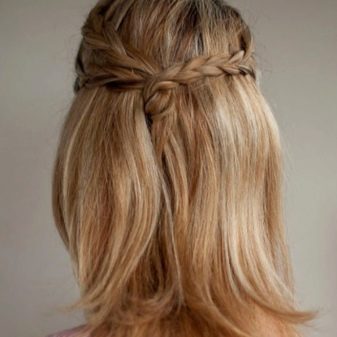
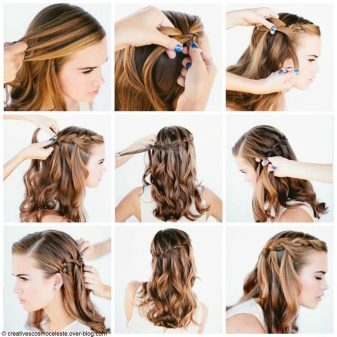
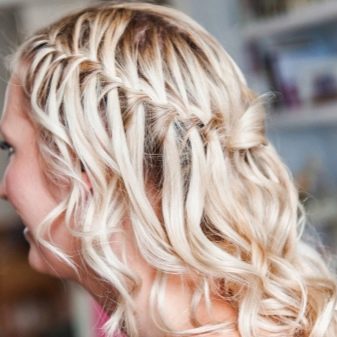
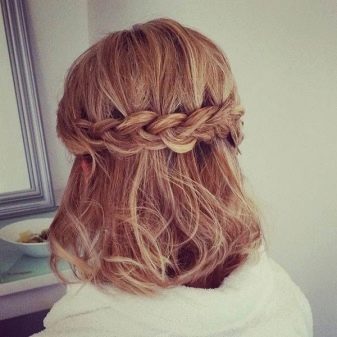
"Waterfall"
Similar to classic weaving. It is necessary to twist the strands on top of each other, when adding hair, release the upper lock, replacing it with an auxiliary one on top. Braid it on both sides and fasten with elastic bands.
"Air"
Take a bunch of hair at the top of your hair and weave a braid out of it. Starting from the second weaving, take in a braid the separated strand at the left temple, then at the right. Add a couple more strands and fix it all with one elastic band.
How to make hair of different lengths?
This type of hairstyle can be done not only on long, but also on medium and short hair. This can be either a classic simple option, or complex with weaving.
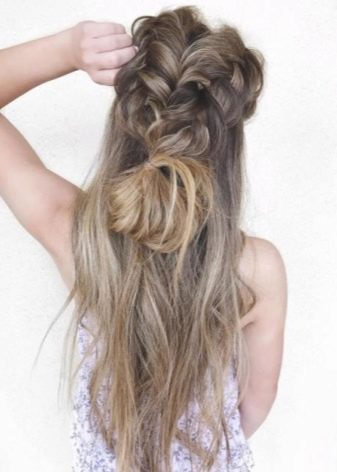
One of the most popular types that can be made to any length - this is a “baby” in the form of a bundle. For this we need only a comb and an elastic band. Comb the entire head of hair back, collect the upper part of the hair, twist it into a tourniquet and wrap it with an elastic band. The more careless the beam, the more creative the hairstyle will look.
Bunch with weaving
Comb the curls, take three identical locks from the forehead, you can twist them both up and under, picking up hair with a binding on both sides. Having reached the crown of the head, tie the tail. Then twist it into a tourniquet and stretch the strands of hair a little, wrap around the elastic. Fasten your hairstyle with regular rubber or hairpins.
In this way, you can braid not only one braid, but also two, three. Then twist into a bundle and weave to the end, twisting each braid separately, securing with hairpins.
The classic look of the "Malvinka" is also popular among young girls. The presence of accessories allows you to fix the "little girl" not only with an elastic band or invisible, but also with different hairpins.
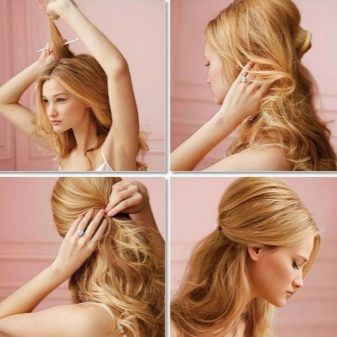
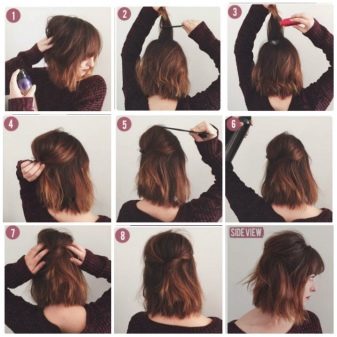
Step-by-step instructions "Malvinki" with fleece for all hair lengths.
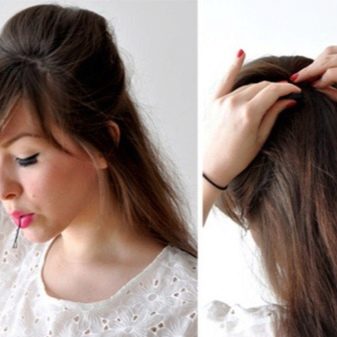
- Comb your well-washed and dried hair back.
- Choose a lock from the forehead to the crown and comb a little with a comb, lift and fasten with invisible ones.
- Take a strand from one of the temple and also fasten it with invisibility, do the same with another strand at the temple.
- You can decorate with a beautiful hair clip with pebbles or flowers.
- Fix the result with varnish. Spraying lightly throughout the hairstyle.
Long hair styling
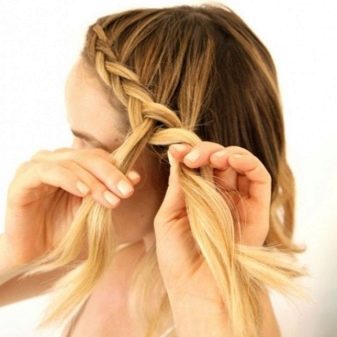
A classic French braid with your own hands.
- Comb your hair back, dividing it into three parts: the first from the forehead to the crown and two at the temples.
- Remove the first part so that it does not interfere.
- Take the remaining two and tie them together in the back.
- Unfasten the first part, take three strands and start weaving a French braid, weaving strands of hair until they end.
- Braiding the braid to the end, tie a small tail and gently pull the locks.
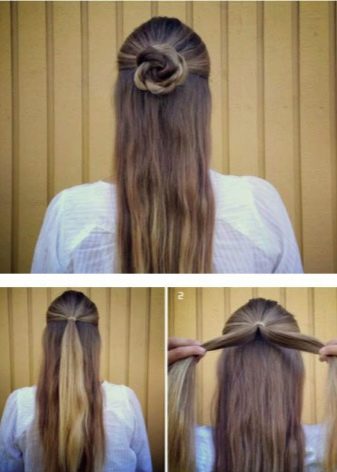
A bundle of tow.
- Tie a piece of hair at the crown with an elastic band.
- Divide the assembled tail into two identical parts, twist the harnesses from the halves.
- Connect the two bundles together with an elastic band.
- Begin twisting a common tourniquet, while making a flower, fastening with studs.
- If desired, insert a hairpin with a pebble in the middle.
"Malvinka" with rubber bands.
- Tie a regular “malvinka” with an elastic band.
- Take the same tail and tie a rubber band at a distance of 5 cm, gently stretch the curls of hair.
- Do this along the entire length of the tail, remembering to stretch the bundles.
- Fix the hairstyle with varnish.
Greek "malvinka", for the implementation of this hairstyle we need a piece-wrap (bezel, elastic).
- Comb your hair.
- Put on the bezel.
- Take a thick strand on one side and twist it through the rim.
- Pick up the next lock and again with the previous lock spin through the rim.
- Do the same on the other hand.
- Reaching the nape, leave part of the hair without affecting, and rotate the upper one into the rim.
- For greater confidence, secure with studs. Curl the remaining hair or leave it that way.
- Fix with varnish and decorate with scallop or flowers.
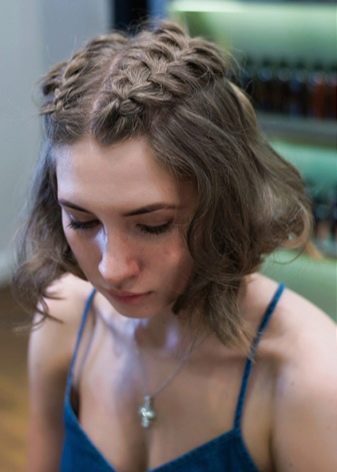
On short hair
Openwork braid
- Make a middle part, dividing your hair in half.
- Separate the lock from the forehead, then divide it into three locks, weave them together underneath. Selecting hair, add it to the already created strands and cross each other, weave so to the back of the head.
- Weave the second side in the same way.
- Fasten together with an elastic band or invisible.
Gently pull the strands with your fingers, sprinkle the hairstyle with varnish to fix it.
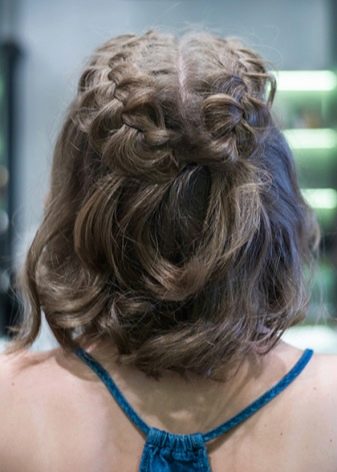
Openwork braid around the head.
- Comb the entire hair back, leaving the hair in front a little.
- Take three strands of hair from the temple and begin to weave an eversion braid (interlocking strands under the bottom).
- Weave extra hair only on top. Weave in a circle, reaching the opposite side, continue to weave, weaving the remaining separated hair.
- Having reached the beginning of weaving, weave an ordinary braid, tie an elastic band in the color of your hair.
- Hide the pigtail in your hair with hairpins.
Fix all this with a small amount of varnish or before you weave, coat the entire hair with foam or mousse.
The simplest "malvinka":
- with two pigtails: pre-curl, take two locks and weave regular braids, tie them with silicone colorless elastic bands. Comb the hair on the top of the hair with a comb and spray with varnish, fix the pigtails with invisibility;
- with two plaits: do exactly the same in the above example, only instead of braids, twist the plaits and tie them together with a common rubber band.
See how to make a Malvink hairstyle in the next video.


