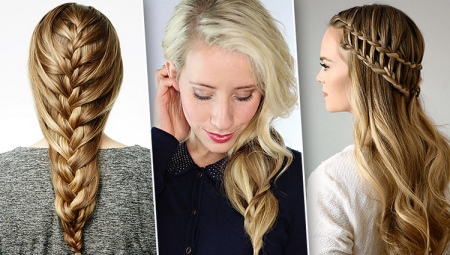
A braid is a classic hairstyle that will suit any girl. A similar styling in its various variations can be created on hair of any length, as well as regardless of the structure of the hair (straight or curly) and the shape of the face (oval, circle, triangle). Hairdressing experts assure that the braid is suitable for everyone, the main thing is to choose the right hairstyle.
There are many types of braids: from the simplest to the most complex. Thus, such a hairstyle can become not only everyday styling, but also turn into a luxurious option for a festive event.
What types of braids exist, how to create an unusual styling with your own hands and at home, what options for everyday wear and for a festive occasion exist - this material is devoted to answers to these and some other questions.
Kinds
Today, hairdressers as well as beauty salons offer a huge variety of all kinds of braids. However, in order to create such a hairstyle, it is not necessary to use professional services. So, for example, you can create a wide range of variations of braids with your own hands. The most popular types include:
- ordinary;
- with curls;
- on the side;
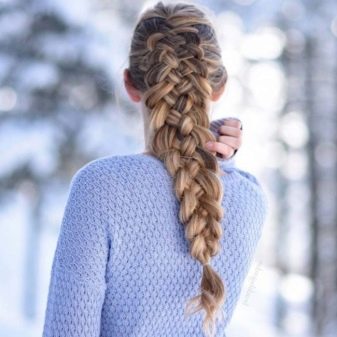
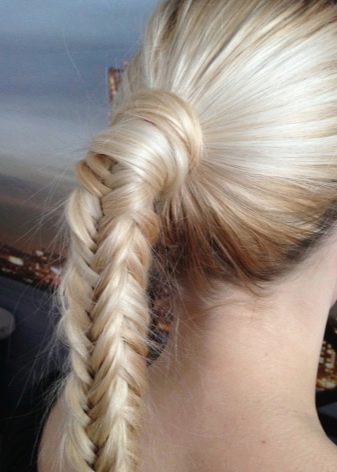
- fish tail;
- of two strands;
- of four strands;
- of five strands.

These styling can be done both to a loved one (daughter, mother, sister), and to herself. The main thing is to know all the subtleties and nuances, as well as clearly follow the instructions. In addition, with the manifestation of imagination, creativity and creativity, you can create your own, original and unique braid, which will make an indelible impression on others and become your personal highlight.Do not be afraid to try and experiment, then everything will work out.
However, before embarking on unusual experiments, you need to familiarize yourself with the basic principles and methods of weaving the most popular and common types of braids.


How to weave?
Regardless of what type of braid you decide to braid, you first need to carefully prepare your hair. To do this, they should be washed, and also applied to your hair conditioner - so the hair will be softer, more flexible and supple for styling. After this, the hair needs to be dried well.
If possible, try not to use a hair dryer, so as not to damage the structure of your curls. Also, the hair needs to be combed.


After all these manipulations, you can proceed to the direct weaving procedure. Let's consider stepwise different techniques and patterns of braid weaving.
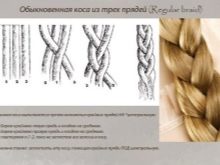
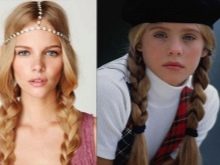
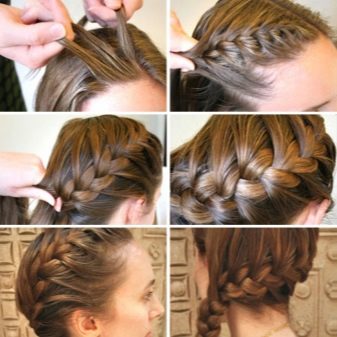
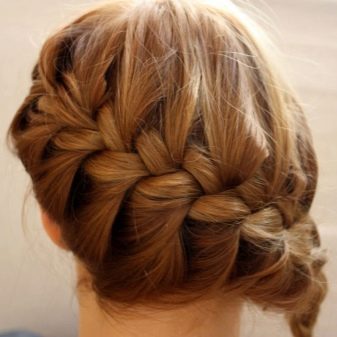
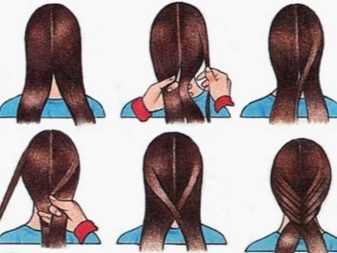
Plain
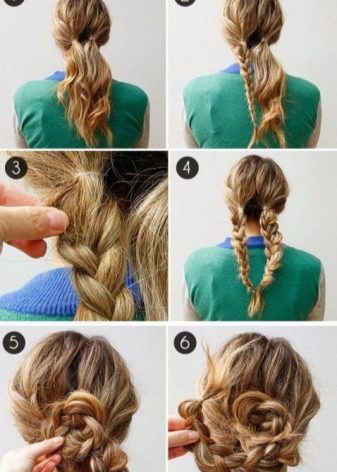
An ordinary braid is considered almost a classic styling. In our country, this is a traditional hairstyle that has been used by girls and women since ancient times. Consider a step-by-step simple weaving pattern:
- divide the hair into 3 equal parts;
- using the rightmost lock, cover the middle lock, thereby moving the right to the center;
- Now we carry out a similar procedure with the left strand, but now the role of the central strand is performed by the right one, since we moved it a step earlier;
- repeat the previous 2 steps until the hairstyle is ready.
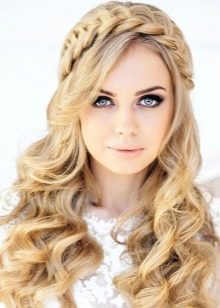
An excellent and stylish addition to such a braid will be a rim or hoop, which will give the image of romance and femininity. In addition, a similar braid can be braided from a ponytail - so you get a more athletic hairstyle.

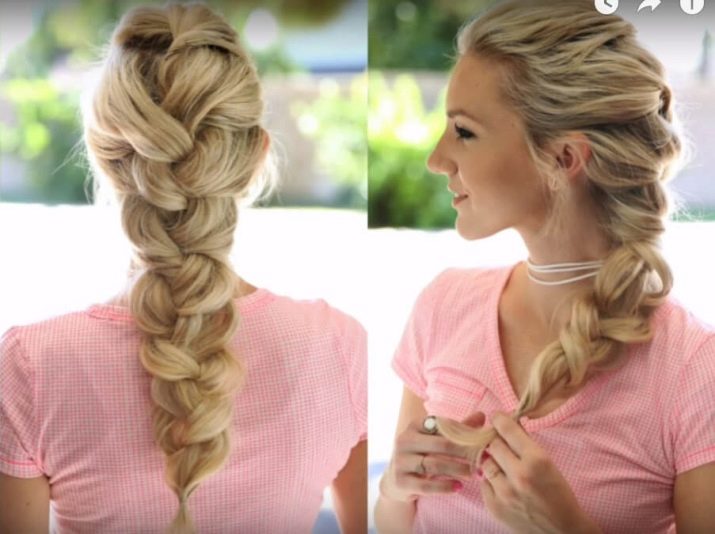
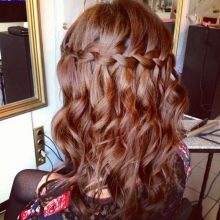
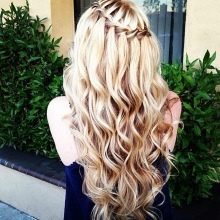
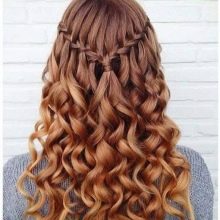
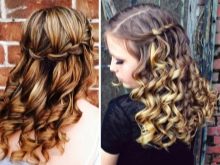
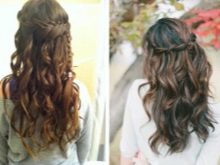
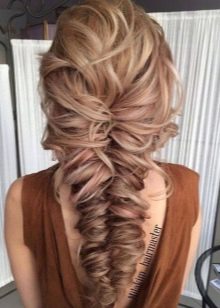
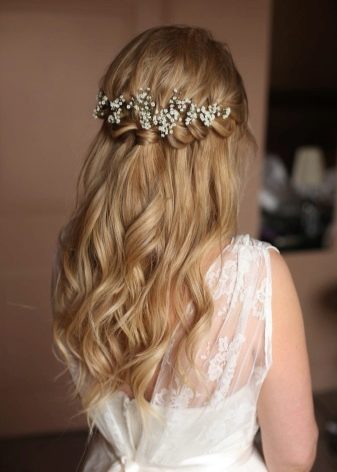
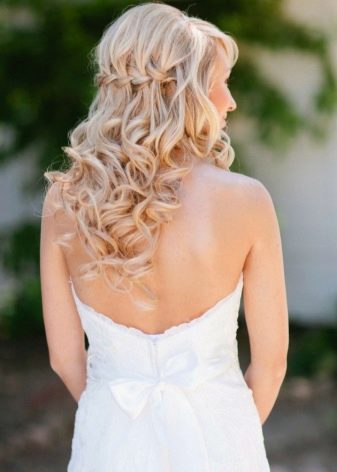
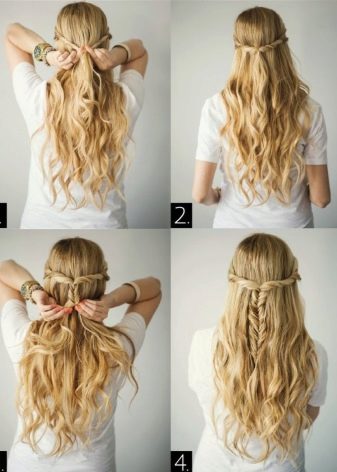
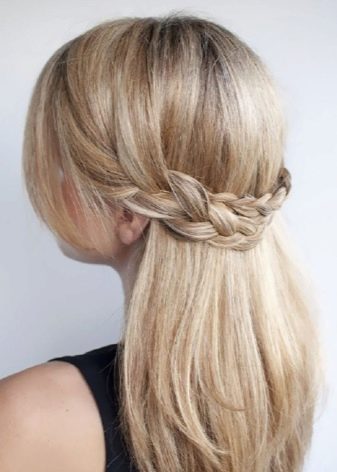
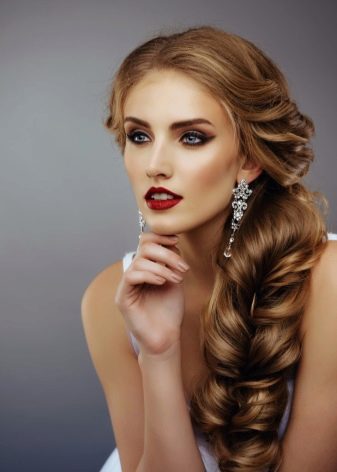
With curls
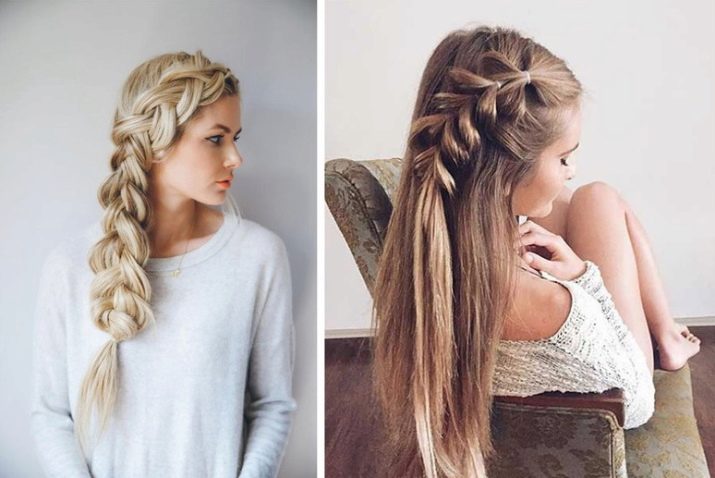
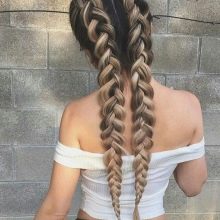
A braid with curls (or a waterfall) is a hairstyle that is designed for special occasions. Such styling can be done at graduation, birthday and even a wedding.
The basis for this hairstyle will be the usual braid of 3 parts. However, unlike the traditional version, in the hairstyle "waterfall" a simple braid will weave not vertically, but horizontally. In addition, the released curls will create a unique volume and give the hairstyle a festivity.
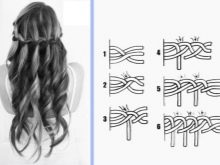
It is worth noting that this hairstyle can be created in 2 ways: by weaving one or two symmetrical braids. We will consider the second option, since it is more common and stylish.
- First you need to take a small strand of hair near the temple, choosing your left or right side at will. Now this part of the hair must be divided into 3 identical strands.
- We begin to weave the braid according to the scheme described above - the side locks on one and the other hand alternately move to the center. We do this several times.
- After that, add a small amount of hair to the top lock. We also release the lower strand and collect a new one under it - for this, the new strand must be separated from the already free hair.
- We continue to weave the braid until we reach the middle of the head. Important: if you want to weave only one braid, then at this point you just continue weaving until you reach the edge of the hair. If you will perform a hairstyle of 2 symmetrical braids, then continue to follow the steps according to the instructions.
- After you have reached the center of the head, the obtained braid needs to be fixed, and on the other hand, you should start weaving the same braid according to a similar principle.
- When both braids “meet” in the center of the head, they must be fixed with elastic bands.
- To give the image lightness and romance, the remaining pile of hair that was not used in weaving can be wound on a curling iron or curlers. If you do not like curls, then strands, on the contrary, can be straightened with a hair straightener.
So, showing a little perseverance and patience, as well as making a small amount of effort, you created a beautiful and unusual hairstyle yourself and at home, thereby saving on a trip to a beauty salon.
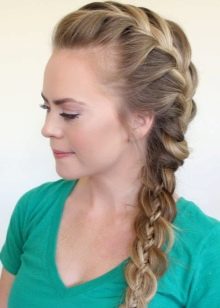
On the side
One of the most popular varieties of a side braid is a French spikelet on its side. Consider in more detail the principle of weaving this hairstyle.
- At one of the temples (right or left of your choice), separate a small part of the hair. It, in turn, must be divided into 3 parts.
- Now we proceed to weaving an ordinary braid, the principle of which is described above.
- With each new stitch, alternately add a small section of hair, then on the right, then on the left. So, as a result of weaving, you should grab all the hair from the head.
- If you want to give the braid more volume, then loosen the locks a little, loosening them starting from the lowest and gradually moving to the top.
Thus, a simple to execute, but aesthetic attractive braid is ready.
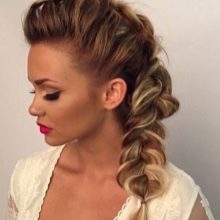
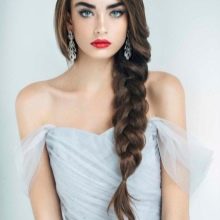
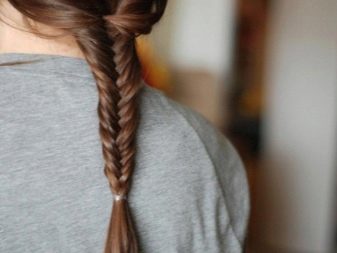
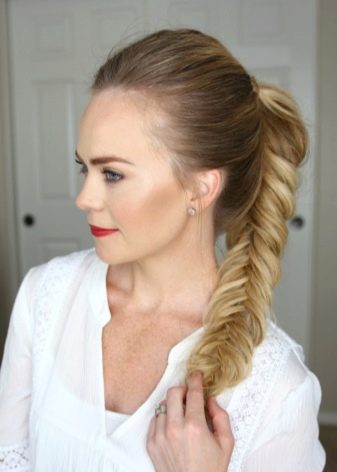
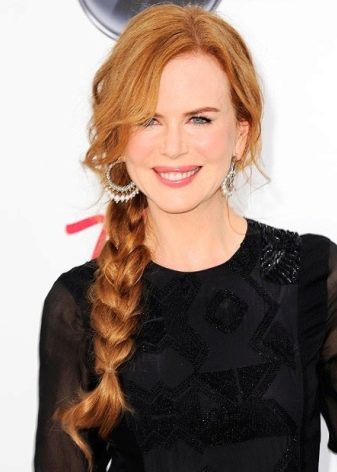
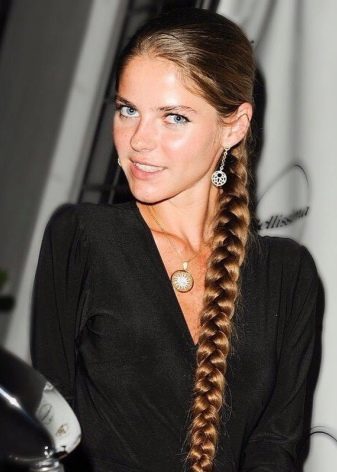
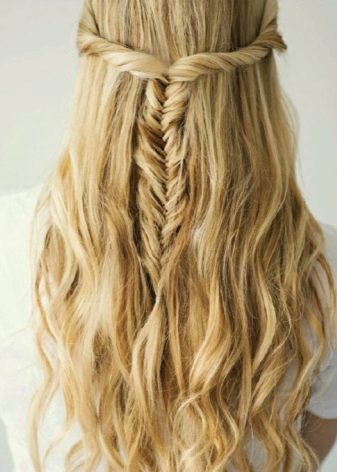
Fish tail
A fishtail is a type of braid that can be braided not only for everyday wear, but also as a festive styling. If you follow the weaving pattern step by step, then creating a hairstyle will not cause difficulties even for beginners.
First of all, it should be noted that To create such a styling, long hair is best suited, however, you can also weave a fishtail on medium-sized curls. But on short haircuts to create a similar braid will be quite problematic.

It is important to remember that the fish tail weaves starting from the back of the head. So, we will analyze the weaving process in stages:
- the total volume of hair is divided into 2 equal parts;
- on the left side of the hair, separate a small strand from the ear, which we transfer from above to the right side;
- We perform a similar procedure from right to left;
- alternate the previous 2 steps with each other and repeat until the length of the hair ends;
- at the end we fix the braid.
The result is a spectacular and unusual hairstyle without much effort.
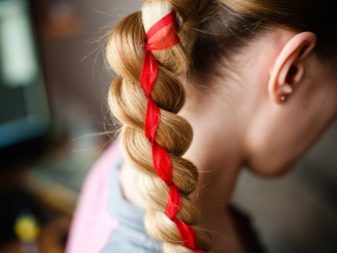
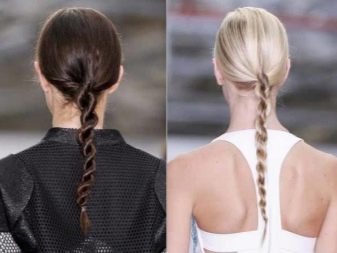
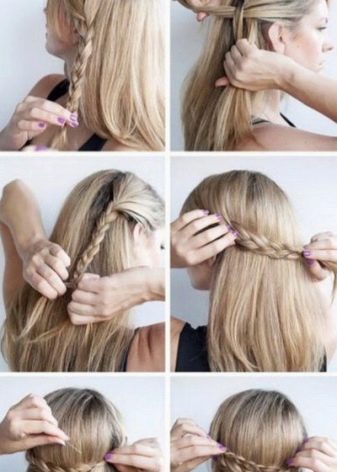
Of two strands
In fact, the braid, consisting of only 2 strands, is a twisted tail of bundles. It is believed that such a hairstyle will most advantageously look on medium-length hair. If you want to decorate your hairstyle or are going to a special occasion, it is important to remember that such a braid can be given a zest and originality.
To do this, tape should be woven into it, but make sure that the color of the tape fits into your overall image.

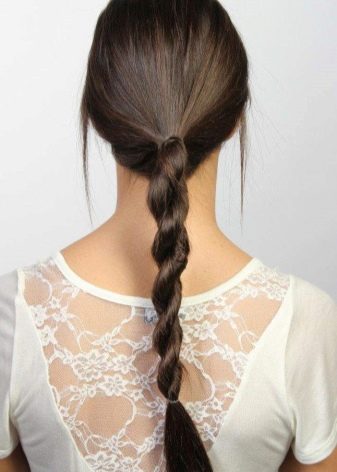
If we talk about the weaving pattern, the sequence of actions is as follows.
- Prepared hair must be divided into 2 equal parts. Attach a tape to any of the parts (of your choice).
- Now we proceed to the formation of tourniquets: for this, one and the other part of the hair must be twisted clockwise. It is important to ensure that the harnesses are pretty tight.
- To weave the braids directly, the 2 tows obtained must be twisted together, but now you need to do this counterclockwise - this way you will ensure the braid’s strength.
- The last stage is fixing the braids. This can be done with a tape or with ordinary gum. The hairstyle is ready.
Usually it is worn in everyday life, but if the braid is decorated with ribbons or other decorative elements, then you can use styling for a solemn exit.
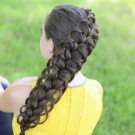
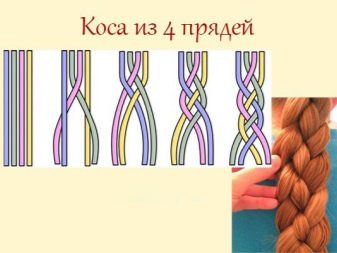
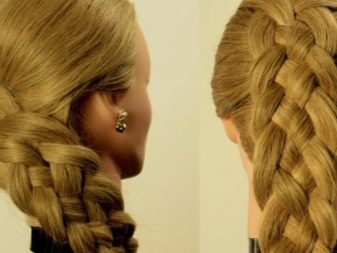
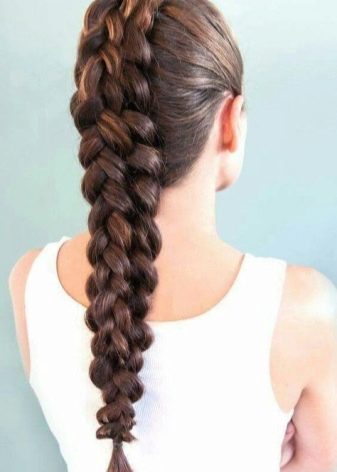
Of four strands
The main rule for creating such a braid is to use only extreme strands of hair in the process of weaving a hairstyle.
Consider a step-by-step way to create hairstyles.
- We divide the entire pile of hair into 4 equal parts by volume. For convenience, the hair can be divided into 2 parts, and then each of them - another 2.
- The very first strand, which is located on the left side, needs to be stretched over the neighboring strand (second on the left) and under the next (third on the left) - thus, in your left hand should be the second and third strands on the left, and in the right - two extreme strands (right and left);
- The rightmost strand left in your right hand needs to be extended under the leftmost arm, which is in the left hand.
- Then the strand that has become extreme on the left side must be drawn over the next and under the next one (as in step No. 2).
- The strand to the right should be threaded under the adjacent one on the left side.
- We spend the leftmost strand under the next and over the next.
- Pass the rightmost strand under the adjacent one.
- The previous two steps should be repeated along the entire length of the hair.
- At the end of weaving, we fix the braid.
As you can see, this hairstyle is quite difficult to perform. However, the result is worth all your efforts.
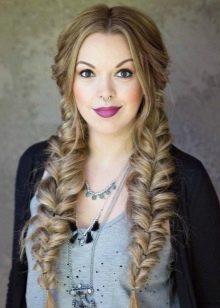
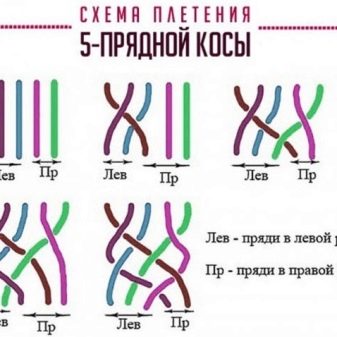
Of five strands
If you plan to create such a hairstyle for a special occasion, then a few days before the holiday you need to practice its performance. The fact is that a braid of 5 strands is woven for a rather long time, and the process itself will require a lot of effort. Having trained, you will protect yourself from being late or disappointed in connection with a failed installation.
- As in all previous cases, the total volume of hair must be divided. This time into 5 identical parts.
- Now we use those 3 strands that turned out to be in the center. First of all, you need to move the left strand to the center, and then perform the same manipulation with the right strand (we implement the principle of weaving an ordinary braid). Now, the outermost strands of 3 middle ones need to be separated from the rest of the hair mass and temporarily backed by clamps (for now, we will not use these strands). According to the results of the done manipulations for weaving, 3 strands will be available to you: the most central strand, as well as the extreme right and left.
- Of the remaining 3 strands, the left and right ones are in turn moved to the center. At this time, we fix the middle strand with a clamp (you can also use a hairpin, invisibility or any other device).
- Now, those strands that we fixed earlier, except for the middle one, need to be detached and placed along the edges of the forming braid.
- On the contrary, those strands that have just been used must be fixed by removing them from the weaving process.
- From the remaining parts, the left and right are alternately moved to the center. Then fix the middle again with a clip. We release the locked strands, and those that we just used, we stab. We carry out a similar procedure until we finish weaving.
After you have finished the weaving process, you need to spray the hair with a varnish with a high level of fixation in order to maintain the integrity of the braid for a longer time.
Holiday styling options
Based on the braid weaving methods described above, you can create unusual evening hairstyles that are suitable for any holiday and other special occasion. The main thing is to correctly carry out the main weaving, which can later be supplemented with accessories or small adjustments.
- So, for example, a braid with curls (or a waterfall) will be an excellent base for holiday styling. In particular, this hairstyle looks good on long hair. Often, such weaving can be seen in wedding photographs. Brides loved this styling for beauty, simplicity and femininity.
- If for a festive occasion you want to braid a fishtail, then such a braid can be beautifully beaten with a loop, which is quite easy to do at the very base of the hair even before the start of the main weave.
- Also, for an evening exit, convex side braids are suitable. They will give youth and mischief to the overall image.
- More complex styling (for example, braids of 4 or 5 strands) will be an excellent option for various competitions: for example, a beauty contest or a dance tournament. Often, this braid is used by ballroom dancers, since, on the one hand, the hairstyle looks pretty impressive, and on the other hand, it does not interfere with the performance of choreographic compositions.
- If you show a little creativity, then the usual braid of 3 strands can be turned into a ceremonial styling. To do this, just use accessories and jewelry to your liking.
Whatever braid you choose as a festive hairstyle, carefully make sure that it matches your overall image, favorably complements and decorates it.
Beautiful examples
If you still have not decided on the most suitable styling for your particular case, then we suggest you be inspired by beautiful examples.
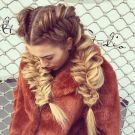
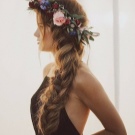
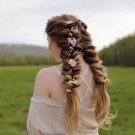
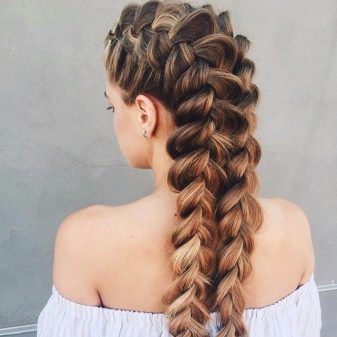
For example, this option consists from the layout of several types of weaving. To begin with, a tourniquet was used, which is made symmetrically on both sides of the head, and then a fish tail is assembled from the hair. To give the image of completeness, loose hair is slightly twisted. Hairstyle looks neat and feminine.
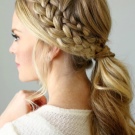
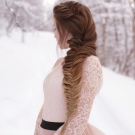
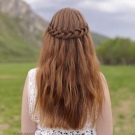
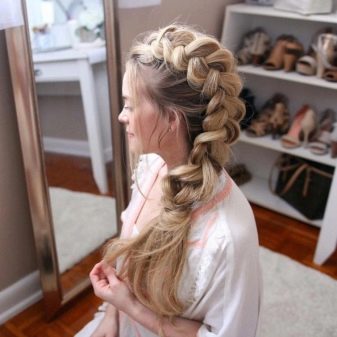
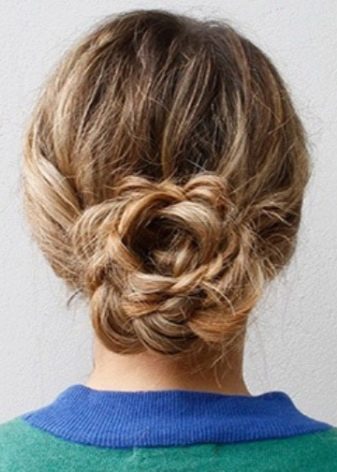
And here is the scythe with curls released. In this variation, the hairstyle is collected with weaving only 1 braid, and not 2 symmetrical. It looks pretty simple and tasteful. For strength, do not forget to fix the braid - in this case, studs and invisibility are used. The released bangs look pretty stylish.
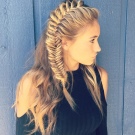
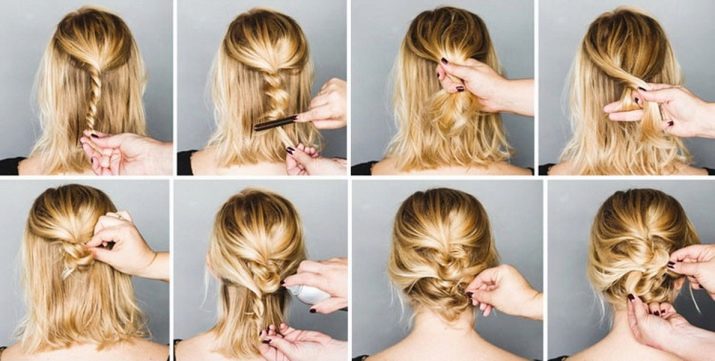
For those who are not afraid of difficulties, stylists have prepared a spectacular version of the full evening styling from braids, the basis of which are simple braids of 3 strands. Here, weakened strands look beneficial. Thus, you can make sure that a simple but effective trick can completely transform your entire image.
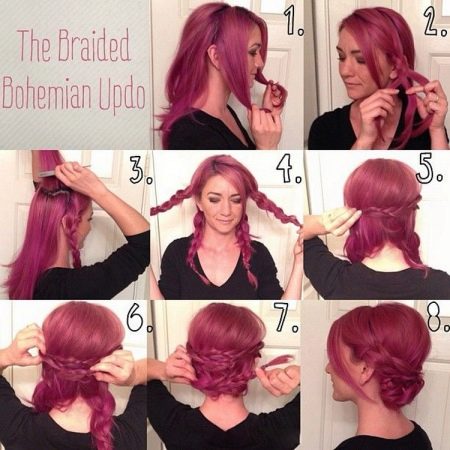
Another creative and stylish hairstyle that proves that creating evening styling is possible even from a simple braid, the main thing is to apply a creative approach. This time, 2 simple braids are used as a basis, which are collected in an elegant bundle.
Four braids from 3 strands can turn into an elegant styling for office or evening out. Such hairstyles make an indelible impression on others - no one can guess that you did them yourself with your own hands, and did not turn to a professional hairdresser for help.
Thus, we were able to make sure that A braid is not a boring and simple everyday styling, but the ability to create an original and unusual hairstyle on your hair. By braiding braids in various variations, every day you can create a new image: business, romantic or feminine.
Do not be afraid to try and experiment and you will succeed.

See how to braid pigtails in the next video.


