Foamiran is a relatively new, but popular material that is used in the manufacture of various crafts. This is a practical and plastic raw material, which is easy to give almost any shape. In this article, we will learn how to correctly make different types of crowns from foamiran.
Features patterns
Today, foamiran is one of the most popular materials that are used in the manufacture of a variety of crafts. Masters of all levels turn to him to do not only beautiful, but also realistic things.
Foamiran products are often used as home decorations, but also become wonderful original gifts.
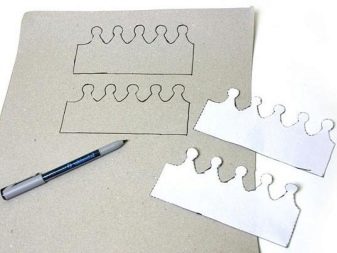
In order for the product from foamiran to turn out to be as attractive and realistic as possible, it must be correctly manufactured. The process itself cannot be called incomprehensibly complex and confusing. One of the main stages is the preparation of neat patterns and patterns. Before making a template for the subsequent cutting of the crown, the master must definitely plan everything carefully and determine the specific type of accessory that he wants to make. It is equally important to make detailed measurements if it is planned to make a copy of this product.
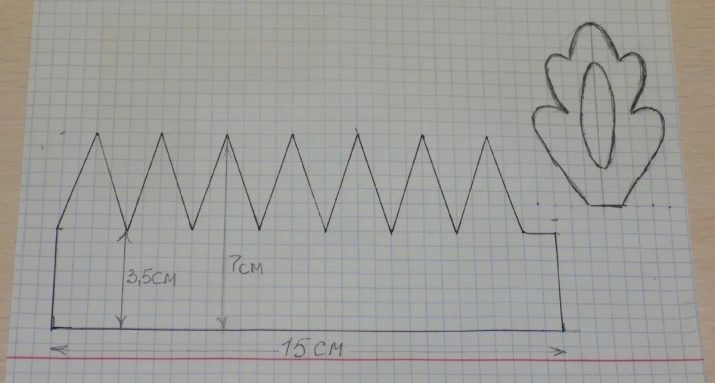
If we are talking about a simple model of a corona made of velvety foamiran, then here you will need to measure its girth and height using a simple centimeter tape. Measurement should begin from the center point of the forehead. The resulting numbers should be transferred to a rectangular sheet of paper. On its basis, it will be necessary to build either a fence or curly teeth. In most situations, the lower border of the workpiece is depicted as arched.Thanks to this feature, the product is much simpler and more convenient to fold and comfortably fits on your head.
When the master planned to make a crown like a diadem with his own hands, he first of all needed to take measurements from a scallop or a hairpin, on which a foamiran design would be attached. There is also such an interesting subspecies of the crown, which is popularly called the “kokoshnik”. For it, you need to measure the width of the head and height from the tip of the nose to the top of the head. According to the identified values, an arch is formed for the kokoshnik.
Correctly composing a template and patterns for cutting and manufacturing a foamiran accessory, the master has every chance to make a beautiful and high-quality product. The main thing is to take these steps responsibly and seriously - do not underestimate their importance.
Manufacturing options
From the above it can be concluded that the manufacturing process of the corona from foamiran largely depends on its specific type and design features. Cope with all stages of work can not only experienced but also a beginner needlewoman. If you belong to the last category of craftsmen, it is best to rely on a detailed step-by-step master class during the manufacture of the accessory.


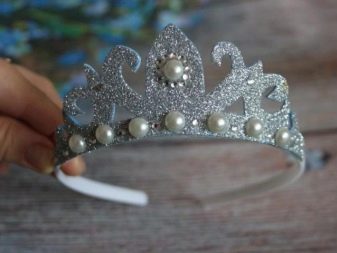
Diadem
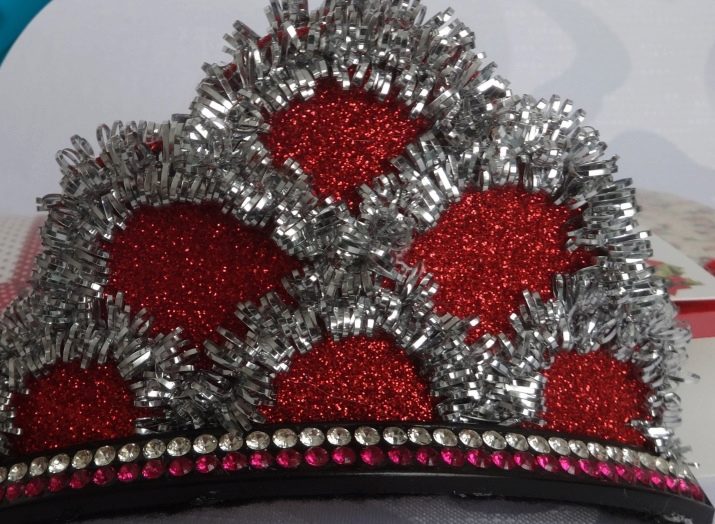
A beautifully made diadem of foamiran can be a very original and effective accessory. Subsequently, it can be tried on in combination with New Year's or other holiday attire.
An interesting combination is a diadem and a high hairstyle. This is a great solution for the girl who plans to visit the matinee.
To make such a bright and festive crown of foamiran, you will need:
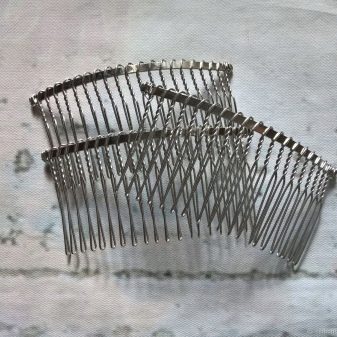
- scallop;
- shiny and red foamiran;
- thin silver tinsel, fixed on the basis of a wire;
- high-quality hot glue;
- felt black.
We will analyze in stages what needs to be done to make an elegant crown-diadem.
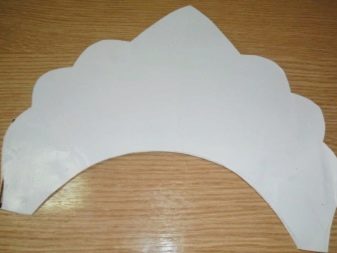
- Prepare the right patterns. Lay the scallop on a sheet of A4 paper. Circle the upper border of the product with a pen. Cut the sheet according to the intended strip.
- Fold the leaf in half. From the top point, set the height of the diadem up. Arc the upper part of the accessory with its edge.
- Cut the template as carefully as possible. Put it on foamiran, cut the workpiece.
- The resulting blank on the bottom line must be divided into 3 equal segments.
- Transfer the length of one of such segments to a simple snow-white sheet, lift the arc guide from it.
- The next step will be to cut out an arc-like pattern and attach to the bottom of a larger workpiece.
- Take a toothpick. Use it to draw lines for the tinsel, moving along the arc of a small template.
- Gently move the pattern across the workpiece in a checkerboard pattern. Continue drawing lines.
- In accordance with the marking, slowly paste the tinsel. Cut off the unnecessary edge of the foamiran base in the upper half of the craft blank.
- On the back, glue the upper and lower borders of the diadem with tinsel.
- Take the wire. Carefully, but surely pierce her diadem in the lower part in 4 places, maintaining the same distance. Fix the craft on the scallop tines.
- On the back of the hairpin, stick the wire to the surface and mask its fasteners by attaching a felt dark strip.
After that, the product will be completely ready for use. If the work at all stages was done correctly, the accessory will turn out to be beautiful and attractive.
Kokoshnik crown
With your own hands you can make not only “royal” tiaras, but also funny crowns like a kokoshnik. To do this, you first need to prepare a template in accordance with the size of the user's head. For the manufacture will need the following components:
- snow-white foamiran;
- beads;
- fringe for decorating the product;
- halves of kanzashi tapes;
- fishing line;
- white satin ribbon;
- tinsel;
- hoop;
- hot glue in the form of a gun.
Consider the procedure for the manufacture of elegant kokoshnik from foamiran.
- In accordance with the prepared template, cut thick cardboard and 2 blanks from the foamiran itself.
- Glue cardboard parts with foamiran as tight and high quality as possible.
- Wrap the hoop with a beautiful satin ribbon. It will be possible to securely fix it using high-quality hot-melt adhesive.
- Carefully bend the cloves of the future product. Press them with ribs to the heated iron to fix the result and fix the formed structure of the kokoshnik.
- Next, it will be necessary to glue the kokoshnik with teeth directly to the rim. Sections with joints will need to be masked with shiny tinsel. Glue the fringe on the side sections.
- The next step is to string prepared beads on a fishing line. The resulting funny garland will need to be glued to the upper border of the foamiran accessory.
- It's time to take kanzashi flowers. Place them in each of the arches of the product. Decorate the upper flower with large beads in the inner space.
After that, the accessory will be ready. It is perfect for complementing the image of the Snow Maiden, Snowflake or Snow Queen.

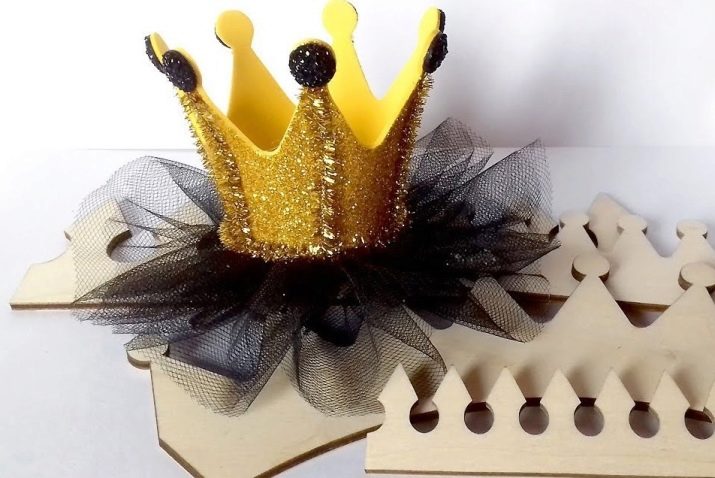
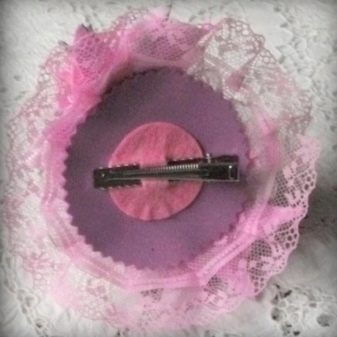
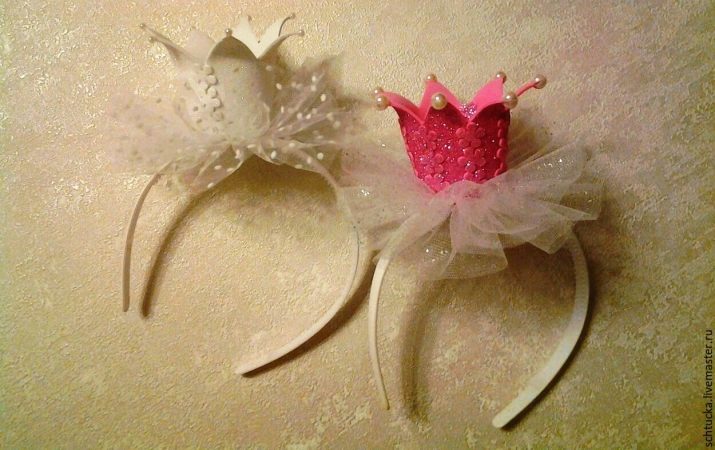
Hairpin
A foamiran crown attached to the base in the form of a hairpin can become a cute and bright decoration. It can be made even more attractive through a variety of jewelry and decorations. To create such an accessory you will need:
- pattern with a "fence" (you can do it yourself, but you can download it from the Internet);
- crocodile clip;
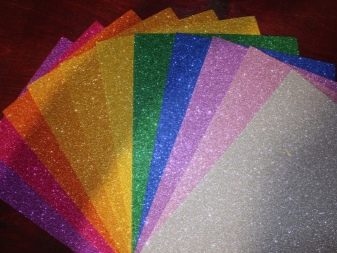
- glitter foamiran of any color you like;
- tulle;
- felt;
- satin ribbon (preferably with the same color as the center);
- hot glue;
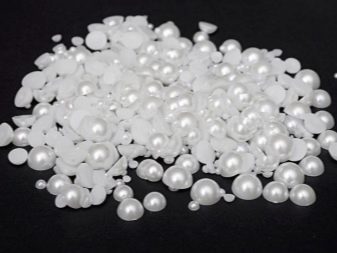
- half beads;
- needles and threads in the color of tulle.
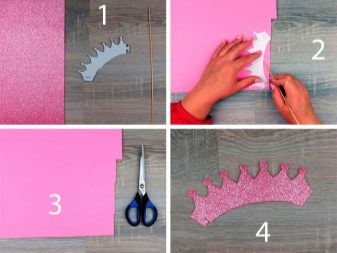
And now we will analyze a detailed MK for the manufacture of a bright crown from foamiran with glitter on a hairpin.
- Cut out a pattern from paper or cardboard. Fold it with a crown. Put on a clean white sheet, draw a clear outline so that you get a round base.
- Attach the resulting paper patterns to the foamiran. All contours should be transferred using a toothpick. Cut out the components. Cut an additional circle of felt.
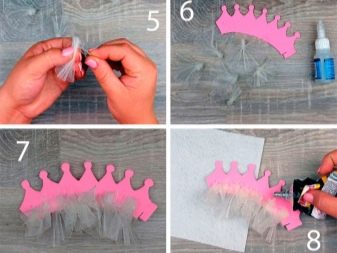
- Prepare a “skirt” for the crown. Walk along the edge of the tulle with a needle and thread. Sew wide stitches. Pull the fabric into a kind of skirt. Then straighten the formed folds.
- In the middle of the "skirt" from 2 sides, glue the circles cut out of foamiran. The matte side should “look” at the material.
- Complete the ribbon with the top component of the hair clip. Fix the atlas better with hot melt adhesive.
- Attach the "skirt" to the hairpin. The felt circle should be directed towards the atlas.
- Glue the sides of the crown using high-quality hot-melt adhesive. Set the item on the skirt.
- Glue the half beads along the lower border of the product and on top of the "fence."
Wait until the accessory is completely dry. After that, the crown on the hairpin can be considered finished!
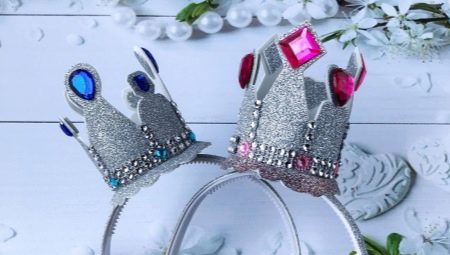
On the rim
To make this accessory with your own hands, the master must prepare:
- standard pattern "fence";
- golden foamiran;
- thin gum, suitable for coloring to foamiran;
- decorative elastic with lace;
- beads;
- hot glue;
- satin ribbon and bezel itself.

We will analyze the procedure.
- Transfer the pattern using a toothpick to the base material. Cut the workpiece.
- Fix the edges of the product with hot glue.
- Glue a decorative rubber band along the bottom border. Add crown teeth with beads.
- Circle the thin rubber part around the rim. Extra length should be cut off. The result is a small segment. Make another one similar to it.
- Glue the rubber pieces according to the type of loops to the inner and lower sides of the crown on opposite edges. Mask the loops in small pieces of foamiran.
- Glue the bezel with a satin ribbon using hot melt adhesive.
- Putting the crown on the rim will be due to the loops.
Recommendations
Let us examine a few useful recommendations for the manufacture of foamiran crowns.
- A stencil for making any crown or tiara can not only be downloaded from the Internet, but also generated independently. Especially cool options are obtained from more experienced craftsmen.
- Cut out all the details as accurately as possible. Use scissors only with sharp blades - do not use a blunt tool.
- For the manufacture of high-quality and beautiful crowns, it is better to use not the Chinese, but the Iranian type of foamiran. It costs more, but it looks more spectacular and is more practical, wear-resistant.
- When gluing the parts of the accessory, one should not overdo it with glue. If there is too much adhesive, the crown will be less attractive and neat.
It is recommended to place all the tools and materials necessary for manufacturing in advance near the place of creative work, so that at the crucial moment you do not have to spend time looking for the right fixture - they will all be at your fingertips.
Product Examples
Consider some successful examples of home-made crowns made from "obedient" and aesthetic foamiran.
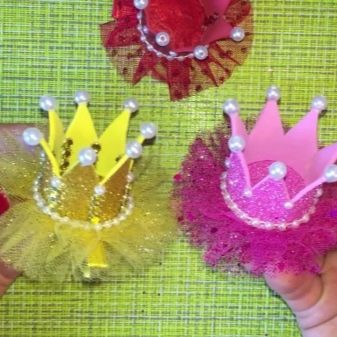
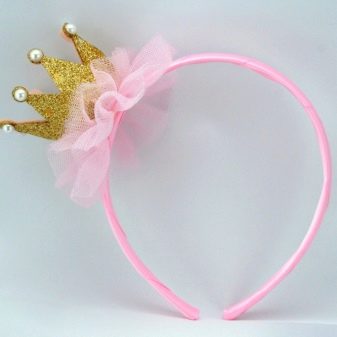
- Miniature foamiran crowns with slightly curved cloves complemented by beads look very cute on thin rims. The lower part can be decorated with bright wide skirts. The crowns themselves can have any color, for example, white or pink.
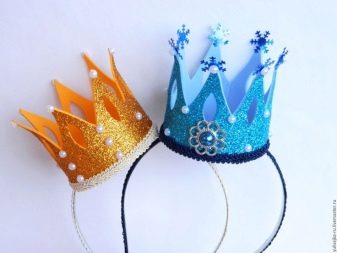
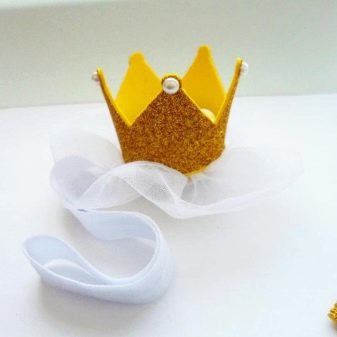
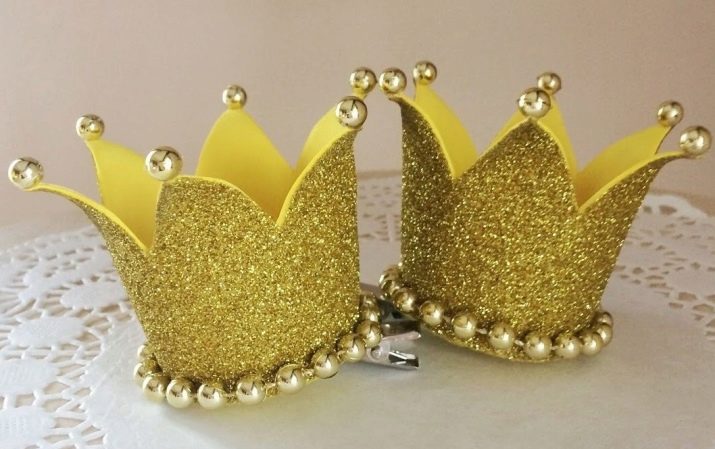
- From golden foamiran chic crowns with large, slightly bent outward cloves are obtained. You can decorate the product with shiny golden beads glued to the tips of the cloves and the bottom of the accessories.
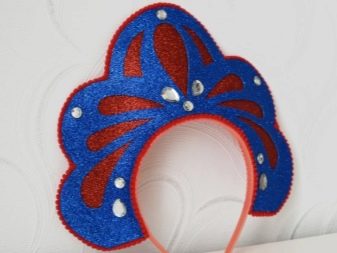
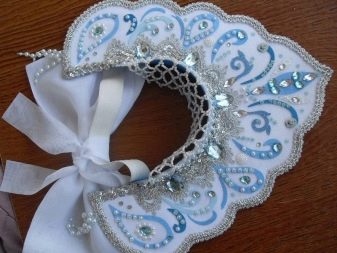
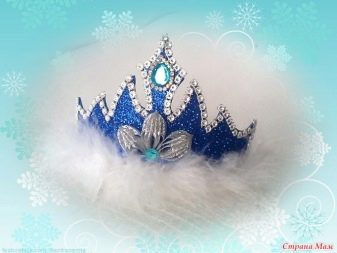
- A glamorous Snow Maiden diadem is made of blue glitter foamiran. It can be decorated with silver and light blue pebbles, fluffy snow-white inserts that simulate fur. It is advisable to give the accessory an unusual shape with complex pointed details.

A master class on making a glitter foamiran crown on a hairpin in the video below.


