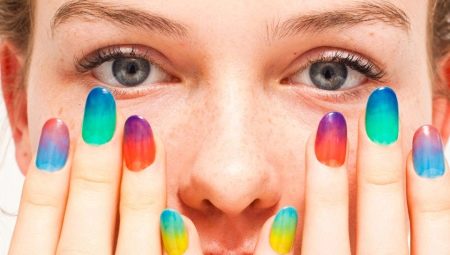
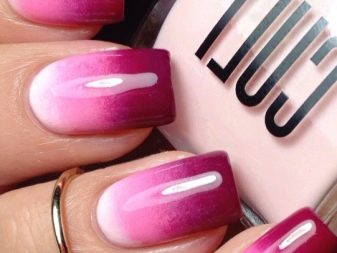
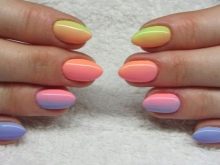
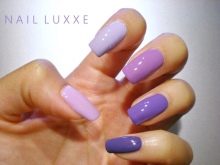
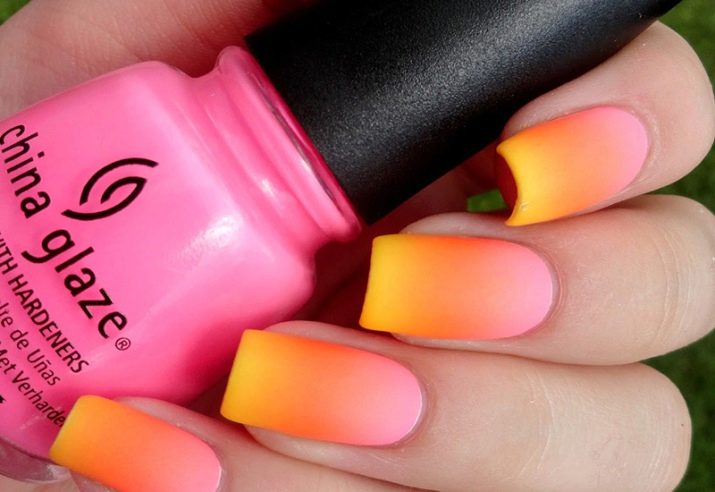
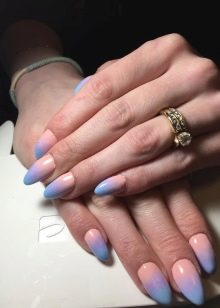
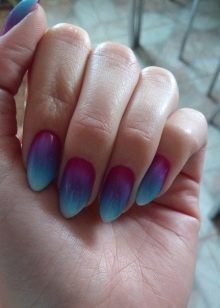
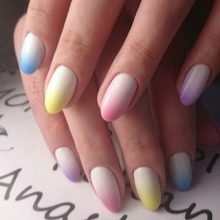
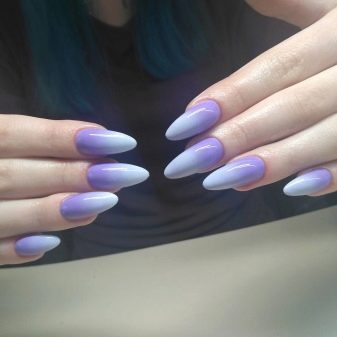
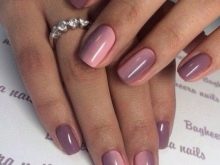
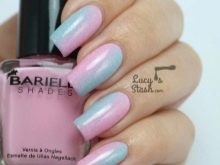
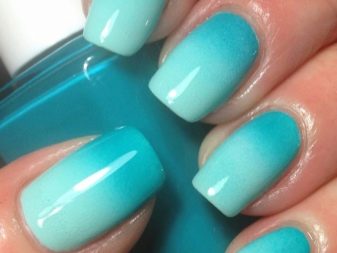
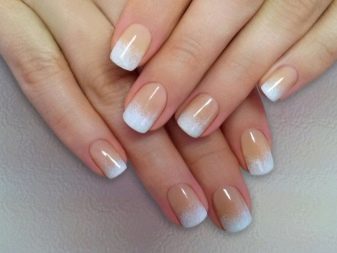
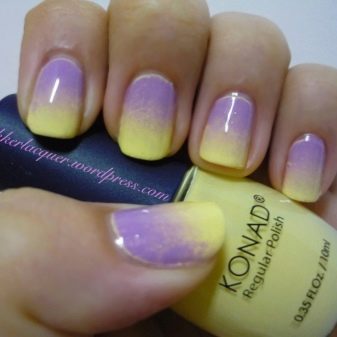
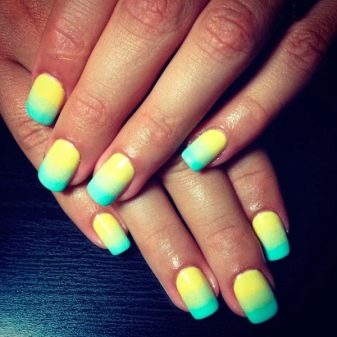
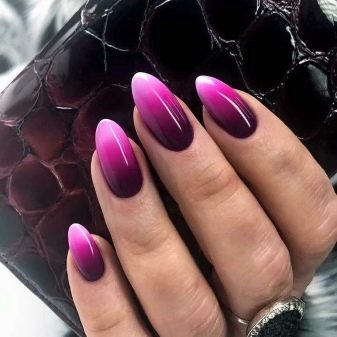
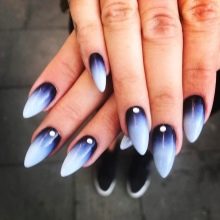
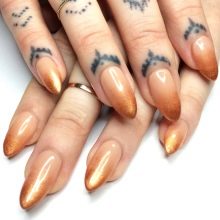
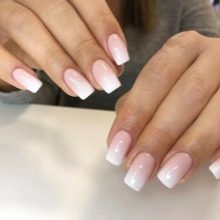
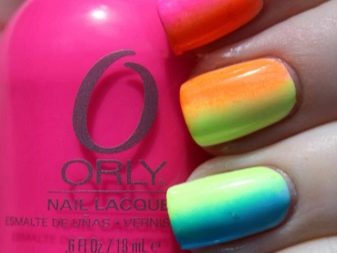
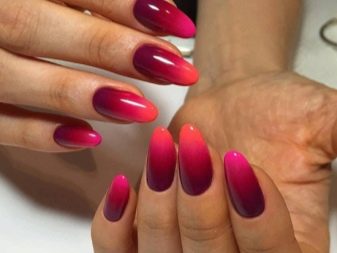
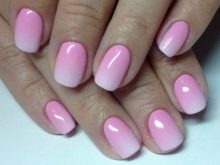
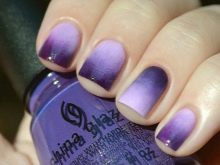
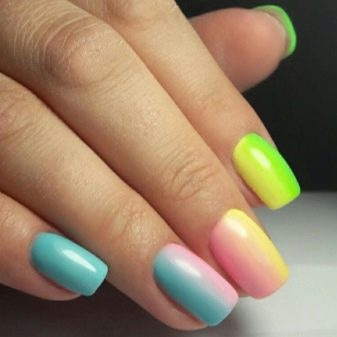
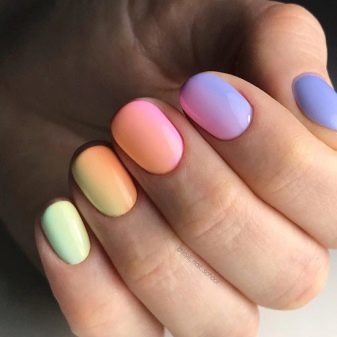
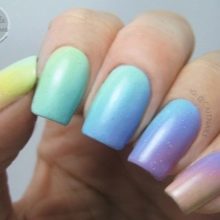
One of the most attractive manicure styles is considered ombre, otherwise called a gradient or stretch. Its distinguishing feature is a leisurely transition of color from light to dark. As a rule, this “movement” comes from the hole, that is, the base is varnished in pastel shades, and the tip is already saturated dark. The best look is the transition of colors of a single color scheme, for example, from pale pink to rich cherry. A special kind of gradient is called stretching across the arm. In this case, the thumb is painted in one shade, the little finger in another, and intermediate colors are formed between them.

Necessary tools and materials
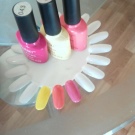
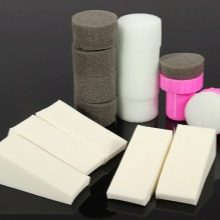
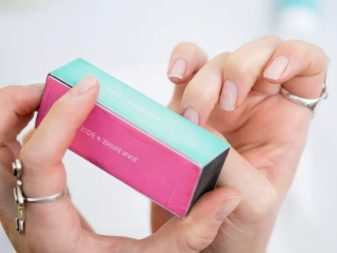
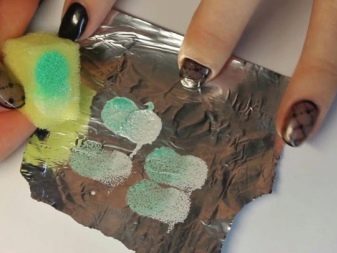
In order to create an ombre on the nails, you will need traditional processing tools, for example, a nail file and scissors, a special base and a transparent glossy fastener, a foam sponge, several varnishes, white paper or foil, as well as cotton buds and a remover. Varnishes can be ordinary or gel varnishes. Palette options include items such as a piece of plastic, a saucer, a plastic lid, or a disposable plate. Instead of a special sponge, by the way, you can take the usual one for washing dishes and then cut it into several parts.
Since after using it you still have to throw it away, such a solution will be doubly economical.
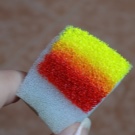
Of course, the kitchen sponge also has disadvantages. Due to the cellular structure of the material itself, a slightly uneven shade transition is formed, as if covered with grains.It turns out to smooth it out, pressing the sponge to the nail several times, but in this case small air bubbles are obtained in the varnish layer. Therefore, it is better to purchase an expensive latex sponge, used for applying foundation. It is equally resilient, like a kitchen sponge, but has much smaller pores. As a result, the layers blend harmoniously without the appearance of bubbles, and the resulting gradient is natural.
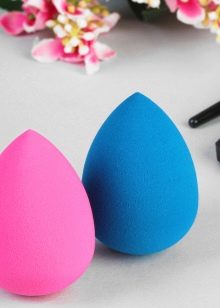
It is better not to take cheap latex sponges, as they are too soft and are not able to print the gradient. Moreover, they absorb an excessive amount of varnish and even fall apart into pieces during operation. The simplest variation of ombre can be created with the help of foam applicators used for applying shadows. Of course, specialists have already invented specialized sponges. The first variation looks like an elongated triangle made of foam latex, and the second - like a round sponge made of finely porous foam, attached to a plastic base.
Effect Techniques
Experts identify three main techniques for creating ombre, which can be modified and adjusted to the desired design. By the way, the smoothness of the transition, as well as the number of varnishes used, depends on the desire of the master or customer.
Vertical
In a vertical ombre, the transition is from one edge of the nail to the other from left to right. As a rule, varnish is applied with a flat brush, and the transition is formed when using a sponge or a shadow applicator. A coating of one color is applied to one half, the other to the other, and then the border is blurred.
Horizontal
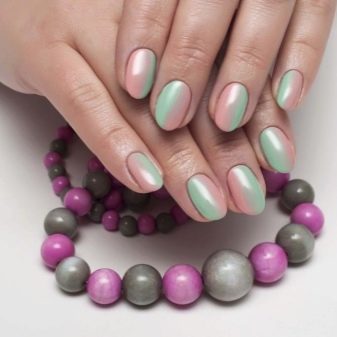
Horizontal ombre implies smooth and calm transverse transitions from the cuticle to the nail edge. They can be created using two colors or more.
The gradient is created using three varnishes applied end-to-end on the palette.

Diagonal
In the case of a diagonal ombre, the flow of flowers, as the name suggests, occurs diagonally.

In addition to the above, there are three ways to design an ombre with a brush.
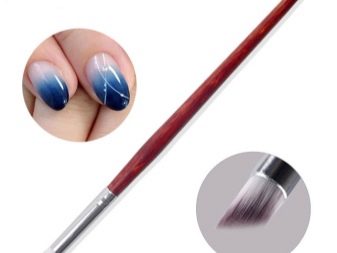
- In the first case, a flat tool with an elastic bristle and a napkin-free cloth are taken. On the nail plate are coated strips that are practically in contact with each other. Then the brush is lowered into the nail polish remover and gently blurs the border. As a rule, the procedure is repeated several times to create at least three layers with bright colors.

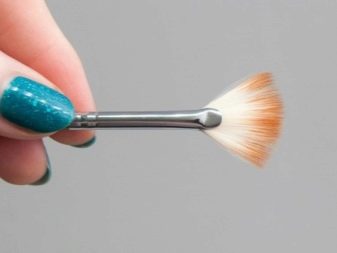
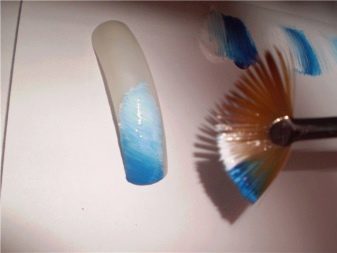
- In the second case, a fan brush is required. First, the entire nail is painted with the first varnish, and this color will have to remain on the cuticle. Then the middle of the plate is painted with an intermediate shade, and the tip is painted with a second varnish. The fan brush is slightly moistened, and then the transitions are blurred with its help.
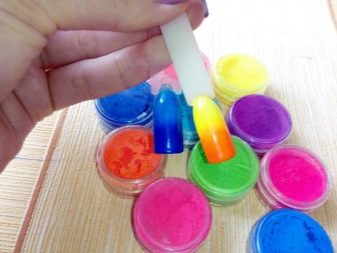
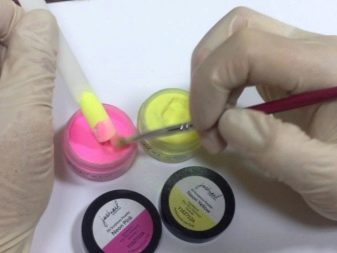
- Finally, ombre with acrylic powder is isolated. In this case, powder is immediately applied to the painted nail, with its help the borders between the shades are shaded.
How to make a manicure with a gradient at home?
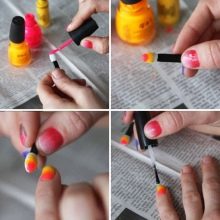
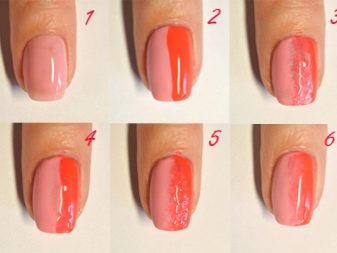
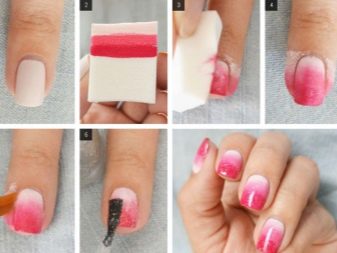
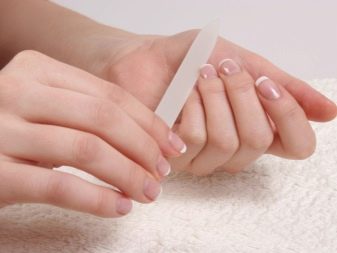
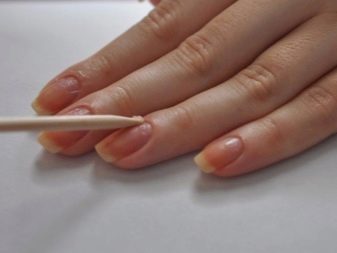
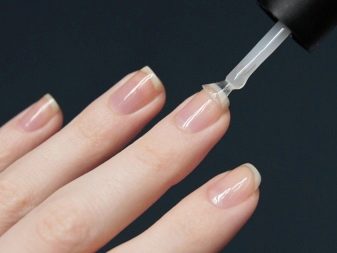
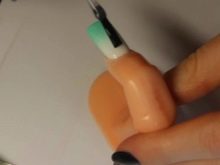
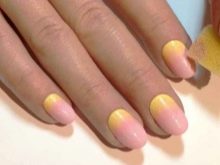
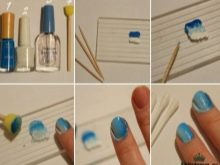
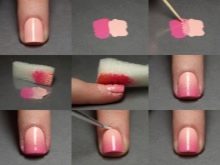
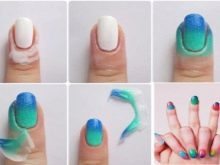
At home, it is entirely possible to make an ombre correctly if you follow the instructions step by step. First of all, the nails are processed, as with any other type of manicure. The nail plate is given the desired shape, a cuticle is removed near the hole with an orange stick, the surface is sanded and, if necessary, the skin of the hands is nourished with cream. In addition, the nail will have to be degreased with a nail polish remover and coated with a base that will not only perform a protective function, but also provide high-quality adhesion with a color coating. A thick white sheet or foil will be used as a palette.
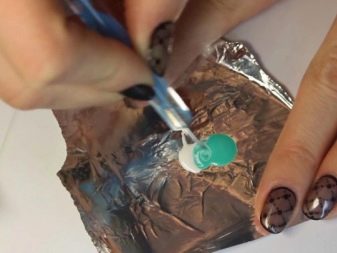
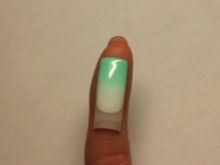
Parallel stripes are drawn on it with selected varnishes, which only barely touch each other. It is important to arrange so that then an ombre is formed, which means that it is necessary to consider a harmoniously looking sequence.The sponge is lowered onto the palette so as to capture all the paints, and then transferred to the nail, being pressed to it several times with light pats. By the way, for each nail plate will have to create a separate blank. When all the nails are dry, with a cotton swab it will be necessary to remove all excess, and then fix the finished manicure with a transparent fixative.
The top will not only smooth out a rather rough surface, but will also blur the border between tones, dissolving them a little.
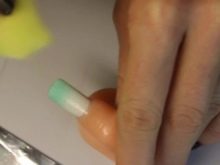
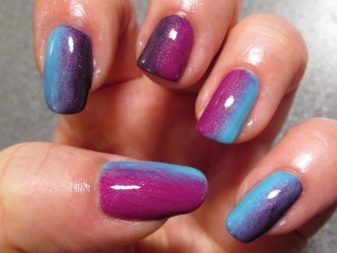
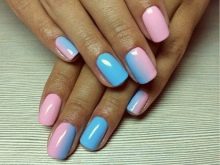
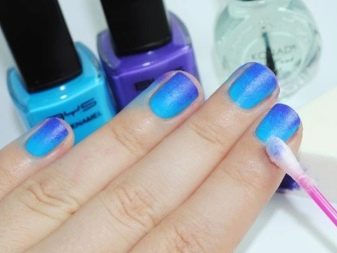
There is another common ombre variation that comes in contrasting shades. For such a manicure, you will have to choose two opposite, but nonetheless combining colors. It can be blue and orange, yellow and purple, or bright red and light green. First, the nails are prepared according to the usual scheme, including the base being applied. Then the color is applied to the nail, which will "finish" the plate, that is, be at its tip. When it dries, a second color is applied with a sponge or sponge, moreover, covering the plate from the base to the middle. On top, everything is fixed with colorless varnish.
In general, there are the following ways to apply a gradient:
- first one tip of the varnish is painted, and then a second is applied with a sponge;
- a palette with two strips of selected colors is used, the borders of which are mixed with a toothpick; there can be as many colors as you like; an ombre is created with a sponge dipping all the colors at one time;
- strips are applied immediately to the sponge and immediately transferred to the nail plate; this method is well suited for quick-drying varnishes.
Important! Many experts recommend creating an additional base of a white shade. It will make other used paints brighter, but you will have to spend enough effort to hide the substrate. The lateral zones and the cuticle zone will need to be additionally treated with a brush or tweezers with a miniature fragment of the sponge.
Secrets of Perfect Cover
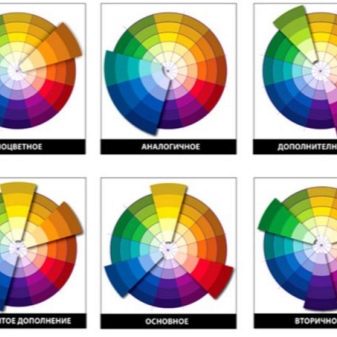
To make a good ombre, you need to try to avoid common mistakes. The first thing is about accuracy - only in this case this type of manicure looks beautiful. Then, on their own, it is not always possible to choose a harmonious combination of colors, it is better to consult a specialist or find a ready-made scheme on the Internet. In the case when you still want to choose the colors yourself, you should choose several shades of the same color, for example, from beige to coffee, or look at the color wheel and give preference to adjacent tones. Contrasting shades can only be combined if there is an intermediate tone that creates a transition zone. Ombre does not combine with sparkles and rhinestones, in this case the effect of bad taste and redundancy most often occurs.
Finally, the ombre cannot be attributed to universal designs, so it is still not advised to do it on the eve of an important business meeting.
Ombre is suitable for nails of any size and shape. By the way, after gradient staining, the plate becomes visually narrower, and the fingers are more elegant. However, it is worth remembering that for such a manicure, you should not choose coatings of different textures. This means that mother of pearl is combined only with mother of pearl, and cream varnishes - with cream. To avoid the occurrence of bubbles, you must either gently press the sponge, or slightly moisten it with water, or make the first prints on paper to get rid of excess varnish. It will be possible to protect the skin around the nail plate with PVA glue. Before staining, it will need to be spread on the finger, and then wait until it dries. Upon completion, the film will go right along with the varnish. Used for this purpose, film masks for the face, adhesive tape, as well as special tools designed to protect the cuticle.
Beautiful examples
An ombre called Five Fingers is considered very beautiful and quite simple in execution. First, the nail plate of the thumb is covered in the first color. Next on the palette is gently mixed drop by drop of the first and second varnish, and the resulting color is applied to the index finger. Next on the palette is mixed one drop of the first, but already two drops of the second varnish. This shade will be used for the middle finger. A drop of the first and three drops of the second varnish will come in handy for the ring finger. Finally, the little finger will be painted in the second selected color.

In the next video, see 6 ways to make a gradient on the nails.


