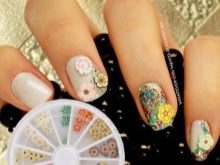
Fimo for nails will decorate any nail design, bringing brightness, juiciness and ripeness to it. Creating flower or fruit compositions cut from fimo sticks on all nails or on several fingers will not require special skills and will not take much time.
Features
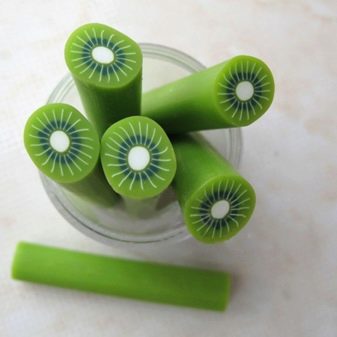
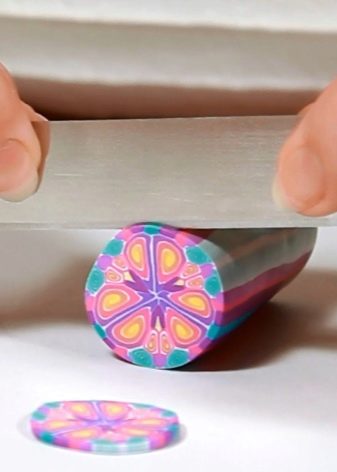
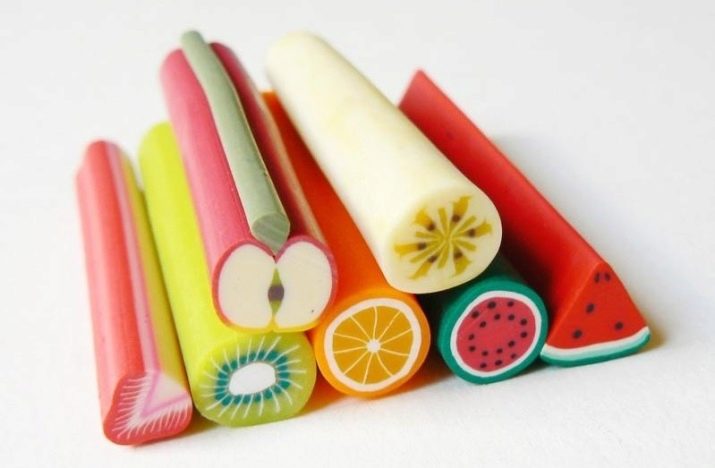
Small sticks (5-7 centimeters in length and 0.5 centimeters in diameter) made of polymer clay are called fimo. They are very plastic, quickly harden in air or in a UV lamp.
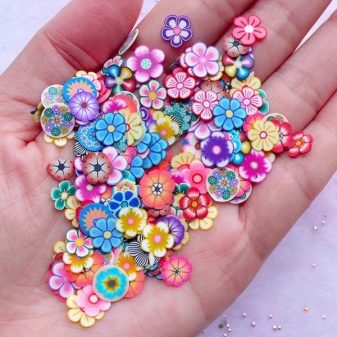
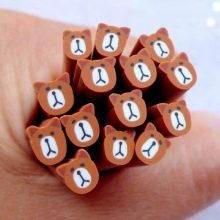
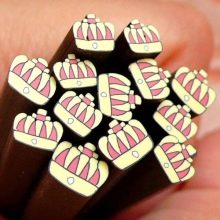
Each stick has a unique pattern inside. Especially popular are fruits and berries in a juicy color scheme.
To create a creative design, you need to cut a thin piece of clay and stick it to the nail plate covered with the necessary coating together with the pattern. Polymer clay greatly simplifies and speeds up the process of nail design.
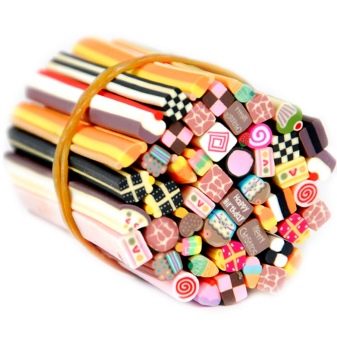
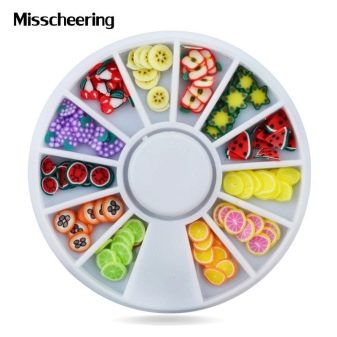
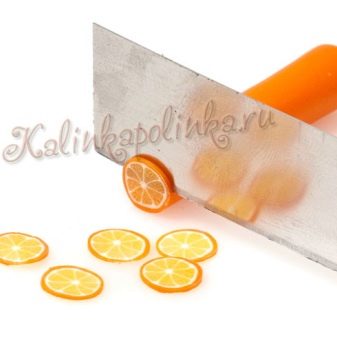
Polymer clay is cut with a very sharp knife. Initially, this process is not entirely easy, because the cut slices must be so thin that they are visible. To save even more time and for a more accurate manicure, you can already buy chopped sticks that are packaged in small washers. Such sets are sold in specialized boutiques and online stores.
Types of Images Inside
The images inside the polymer clay tubes are the most diverse. Consider the most popular ideas.
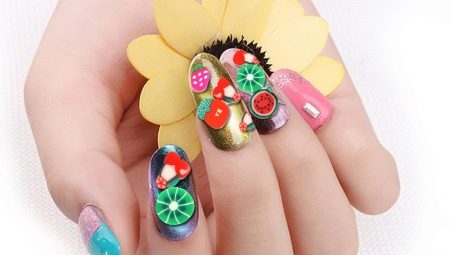
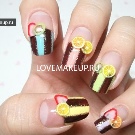
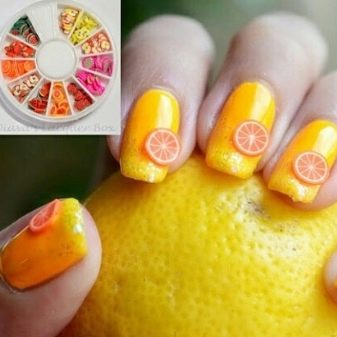
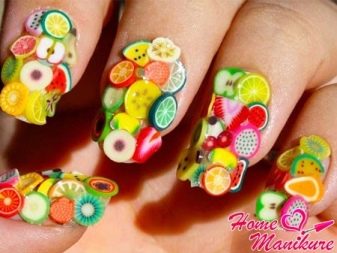
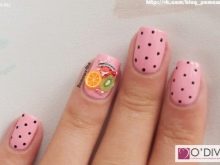
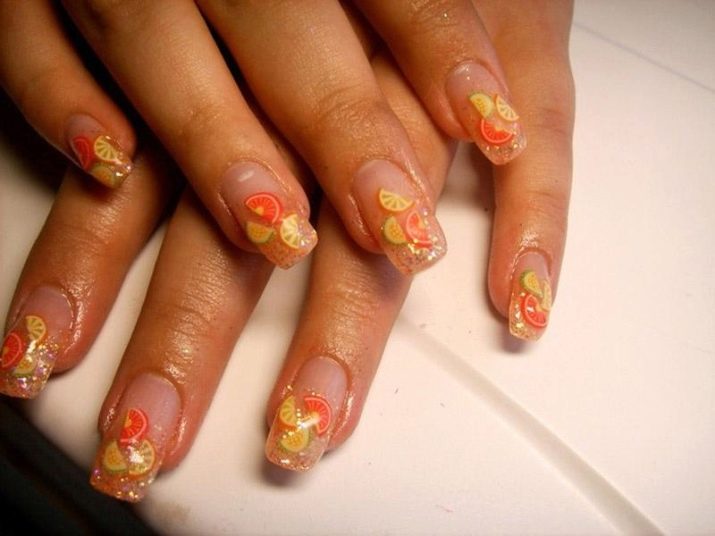
- Fruit. Inside, a variety of tropical fruits are depicted, ranging from classic oranges and lemons to unusual grapefruits and mangoes. Most often, such a juicy and rich in tones option is used in summer nail design options.
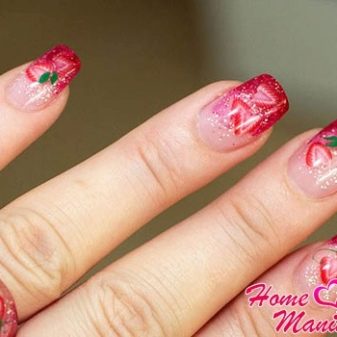
- Berry. Bright raspberries, strawberries, cherries and other berries are an excellent complement to fruit decorations.
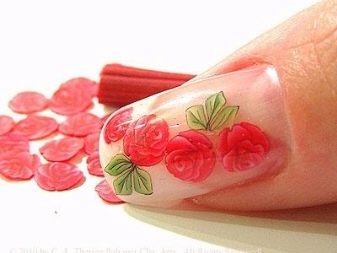
- Floral. Various flower buds, the flowers themselves and their leaves give the manicure lightness and freshness.

- Animals. Cute kittens, puppies, chickens and other little animals are very popular among very young fashionistas. Images of animals are especially in demand in the New Year's nail art.
- Curly. Hearts, stars, crowns and emoticons never lose their popularity, they are loved regardless of the season.

Principles of use
Let us dwell on a few tips on using fimo sticks.
- The ideal basis for fimo design is a transparent or white gel. It is better to refuse acrylic manicure.
- The location of the fimo-drawings is not standardized in any way. They can be glued both randomly and in a specific order.
- It is not necessary to glue the whole picture on the nail, you can use its small fragments.
- The use of colored substrates in manicure is welcome.
- Addition of design is possible with any other decorative elements.
Classic working method
Creating a nail design with polymer clay is a simple and quick procedure. Knowing some of the nuances and observing important rules will make this technique one of the most beloved.
Cutting a polymer clay tube into thin pieces requires a certain dexterity. Too thick elements of phimo-design make heavier and injure the nail plate. Therefore, at first it is better to practice and experiment a little with a stick, which is not a pity. And only then use the necessary wand.
You can fix jewelry made of polymer clay both on a natural nail plate, and on the extension. There are several means for fastening:
- specialized adhesive for gluing polymer clay;
- glue for rhinestones or tips;
- transparent varnish - design elements are firmly pressed to the yet-dry coating;
- transparent gel polish or acrylic - the decor is attached to a small drop of the coating, and then dried in a lamp.
Design Examples
Using different types of sticks, you can create creative and never repeating designs. It is quite possible to experiment with whole parts of clay, as well as with its pieces.
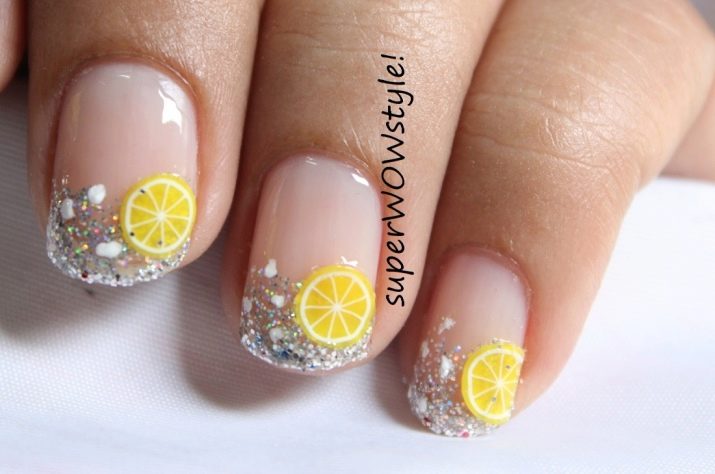
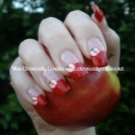
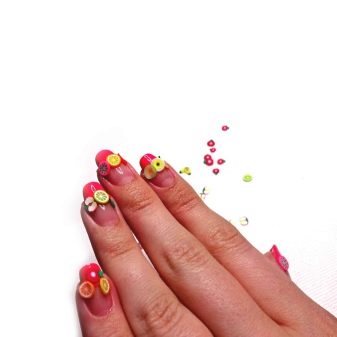
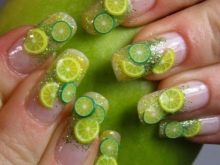
Citrus sweetness
Take fimo sticks with images of lemon, orange and grapefruit. Cut thin circles in half to make slices of citrus. Apply drops of a transparent varnish on a natural nail in those places where jewelry will be fastened. There is no need to observe a certain pattern, let each nail be individual. On the varnish drops, fix the jewelry and let it dry well. Coat all nails with colorless varnish. You can add even more shine using a varnish with fine light sparkles.
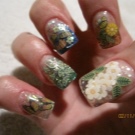
Stained glass window
Polymer clay is a frequent “participant” in aquarium design. Volumetric technique and shiny elements are ideal for Fimo. In this design, gel is used to attach clay.
Prepare your nails in accordance with all the rules for working with gel polish. Perform the first steps of building and coating with camouflage gel. On the camouflage with a toothpick, lay out fimo elements, sparkles, broths. Try to match all the jewelry in color and texture. Cover the decor with a thin layer of transparent gel, dry in a lamp. Put several design elements on the finished layer again, cover with gel and dry. Finish your manicure with a topcoat.
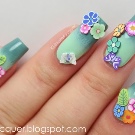
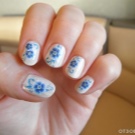
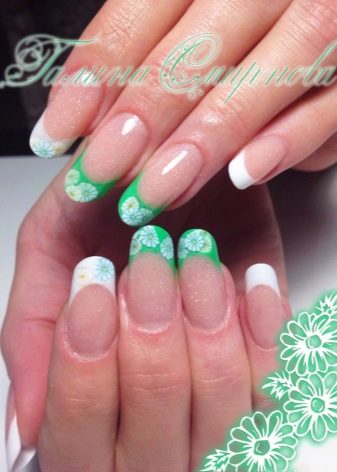
Tenderness
This design is based on French manicure. After creating the jacket, decorate your nails with flower and berry phimo-images, dried flowers and sparkles. Fix the design elements with a transparent gel and dry in a lamp. Finish your manicure with a topcoat.

Do it yourself
Fimo for nails can be created with your own hands at home. Color the wand to your liking and desire.
Creating your own jewelry made of polymer clay, you can experiment not only with the color scheme, but also with the thickness of the stick.
You can buy the material in stores for creativity or in office supplies.
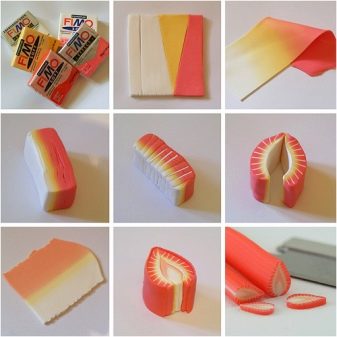
Strawberry
Take white and red polymer clay, a knife and a rolling pin. Roll the balls, and then make triangles out of them. The resulting shapes must be combined into a rectangle, which is rolled and cut into identical strips. Balls are formed from these strips, which are then well kneaded until color uniformity. The next stage is rolling the balls into a “sausage”.
Then the “sausages” are rolled out until a smooth transition of color, the resulting clay is cut into strips. A cylinder is formed from white clay, around which pink stripes are wrapped. The formed triangle is cut on the sides, and thin strips of white clay are inserted into the holes. Ready strawberries are wrapped in red clay, and rolled to the desired thickness.
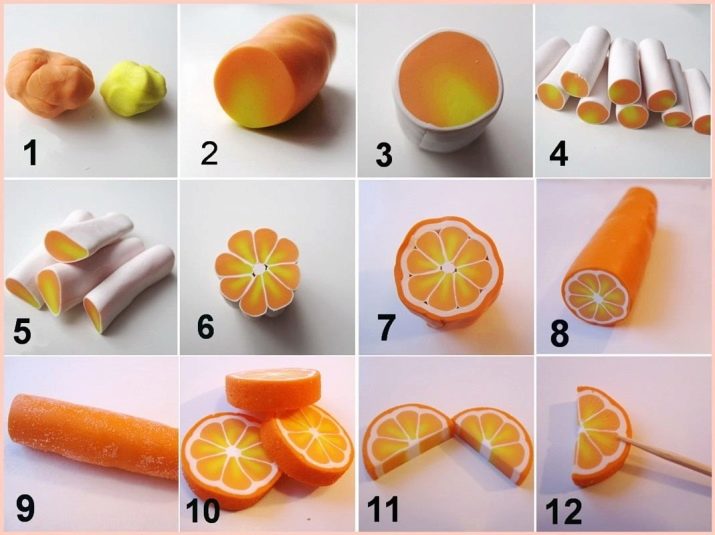
Citrus
Using this technology, you can create any citrus fruit. It will only be necessary to change the color of the clay.
Mix white clay with orange until a pale orange color is obtained. Roll the resulting color into a “sausage” 16 cm long. Divide it into 8 parts. Roll each piece and white clay into a thin layer. Form orange layers into a droplet, connect them together in a circle, shifting a white layer between the drops. Then the product rolls into a circle, and the citrus shape is wrapped in white and orange clay. It remains only to roll the fruit to the desired size.
You will learn more about how to make a fruity nail design with fimo from the next video.


