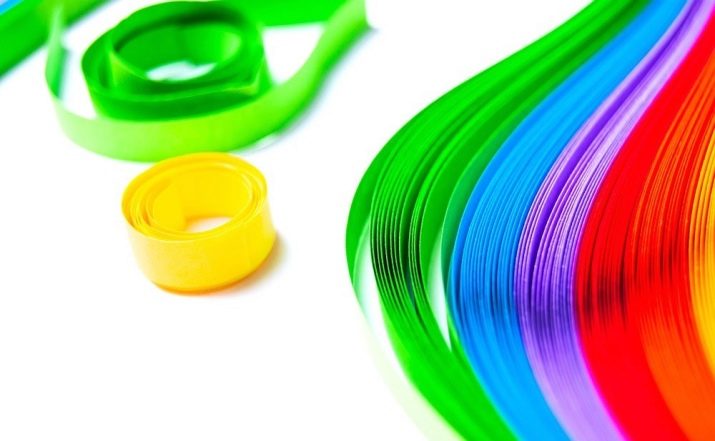
Quilling is a popular type of needlework today. A simple technique allows you to create different images on a regular sheet of cardboard or any other surface. The main quilling material is strips of colored paper. Most manufacturers have recently provided ready-made kits that include cut paper and other craft tools. A postcard made using quilling will be a great New Year gift.
What is required?
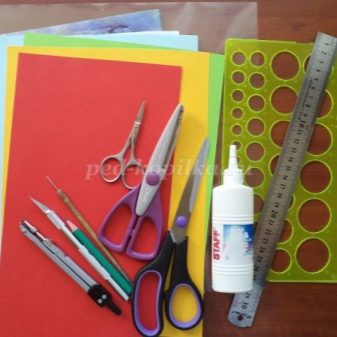
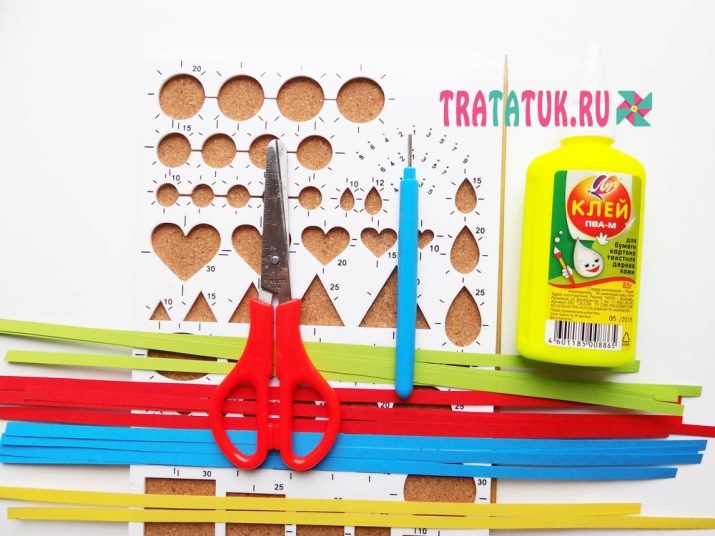
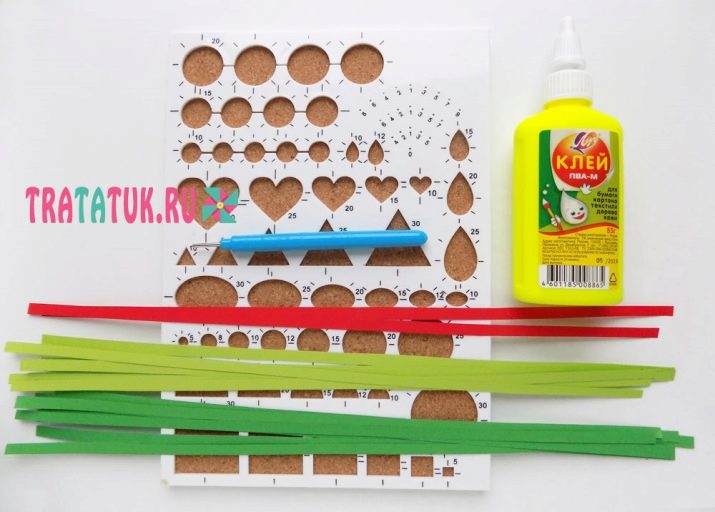
Quilling is a technique for decorating objects using paper spirals. Spirals are separate modules having a certain shape and size, which are installed on the surface to be decorated with an end face. The advantage of quilling is the availability of materials. You don’t have to buy anything special to make a postcard with your own hands. It is enough to purchase:
- scissors;
- a ruler;
- PVA glue or pencil;
- special quilling template;
- tweezers;
- colored paper;
- cardboard.
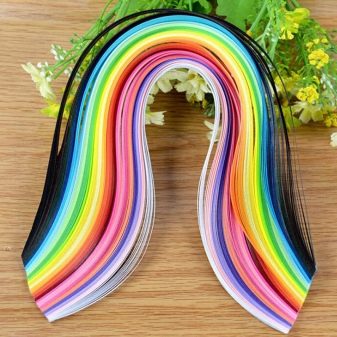
The latter is necessary for the foundation. It is worth noting that some manufacturers sell ready-made colored stripes.
Such sets are found in needlework stores. If necessary, you can cut the strips yourself using paper of A3 or A4 size. It is better to cut with a clerical knife so that there are no notches that scissors usually make. As for paper, it is not necessary to purchase one that is painted in the same color on both sides. If you already have a ready-made idea for a postcard, then it is better to choose paper of suitable colors.
How to do it yourself?
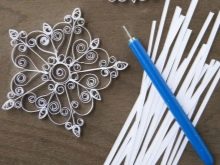
Quilling allows you to create not just New Year's cards, but whole compositions with which you can cheer up your friends and relatives, decorate your home and achieve the atmosphere of the upcoming holiday. Postcards can be done on their own or as a family, which helps to bring family members closer together. Before you look at creating a postcard step by step, should carefully consider its design. If a child is engaged in crafts, you should explain the safety rules to him and clearly demonstrate how to handle the scissors and other tools that are required. The most common symbol of winter and New Year is a snowflake. They adorn walls, windows and various decor items. The quilling technique makes it possible to make volumetric snowflakes. This will require the following.
- Purchase a ready-made kit or cut colored paper into medium-sized stripes.
- Use a toothpick to wind a spiral. At the same time, it is important to give her time so that she blooms a little.
- Fix one end with glue.
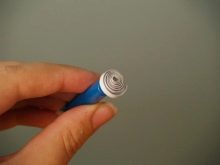
It is worth noting that the shape of the spiral is determined by the one who makes the snowflake.
Fantasy will help to make an attractive composition and arrange the picture in the required style. If there is no opportunity or desire to come up with something yourself, you can familiarize yourself with the methods of twisting paper tapes on the Internet. The number of ribbons is determined by the shape and size of the snowflake. You can also use imagination or the Internet here. Finished elements as a result will be collected in one pattern, representing a finished snowflake. You can make several such decorations, after which they should be glued to cardboard.
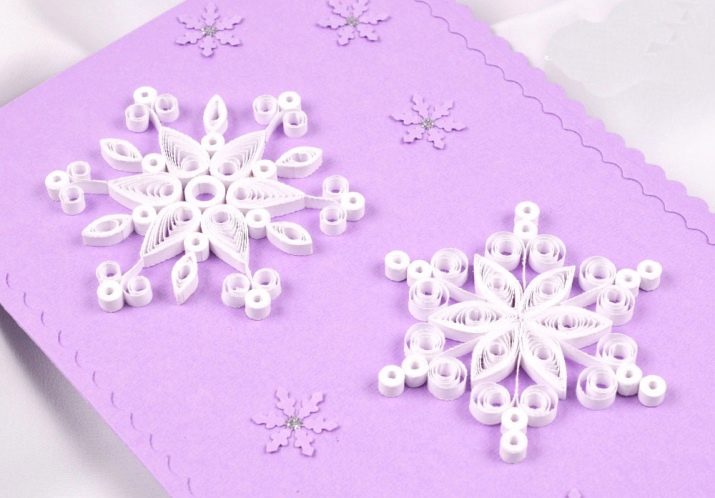
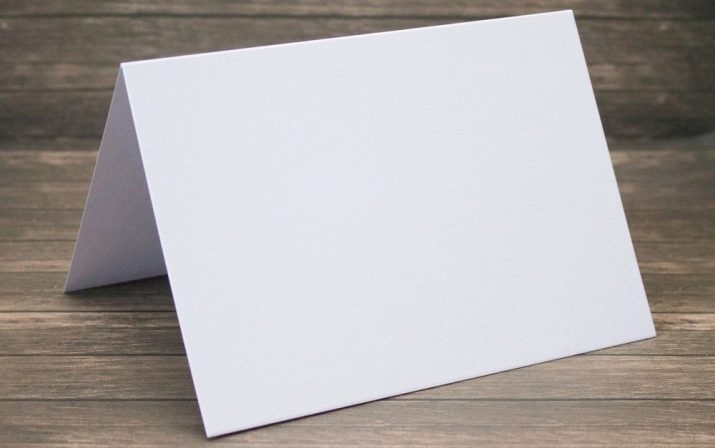
Elements are glued together with PVA glue and tongs. If you connect them with your hands, you can damage the structure and spoil the appearance of the curls. It is worth noting that quilling is a painstaking technique. It is important to train perseverance and patience. There is another option for making a New Year card using quilling. To do this, you will first need to prepare the basis. It is better to take a high-quality sheet of cardboard, which can be given any shape:
- cut off the edges;
- make a card double-sided or single-sided.
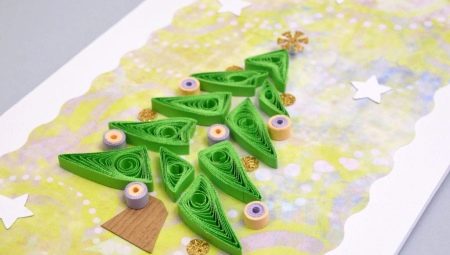
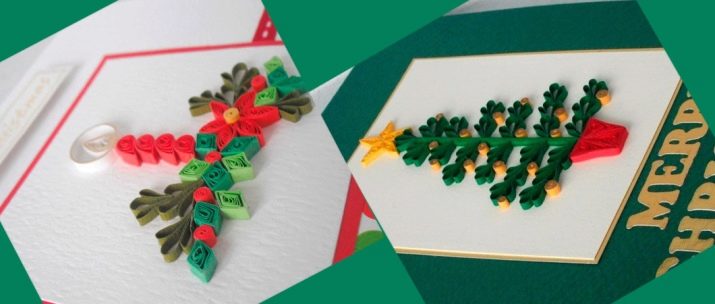
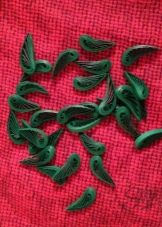
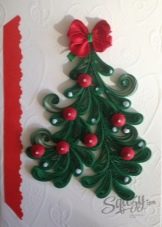
The main symbol of the New Year is tree. It is her image that is associated with the holiday and gifts, so you should think about exploring a master class on its creation. To make it, you need to cut strips of green colored paper, after which you can begin to twist small curls. The following should be done.
- Run the base for the Christmas tree with green “drops” twisted in advance.
- Form an entire Christmas tree by first laying out the blanks on paper without glue.
- Separately roll rolls from brown or black stripes. This will become the trunk of the future Christmas tree.
- Roll up colorful rolls for gifts.
- Carefully glue the workpieces using forceps.
Such a postcard can be made even by those who first got acquainted with quilling. The fir-tree can be given any shape, changing elements of the composition in places. It can also be decorated with balls. If desired, you can also decorate the tree with toys and even a garland. To make the image more vibrant, you should use different quilling techniques.

Useful Tips
It is noteworthy that the "drops" of quilling or rolls can be different. The shape and appearance of twisted stripes depend on several factors. Primarily, winding quality and tightness taken into account. To make the roll tight, it should be wound tightly and immediately glue the end of the strip to prevent it from dissolving. To give a “drop” a certain shape it must be slightly dissolved after winding. Experienced quilling masters can, at the touch of a finger, change the appearance of a twisted roll and make the picture more original.
As a result of changes in design and composition, you can get a great postcard, which will be a great gift for the New Year.
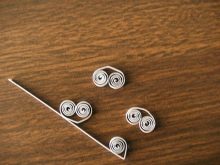
There are several standard techniques that can help you achieve your desired roll shape.
- Eye. To do this, squeeze the workpiece from two sides, gently pushing.
- Rhombus. First of all, you need to make a square, which then will need to be flattened.
- Triangle. A drop is taken as a basis, which should be pulled down and flattened one corner.
- Heart. To create such a shape, you need to chop the strip in half and twist from both ends.
- Crescent. The resulting roll is flattened on both sides and slightly bent, giving the desired shape.
- Arrow. A complex shape that is created from a triangle. The top of the figure needs to be flattened a little.
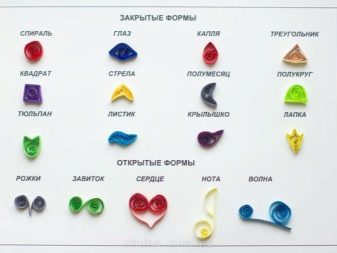
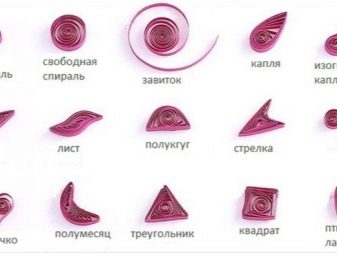
Also from the rolls you can make twigs, curls and other figures, diluting the composition of the future postcard.
Original ideas
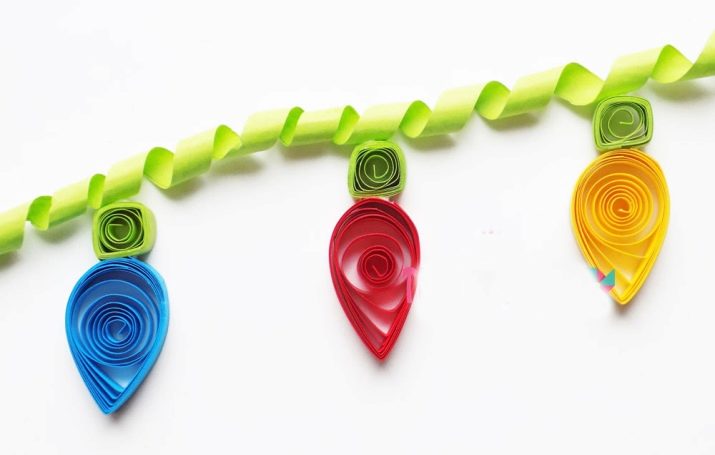
If you don’t want to make a snowflake or a Christmas tree, then you can realize other ideas. For example, a New Year garland will look beautiful on a card. To create it, you need to take:
- multi-colored paper strips;
- quilling tool;
- glue;
- wooden skewer;
- scissors;
- template in which recesses of different sizes are provided.
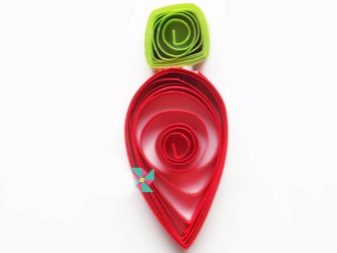
The process of making a garland is quite simple. Start with the bulbs. For this you need the following.
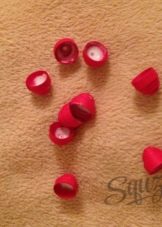
- Take 2 strips of red and glue them together.
- Twist the resulting strip and place in a template with a recess of 20 mm.
- Fix the tip of colored paper with glue.
- Make a few more circles, the amount of which can fit on paper. You can use other colors and diameters of the template.
- Give each blank a drop shape by pulling at one end.
- Twist the green strips, placing them in a recess with a diameter of 10 mm.
- Form squares from the resulting rolls.
- Glue the squares to each drop.
- Make the basis of the garland. To get it, you need to twist a long green strip using a wooden stick. The strip must be wound on a skewer and carefully removed, pulling forward until you get a spiral.
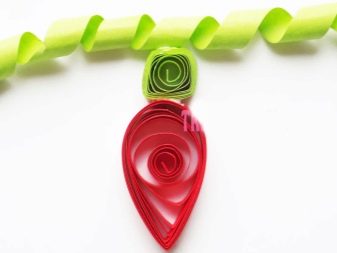
Then it remains only to glue the bulbs to the string of the garland and place the design on the card.
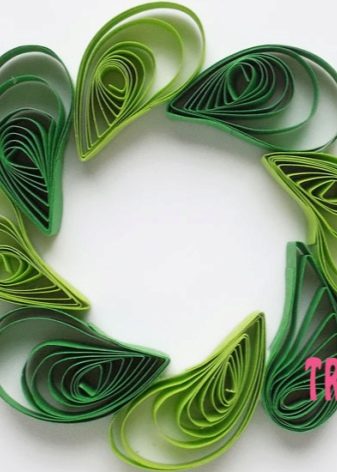
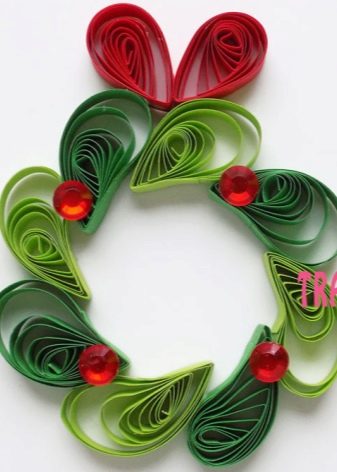
Another original idea is a New Year wreath. To make it you will need:
- strips of green, red and dark green colors;
- a template with the recesses provided in it of different diameters;
- tool for twisting strips;
- glue.
Manufacturing technology is simple and does not require much time. It is better to make a wreath of stripes of different green hue. In order for the design to work out, the following steps are required.
- Take the strips of light green color, twist them and place them in a recess with a diameter of 20 mm.
- Do the same with strips of dark green.
- Gently squeeze each workpiece with your fingers on one side and bend it slightly so that the product takes the form of a comma. In total, such commas will need 8 pieces - 4 of each shade.
- Connect the workpieces with glue so that a circle forms.
- Make a bow from stripes of red. To do this, you need to take two strips and twist each into a workpiece with a diameter of 15 mm. Next, you need to compress the ends of the workpieces, giving them a drop-shaped form.
- Form a bow and fix it on a wreath.
The final step is to use additional decorations to complete the composition. To do this, you can use beads or droplets of colored glass.
Quilling is an interesting technique with which you can make wonderful New Year cards.
See how to make a postcard using the quilling technique.


