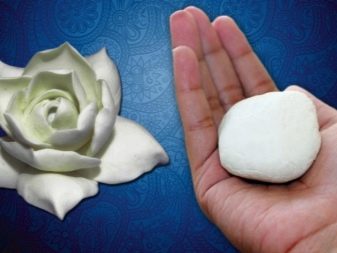
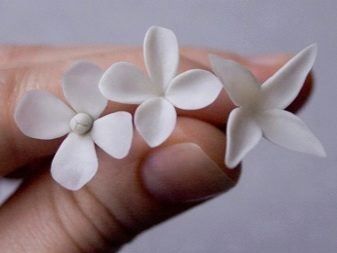
Modeling is a favorite pastime for many since childhood. And in adulthood, it can again carry away and even become a source of income. It is not at all necessary to use standard plasticine, because products for creativity today are very different. For example, you can use cold porcelain - delicate, soft, supple, allowing you to make incredible realistic and sophisticated compositions.

What to make porcelain from?
Cold porcelain is called a plastic mass for sculpting, which is based on corn or potato starch, as well as PVA glue. Due to the resemblance to porcelain, this composition was named.
Only if we compare the sticky mass with the original, it is worth saying that cold porcelain does not need high-temperature sintering, but it hardens at normal room temperature.
And this is wonderful, because even the same plasticine still retains plasticity, despite the conditional hardening.
What are the benefits of cold porcelain:
- it is easy to prepare, because it can be cooked at home;
- all components are inexpensive, because a hobby is definitely not a costly thing;
- the composition is safe even for children - you can share a hobby with them;
- composition is flexible after it hardens;
- the composition has a smooth and pleasant texture;
- it’s easy to work with him;
- it has slight shrinkage during drying;
- This material is distinguished by high ductility.
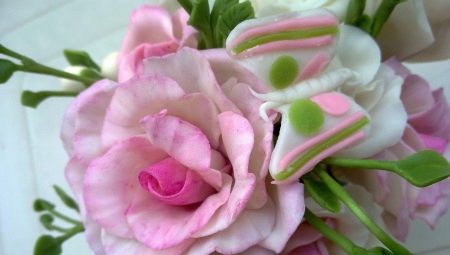
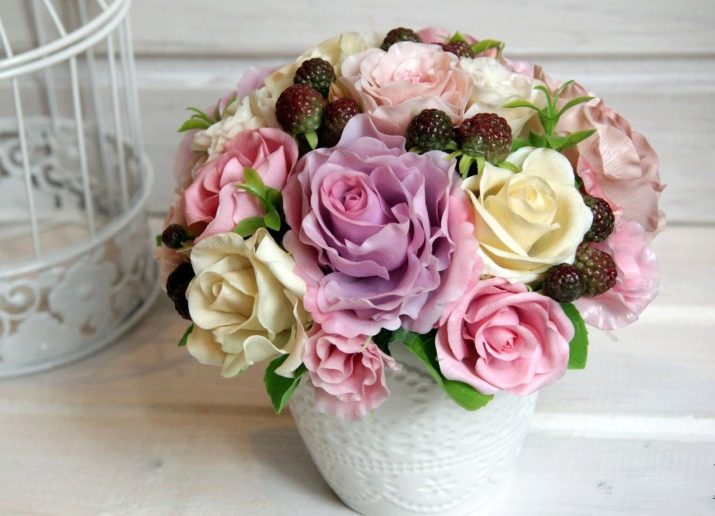
The history of cold porcelain is long: it is believed that he appeared in the XIX century in Argentina. But in the post-Soviet space, such a material has gained great popularity in recent decades. Both adults and children work with him. Unique floral compositions are created from it.It is especially pleasant that the master works on the manufacture of the mass himself: he does not just buy the finished composition in the store, but uses one or another recipe. The classic cold porcelain recipe looks like this:
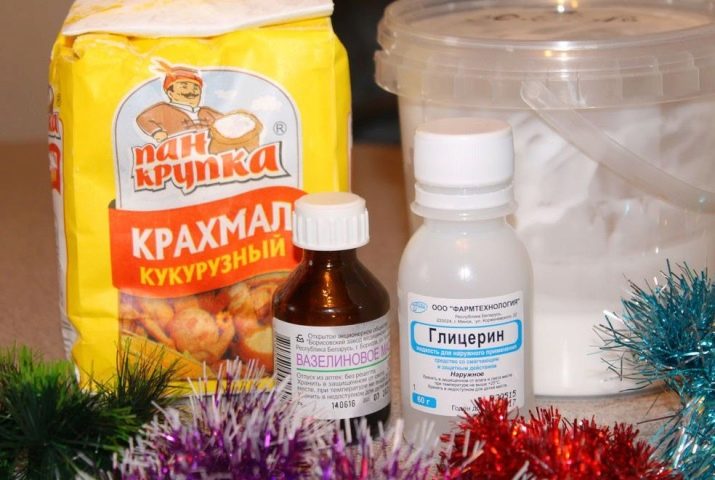
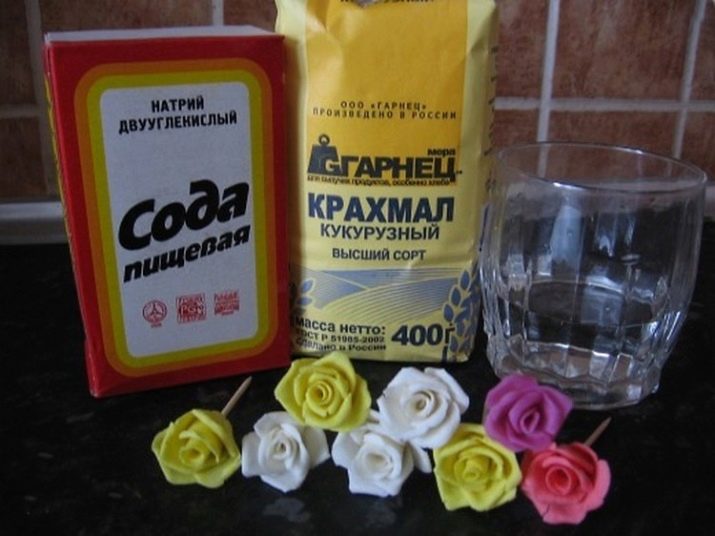
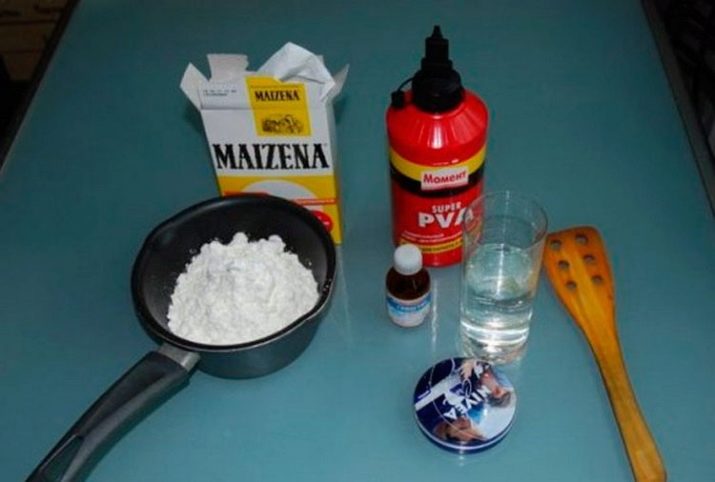
- 200 starch (corn / potato);
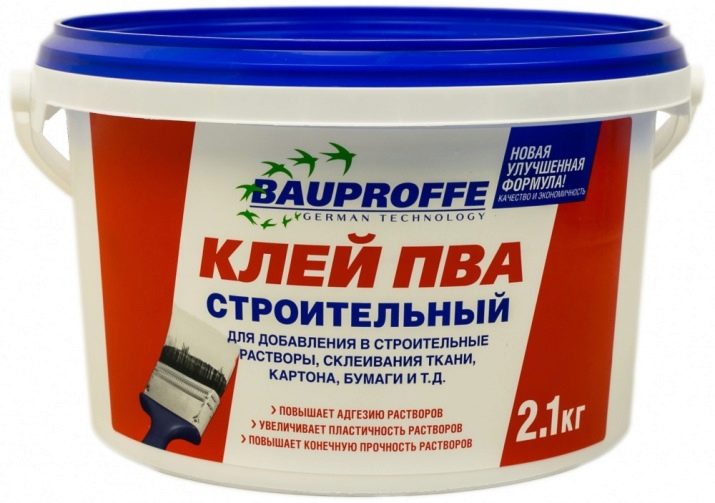
- 200 g of PVA glue (sometimes it is replaced with wallpaper glue);
- 1 teaspoon of glycerin;
- 1 teaspoon of petroleum jelly;
- 1 teaspoon of lemon juice.
You can take any starch, but the properties of the composition will vary based on which option you choose. For example, adding corn starch, you will make the composition smooth, homogeneous, visually cream - these are optimal characteristics. But when using potato starch, the mixture will become more transparent, and its texture will be grainy. You will feel as if sugar grains have been added to the mass. Such a mixture, by the way, cooks faster.
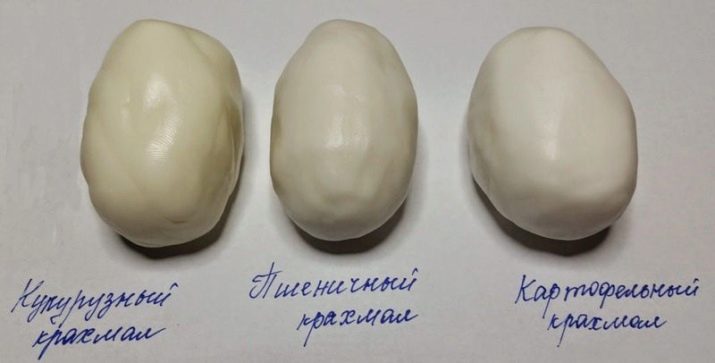
Great if you use two types of starch. So you get 2 options: for colored, painted parts, the mixture based on corn starch will be optimal, but it is optimal to make light elements from clay with potato starch. Glue is also important, many craftsmen prefer to buy glue with a plasticizer.
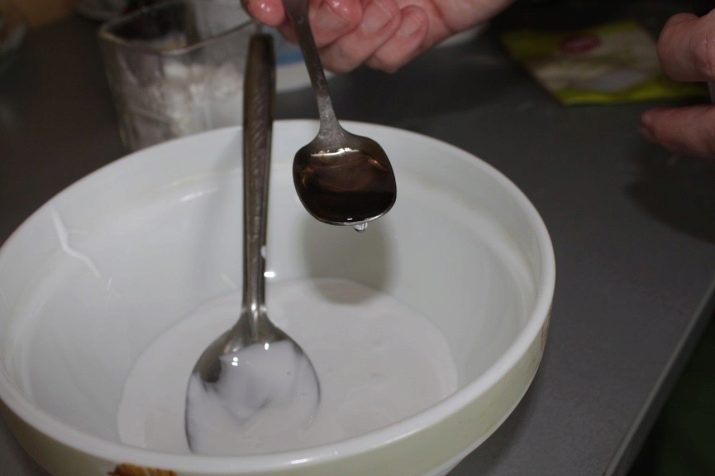
Glycerin is used because of its hygroscopicity, which means that it can draw moisture. Therefore, it is convenient to work with the mixture, it does not stick to the skin. And glycerin copes well with the role of emulsifier and thickener. Vaseline is needed to enhance the plasticity of the dough. If the master refuses such an additive, then in the process of work the mass can simply burst.
So that the porcelain clay does not mold, take lemon juice slightly diluted with water.
Some recipes suggest the creation of porcelain based on soda, in which case soda will replace the liquid component - glue. Moreover, some masters offer to choose just such an option for creating floral arrangements, because a mass based on soda deprives flowers of any artificiality, they look as realistic as possible.
How to do in the microwave?
You can cook cold porcelain in a standard way, but sometimes at home it is more convenient to use a microwave. The main thing is to take a suitable container, which is allowed to be heated in a microwave oven. To make the mass with your own hands you will need:
- a suitable container (preferably one that you will no longer use for cooking);
- beaker;
- cling film;
- pharmacy gloves (can be replaced with polyethylene gloves);
- Scotch;
- plastic container;
- cosmetic oil (or vegetable).
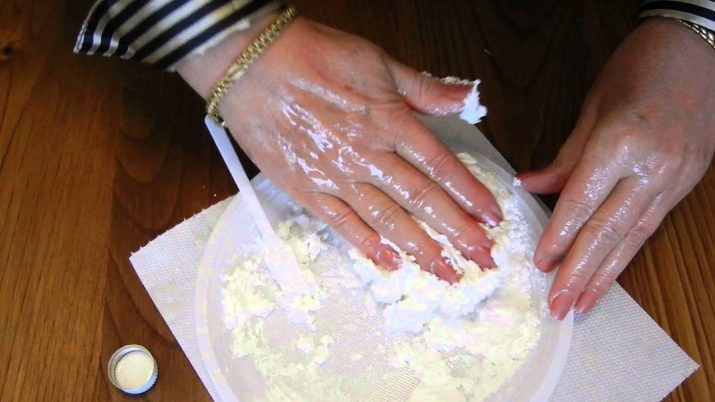
First, the master will measure the glue according to the prescription measure, and then add it to a clean, ready-to-work container. Then measure with a teaspoon glycerin, petroleum jelly, add it to the glue. Next squeeze lemon juice, also add to the composition. All liquid components must be mixed very well. Measure the starch according to the recipe, mix the mixture. Next, put the container in the microwave oven, setting the maximum power in it. Start heating up. You can’t warm the composition with one run, you need to do intervals every 15-20 seconds.
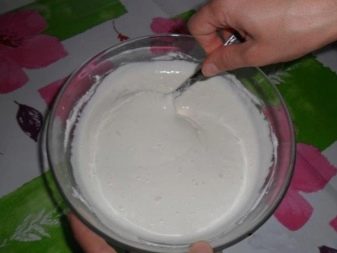

After each approach, the microwave is turned off, the composition is taken out, mixed and put back into the SCH oven. This should be repeated until the dough reaches the desired degree and thickens. It’s difficult to say the exact time, because it depends on what kind of microwave is in your home (its power and even the characteristics of the walls matter).
In the workshops for beginners, the main points of cooking are listed, but often they do not talk about some of the nuances that lead to poor-quality molding.

Important notes on cooking cold porcelain in a microwave oven:
- after making porcelain in the microwave, some masters immediately seal the soft mass into a bag, but if you carefully boil the composition and achieve a dense consistency, you can sculpt it immediately;
- the more cream you have on your hands, the softer the porcelain will turn out, the paint will also soften it;
- it happens that the very first cooking of the mixture in the microwave leads to digestion - very hard lumps can really be thrown away, but rubber-like lumps can be stretched just by coating the hands with glue;
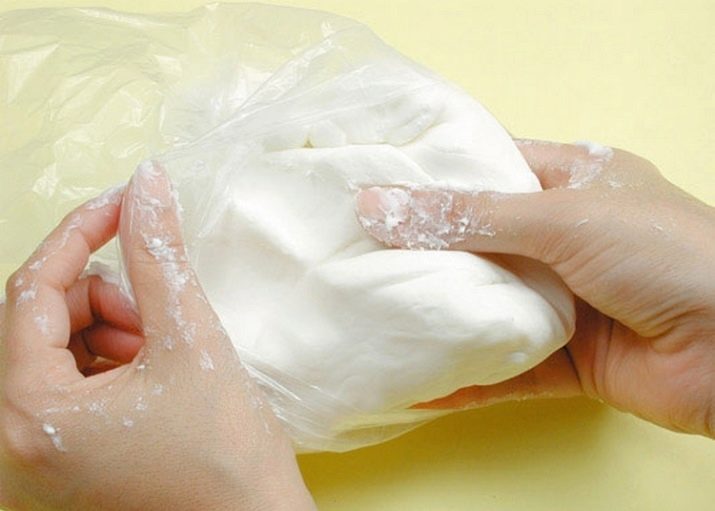
- the pieces of the mixture that you take out of the microwave oven are very hot (by the end of the work - the hottest), so as not to burn your hands, you need to wrap the piece in cellophane without holes, tie it up and put it under cold water, kneading the cake right in the bag.
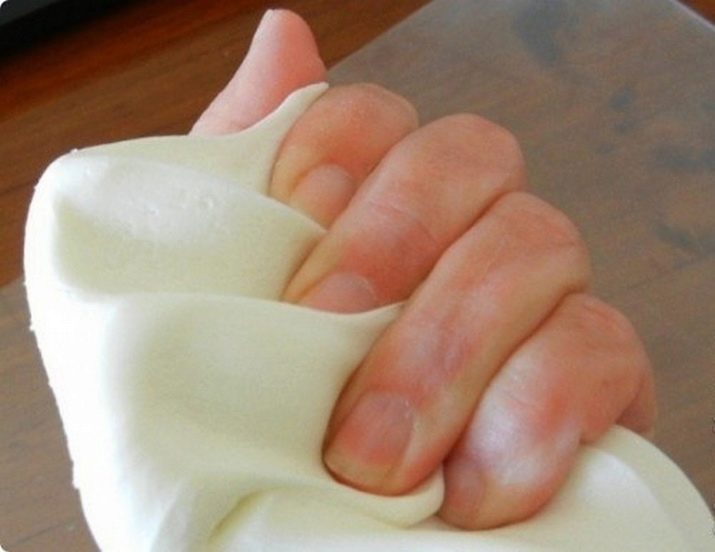
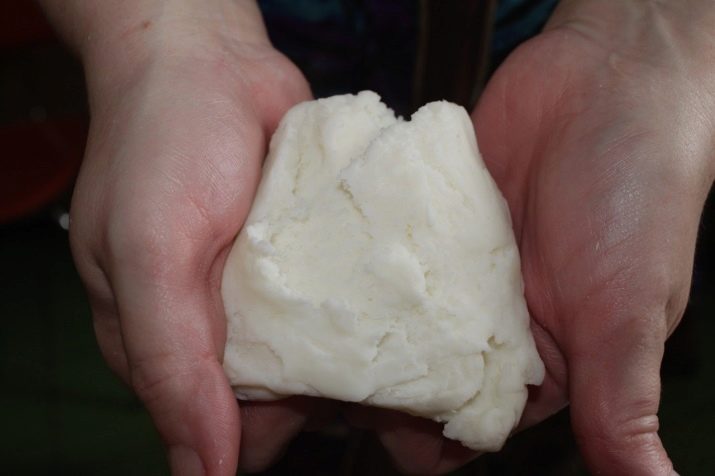
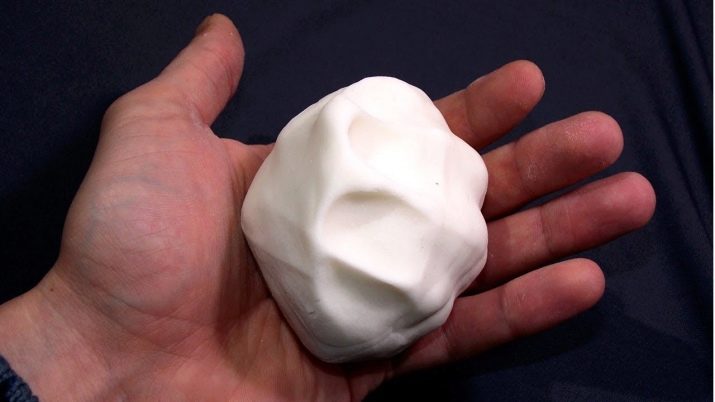
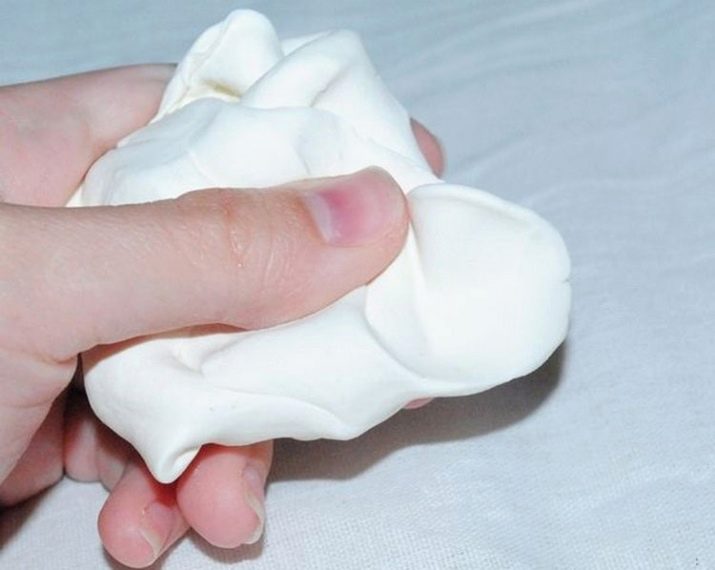
If the mass is cooked correctly, it will not stick to your hands, and if you grease your hands with cream, then the porcelain will slide, rolling into a thin layer.
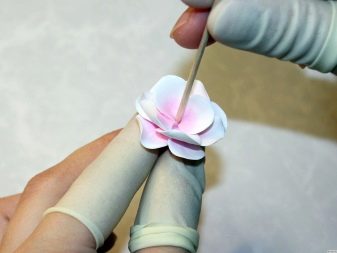
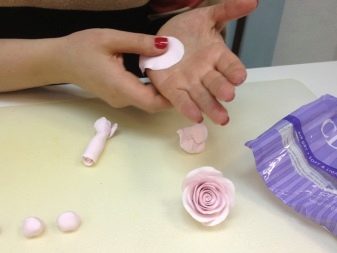
Starting to sculpt, you will see that, for example, the petal will not begin to curl, it will hold its shape. Details stick together well, do not fall off.

Cooking the mixture on the stove
Making soft material is a creative process in itself. Kneading and boiling, changing recipes according to the author’s technique are fascinating. Many experienced craftsmen understand that homemade composition is better than those that sell stores of goods for creativity and even better than those that offer popular workshops. Because experience makes it possible to compare, adapt to different recipes and based on observations to make your own, which is right for you.

Standard porcelain recipe with cooking on the stove:
- corn starch - 150 g;
- white hand cream - 1 teaspoon;
- glycerin - 1 teaspoon;
- water - 100 ml;
- PVA glue - 150 ml;
- pan (it’s good if you have a separate pan for making cold porcelain).
The master class is not particularly difficult.
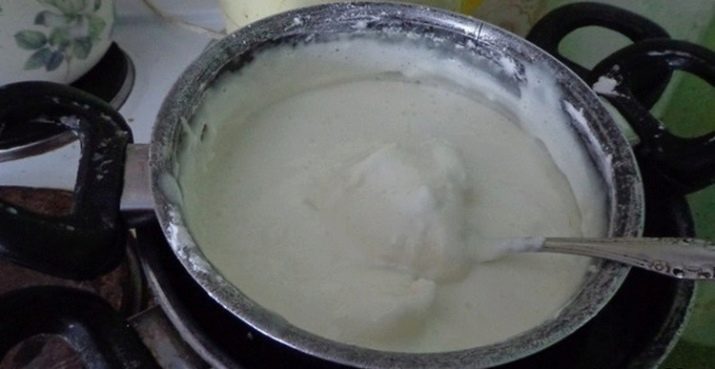
- Take a pan, mix all the liquid ingredients in it, stir them well.
- Heat the medium heat under the pan, cook the mixture on it until smooth, occasionally stirring the mass.
- Add starch a little bit, without ceasing to stir the composition.
- Keep the mixture on fire until it thickens.
- Next, take out the hot composition, put it on a kitchen towel.
- After wrapping the composition thoroughly in a towel, knead the mixture like a regular dough until it cools down.
- After that, you can remove the towel and continue kneading with your hands.
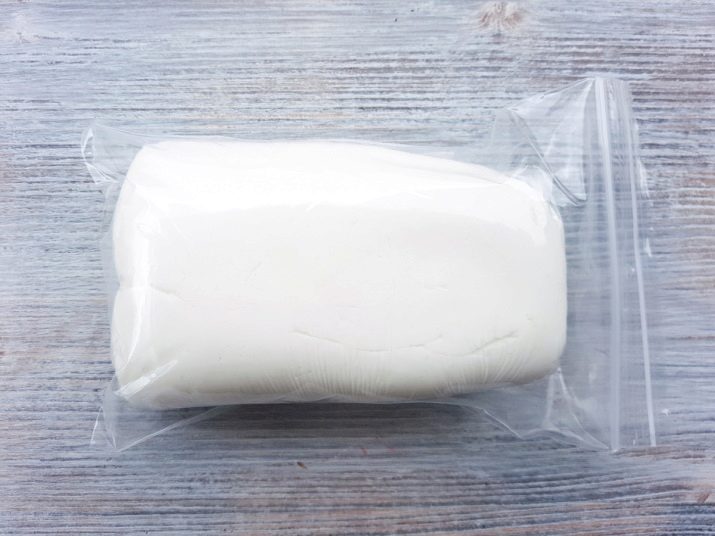
- You need to knead for so long until the mixture becomes soft, until it stops sticking to your hands. After that, it can be transferred to a plastic bag.
There are complicated recipes. For example, the following:
- 1 kg of vinyl glue;
- 0.5 kg of corn starch;
- 1 tablespoon of sodium benzoate;
- 1 tablespoon of stearic acid;
- 1 tablespoon of emulsion for bleaching the dough (it is often replaced with white paint);
- 1 tablespoon of lemon juice;
- 2 tablespoons of glycerin;
- 3 tablespoons of Vaseline.
Prepare the mixture on medium and low heat. There is no universal advice - you need to try and compare. If you cook over low heat, you need to stir the composition with a wooden spoon. A reference to the cooking time is the moment when the dough begins to stick off the walls of the pan. The cooking process is multi-stage: first, the composition resembles a cream, then it looks more like cottage cheese and only at the end it becomes a dense mass. When the dough is behind the walls, remove it from the heat. Put it on the countertop and knead until smooth and plastic. Both transparent and opaque porcelain are cooked on the stove almost the same, but the composition of the mixture will be different.
Storage
A very important question, in which beginners are often mistaken, is the storage of cold porcelain. The first and main mistake is the storage of such a mass in the refrigerator. If she is in the cold, she will begin to crumble, lose her basic qualities (including viscosity). After that, cold porcelain is practically unsuitable. Think of such a simple example: if you put the usual PVA glue in the refrigerator, after a while you will see that it is stratified into water and the “cottage cheese”. With cold porcelain it will be about the same.

That is why the best storage option for homemade sticky mass is to be in the bag. Pack the dough, tie a bag or just roll up so that air can not enter it. If air enters the bag, the porcelain will dry out. And you should not store home-made dough in the dark - this is fraught with the establishment of a fungus. If the fungus “attacks” porcelain, the mass will become sticky and nasty. And if this happens with the test, no cream will save him. Simply send the porcelain wrapped in polyethylene into a plastic container, close it tightly with a lid. As for cling film, this is not the best option. It lets air through, so storing mass in it for a long time will not work.
Products from cold porcelain should be protected from:
- moisture (when wet, they become sap and do not always find their original form);
- direct sunlight (otherwise the product will burn out, and the paint will simply fade);
- frost and cold - low temperatures will make porcelain brittle, and even touching it can lead to breaking off;
- increased humidity - and it threatens the products, because as a result of its influence they can lose their original appearance (for example, you do not need to put a cold porcelain flower arrangement in the bathroom).
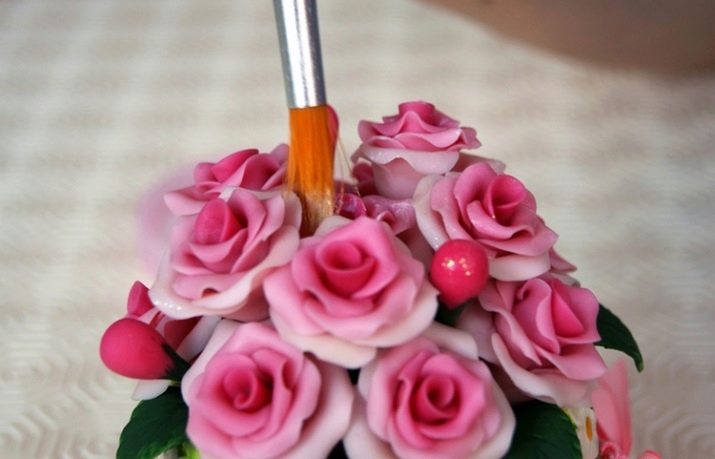
But to add strength and durability to the product, it must be varnished.
And it’s not so important what kind of varnish it will be: you can use art, acrylic, and aerosol. But it is better not to take a varnish for a tree - it will just eat away the mass. Some craftswomen use colorless nail polish. But if you already coated the product with varnish, it will no longer be possible to expand the element, flexibility is lost.
Since starch is present in the mass, cold porcelain products can be attractive to insects - and this point must be taken into account. Even preservatives used in recipes will not protect the product from insects. If you are planning to clean the porcelain, you will need a napkin, a cloth or a hard brush. You can even blow off the dust with a hairdryer, but you should be careful with the temperature regime. If something suddenly sticks to the product, do not rub it, the pollution can clog into the texture. In this situation, sticky tape is suitable for cleaning clothes.
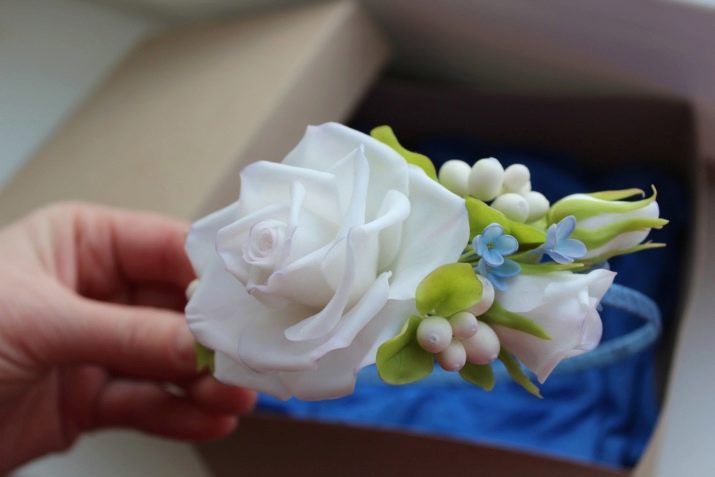
Sure, any product can be accidentally broken or accidentally broken off a piece. In most cases, superglue saves the situation (you just need to take that version of it that is suitable for plastic, and always transparent). The finished product should be stored in a separate box, not mixed with other jewelry.
Each product is characterized by the so-called mechanical fatigue, so you should not wear cold porcelain jewelry under clothes or under headdresses.

See how to make cold porcelain with your own hands in the next video.


