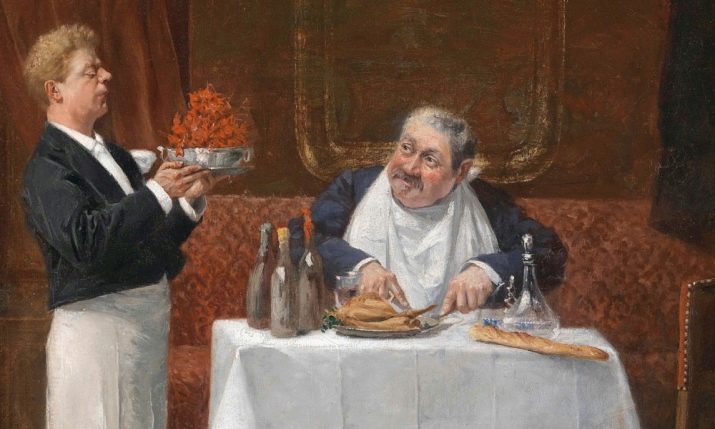
Today, a napkin is a familiar attribute of any feast. Paper is indispensable for hands and face, fabric is served so as not to stain outfits. It’s hard to imagine your life without these unpretentious helpers. Their use is already automatic. However, no one thinks that from ordinary fabrics you can create real masterpieces that can decorate any table.
We offer to know amazing art - Napkin folding, or folding napkins and a little touch on the table setting, as in expensive restaurants.
Features
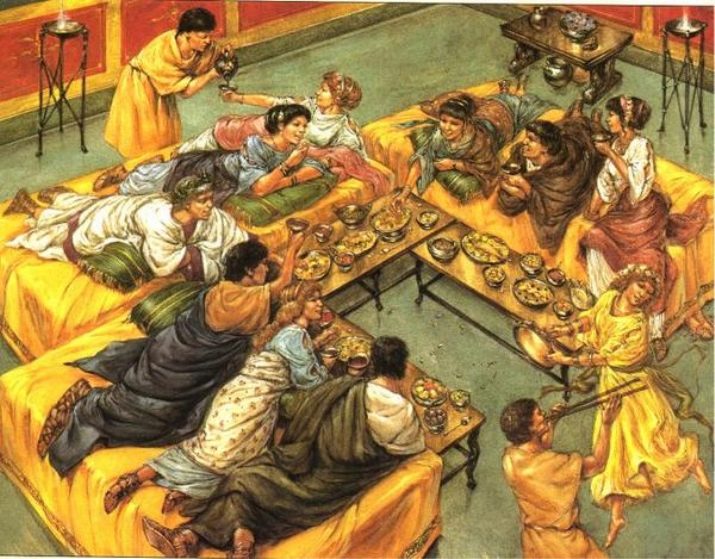
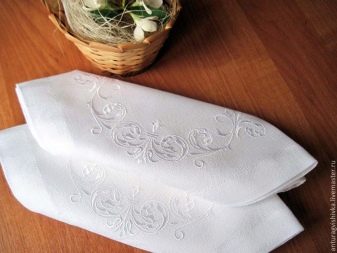
Beautiful fabrics on the table always evoke thoughts of the aristocracy and beautiful palaces. Such associations arise for a reason. The very first “substitutes” for napkins were only among rich and noble people. This is explained, firstly, by the fact that commoners did not think about the purity and ethics of nutrition. And secondly, the high cost of tissue. They first appeared before our era in ancient Rome. They were made from alabaster fibers, which determined their high cost. Accordingly, only rich people could afford such a luxury.
Before the ubiquitous distribution of napkins, different peoples used their own devices. For example, in the East, a beautiful bowl of lemon water was placed on the table, in which hands were washed. Then used rice paper or thin pita bread. In ancient Rome, hands were wiped on the leaves of a fig tree.In Egypt, used the pulp of bread.
In history, there are descriptions of even such strange analogues of napkins as, for example, court hair. If the food was consumed lying down, then carpets or panels were used, which covered the floor.
In Russia, for this purpose, tablecloth floors and clothing sleeves were used, which lasted until the 18th century. By decree of Peter I, cutlery became mandatory. Then they even published a book on etiquette, in which it was explained where, how and why to use the canvas.
The art of folding napkins into different shapes also appeared around the 18th century. This direction originated from origami, which was common in Japan. Previously, this was a kind of "chip", the hallmark of an expensive restaurant or noble people who hosted guests. The ability to fold napkins beautifully spoke of hospitality, belonging to the upper classes. So out of necessity, napkins became table decorations.
Today, such a luxury is available to anyone every day. It is worth buying or stitching simple square canvases yourself. But what a charm and sophistication they give to an ordinary dinner!
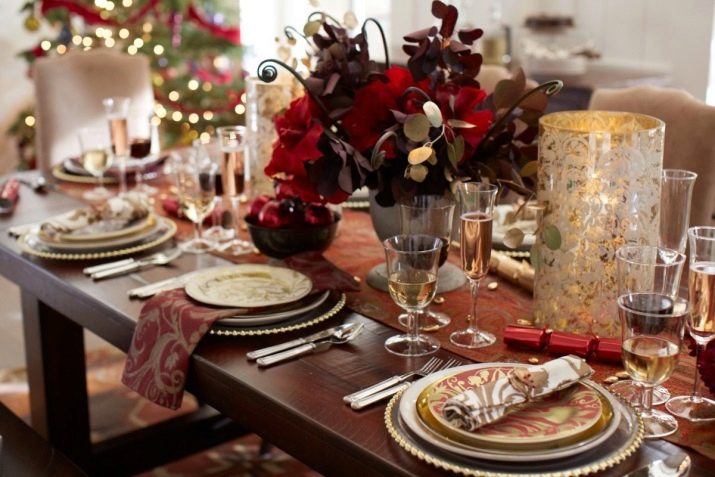
They say that the appearance of the table already determines the mood for the meal. Try to diversify the meal with a beautiful serving, perhaps the dishes you cook will become even tastier from this.

If you don’t know how to diversify your meal, how to properly and skillfully arrange a table, then be sure to learn a couple of Napkin folding schemes proposed below.
The article will describe the rules of etiquette, a few simple step-by-step master classes and the basics of table setting with napkins, as well as inspirational and unusual creative ideas.
Methods of folding: step-by-step master classes
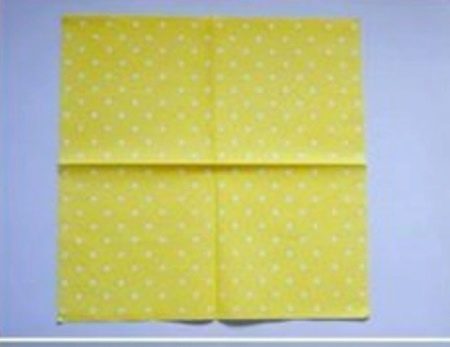
To get started, let's deal with the source material - the napkin itself.
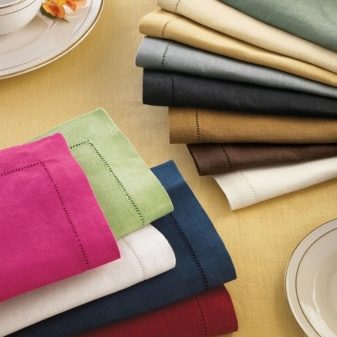
Cloths always have a square shape with a side from 25 cm to 45 cm. The size of the napkin depends on the meal - if it is a full lunch or dinner, then the napkin is served more. If lunch or coffee break is small. They are usually sold in sets of six.
Serving napkins still exist. They are more like tablecloths. They are placed under plates and cutlery. They are not necessarily square in shape, so they are not used for Napkin folding.
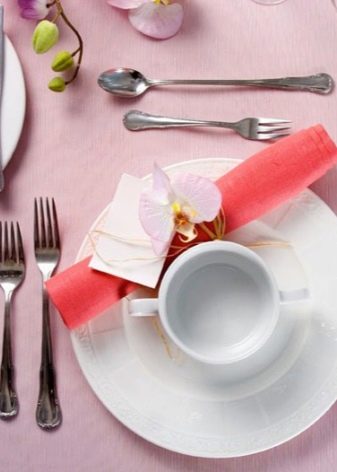
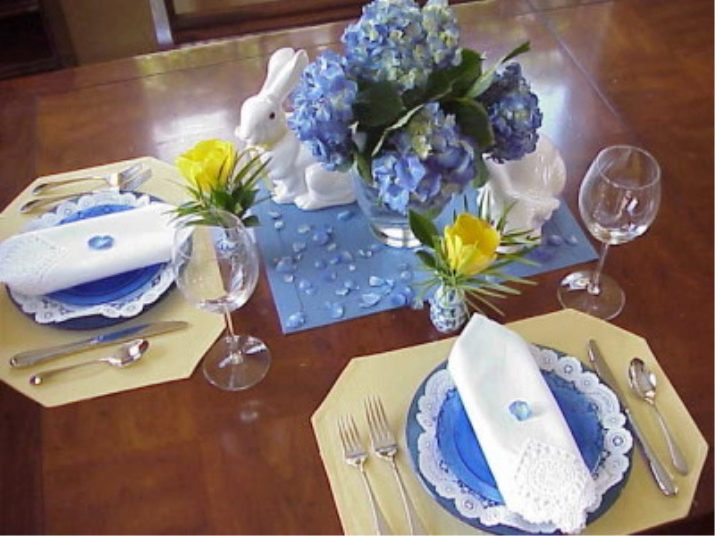
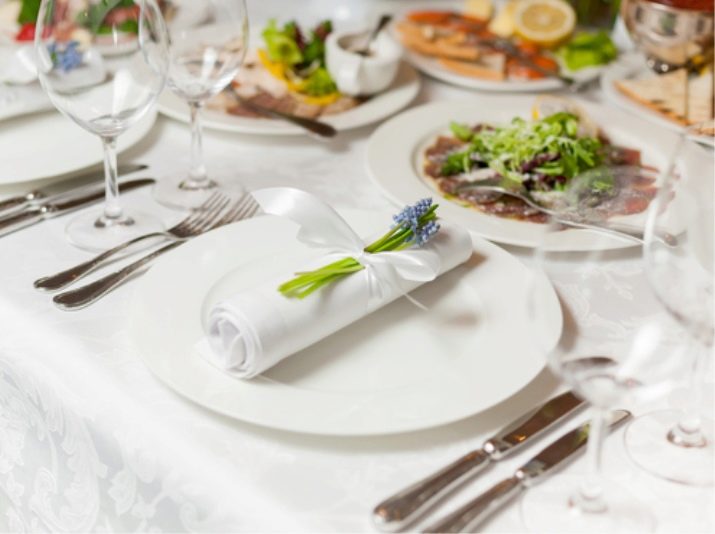
If the textile is used for serving a table that is not filled with food, then it is placed on the top plate. If treats are already on the table, then a napkin is placed to the left of the plate. Sometimes they are threaded into rings, tied with a ribbon, put cutlery in them or put in a glass.
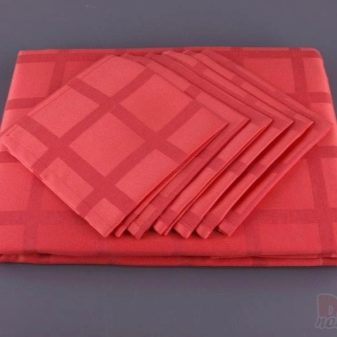
All textiles on the table should be combined with utensils. White fabrics are more universal in this matter. In addition, it is easier to care for them: white things can be washed at 90 degrees, bleached from stains and ironed at high temperatures.
For the holiday, any colors are suitable. The main thing is that everything looks harmonious.
There are many options for how you can elegantly and simply twist, spread out or collapse ordinary napkins. Let's look at some of them.
All schemes in one way or another have the same essence. On this basis, we can distinguish:
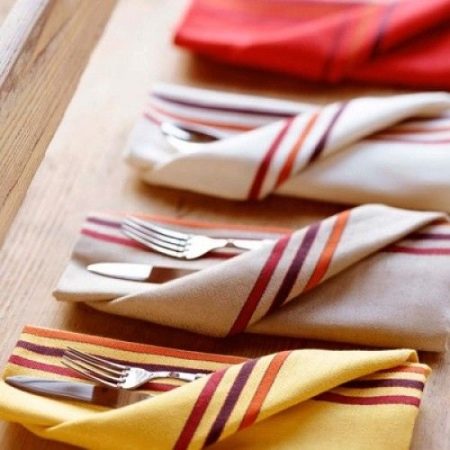
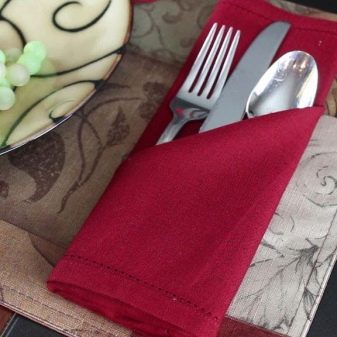
- Horizontal (Flat) Shapes or Sachets. These are small pockets in which forks, spoons and knives are folded. This form of wipes looks original and has additional functionality. They are perfect for formal receptions.
- Vertical (volumetric) figures. More often they have a “standing” shape. They look solemn and unusual. They will surprise guests and add mood to the holiday.
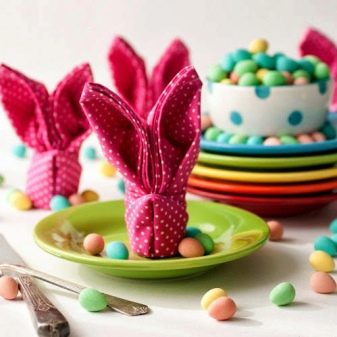
- Themed Origami. Will be appropriate on the appropriate holiday: New Year or Christmas, Valentine's Day, Easter or March 8th. Such figures are more complicated than the previous ones and require certain skills.

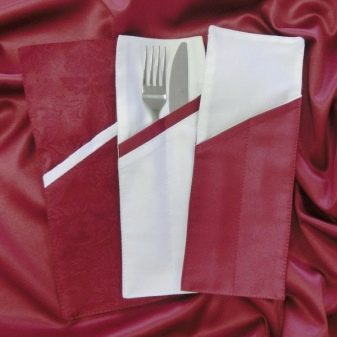
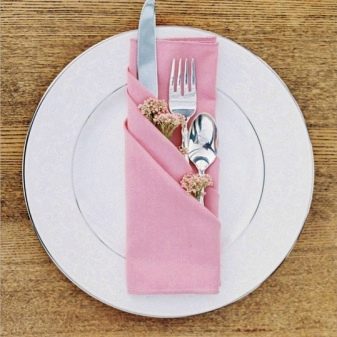
Sachet Envelopes
Carved envelope
Folding Order:
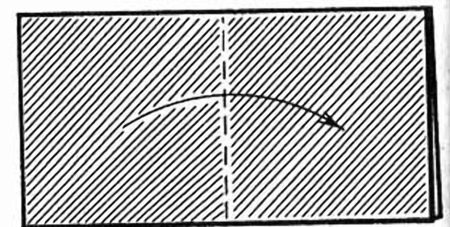
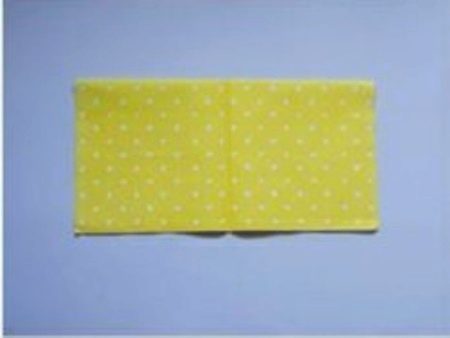
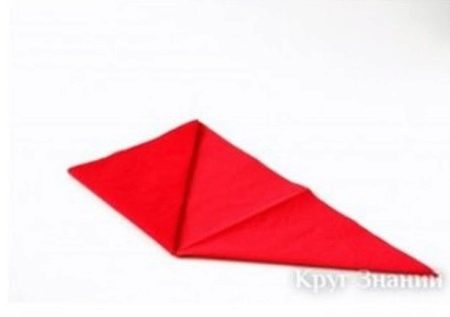
- it is necessary to bend the rag napkin in the mid-horizontal line, connecting the upper corners with the lower ones.The fold should be on top, the free edges on the bottom;
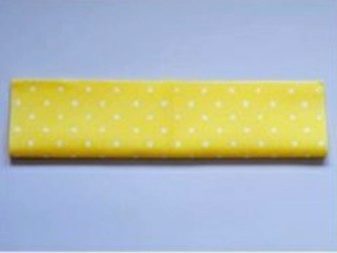
- Then collapse the left half of the rectangle to the right along the middle vertical line. The fold will be on the left;
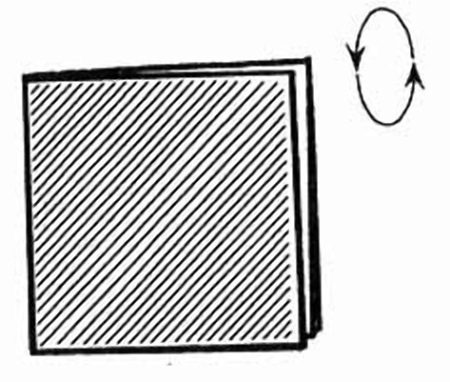
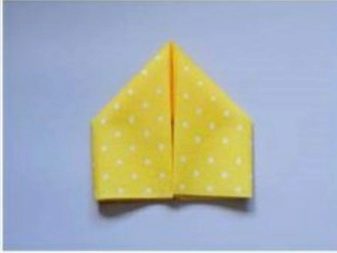
- expand the napkin with free corners from yourself;
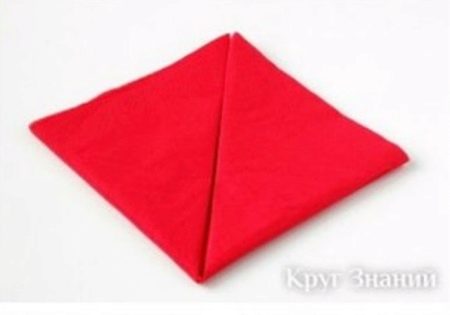
- the next step is to bend one layer of fabric down, not reaching the bottom corner;
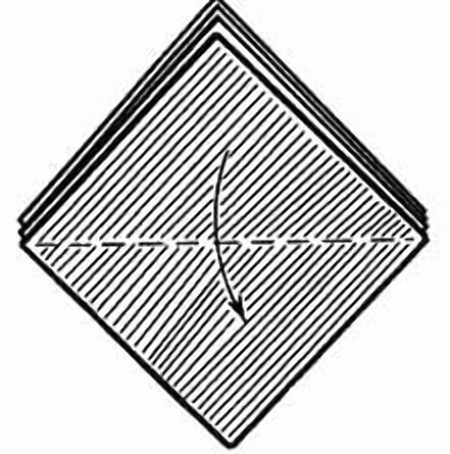
- repeat the same with the second layer;
- now with the third;
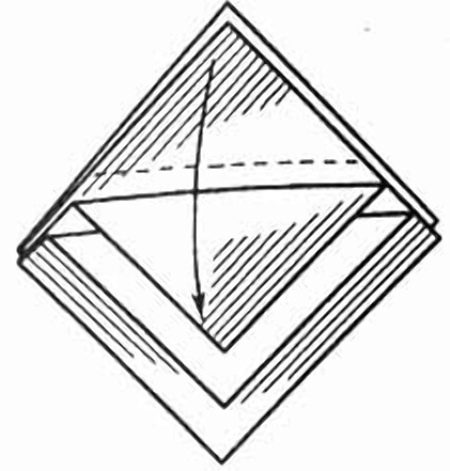
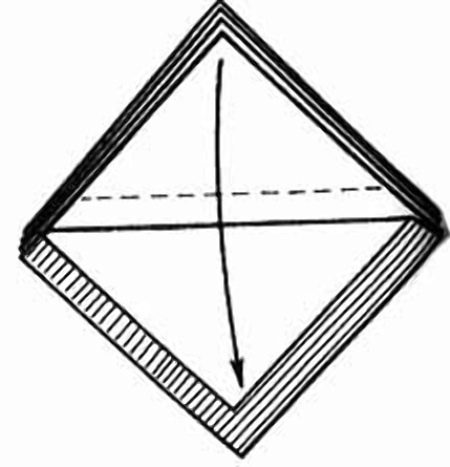
- Now bend the side corners under the figure;
- the envelope is ready. Put the necessary cutlery in each separate pocket.

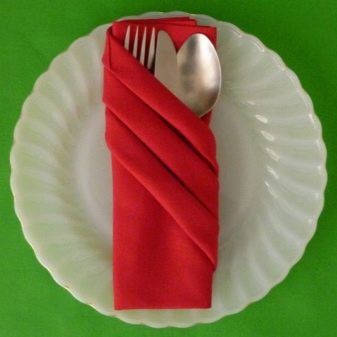
Diagonal ribbon
Folding Order:
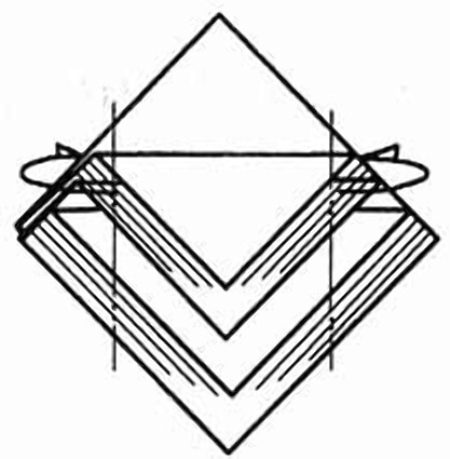
- start with the third paragraph in the previous figure "Carved envelope" - the napkin is folded four times, free corners lie from you;
- then bend the corner of the outer first layer to the center of the square;
- wrap the strip along the intended diagonal and turn the corner inward;

- bend the right half of the figure back;
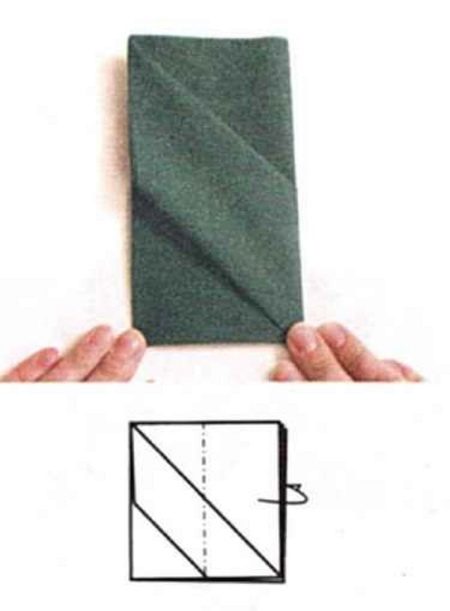
- put cutlery in the resulting pocket.
Similar diagonals allow you to play with them. There are many variations. Here, for example, is another example of such an envelope, which looks much more complicated and textured:
- start with the third paragraph in the previous figure "Carved envelope" - the napkin is folded four times, free corners lie from you;
- then bend the corner of the outer first layer to the center of the square;
- wrap the strip along the intended diagonal and turn the corner inward;
- bend the right half of the figure back;
- put cutlery in the resulting pocket.
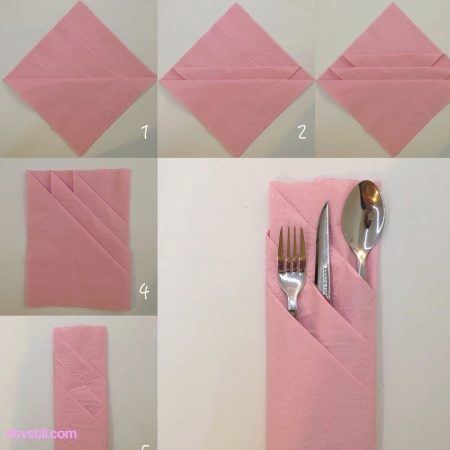
The pictures show a paper napkin, but the same can be done with the fabric.
In addition to placing forks and spoons, you can also decorate a napkin with its spruce twig, flower, dried autumn or juicy fresh leaf or other.
Diamond Envelope
The steps are as follows:
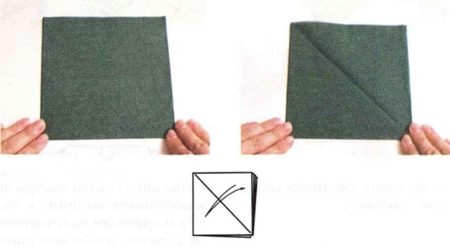
- you need to place the textile with the “left” side up, grasp the upper left corner and pull it toward the center;
- Next, fold the fabric in half from left to right. The fold should be on the right;
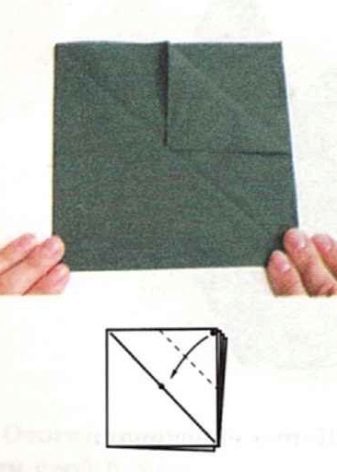
- fold it in half again, but horizontally, that is, turn the lower part under the upper;
- pull the top edge to the center and hide it in the formed envelope;
- then wrap the side corners under the product;
- the final step is to put the fork and knife in the first pocket, and in the second a sprig of greens, a flower or a paper towel.

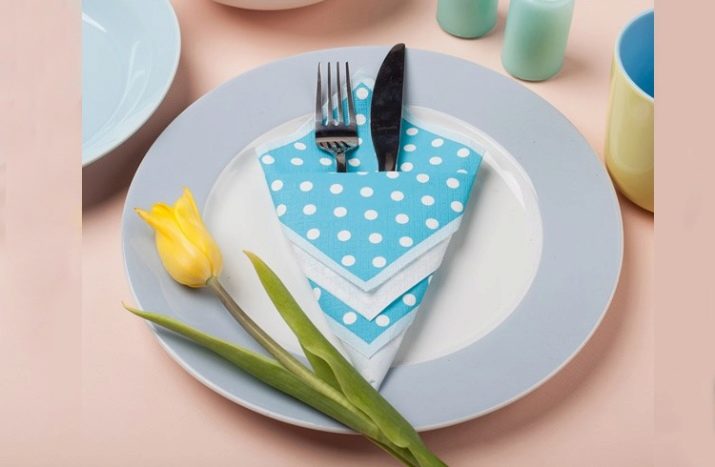
Kulek
Stages:
- fold the fabric in half with the front side inward, position the free edges in a direction away from you;
- Now bend the shape in a vertical line. The result is a quadruple folded in four;
- you need to expand the figure so that the free angle is looking away from you;
- bend in a downward direction alternately in one layer, leaving between them a gap of about one centimeter;
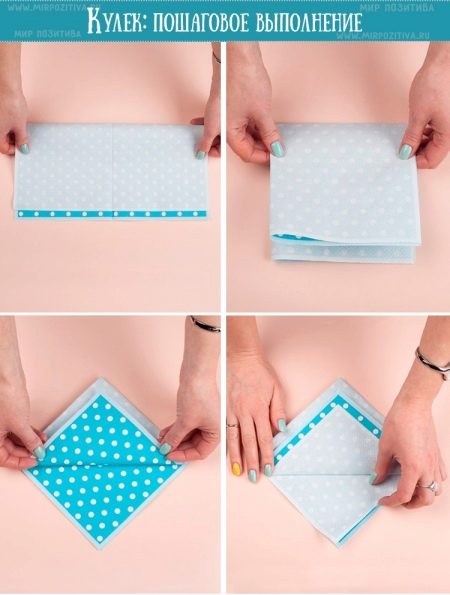
- continue to continue until only the bottom layer of the napkin remains;
- flip the figure, fold the corners to the center, as shown in the diagram;
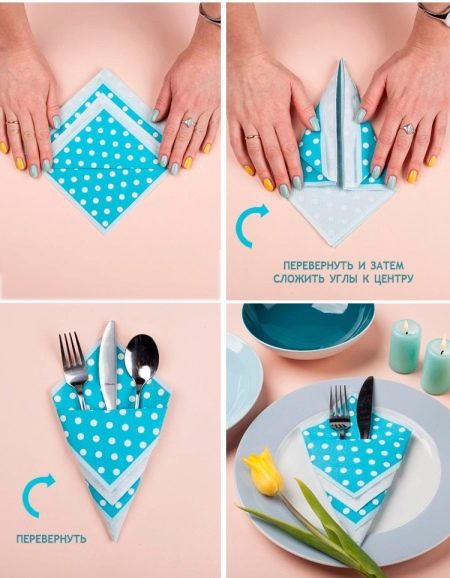
- turn over again - the cutlery bag is ready!
Vertical diagrams
Crown
Scheme of work:
- lay the fabric diagonally, position the base towards you;
- bend the left corner up, as shown in the figure;
- in the same way, bend up and the right edge, then pull up the corner formed at the bottom, but do not connect it to the upper corner: leave about a couple of centimeters;
- Now you should bend the top of the corner bent in the previous step down exactly in the middle so that its top is connected to the horizontal edge of the napkin;
- the next step is to turn the product on the other side;
- carefully reduce the opposite edges of the figure, forming a cylinder: one of the edges must be plugged into the second edge folded diagonally.
Such a figure can be diversified: just bend the free corners behind the “belt”.
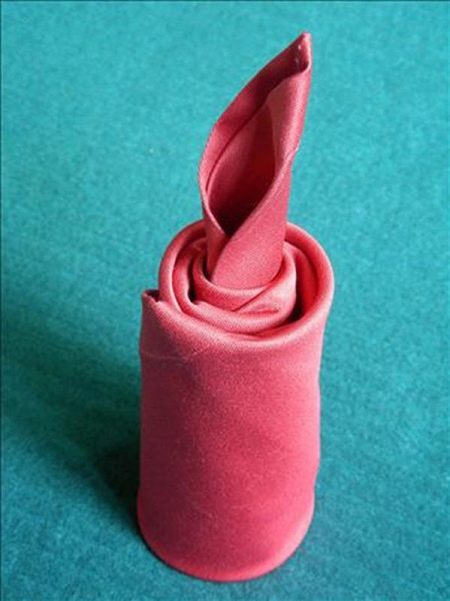
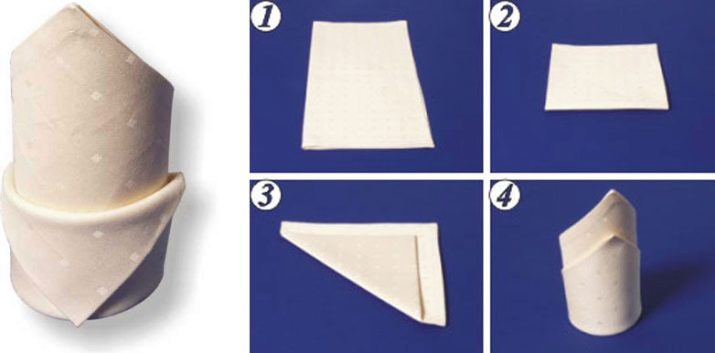
Candle
How to do:
- fold the napkin diagonally with the base of the triangle toward you;
- start folding its upper corner to the base;
- continue the previous step until the hands reach the horizontal edge;
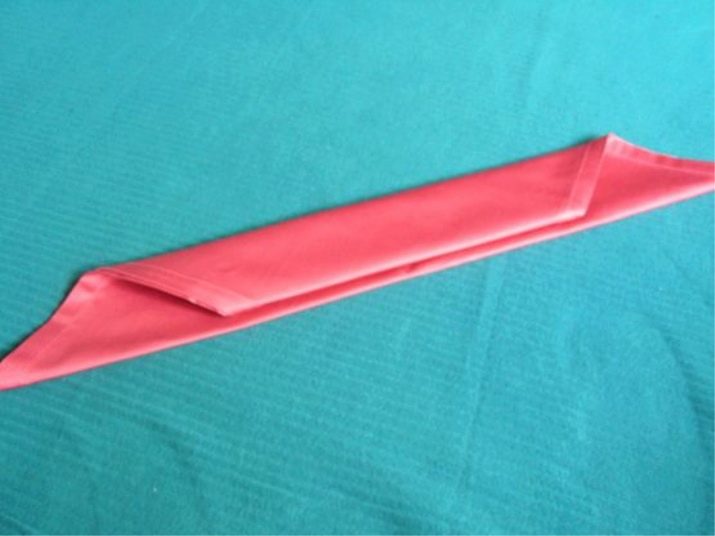
- Now bend the left side up;
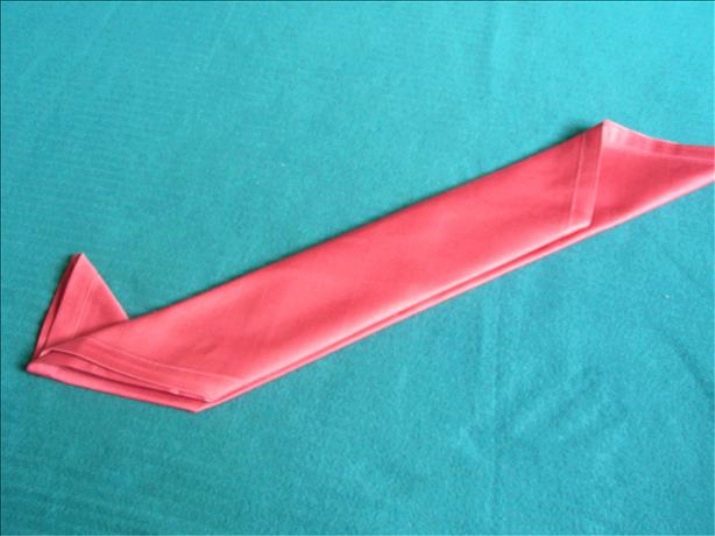
- roll a napkin roll, fix the remaining tip below;
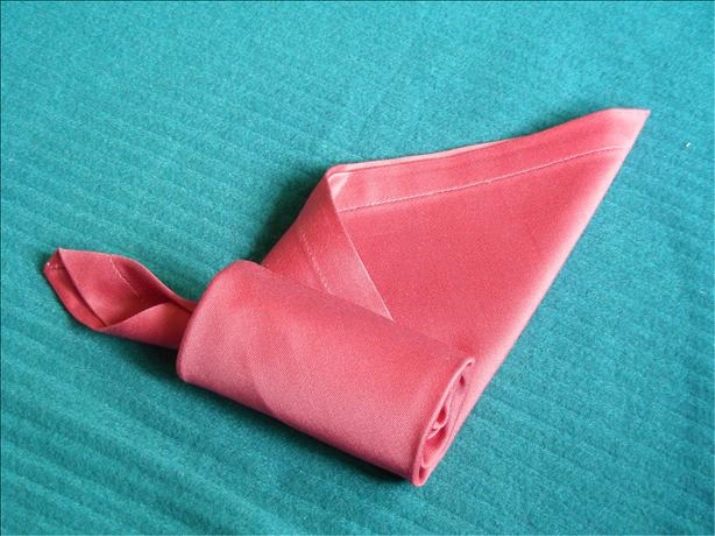
The flame itself can be made of any size.Put the finished “candle” on the plate and slightly pulling the upper tail up, you will get a new figure.
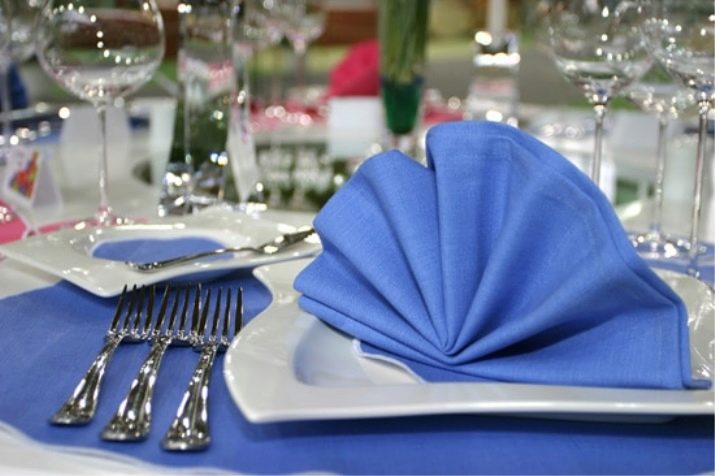
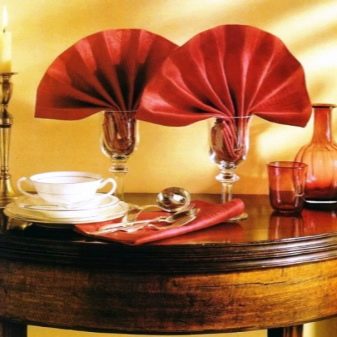
Fan
Stages:
- standard starting form - the napkin is folded in half, then you need to fold about two-thirds of the fabric with an accordion and iron the resulting corrugation well;
- fold the product again in two parts, the accordion should be outside, as shown in the picture;
- curl up the remaining (straight) “tail” diagonally so that a rectangular support for the fan is obtained: an angle of 90 degrees should abut against the accordion;
- it is good to straighten the zigzag and place it resting on the “leg”.
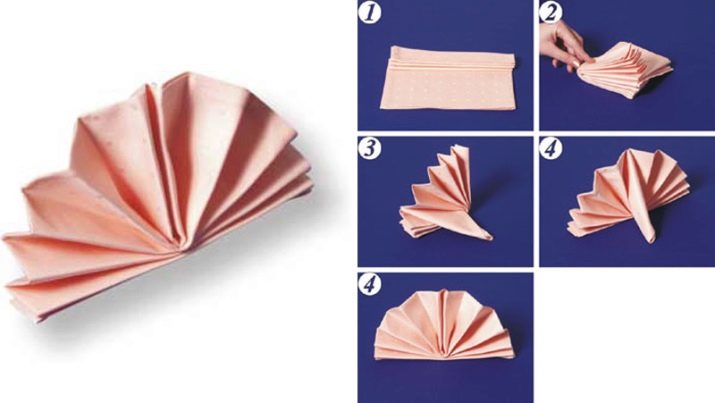
The fan can be installed either on a plate or simply on a table.
With a lapel
Stages:
- the first step is to fold the fabric in half, so that the fold is on the right side;
- Now bend along the horizontal fold line;
- free edges should look away from you;
- wrap the lower left corner diagonally, but do not bring it to the upper edge by about 2-3 centimeters;
- connect the side parts so that you get a ring
- corners are fixed with a paper clip or inserted one into the other;
- set the figure on a plate. You can leave it so or bend down a smaller corner.
Such an origami looks very simple and elegant. In the "belt" you can put a note with the name of the guest, a twig or a flower.
Themed Origami
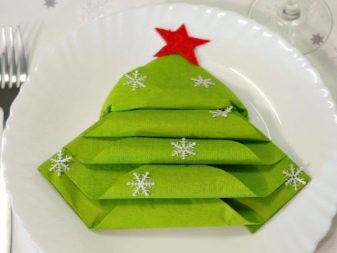
Herringbone
Folding Order:
- fold the green napkin in half, the free edges look down;
- again in half: from left to right, so that the fold is on the right;
- expand the folded square with free edges towards you;
- bend the upper outer layer of the lower corner up and connect this part of the product with the upper;
- further, each subsequent corner must also be raised up, but not brought to the upper corner, leave a couple of centimeters to the previous one, as shown in the diagram ;.
- Now you need to hold all the edges well with your hand so that they do not move out;
- flip a figure;
- outline the middle on the lower fold, hold your finger at this midpoint;
- bend the right corner to the left to your finger;
- do the same with the left side;
- turn the product upside down again;
- pull the top free corner up as far as possible;
- again do the previous step with each subsequent corner.
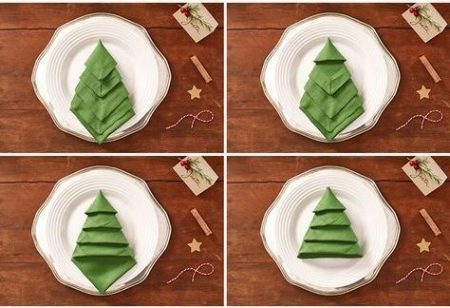
You can leave such a Christmas tree in a horizontal position. It can be decorated with a Christmas toy in the form of an asterisk, and also put a cinnamon stick from below: it will give a festive aroma and complement the image of a spruce with a “wooden” leg.
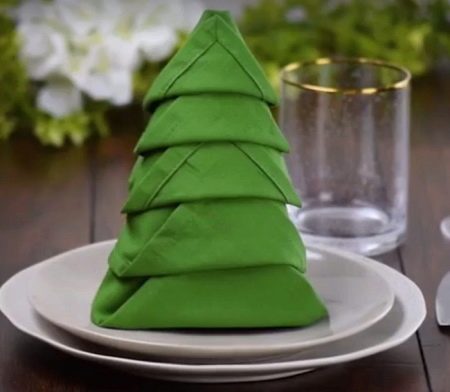
Such a figure can become voluminous. To do this, grab the Christmas tree from the bottom. Put your hand into it and spread the napkin from the inside. Put the Christmas tree on the plate.
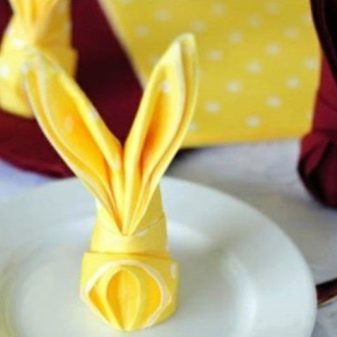
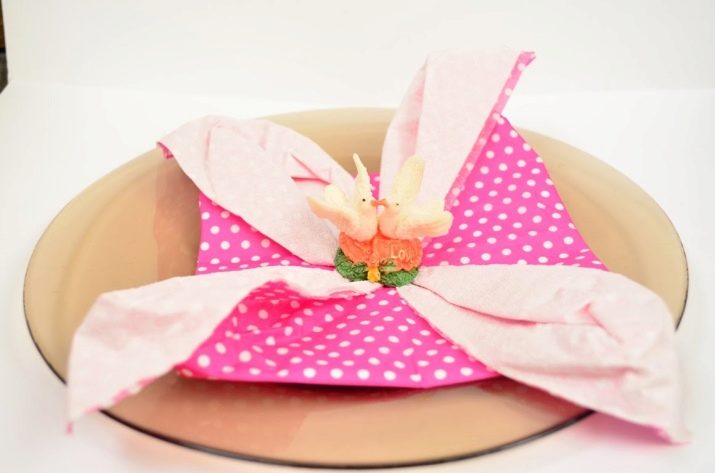
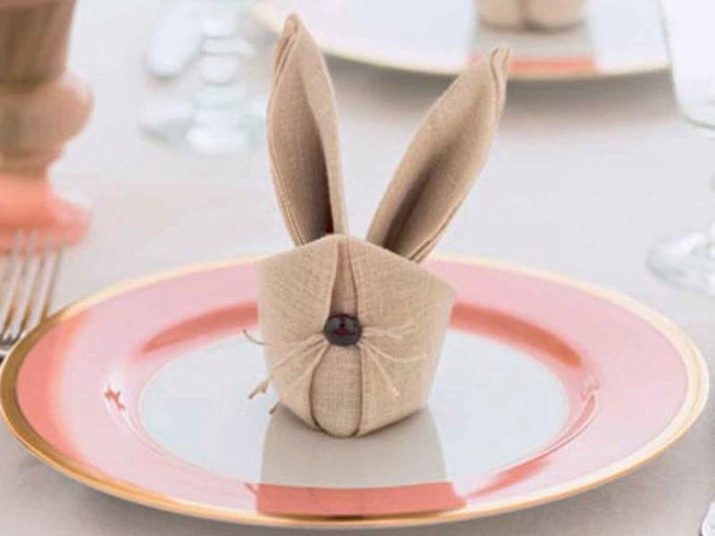
Easter Bunny"
To do this, you need:
- bend the napkin in half in a horizontal line from top to bottom, the fold should be on top;
- now bend the napkin again, but from the bottom up vertically;
- define the middle on the upper fold and bend the right side of the figure down first, then the left. The product should resemble the figure of the house;
- bend the lower right corner diagonally, as shown in the figure, then do the same with the left corner, in the end we get a rhombus;
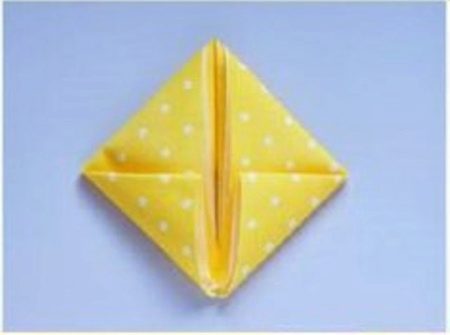
- determine on the upper left bend of the middle at this point to bend the left corner, then the right;
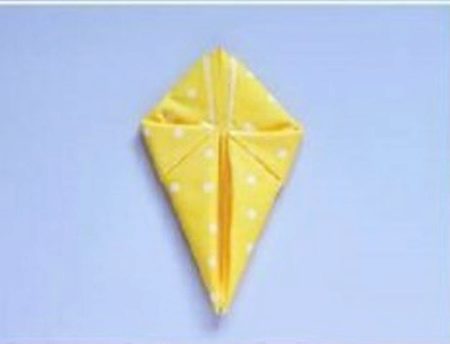
- gently flip the figure to the back;
- bend the bottom corner upwards, this will make a triangle, a sharp peak is looking away from you;
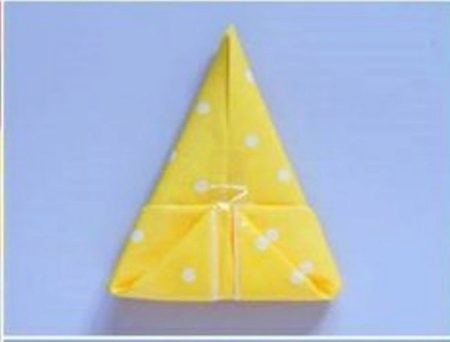
- turn over the napkin again, fold it in half along the longitudinal line;
- connect (it is better to use a paper clip) side angles with each other;
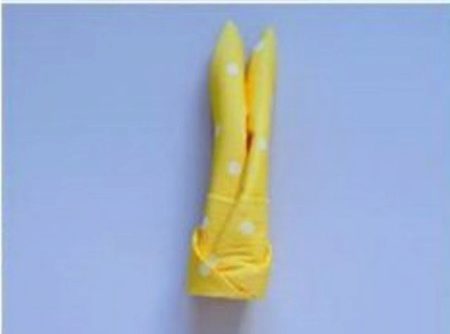
- it remains to spread the "ears" in different directions.
Easter bunny is ready for fun for children. Be sure that guests will appreciate your skill, and children will want to learn how to do the same. By the way, origami perfectly develops motor skills.
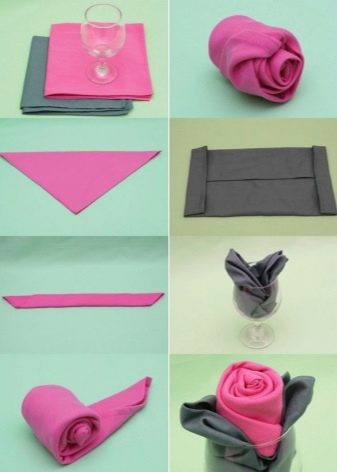
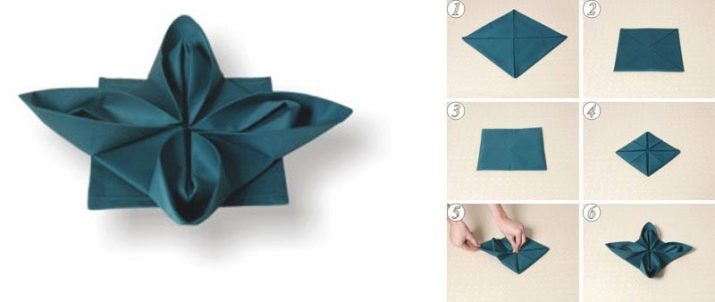
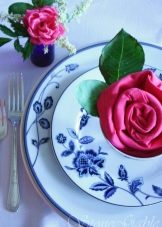
rose flower
The scheme is simple:
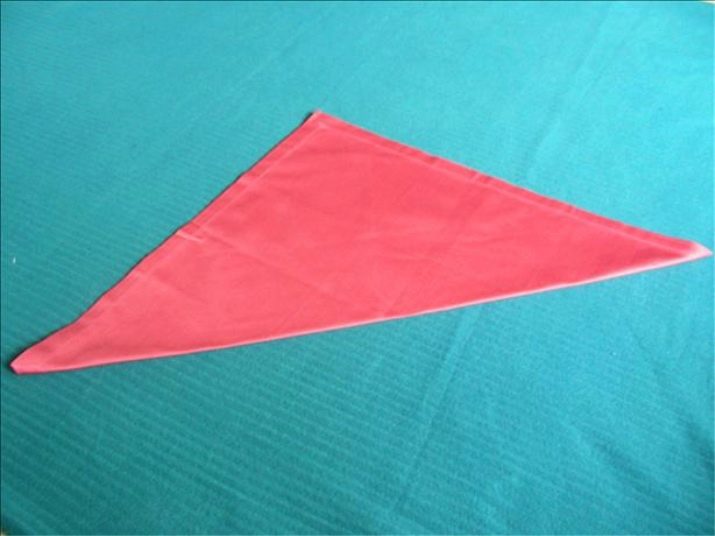
- connect two opposite edges of the napkin, folding it diagonally;
- position the upper corner away from you;
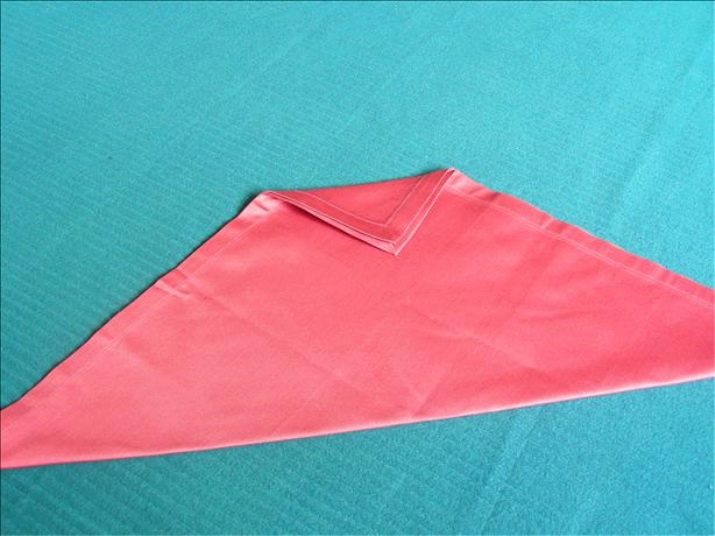
- then gently tighten the base of the triangle, rising up until about 6-8 cm remain to the upper corner;
- Now you need to twist the “tail” of the figure, moving from the left side to the right, this is similar to how we made the “candle”. In the process, you should straighten the fabric and lay it so that it resembles rose petals;
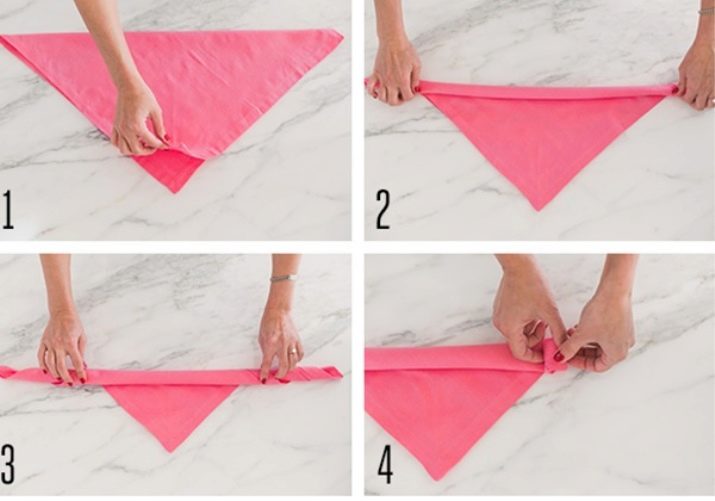
- fix the free edge, as shown in the picture;
- deploy in different directions the "leaves" of the rose;
- put the finished rose on a plate or dip into a glass.
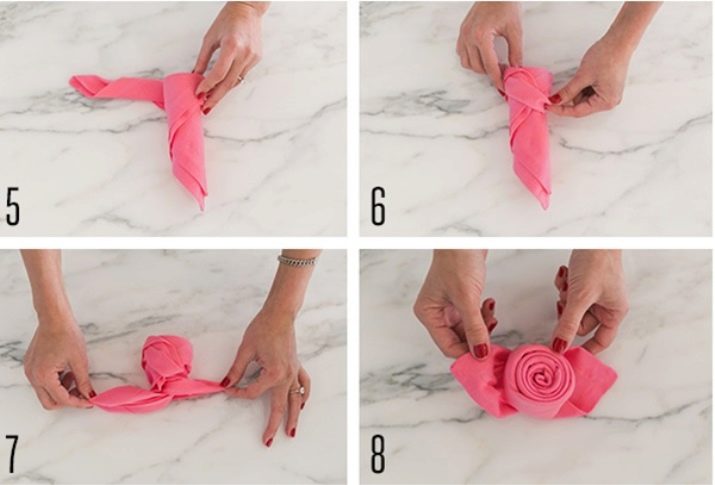
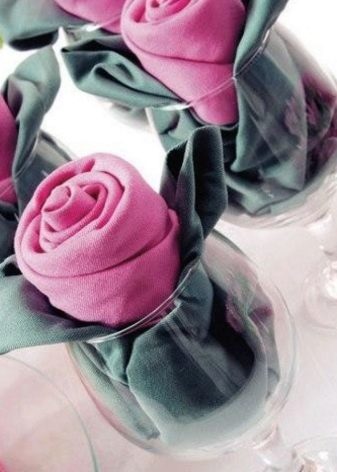
The proposed scheme can be used as a base for the manufacture of the flower itself. And the leaves can be brought closer to natural in color. Take two napkins, one, for example, pink, and the other green. From the first, make the rose itself according to the option proposed above, but do not leave the top corner 6-8 cm (in step No. 3), but screw the triangle to the end. Next, do all the points to the end. Put a green handkerchief in the glass and place the finished rose in it. And so your napkin will play in a new way.
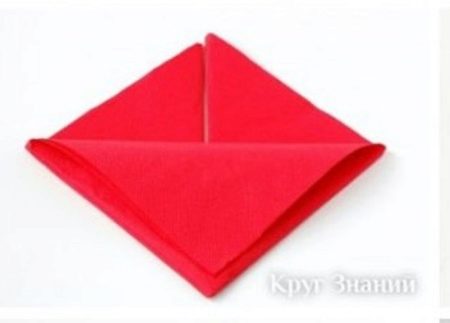
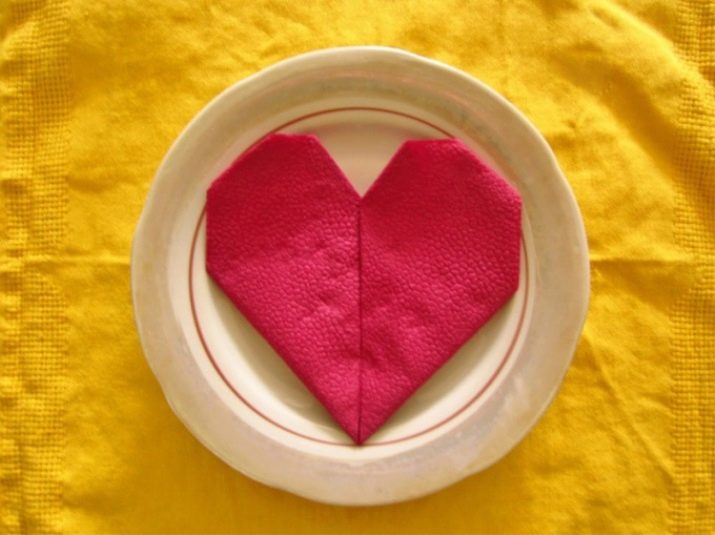
Heart
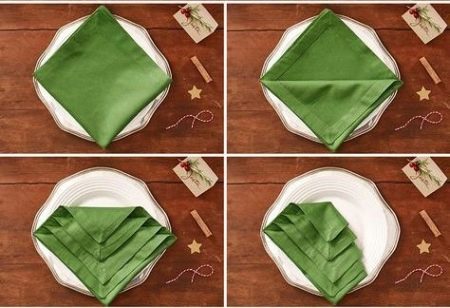
Based on the color scheme of table setting, use a fabric of red, pink, purple or any other color you like. Step-by-step manufacturing:
- the first step is to fold the canvas diagonally, turn the fold towards you, and the corner away from you;

- pull the left corner up to align with the upper corner of the original triangle;
- Now do the same with the right side, we get a rhombus;
- flip a figure;
- then pull the top corner down and connect it to the bottom;
- pull the lower left corner diagonally to the left;
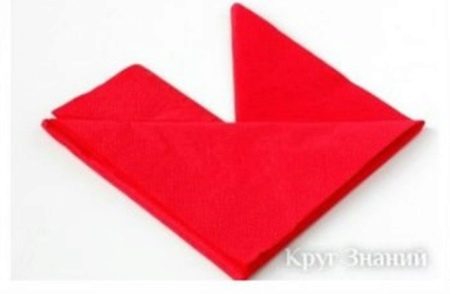
- now right;
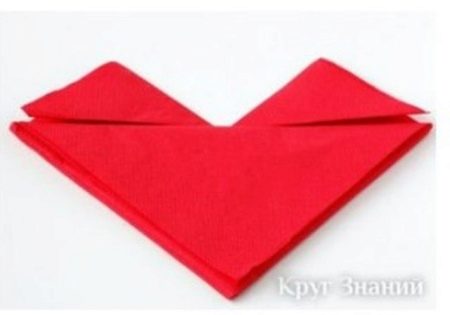
- wrap the side corners of the napkin, giving the heart a more rounded shape;
- the final action is to flip the figure.
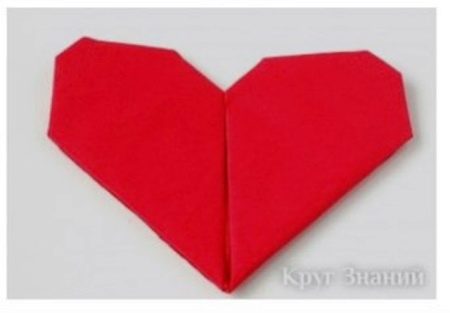
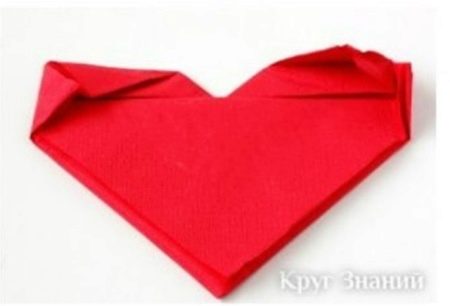
The heart is ready. In such a simple way it will turn out to surprise your beloved on February 14 or any other romantic dinner.
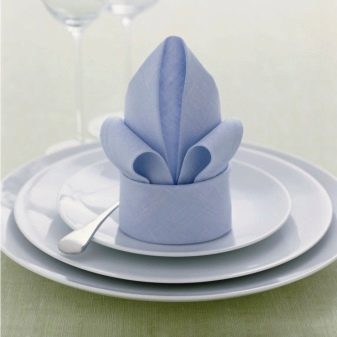
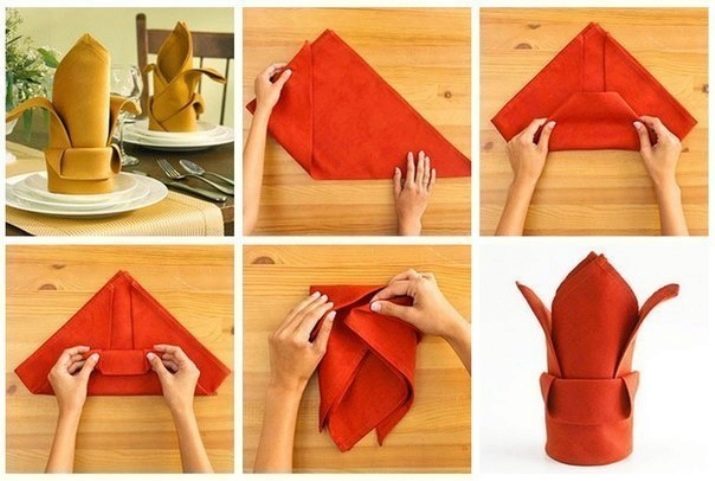
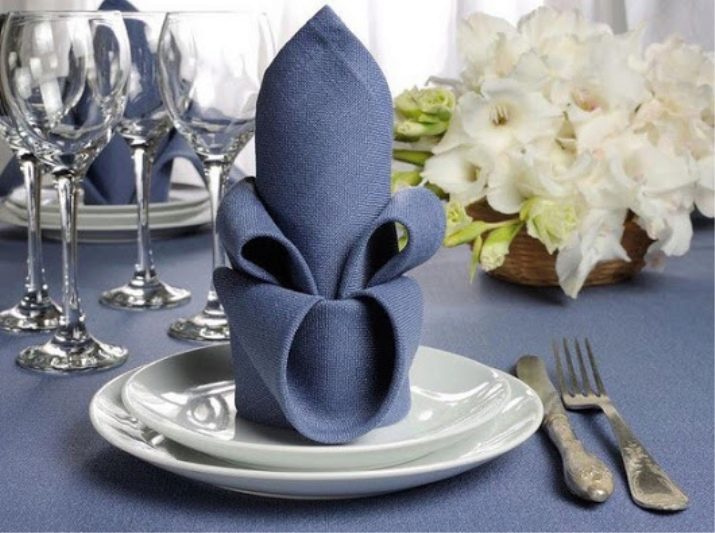
Lily
Step-by-step scheme:
- the fabric should lie with the “left” side up;
- in turn, you should bend each corner to the center, a rhombus is formed in front of you;
- repeat step 2;
- gently, holding the core, turn the napkin over;
- fold corners in the middle again;
- holding the center with your hand or placing a glass on it, gently pull at each tip in the direction from the center, as shown in the figure.
The flower can also be served with beads or ribbons.
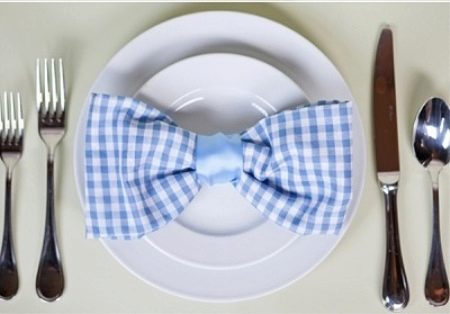
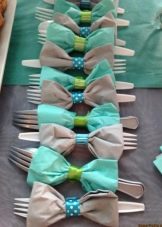
Butterfly
Folding Stages:
- fold the fabric into a tape in three or four folds;
- Now it’s important to outline the middle of the tape and bend the right and left edges alternately to the intended center.
- put the tape under the napkin and tie it at the junction of the edges of the napkin. Here you can use a special napkin ring.
- the last step is to turn the product over. And here is a cute bow that can decorate any holiday.
Tips & Tricks
In the process of preparing the table for a family dinner or holiday it will be wonderful if the hostess gets acquainted with the basic techniques of decoration and serving, as well as several ways of laying napkins. In order for you to succeed, you should adhere to several rules, following which you will quickly fall in love with the art of Napkin folding:
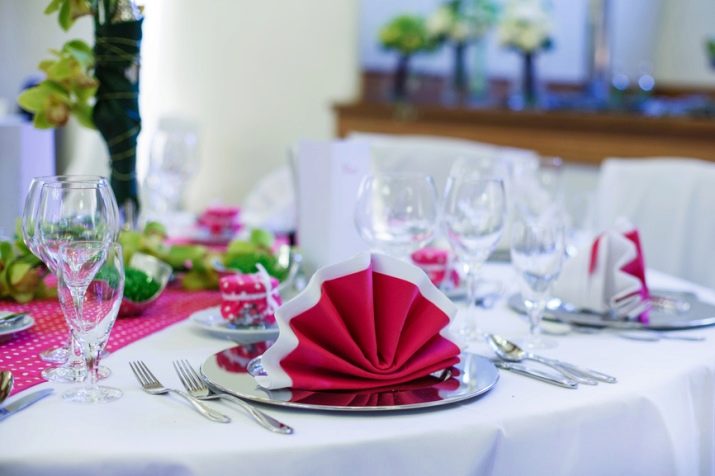
- Napkins should look organically in an ensemble with dishes and a tablecloth. It is better that all wipes are of one or two colors.
- If you decide to decorate the serving with folded napkins, then fold them in the same manner. Do not show all your skills in one evening.
- Linen wipes should be well washed, spotless, moderately starched and well ironed. Crumpled or dirty napkins, no matter how intricately you put them together, will look untidy.
- Starching a napkin is easy: dissolve 1 teaspoon of starch in 1 liter of water, add a pinch of salt and mix well, dip the product in the solution for 15 minutes, dry and iron.
- Do not use aerosol starch. He will not give the desired texture.


- When ironing, the fabric is better to moisten. Use the iron even when folding: it will make the folds perfectly even.
- The fabric should be folded so that it is easy to unfold. Remember the main function of the napkin.
- The use of linen napkins does not exclude the presence of paper on the table. The fabric is used to protect clothing from possible drops and stains. She neatly unfolds on her lap. Under no circumstances should a linen napkin be plugged into the collar; this is a sign of bad taste. It is allowed to wet the corners of the mouth with such a napkin. However, wiping your hands and mouth with it is not worth it. Just for these purposes, a paper version should be provided on the table.
If you think that a napkin holder with paper napkins will look old-fashioned on your table, you can do without it - put one napkin under the plate for each guest. So they will not break the big picture.
- Pay attention to the composition of the fabric. Choose natural materials such as cotton, cambric, or calico. It is permissible to add a small percentage of synthetics (up to 20). Do not use chiffon, silk (satin, dupont) or satin. They will not absorb moisture.
- The location of the napkin on the table is also very important. More often it is placed on the plate itself or to the left of it. If you have chosen the option with a pocket for cutlery, then put it to the right of the plate. Sometimes a napkin is placed in a glass.
Remember that Napkin folding is an art. Of course, there are no single true options. Having learned the basics, you can invent your own copyright schemes. It is better to determine for yourself 2-3 ideal figures for you and periodically alternate them.
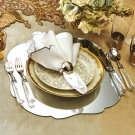
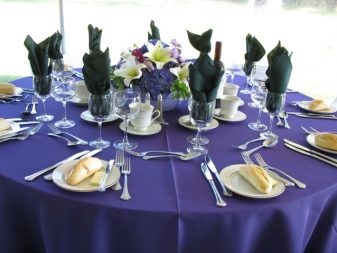
Good examples and options
Table setting will be successful when the above rules are followed. Remember aesthetics and simplicity. The main thing on the table will always be dishes prepared with love, and dishes, tablecloths and fabrics - only in addition to them. Having carefully made origami from napkins, choosing the right colors and accessories, you will get your own successful example, which will be joyfully shared with friends.
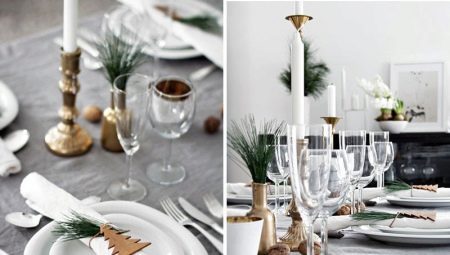
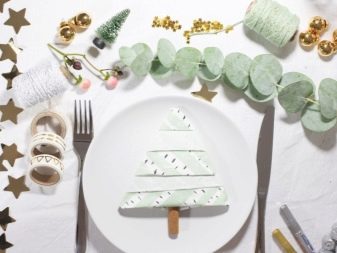
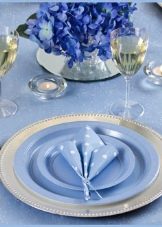
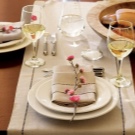
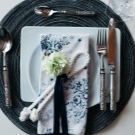
The choice of color, fabric and various attributes of the serving, of course, depends on the theme of the feast. For example, for a man’s birthday or celebration of February 23, an unusual version in the “male” version is perfect. The choice of color should also be appropriate. It can be fabrics of any shades of green, blue, turquoise, gray, chocolate and others.
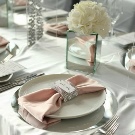
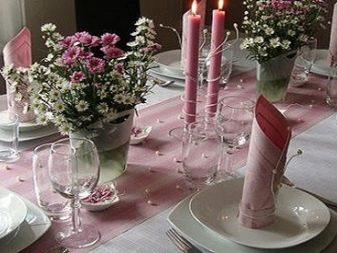
For a women's holiday, something light and tender is needed. Here, napkins folded in figures of flowers, for example, lilies or roses, will be very useful.

Such options are suitable for girls. There is nothing more beautiful than such minimalism. Pay attention to how colors and textures are combined on the table.
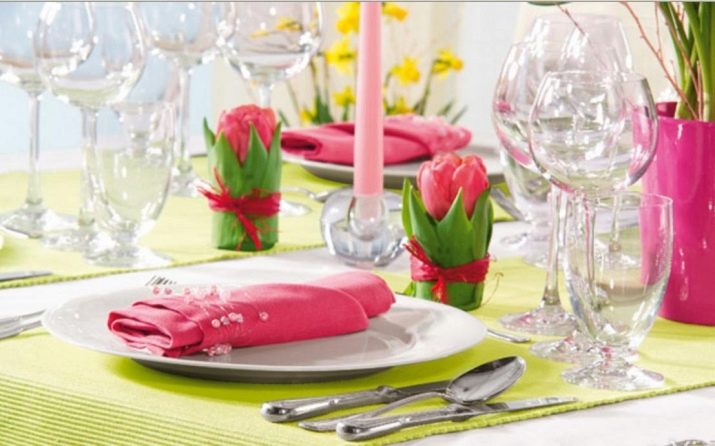
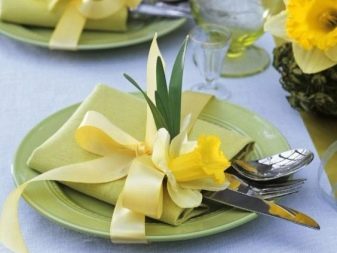
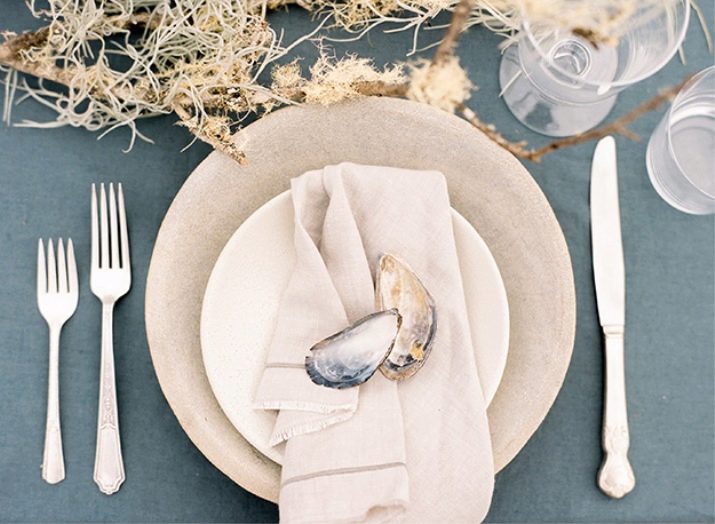
To design a table, you can use absolutely any items. They are decorated with fresh flowers, and twigs, jewelry and even seashells. For bandaging napkins, fabric ribbons in color, ordinary twine, dense multi-colored threads, as well as silver or gold rings, are perfect.
Napkin folding is an interesting activity for both adults and children. See what fun ideas you can bring to life with your child. Such figures will tastefully complement a children's birthday or party.
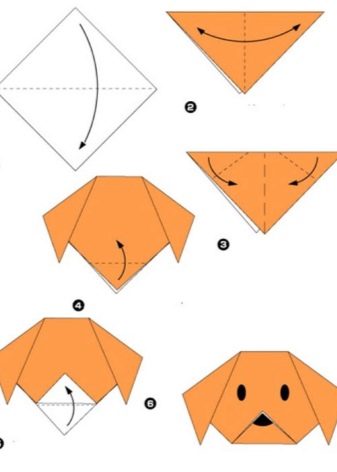
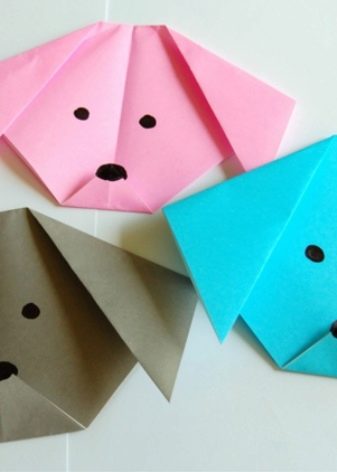
So you can fold the napkin in the shape of a dog. Decorate the napkin with a pair of black circles - these will be the eyes of the dog, an oval to make her nose, and several stripes - for eyebrows or mustaches.
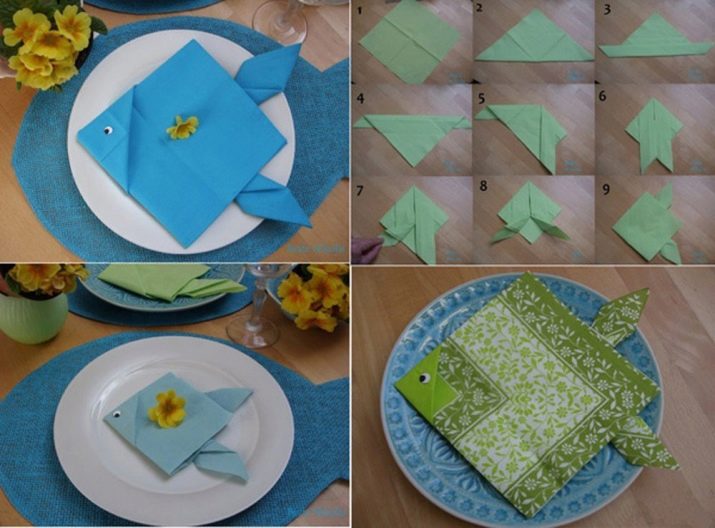
Or in the form of a fish. Also, complete the napkin by painting with a felt-tip pen or by gluing a black dot - the eye.
You can also play with the arrangement of holiday canvases. Leave them on a plate or put them in a glass.
It is permissible to arrange napkins and point on the table, arranging several pieces in one figure. This will allow each guest to take as many napkins as he needs, and not be limited only by the amount that is at hand. Also in this case, it will be possible to distribute thematic figures according to the status of guests, arranging, for example, cool elements from the youth, modest rag “flowers” near respectable ladies and cheerful bunnies in the children's part of the table.
See how to beautifully fold napkins for table setting in the next video.


