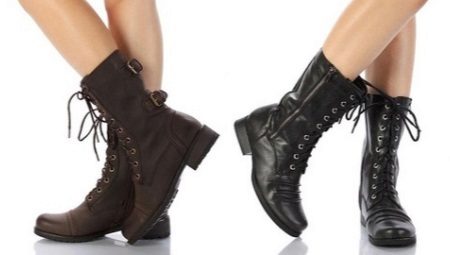
After a successful purchase of a new pair of shoes, you should think about how to lace it up correctly.


A properly selected method of lacing will not only create additional comfort for your feet, but also extend the service life of your shoes.
So, to understand this matter, we bring to your attention some of the most interesting ways of lacing.
Views and fashionable ways
Classic lacing
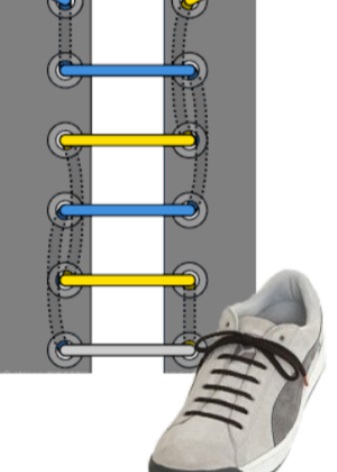
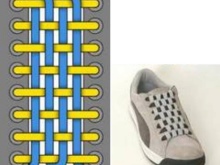
In the world there are a huge number of ways to lace up shoes. They number more than a billion, but among them only two are considered traditional.
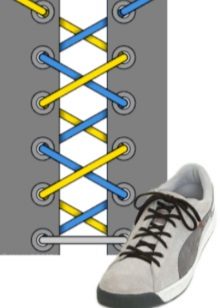
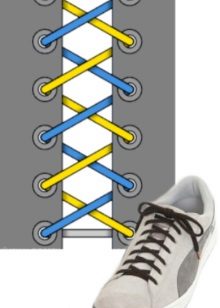
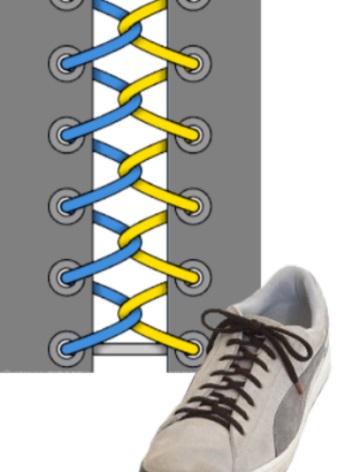
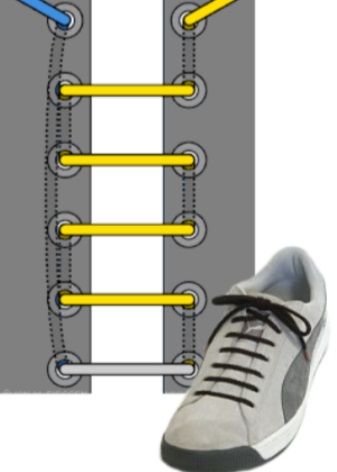
- Method 1
To perform lacing with this method, you will need ordinary laces that match the style of your shoes. We stretch both parts of the lace through a pair of holes located below, and pull them out. We stretch the parts of the lace from the inside out through the next two holes, crossing them. In this way we lace up to the end. The advantages of this method will be ease and convenience. It is also worth noting that lacing tightens the boot, not the ankle joint, which creates additional comfort.
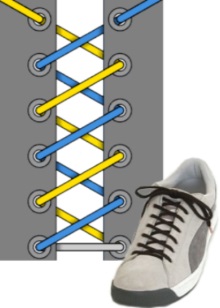
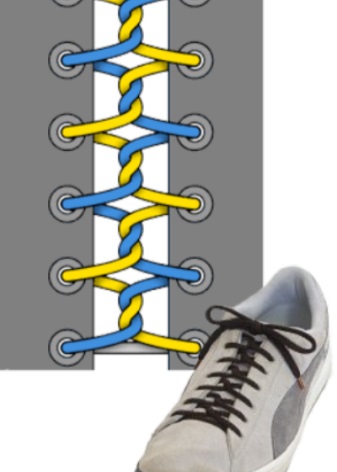
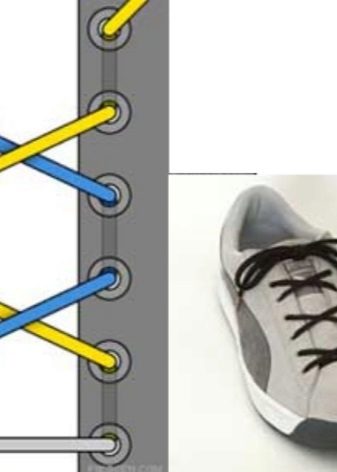
- Method 2
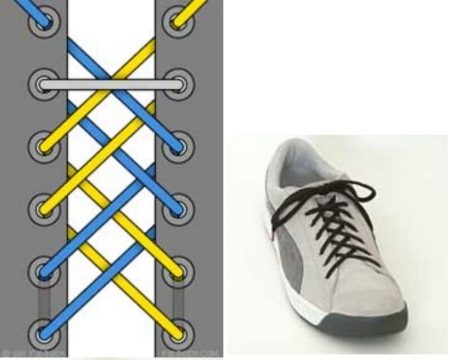
It differs from the previous method only in that the crossing of the lace occurs alternately on top and below the holes. The lace stretches from top to bottom through a pair of holes from below, its parts intersect and stretch through the next two holes.After repeated crossing, the parts are passed through the following holes from the outside to the inside. In this way we lace up the shoes completely. In addition to the speed and ease of this method, the advantage will be decorativeness, as well as the fact that this technology of lacing helps to reduce wear on the laces.


If there are an odd number of pairs of holes, start lacing from the inside so that the laces go out.
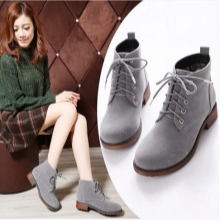
Straight lacing
For those who don’t like the classic crossed lacing methods, we offer direct lacing technologies. These methods are externally and technologically different from traditional ones, but they have their own advantages.
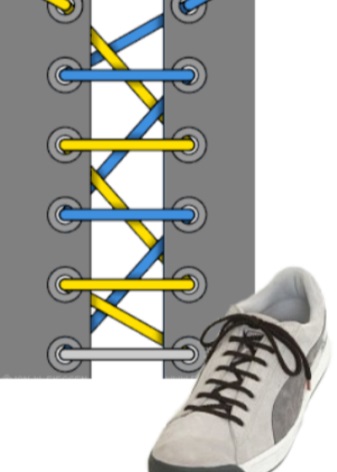
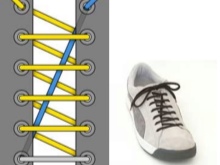
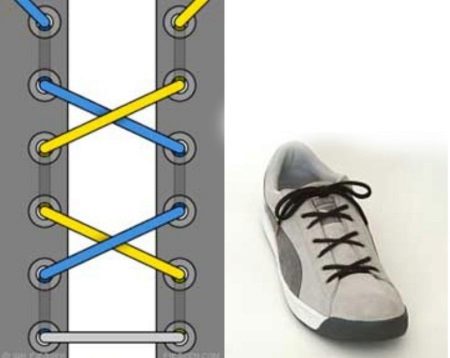
- Method 1
This method is considered traditional European. Pull the lace through a pair of lower holes from the outside inward. Pull the left part of the lace through the hole diagonally from the inside out, while missing one. Pull the right part of the lace through the next hole diagonally from the inside out. Pass the parts of the lace through directly opposite holes from the outside to the inside. Lace up one by one with the other part of the lace to the top of the shoe.
This is one way to quickly and neatly lace up your shoes. And the zigzag method will provide a reliable and strong lacing
- Method 2
With this option, you can hide the untidy back of the lacing and provides that the bow will not be visible.
Pull the lace through the lower holes from the outside inwards. Bring the right part of the lace from the inside out with a hole above the one into which you passed it. Pass this end of the lace through the directly opposite hole from the outside to the inside. Leave the left cord from the inside out with the hole above, while missing the one into which the right end is threaded. We pass the left part through the directly opposite hole from the outside to the inside, and bring the right one to the hole higher than we left. Thus, we lace up to the end of the shoe, tie the laces and remove the bow inside the shoe.
This lacing has a neater appearance than the previous one, but the lacing technology is a bit more complicated. Most of all, this technology is designed for shoes with an even number of pairs of holes. However, with an odd number of pairs, you can skip the bottom or top pair.

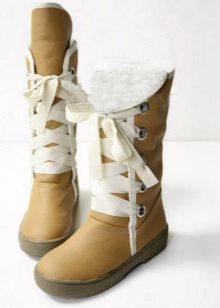


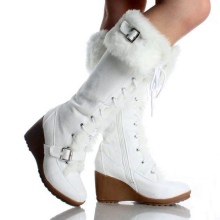
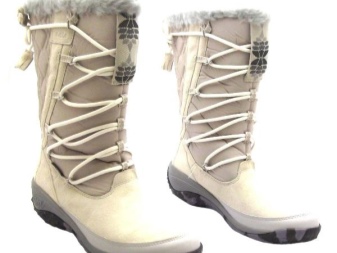
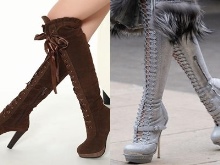
Winter boot lacing
For lacing winter shoes you need a simple, but interesting, quick and neat method of lacing that will securely fix your foot in shoes and will not create discomfort.
Pull the left side through the hole from the inside out and the right side from the outside in. Pull the left side through the hole above the right side from the outside inwards, and the right one through the hole above the left side from the inside out. Thus, through the openings on the right, the ends of the lace pass only from the outside inward, and into the openings on the left - only from the inside out.
We advise you to lace up the shoes in a mirror image, it will look extraordinary and very interesting.
This lacing method is also perfect for shoes with high shafts. It will reduce friction, which allows you to tighten and loosen the lacing without much effort.


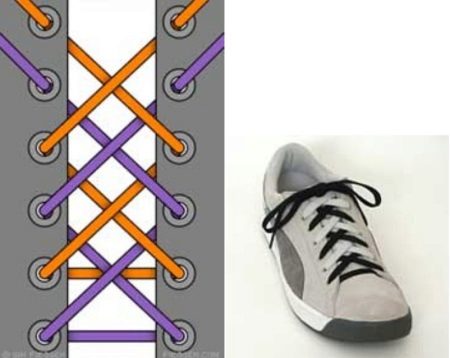
Lacing with loops
- Method 1
An interesting and unusual way of lacing, which, despite the simplicity of execution, has some disadvantages. The laces do not intersect, but are intertwined with each other in the middle, because of which they can move out from the middle, and also because of friction, the wear of the laces increases.
Try this method in two colors.
Pull the lace into the bottom holes from the inside out. Cross the right and left ends with each other, stretch them into the holes above those from which they went from the outside inward. Thus, you make two loops from the ends of the lace that interlock in the middle.
- Method 2
This is a very beautiful lacing method, which differs from the previous one in that the ends of the lace are twisted twice and are not diagonal through the hole above.
Pull the lace into the bottom holes from the inside out.Cross the right and left ends together. Pull the right end of the lace into the hole above the left, and the left end - above the right, from the inside out. Continue to the top of the shoes.
This is a very tight lacing that will be difficult to loosen. Also make sure that the center does not move.


Lace up without a bow

Most of us do not like bows that form after tying shoelaces. Therefore, we found several ways to lace up shoes without a bow. One of them was described in straight lacing by the second method.
- Method 1
For this method, you need two pairs of laces of different colors. With one cord, you perform the second method of direct lacing, and you pass the second cord through the resulting fabric. Since the technique of straight lacing is described, we will consider how to work with the second lace. So, after you have finished the straight lacing, adjust it along your foot, tie the laces and hide the bow. Take the second lace, tie one end on the bottom straight line of the previous lacing and hide the end. Next, pull the remaining end through the "threads" alternately under and above them in a checkerboard pattern. Thus, you will be able to "weave" the fabric from the laces. You can hide the second end of the lace in a way similar to the one we hid the first end.
We got a beautiful and loose lacing, which we spent time only once.
- Method 2
Starting to lace up. At one end of the lace we tie a knot. We draw the second end of the lace from any upper hole from the inside out and stretch it in the opposite direction in a straight line from the outside to the inside. We withdraw from the inside out from the hole diagonally and stretch it in the opposite direction in a straight line from the outside to the inside. We continue to lace up this way to the end. The rest of the lace can be stretched through the lacing up, or you can tie a knot and cut.


Quick lacing
Classic, straight, winter shoe lacing and lacing with loops, and some bow-less lacing techniques described above are some of the quickest ways to lace up shoes. But this does not end with quick lacing methods. For example, we give one more.
Pass the lace into the lower holes from the outside inwards, pull the left end of the lace into the highest hole diagonally from the inside out. The right end of the lace will be working. We bring it into the hole above the one into which the left entered from the inside out. Next, we skip the right end to the hole in the opposite direction in a straight line from the outside in. In this way, lace up.
Inner Hidden Lacing

Not everyone likes lacing, which shows the inside of the lacing. For you, we have selected the method of internal hidden lacing.
Pass the lace into the lower holes from the outside inwards, put the left end of the lace into the upper left hole from the inside out. Since the left end of the lace is not used, it should be shorter than the right. Bring out the right end of the lace with a hole above the one into which it entered, from the inside out. Pass it through the directly opposite hole from the outside to the inside. In this way, lace up to the end.
The second method of direct lacing can also be attributed to the type of internal hidden lacing.


Original lacing options
Thickening for a thicket or cycling
It looks unusual, but the location of the bow on the sides will ensure the safety of a bike ride or walk through the woods.
Pass the cord through the lower holes from the inside out. Pull the right part of the lace and pull it into the hole above from the outside in. Next, take it out of the directly opposite hole from the inside out. Pull the left part of the lace into the hole, passing the one from which you just pulled out the right part, from the outside in. Pull the left part of the lace from the hole directly opposite to the one into which you inserted it. In this way, continue to lace up to the end.


Lacing "World Wide Web"

We start lacing with the second pair of holes from the bottom.To do this, we draw the lace from the inside out and stretch the ends into the holes below the outer part. We cross both parts of the lace and bring them into the next upper holes from the inside out. We return below and poddevat the strip of lace obtained before this. In this way, we repeat to the end, only the last time we don’t pry, but simply withdraw and tie.


Double back lacing
We begin to lace up from the second pair of holes from above from the outside to the inside. We cross the parts of the lace and stretch them into the hole below, passing one, from the outside to the inside. So we lace up to the lower holes, and then we stretch the ends of the lace into the holes above from the inside out and we lace up to the top.
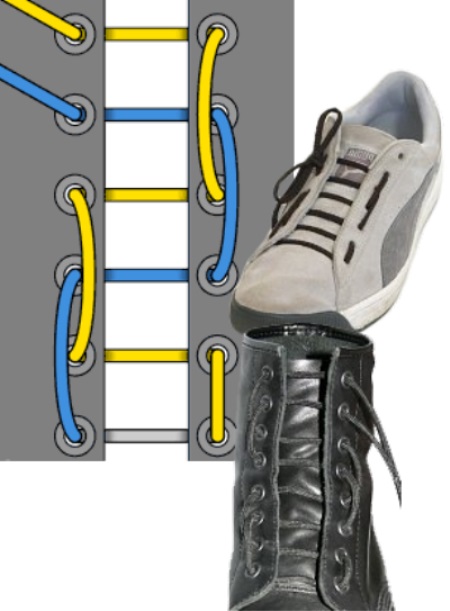
Butterfly lacing
We stretch the lace into the lower holes from the outside inward, we bring it into the holes above from the inside out. We cross and stretch into the holes. Repeat to the top. If the number of pairs of holes is even, then we replace the first action, instead we pull the cord from the inside out and immediately cross.


Interesting examples
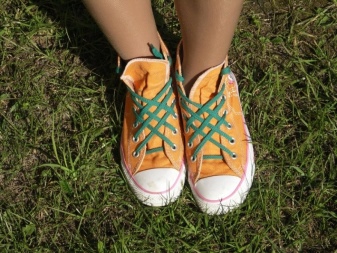
Two-tone lacing
The only drawback of this method is the node that may bother you. So, we connect the two shoelaces and bring the ends through different holes on one side. We lace up by the method of internal hidden lacing.


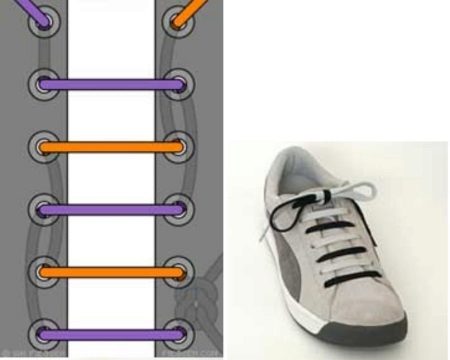
Double two-tone lacing
We lace up both laces with the first method of classical lacing, we just skip the holes in order to lace with a different color.


This material presents only some methods and types of lacing shoes. But they will help you look stylish and extraordinary.


