
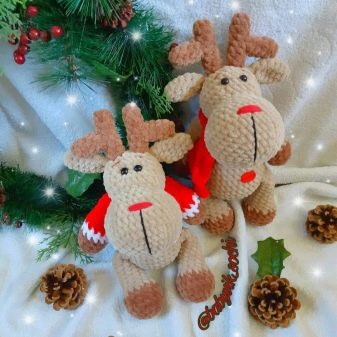
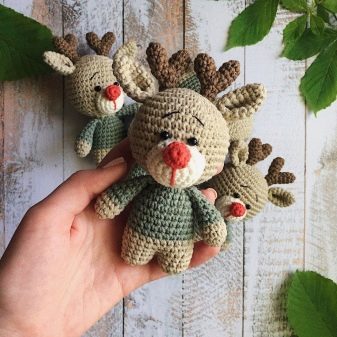
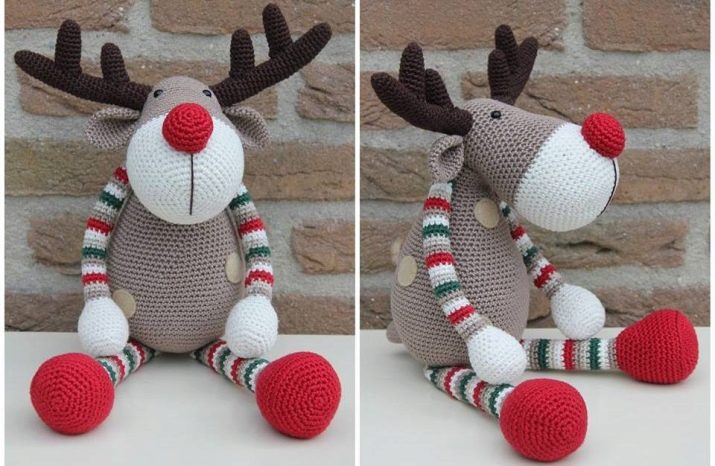
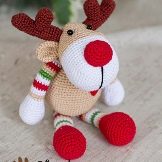
Amigurumi technique allows you to create the cutest knitted toys that have not only an attractive appearance, but also a unique character. For example, using this type of needlework, you can knit a wonderful gift for the New Year - Christmas deer.
Features
Amigurumi Christmas deer created in a special Japanese knitting technique requiring the use of either a hook or knitting needles. As a rule, this type of needlework is used to create small cute little animals, little men, or inanimate objects endowed with human properties. The latter most often include bags, hats, cacti, cups, hamburgers and other common household items. They are characterized by the presence of a large head in the form of a ball, a small cylindrical body and miniature limbs. The popularity of amigurumi has been growing particularly rapidly lately. Products in this technique, including deer, are made from yarn, and knitting goes in a spiral, and the circles do not join.
The fabric should be obtained without gaps and gaps, so the thickness of the hook should be significantly less than the thickness of the thread used. Otherwise, the material used for packing will begin to break through the holes. Amigurumi toys are created in parts, which are then interconnected.
For stuffing the body, it is customary to use fiber filler, and fragments of plastic can be added inside the limbs for weight.
Tools and materials
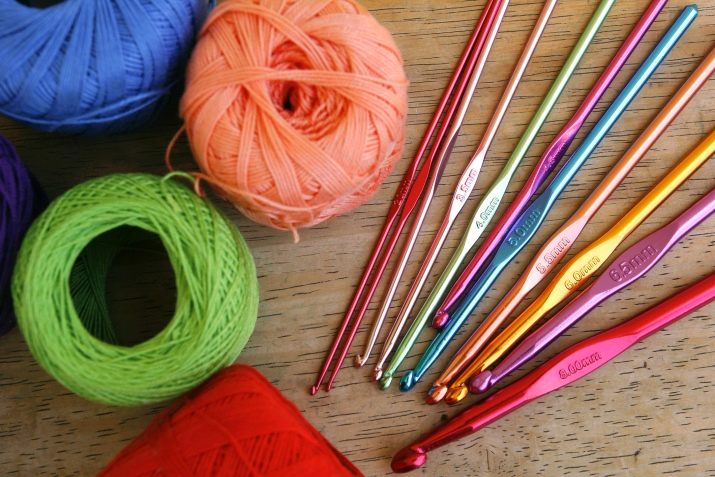
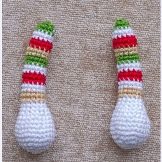
Yarn for knitting Christmas deer can be absolutely any, for example, brand Irisreceiving good reviews. Usually, about five colors are required - for example, red, white, green, beige and dark brown. To work, you need a hook at number 14 and the filler is a synthetic winterizer or cotton. A pair of black beads will fulfill the role of the eyes of a deer, and a decorative button can decorate his sweater.
I must say that the thicker the material used, the larger the deer will turn out, which means that a figure from plush yarn will be much larger than a ten-centimeter sitting toy from Iris.
Knitting technology
As mentioned above, a master class in knitting toys using the amigurumi technique involves the creation of individual components and their subsequent combination into a single whole. Work usually begins with the design of the head of a deer, which will require white yarn. It is better to borrow the exact knitting pattern from a specialized publication for needlewomen, since its description is clear only to people who are versed in this subject. However, if the beginner still decided to tie the animal in the amigurumi technique on his own, he must recognize the basic elements of needlework - increase, decrease, single crochet (sb) and amigurumi ring.
Only being familiar with these concepts, you can begin to work.
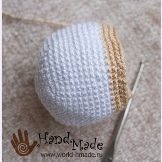
The head of a deer is first knitted with white yarn. To create the first row, 2 air loops are dialed, 6 single crochet stitches are sewn into the second loop from the hook. As a result, 6 loops should form in a row. In the second row, an increase is knitted six times to get 12 loops. In the third row, six times it is necessary to repeat the increase and one single crochet - you should get 18 loops. The fourth row requires a sixfold repetition of the increase and 2 single crochet, in the fifth row - the same thing, but 3 sc, and so on until the ninth row. In it, the increase and 7 SCs are repeated 6 times, resulting in 54 loops.
Rows 10 through 16 contain only 54 single crochet stitches. In the seventeenth row, the decrease and 7 sc are repeated 6 times, and the 18 row consists of only 48 sc. Having replaced white yarn with beige yarn, it is necessary to fill in the next two rows of 48 sc each. In the twenty first row, the decrease and 6 sc are repeated 6 times, and the 22 row consists of only 42 sc. In the 23rd row, a six-fold repetition of the decrease and 5 sbn is used, and the 24-27 rows are filled with 36 sbn each. In the 28th row, the decrease and 4 sbn are repeated 6 times, and the next two rows contain only 30 sbn each. In the 31 row, the decrease and 3 sb are repeated 6 times, in the next row the same thing happens with the decrease and 2 sb.
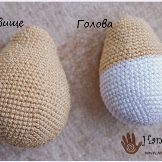
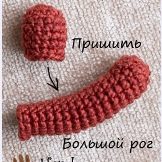
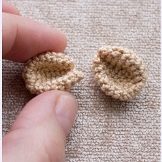
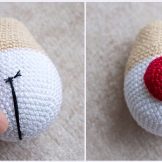
At this stage, the head can be filled with padding polyester. In the 33rd row, the decrease and sbn are repeated 6 times, and the 34th row is filled with decreases until the hole closes completely. Based on the knitting of the head, the remaining details of the deer are created. Collecting deer you must first sew all the small parts on the head, and then connect it to the body. By the way, the deer nose should be located just below the middle of the muzzle, and the spots on the forehead are embroidered with a white thread. Thus, all the ends of the threads can be hidden, making the toy neat and visually finished. The tail is sewn last, and thus so that the deer can stably sit and not fall.

See how to make a deer amigurs in the video.


