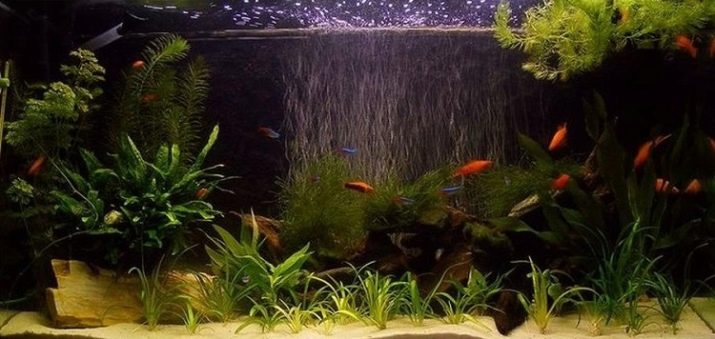
The vital activity of a home aquarium is inconceivable without a high-quality enrichment of water with oxygen. For this, specialized membrane or piston type compressors are used. In a situation where it is difficult to buy a unit, you can do it yourself. In a home environment, it is easiest to make a mechanical compressor that works without an electric motor. However, if you make a little effort, then more complex devices will be on your shoulder.

Homemade Compressor Requirements
A homemade compressor is required to perform certain functions.
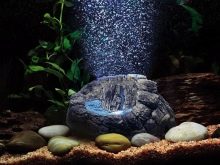
- Provide a stable supply of oxygen. Under natural conditions, oxygen enrichment is due to the flow of water. In an aquarium, the process is carried out by living vegetation due to photosynthesis. But - this is during the day, and at night, vegetation and animals consume oxygen, while emitting carbon dioxide, and you can’t do without an oxygen pump for the aquarium in this situation.
- Create artificial flowwhich prevents the fluid from stagnating and becoming a swamp. This happens due to the accumulation of a huge amount of feed fragments and the life of the inhabitants falling into the water of small debris and dust, a film formed on the surface, and a small concentration of oxygen.
- Also A homemade compressor for the aquarium is absolutely obliged to carry out moderate air flow control. It is advisable to pre-calculate the power of the built-in electric motor from the formula 0.5 l / h per liter of water.
It is recommended to install a supercharger with a minimum voltage (not more than 12 V) in the aquarium.
Tools and materials
At home, you can build an air blower for the aquarium yourself from improvised means. To create a conventional mechanical air compressor you will need:
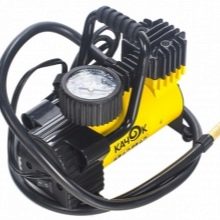
- car pump (suitable for hand, from a bicycle);
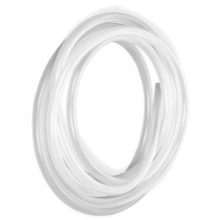
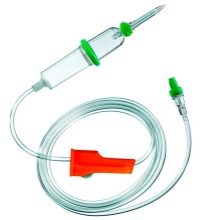
- silicone tube (the perfect solution is a tube from a dropper);
- 3-way crane;
- a mechanism for squeezing the tube (you can apply a clip from the dropper);
- clamps;
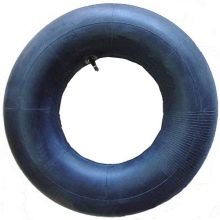
- car camera (for a small tank up to 80 l is enough from a soccer ball).
For a battery-powered device with a cooler you will need:
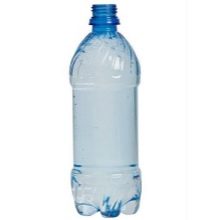
- not very large PET bottle;
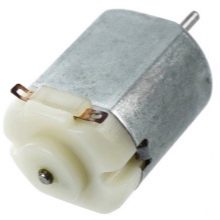
- small electric motor (cooler from a computer fan is perfect);
- a tube from a dropper;
- glue (it is desirable to apply instant action);
- wiring;
- batteries
- battery pack (box for placing batteries with an on / off button).
To make a 4-chamber air mini-compressor, the following tools and materials will be required:
- PET bottle with a large neck - 4 pieces;
- round balloon - 4 pieces;
- elastic bands - 4 pieces;
- 5 microgram syringe - 4 pieces;
- plastic size 10x15 centimeters - 1 piece;
- PET bottle cap - 1 piece;
- a piece of plastic measuring 5x5 centimeters - 1 piece;
- paper clips - 5 pieces;
- dropper - 1 piece;
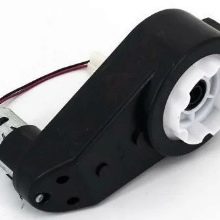
- gearbox with motor - 1 piece;
- switch - 1 piece;
- battery - 1 piece;
- wires - 2 pieces;
- electric soldering iron;
- knife;
- Super glue;
- hot glue.
Manufacturing process
There are many options for creating a compressor, but we will consider the simplest ones.
Conventional mechanical supercharger
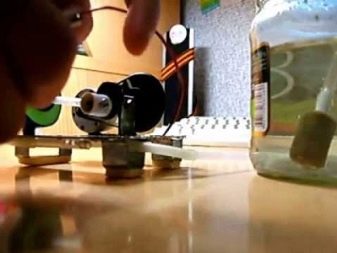
Assembly is quite simple and includes several steps.
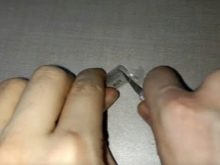
- Take 3 tubes taken from the dropper from the 3-way valve. They are fixed on the tee by means of clamps.
- Connect one to a car or bicycle pump.
- Connect the second with a ball or a car camera (you need to remove the nipple from them in advance).
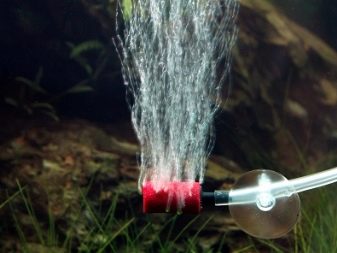
- In the remaining pipe, solder the free end and puncture several small holes in a circle (it will be used as an aerator). So that the tip could not emerge, it is necessary to tie a small load to it.
The work of the device is carried out in this way: the air pump is pumped into the chamber, then the clamp on the nozzle is slightly loosened, and small bubbles begin to gradually exit through the spray gun into the aquarium (using the clamp, you can adjust the feed rate).

Advantages and disadvantages
The main disadvantage of a self-made mechanical compressor is that for its operation you need to pump the camera every day (sometimes several times a day). Another disadvantage is the impossibility of using such a device in large containers. Dropping the device for a couple of days without supervision will also fail.
The advantages are:
- Silent work. In comparison with piston and membrane units, it does not make any noise, so the aquarium can be installed in the bedroom.
- Autonomous from the electric network. Even in the event of a power outage, this will not affect the life of the fish at all.
- Long service life. Due to the lack of electromechanized units, the time of use of this device is almost unlimited.
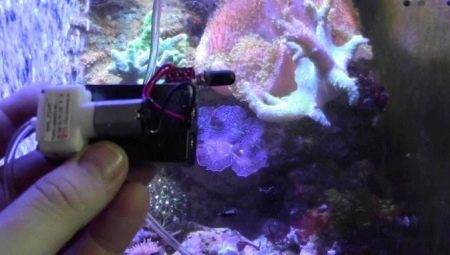
Battery Operated Cooler
When long transportation of an aquarium with its inhabitants is necessary, the question may arise how to provide fish with oxygen on the way. Take with you a stationary device that is powered by the mains, will not work. A homemade mechanical air blower is also not suitable, because it is too bulky. In this case, you can make a compressor for the aquarium, powered by batteries.
Along with mobility, a big plus of this unit is that it is almost silent.
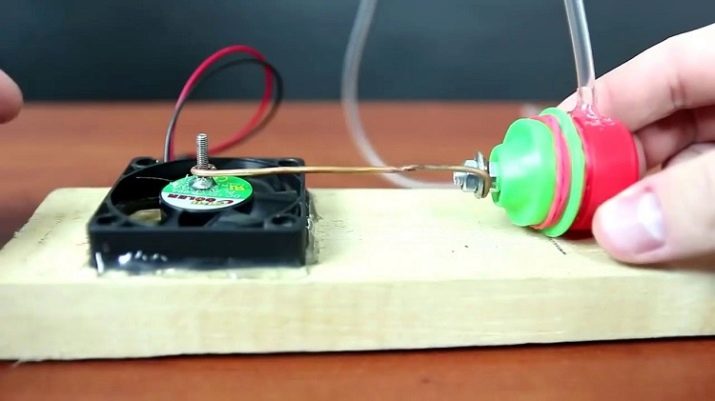
The compressor manufacturing procedure is as follows:
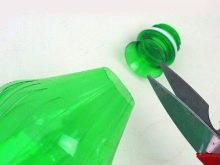
- cut a plastic bottle into 2 halves;
- solder or screw 2-wiring to the cooler motor;
- to fix the engine inside the bottle with superglue;
- insert a nozzle into the neck of the bottle (the free end must be sealed in advance and pierced at several points with a thin needle - it will play the role of a sprayer in the aquarium);
- connect the wires to the battery pack;
- Align the bottle halves together by wrapping the joint with tape.
It must be remembered that a powerful motor can significantly harm the inhabitants of the aquarium. Moving fluid at high speed will disrupt all life processes of the fish, as a result of which they can die.
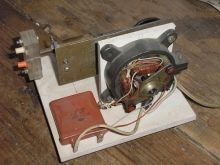
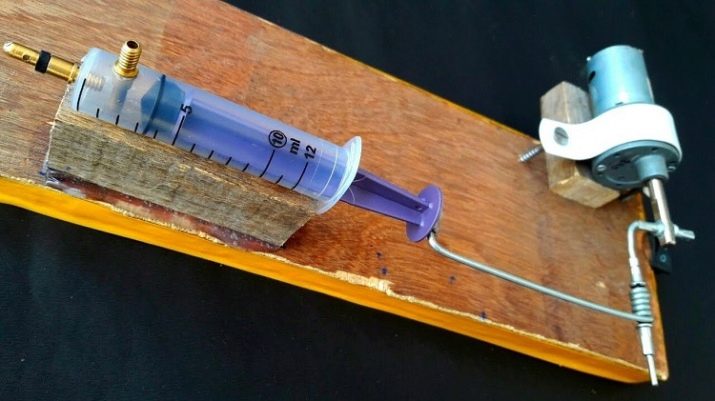
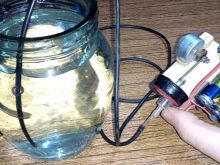
4-chamber aquarium compressor
The manufacturing procedure is as follows.
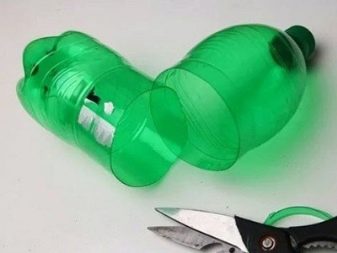
- We cut off the lid of the plastic bottle with a neck. We remove irregularities and a plastic strip. We turn off the lid from the part of the bottle.
- Cut a round part near the balloon and divide it into 2 parts. We fix one part of the ball with rubber bands on the neck of the bottle.
- Carefully pull the ball and cut off the excess, which sticks out more than 2 millimeters from the elastic.
- On the covers, we outline 2 points of the type of a socket and make holes using a soldering iron. We remove irregularities.
- From the rest of the balls we cut out strips of size 0.5x1 cm. We glue them to the covers on one side of the hole. At the same time, we glue one strip outside the cover next to one hole (this will be an exhaust valve), and the second - inside the cover already near the second hole.
- At the syringe, we cut off the area where the needle is fixed, and stick it on the exhaust valve, using hot melt adhesive.
- Combine the necks and lids together - these will be mini-compressor chambers.
- We glue the mini-cameras on the base, 2 from each edge. In the center of the base, glue the bottle cap with the hole down.
- We cut out 2 circles with a diameter of 2 cm from plastic. We make a hole on one side and thread the aligned clip halfway. The remaining part is fixed with glue to the circle.
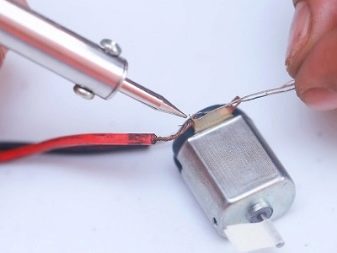
- We take the engine with the gearbox and stick the circles with staples on the side protrusions. We apply a large amount of glue in order to fix the circles to the maximum.
- Combine the reducer with the cover, which was fixed in the center of the base.
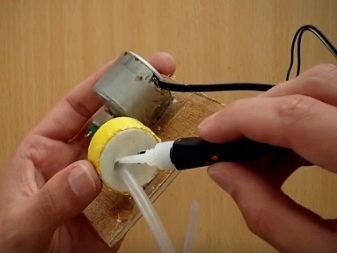
- Cut the cotton bud into 4 parts. We straighten the paper clip and make a loop at one end.
- Insert a part of a cotton swab into the loop. After we wind the thread on it and impregnate with superglue.
- We dress the loop on the gearbox, measure the distance to the free cover. Before removing the excess, wrap the edge, glue it to a small piece of plastic. After a while, when everything froze, we connect with a mini-supercharger.
- After connecting all the clips to the gearbox, we bend the tip on the drive for fixing. Solder the wires to the motor. We glue the battery, the switch and solder the wires.
- From a section of a dropper we construct a connection for 4 nozzles, which we cut in advance. To do this, create holes in the container using a soldering iron.
- We connect one end of the nozzle to the edge of the syringe, and insert the other into the dropper. We fix them with hot glue and glue the dropper to the base next to the battery. The mini-supercharger is ready.
Useful Tips
Mostly an aquarium is placed in those rooms where people regularly visit. The first thing to consider is that the unit must work non-stop, and therefore the quality of its creation should not be neglected. If you made a device using an electromagnet that generates excess noise, then such an assembly can be hidden in a closed bedside table. To do this, you need a long duct. In addition, the aquarium compressor can be delivered in packaging from an old film, which will help reduce the shock wave. A wooden box will cover the structure from the look and affect the sound insulation.
The owners of round aquariums should not forget that in this type of design, too powerful equipment can adversely affect the life of fish. Their health will be at risk due to rapid fluid circulation.Actually, this is considered an important aspect in which a low-power device is preferable for round aquariums.
The fact that if there is a large volume of vegetation in the aquarium, the use of a compressor during the day is not necessary. Basically, it is launched only at night, when the vegetation stops producing oxygen and, along with the fish, it begins to consume it.
In order to prevent water from being poured into the unit when the unit is turned off due to reverse traction, it is necessary to put a non-return valve on the pipe going towards the sprayer.
You can find out how to make a smart stand-alone compressor for an aquarium yourself by watching the video below.


